
White Chocolate Candy Train is an incredible treat that delights both children and adults. This whimsical dessert combines the sweetness of white chocolate with a playful design that resembles a train. It’s not just a treat; it’s a fun project that encourages creativity and teamwork in the kitchen. Whether you’re planning a birthday party or simply want a unique dessert, this candy train will surely steal the show.
Imagine the joy on your child’s face as they see this delicious creation. The combination of colorful candies and white chocolate creates an eye-catching masterpiece. Plus, it’s easy to assemble, making it a fantastic activity for family bonding. In this article, you’ll discover why this recipe is so special, how to create it step-by-step, and tips for serving it perfectly.
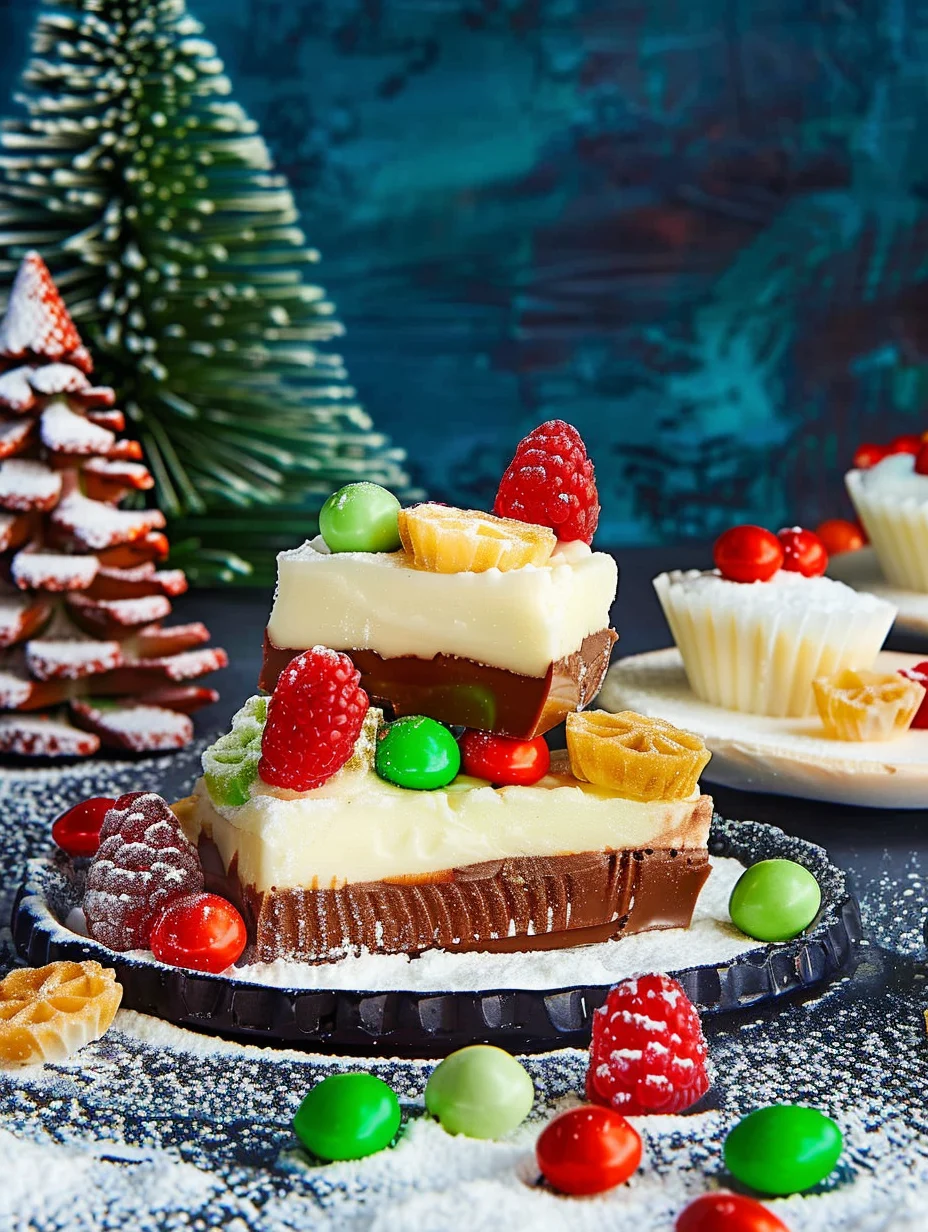
Creating a White Chocolate Candy Train offers a wonderful opportunity for creativity. You can customize it with your favorite candies, making it truly unique. This delightful dessert is not only appealing to the eyes but also to the taste buds. The creamy white chocolate melts in your mouth, while the assorted candies add bursts of flavor and texture. Let’s dive into the details of this amazing candy train recipe!
Why You’ll Love This Recipe
There are countless reasons to fall in love with the White Chocolate Candy Train recipe. Here are some delightful aspects that make it a must-try:
1. Fun Activity: Assembling the train is a great way for families to bond while enjoying a creative project.
2. Customizable Design: You can choose from a variety of candies, making each train a unique creation.
3. Visually Stunning: The bright colors and fun shapes make this candy train a showstopper at any gathering.
4. Delicious Flavor: The combination of white chocolate and assorted candies creates a delightful taste experience.
5. Easy to Make: The straightforward instructions ensure that anyone can create this treat, regardless of baking skills.
6. Perfect for All Ages: Kids will love helping with the assembly, while adults will appreciate the delicious flavors.
These factors contribute to the amazing appeal of the White Chocolate Candy Train. It’s a delightful treat that brings smiles and happiness to everyone involved!
Preparation and Cooking Time
Creating your White Chocolate Candy Train is a quick and enjoyable process. Here’s a breakdown of the time required:
– Preparation Time: 30 minutes
– Chilling Time: 1 hour
– Assembly Time: 20 minutes
Overall, you can expect to spend about 1 hour and 50 minutes from start to finish, making it a perfect weekend project!
Ingredients
– 2 cups white chocolate chips
– 1 cup assorted candies (e.g., gummy bears, chocolate buttons, M&M’s)
– 1 cup pretzel sticks
– 1 cup mini marshmallows
– 1 cup candy canes (for wheels)
– 1 tablespoon vegetable oil (optional, for thinning chocolate)
– Edible glitter or sprinkles (optional, for decoration)
Step-by-Step Instructions
Creating your White Chocolate Candy Train is simple and fun! Follow these steps to assemble your delicious masterpiece:
1. Melt the White Chocolate: In a microwave-safe bowl, melt the white chocolate chips in 30-second intervals, stirring in between until smooth. If needed, add vegetable oil for a thinner consistency.
2. Shape the Train Pieces: On a parchment-lined baking sheet, pour some melted white chocolate and spread it into rectangles to form the train cars. Allow the chocolate to cool slightly and harden.
3. Create the Train Engine: Use a larger rectangle of chocolate for the engine. While it’s still warm, press a few pretzel sticks into one end to create the smokestack.
4. Add Wheels: Attach candy canes or mini marshmallows to the bottom of each train car for wheels. Ensure they are securely in place before the chocolate hardens.
5. Decorate the Train: Use assorted candies to decorate the train cars. Attach gummy bears, chocolate buttons, or M&M’s to the sides of the train with melted white chocolate.
6. Assemble the Train: Once the chocolate pieces have hardened, stack them to form the train. Use melted chocolate as glue to hold the cars together.
7. Chill the Train: Place the assembled train in the refrigerator for about 1 hour to ensure everything is secure and set.
8. Final Touches: Once chilled, add edible glitter or sprinkles for extra sparkle and fun!
How to Serve
Serving your White Chocolate Candy Train can be just as fun as making it! Here are some tips to ensure your creation is a hit:
1. Presentation: Place the candy train on a decorative platter or a large cake stand for an impressive display.
2. Slice and Share: Cut the train into sections for easy sharing. This also makes it less daunting for guests to enjoy a piece.
3. Pair with Drinks: Serve alongside milk, hot chocolate, or even a fun punch to complement the sweetness of the candy train.
4. Themed Parties: This candy train is perfect for themed parties, so consider using it as a centerpiece for a train-themed birthday or festive gathering.
5. Encourage Creativity: Allow guests to decorate their sections of the train with additional candies for a personalized touch.
By following these serving suggestions, you can turn your White Chocolate Candy Train into a delightful centerpiece that everyone will enjoy!
Additional Tips
– Use High-Quality White Chocolate: Opt for premium white chocolate chips to enhance flavor and texture. This will make a noticeable difference in your final product.
– Experiment with Candies: Feel free to incorporate seasonal candies or color-coordinated options to match events or celebrations.
– Keep the Work Area Clean: To make the assembly process easier, have a clean workspace and all your ingredients prepped and ready to go.
Recipe Variation
The White Chocolate Candy Train can be adapted in various ways to suit your preferences. Here are a few fun variations to consider:
1. Chocolate Candy Train: Substitute white chocolate with dark or milk chocolate for a different taste. This variation will appeal to those who prefer richer chocolate flavors.
2. Healthier Options: Use dried fruit, nuts, or yogurt-covered treats instead of candies for a healthier twist.
3. Theme-Based Trains: Decorate your train based on holidays or themes, using colored candies and sprinkles that fit the occasion, like red and green for Christmas or pastel colors for Easter.
Freezing and Storage
– Storage: The White Chocolate Candy Train can be kept in an airtight container in the refrigerator for up to one week. This will help maintain its freshness.
– Freezing: If you want to save portions for later, you can freeze the assembled train. Wrap it in plastic wrap and then place it in a freezer-safe container. It should be good for up to three months. Ensure it’s well-wrapped to prevent freezer burn.
Special Equipment
To make the White Chocolate Candy Train, you will need the following essential tools:
– Microwave-safe bowls: For melting the white chocolate.
– Parchment paper: To line your baking sheet for easy removal of the chocolate pieces.
– Spatula: To spread the melted chocolate evenly.
– Refrigerator: For chilling the assembled train until set.
– Decorative platter: To present your finished candy train attractively.
Frequently Asked Questions
Can I make the White Chocolate Candy Train in advance?
Yes, you can prepare the train a day ahead. Just ensure it’s stored properly in the refrigerator.
What types of candies work best?
You can use any of your favorite candies, including gummy candies, chocolate treats, or even fruit-flavored options. Mix textures and colors for a fun look!
Is there a way to make this allergen-friendly?
Absolutely! Use allergen-free chocolate, and swap out candies for those that are nut-free or gluten-free according to your needs.
Can I use chocolate molds for the train pieces?
Yes! If you have train-shaped molds, you can pour the melted chocolate into them to create perfectly shaped train cars.
What if my chocolate doesn’t melt smoothly?
If your chocolate is clumpy, it may have been overheated. Try adding a teaspoon of vegetable oil and reheat gently, stirring constantly until smooth.
Conclusion
The White Chocolate Candy Train is more than just a dessert; it’s an experience filled with creativity and joy. Perfect for family gatherings, birthday parties, or any festive occasion, this delightful treat will surely impress guests of all ages. With the ability to customize and adapt, the possibilities are endless. So gather your loved ones, unleash your creativity, and enjoy making this sweet masterpiece together!

White Chocolate Candy Train: An Amazing Ultimate Recipe
- Total Time: 45 minutes
Ingredients
– 2 cups white chocolate chips
– 1 cup assorted candies (e.g., gummy bears, chocolate buttons, M&M’s)
– 1 cup pretzel sticks
– 1 cup mini marshmallows
– 1 cup candy canes (for wheels)
– 1 tablespoon vegetable oil (optional, for thinning chocolate)
– Edible glitter or sprinkles (optional, for decoration)
Instructions
Creating your White Chocolate Candy Train is simple and fun! Follow these steps to assemble your delicious masterpiece:
1. Melt the White Chocolate: In a microwave-safe bowl, melt the white chocolate chips in 30-second intervals, stirring in between until smooth. If needed, add vegetable oil for a thinner consistency.
2. Shape the Train Pieces: On a parchment-lined baking sheet, pour some melted white chocolate and spread it into rectangles to form the train cars. Allow the chocolate to cool slightly and harden.
3. Create the Train Engine: Use a larger rectangle of chocolate for the engine. While it’s still warm, press a few pretzel sticks into one end to create the smokestack.
4. Add Wheels: Attach candy canes or mini marshmallows to the bottom of each train car for wheels. Ensure they are securely in place before the chocolate hardens.
5. Decorate the Train: Use assorted candies to decorate the train cars. Attach gummy bears, chocolate buttons, or M&M’s to the sides of the train with melted white chocolate.
6. Assemble the Train: Once the chocolate pieces have hardened, stack them to form the train. Use melted chocolate as glue to hold the cars together.
7. Chill the Train: Place the assembled train in the refrigerator for about 1 hour to ensure everything is secure and set.
8. Final Touches: Once chilled, add edible glitter or sprinkles for extra sparkle and fun!
- Prep Time: 15 minutes
- Cook Time: 30 minutes
Nutrition
- Serving Size: 8
- Calories: 300 kcal
- Fat: 15g
- Protein: 2g