
The Ultimate Grazing Board is a delightful way to impress your guests at any gathering. This culinary masterpiece serves as a visual feast and tantalizes the taste buds with its amazing variety of flavors and textures. Whether you’re hosting a casual get-together or a sophisticated dinner party, assembling the ultimate grazing board will surely be a highlight of your event.
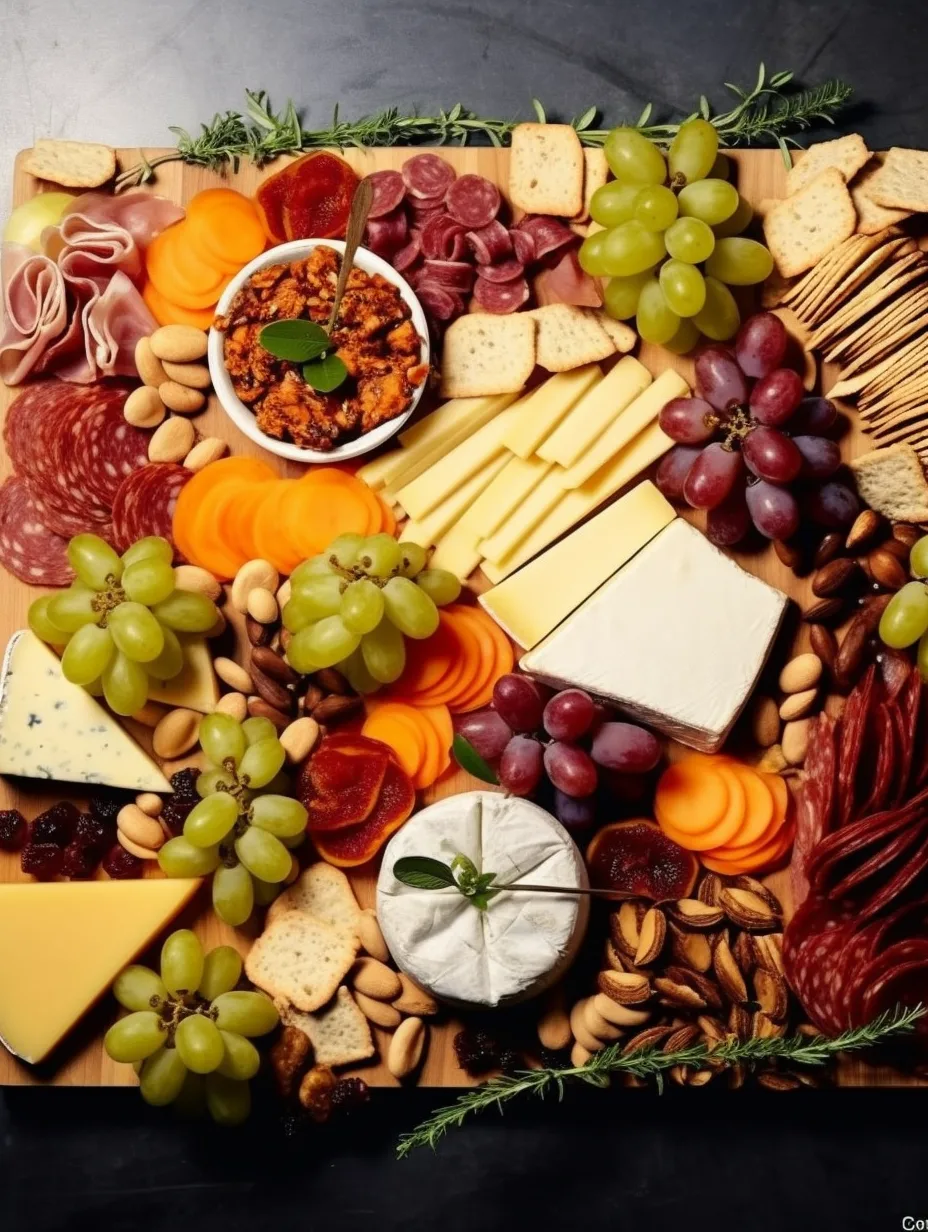
Imagine a beautifully arranged platter filled with an array of delicious cheeses, savory meats, crisp vegetables, and delectable fruits. The harmony of colors and the artistic presentation invite everyone to dig in. The Ultimate Grazing Board is not just a dish; it’s an experience that brings people together. It encourages mingling and conversation while allowing everyone to customize their plates according to their preferences.
In this guide, you’ll learn how to create the perfect grazing board that will leave everyone impressed. We’ll cover why this recipe is so beloved by many, the preparation and cooking time, a complete list of ingredients, step-by-step instructions, and tips on serving it. Whether you are a seasoned host or trying it for the first time, this amazing grazing board recipe will help create memorable moments with family and friends.
Why You’ll Love This Recipe
The Ultimate Grazing Board combines various elements that entice both the eyes and the palate. Here are just a few reasons why you’ll adore this recipe:
1. Customization: Everyone can choose their favorite items, making it suitable for all tastes.
2. Visual Appeal: The assortment of colors and textures creates a stunning display that enhances any gathering.
3. No-Cook Recipe: Most components require no cooking, making preparation a breeze!
4. Social Experience: Grazing boards promote interaction and sharing among guests.
5. Versatile Options: You can cater to various dietary needs, from vegetarian to gluten-free.
6. Great for Leftovers: Any leftover ingredients can be easily repurposed into meals for the week.
With all these reasons, you understand why the Ultimate Grazing Board is a popular choice for hosting events. It’s not merely about food; it’s about gathering, celebrating, and enjoying the company of loved ones.
Preparation and Cooking Time
Creating The Ultimate Grazing Board does not require hours in the kitchen. Here’s a breakdown of the time involved:
– Preparation Time: 30 minutes to an hour, depending on what you choose to include.
This minimal time commitment makes it easy to fit into your event planning!
Ingredients
– A selection of cheeses (e.g., Brie, cheddar, goat cheese)
– An assortment of charcuterie (e.g., prosciutto, salami, chorizo)
– Fresh fruits (e.g., grapes, apples, berries)
– Dried fruits (e.g., apricots, figs)
– Assorted nuts (e.g., almonds, walnuts, pecans)
– Fresh vegetables (e.g., cherry tomatoes, cucumber slices, bell pepper strips)
– Spreads (e.g., honey, hummus, olive tapenade)
– Crackers and/or bread (e.g., baguette slices, gluten-free options)
– Herbs for garnish (e.g., rosemary, basil, mint)
Step-by-Step Instructions
Creating The Ultimate Grazing Board is straightforward and fun. Just follow these simple steps:
1. Select Your Board: Choose a large cutting board, platter, or slate board as the base.
2. Start with Cheese: Arrange your cheeses evenly across the board. Place small bowls for spreads near the cheese.
3. Add Charcuterie: Begin layering your assorted meats near the cheese sections. Create small piles or fan them out for visual appeal.
4. Place Fruits: Cluster fresh and dried fruits in separate sections to add color and sweetness.
5. Add Vegetables: Strategically place your fresh veggies, filling in any gaps on the board.
6. Incorporate Nuts: Sprinkle nuts throughout the board for added texture and crunch.
7. Distribute Crackers and Bread: Place crackers and bread around the edge of the board, creating easy access for guests.
8. Garnish: Finish off with fresh herbs scattered throughout for a touch of elegance.
9. Final Touch: Ensure everything is clean and visually appealing before serving.
By following these steps, you’ll have a stunning grazing board ready to impress your guests!
How to Serve
To make your Ultimate Grazing Board even more special, consider the following tips when serving:
1. Present Beautifully: Ensure your board is visually appealing. A well-arranged platter is more inviting.
2. Include Utensils: Provide small utensils for spreading and tongs for guests to serve themselves.
3. Beverage Pairing: Offer a selection of wines, craft beers, or even mocktails to enhance the grazing experience.
4. Encourage Sharing: Place the grazing board at the center of the table to encourage guests to gather around it.
5. Seasonal Variations: Change ingredients according to the season to keep your grazing offers interesting and fresh.
By putting thought into how you present and serve The Ultimate Grazing Board, you elevate the experience for everyone involved, ensuring a gathering that’s not only delicious but memorable, too!
Additional Tips
– Use Seasonal Ingredients: Incorporating seasonal fruits and vegetables can elevate the freshness and flavor of your grazing board.
– Balance Flavors: Ensure you have a mix of sweet, salty, and savory elements. This balance creates a more satisfying experience.
– Enhance with Color: Use colorful garnishes, like edible flowers or vibrant herbs, to make your board visually striking.
– Use Varied Textures: Incorporate soft, hard, crunchy, and creamy elements to keep each bite exciting.
– Consider Dietary Restrictions: Always inquire about any dietary restrictions your guests may have to accommodate their needs.
Recipe Variation
Feel free to get creative with your Ultimate Grazing Board! Here are a few variations to inspire you:
1. Mediterranean Style: Replace charcuterie with a selection of Mediterranean dips (e.g., tzatziki, baba ghanoush) and include pita chips, olives, and feta cheese.
2. Sweet Dessert Board: Create a dessert version featuring assorted chocolates, cookies, caramel, and fresh fruits.
3. Themed Boards: Tailor your grazing board to match a theme, such as Italian (cheeses, meats, and bread) or Mexican (salsa, chips, guacamole).
Freezing and Storage
– Storage: The grazing board is best enjoyed fresh; however, covered leftovers can be stored in the refrigerator for up to two days.
– Freezing: Most components don’t freeze well due to texture changes, but you can freeze leftover spreads or meats in airtight containers for convenience.
Special Equipment
While you don’t need much to create The Ultimate Grazing Board, certain items can make the process easier:
– Cutting Board/Platter: A large wooden or slate board works beautifully as a base for presentation.
– Small Bowls: Use bowls for dips and spreads to keep them organized and tidy.
– Utensils: Tongs and spreaders for guests to serve themselves comfortably.
Frequently Asked Questions
What kind of cheeses work best?
Choose a mix of hard and soft cheeses for variety. Popular options include Brie, cheddar, and gouda.
Can I make a grazing board for breakfast?
Absolutely! Include things like yogurt, granola, pastries, and fresh fruit for a delightful breakfast option.
How do I keep the board fresh?
Cover the board with plastic wrap or use a lid if you’re not serving immediately. This helps retain freshness for a short time.
How many people does a grazing board serve?
A standard grazing board can serve 8 to 12 guests, depending on the size and quantity of items included.
Is a grazing board suitable for formal events?
Yes! When presented elegantly, a grazing board can be very sophisticated and appropriate for formal gatherings.
Conclusion
The Ultimate Grazing Board is a versatile centerpiece perfect for any gathering. With its impressive range of flavors, textures, and visual appeal, it serves as both an appetizer and a conversation starter. Remember, the essence of the grazing board lies in its customization; it’s about what you love and how you want to share that experience with others. Whether you’re preparing for a casual picnic or a lavish dinner party, this recipe is sure to leave your guests delighted and satisfied!

The Ultimate Grazing Board: An Amazing Recipe for Entertaining
- Total Time: 15 minutes
Ingredients
– A selection of cheeses (e.g., Brie, cheddar, goat cheese)
– An assortment of charcuterie (e.g., prosciutto, salami, chorizo)
– Fresh fruits (e.g., grapes, apples, berries)
– Dried fruits (e.g., apricots, figs)
– Assorted nuts (e.g., almonds, walnuts, pecans)
– Fresh vegetables (e.g., cherry tomatoes, cucumber slices, bell pepper strips)
– Spreads (e.g., honey, hummus, olive tapenade)
– Crackers and/or bread (e.g., baguette slices, gluten-free options)
– Herbs for garnish (e.g., rosemary, basil, mint)
Instructions
Creating The Ultimate Grazing Board is straightforward and fun. Just follow these simple steps:
1. Select Your Board: Choose a large cutting board, platter, or slate board as the base.
2. Start with Cheese: Arrange your cheeses evenly across the board. Place small bowls for spreads near the cheese.
3. Add Charcuterie: Begin layering your assorted meats near the cheese sections. Create small piles or fan them out for visual appeal.
4. Place Fruits: Cluster fresh and dried fruits in separate sections to add color and sweetness.
5. Add Vegetables: Strategically place your fresh veggies, filling in any gaps on the board.
6. Incorporate Nuts: Sprinkle nuts throughout the board for added texture and crunch.
7. Distribute Crackers and Bread: Place crackers and bread around the edge of the board, creating easy access for guests.
8. Garnish: Finish off with fresh herbs scattered throughout for a touch of elegance.
9. Final Touch: Ensure everything is clean and visually appealing before serving.
By following these steps, you’ll have a stunning grazing board ready to impress your guests!
- Prep Time: 15 minutes
- Cook Time: 0 minutes
Nutrition
- Serving Size: 10–12 persons
- Calories: Varies (calculated by ingredients used)
- Fat: Varies (calculated by ingredients used)
- Protein: Varies (calculated by ingredients used)