
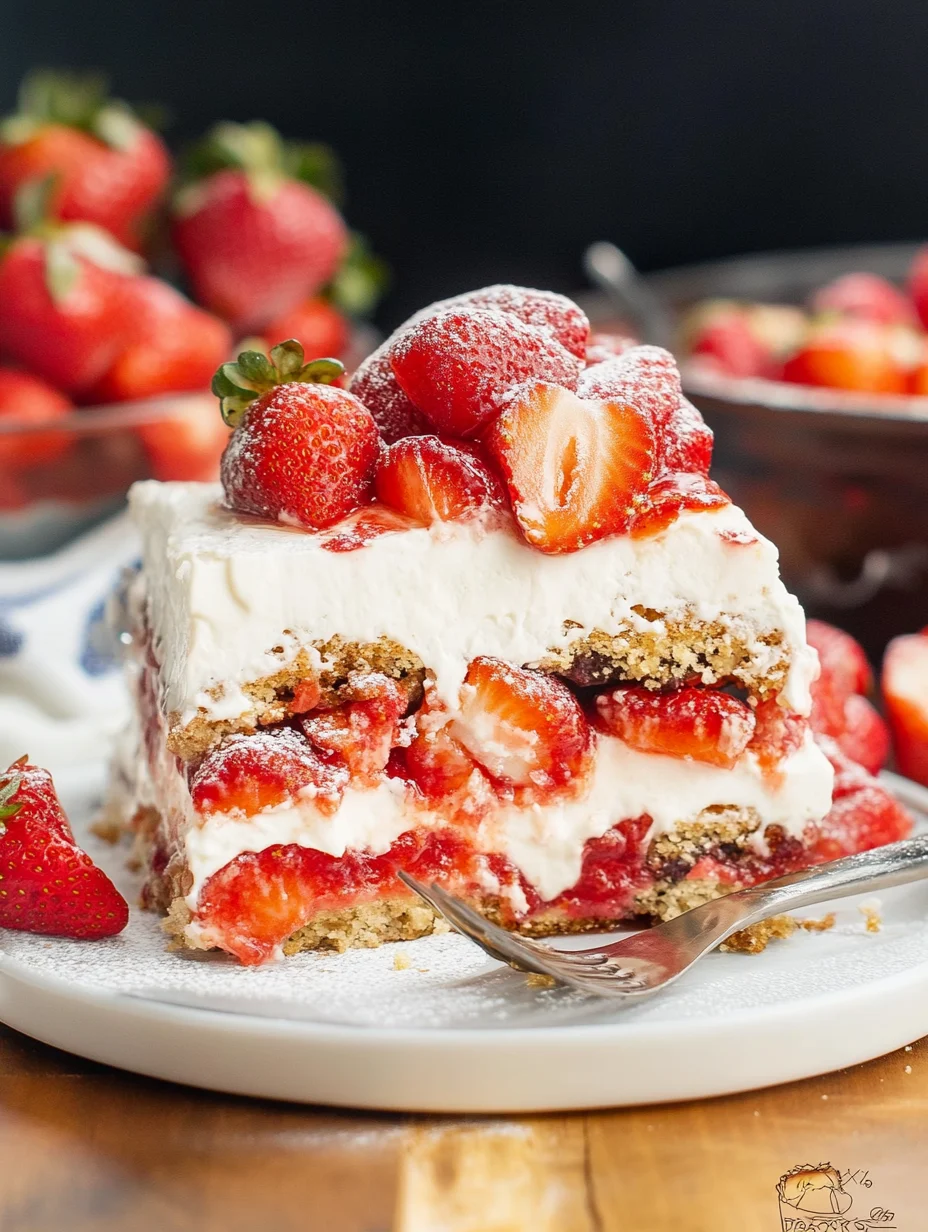
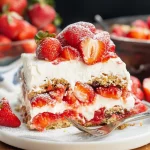
Strawberry Icebox Cake is one of those desserts that feels like a magical experience on a warm summer day. Full of delightful layers and amazing flavors, this cake is a showstopper that brings joy and refreshment to any gathering. With its fresh strawberries, luscious whipped cream, and layers of graham crackers, this dessert is as visually stunning as it is delicious. It’s a perfect option for picnics, barbecues, or just a delightful treat at home.
The beauty of Strawberry Icebox Cake lies in its simplicity. Landed somewhere between a cake and a cheesecake, its no-bake nature makes it incredibly easy to prepare. You don’t need to turn on the oven, making it a terrific choice for hot days when you want something sweet without the added heat. Imagine the first bite—cool, creamy, and bursting with strawberry goodness—turning your ordinary gathering into something extraordinary.
With minimal effort, you can put together a dessert that will impress your friends and family. In this article, you will find everything you need to know about making the ultimate Strawberry Icebox Cake—from the ingredients you’ll require to the step-by-step process that leads to this fabulous creation. So let’s dive into what makes Strawberry Icebox Cake an unforgettable treat!
Why You’ll Love This Recipe
The carefully layered Strawberry Icebox Cake showcases why this recipe is beloved by many. Here are some compelling reasons why this cake should be your go-to summer dessert:
1. No-Bake Simplicity: Because it requires no baking, the recipe is perfect for those hot days when you want something refreshing.
2. Fresh and Fruity Flavor: The combination of fresh strawberries and whipped cream makes every bite a taste of summer.
3. Visual Appeal: The layers of strawberries and cream create a stunning presentation that will impress your guests.
4. Effortless Preparation: The steps are straightforward, making it possible for even novice bakers to achieve success.
5. Versatile Ingredients: You can easily substitute with other fruits like blueberries or raspberries if you desire a variation of flavors.
6. Make Ahead Option: This cake can be made the night before, allowing flavors to meld and ensuring you spend more time with your guests and less time in the kitchen.
As you can see, the factors that contribute to the popularity of Strawberry Icebox Cake extend beyond just its taste. This dessert provides a sensory experience and a delightful celebration of fresh ingredients that will become a favorite in your recipe collection.
Preparation and Cooking Time
Creating your Strawberry Icebox Cake is a delightful process that shouldn’t take much time. Here’s a breakdown of the time you’ll need to prepare this dessert:
– Preparation Time: 30 minutes
– Chilling Time: 4-6 hours (or overnight for best results)
– Total Time: Approximately 5-6 hours, including chilling
These times account for gathering your ingredients, assembling the cake, and allowing it to chill in the refrigerator, ultimately leading to a dessert that’s well worth the wait.
Ingredients
– 2 cups heavy whipping cream
– 3/4 cup powdered sugar
– 1 teaspoon vanilla extract
– 1 pound fresh strawberries, hulled and sliced
– 1 package (14.4 oz) graham crackers
– Additional strawberries for decoration (optional)
Step-by-Step Instructions
Follow these easy steps to whip up your Strawberry Icebox Cake:
1. Prepare Whipping Cream: In a large bowl, pour in the heavy whipping cream. Add the powdered sugar and vanilla extract. Whip until soft peaks form.
2. Layer Ingredients: In a rectangular dish, spread a layer of whipped cream at the bottom to begin.
3. Add Graham Crackers: Place a layer of graham crackers on top of the whipped cream, filling the bottom of the dish.
4. First Fruit Layer: Add a layer of sliced strawberries over the graham crackers, and then cover them with more whipped cream.
5. Repeat Layers: Continue layering in this order: graham crackers, whipped cream, and strawberries, until you reach the top of the dish or run out of your ingredients.
6. Final Cream Layer: Finish with a generous layer of whipped cream on the top layer.
7. Chill: Cover the dish with plastic wrap and refrigerate for at least 4 hours, or preferably overnight. This allows the flavors to meld and the graham crackers to soften.
8. Serve: When ready to serve, slice into squares and enjoy! Optionally, you can garnish with additional strawberries for a more appealing presentation.
These steps transform simple ingredients into a glorious cake that is as much a feast for the eyes as it is for the palate.
How to Serve
Serving Strawberry Icebox Cake is as enjoyable as preparing it. Here are some tips to make the presentation special:
1. Presentation Matters: Use a clean knife to slice and serve the cake onto individual plates. This ensures neat portions that showcase the layers.
2. Garnish Creatively: Add fresh strawberry slices or sprigs of mint on top of each slice to enhance the allure.
3. Chill Before Serving: Ensure the cake remains chilled until serving time. It maintains the best texture when kept cool.
4. Drink Pairing: Consider serving with iced tea, lemonade, or a refreshing white wine to complement the sweetness of the dessert.
5. Portion Size: Cut smaller portions since the dessert is rich and a little goes a long way. This encourages guests to come back for seconds!
By focusing on the presentation and serving suggestions, your Strawberry Icebox Cake will not only tantalize taste buds but also create an elegant dining experience. Enjoy every layer and every smile as you share this delightful treat!
Additional Tips
– Use Fresh Strawberries: Choose ripe and unblemished strawberries for the best flavor and appearance.
– Chill Your Tools: For the best whipped cream, chill your mixing bowl and beaters before whipping.
– Adjust Ingredients: Feel free to add more whipped cream or strawberries between the layers for a richer taste.
– Try Different Crackers: For a twist, experiment with chocolate or cinnamon graham crackers for added flavor.
– Customize Sweetness: Adjust the amount of powdered sugar based on the natural sweetness of your strawberries.
Recipe Variation
Here are some creative variations you can try with your Strawberry Icebox Cake:
1. Chocolate Strawberry Icebox Cake: Alternate layers of the original recipe with layers of chocolate pudding or mousse for a decadent touch.
2. Mixed Berry Icebox Cake: Replace strawberries with a mix of blueberries and raspberries for a colorful, berry-flavored treat.
3. Coconut Strawberry Icebox Cake: Add shredded coconut to the whipped cream for a tropical twist.
4. Lemon-Honey Icebox Cake: Incorporate lemon zest and a drizzle of honey into the whipped cream for a zesty flair.
5. Vegan Version: Use coconut cream instead of heavy whipping cream and a plant-based sweetener to make a vegan-friendly dessert.
Freezing and Storage
– Storage: Store leftover Strawberry Icebox Cake in the refrigerator, covered with plastic wrap or in an airtight container. It will maintain its quality for about 4-5 days.
– Freezing: You can freeze slices of the cake for up to 3 months. Make sure to wrap them tightly in plastic wrap and place them in a freezer-safe container to prevent freezer burn. Thaw overnight in the refrigerator before serving for best results.
Special Equipment
To make your Strawberry Icebox Cake, you’ll need a few essential tools:
– Mixing Bowls: For combining your whipped cream and assembling the cake.
– Electric Mixer: To whip the cream to the desired consistency easily.
– Spatula: For spreading the cream evenly between layers.
– Rectangular Dish: A 9×13 inch or similar-sized dish works well for layering.
– Plastic Wrap: To cover the cake during the chilling process.
Frequently Asked Questions
Can I use frozen strawberries instead of fresh?
While fresh strawberries are preferred for their taste and texture, you can use frozen strawberries as a substitute. Just be sure to thaw and drain them beforehand to remove excess moisture.
How long can this cake sit out at room temperature?
For food safety, it’s advisable not to leave the cake out for more than 2 hours, especially in warm weather.
Can I double the recipe?
Yes, you can easily double the recipe. Just be sure to use a larger dish for assembly and adjust chilling time as needed.
What if I don’t have graham crackers?
You can use any type of plain cookie or biscuit as a substitute. Shortbread or vanilla wafers work wonderfully as alternatives.
Is it possible to add a different flavor to the whipped cream?
Absolutely! You can incorporate extracts, such as almond or mint, into the whipped cream to add more flavor.
Conclusion
Crafting the ultimate Strawberry Icebox Cake is an easy endeavor that provides tremendous rewards. With its refreshing layers of strawberries, whipped cream, and graham crackers, this dessert captures the essence of summer. Whether served at a barbecue or enjoyed as a sweet treat at home, this cake will surely impress everyone who tastes it. Enjoy the cool, creamy delight with friends and family, making every occasion a little sweeter!
Strawberry Icebox Cake: An Incredible 5-Layer Recipe
- Total Time: 30 minutes
Ingredients
– 2 cups heavy whipping cream
– 3/4 cup powdered sugar
– 1 teaspoon vanilla extract
– 1 pound fresh strawberries, hulled and sliced
– 1 package (14.4 oz) graham crackers
– Additional strawberries for decoration (optional)
Instructions
Follow these easy steps to whip up your Strawberry Icebox Cake:
1. Prepare Whipping Cream: In a large bowl, pour in the heavy whipping cream. Add the powdered sugar and vanilla extract. Whip until soft peaks form.
2. Layer Ingredients: In a rectangular dish, spread a layer of whipped cream at the bottom to begin.
3. Add Graham Crackers: Place a layer of graham crackers on top of the whipped cream, filling the bottom of the dish.
4. First Fruit Layer: Add a layer of sliced strawberries over the graham crackers, and then cover them with more whipped cream.
5. Repeat Layers: Continue layering in this order: graham crackers, whipped cream, and strawberries, until you reach the top of the dish or run out of your ingredients.
6. Final Cream Layer: Finish with a generous layer of whipped cream on the top layer.
7. Chill: Cover the dish with plastic wrap and refrigerate for at least 4 hours, or preferably overnight. This allows the flavors to meld and the graham crackers to soften.
8. Serve: When ready to serve, slice into squares and enjoy! Optionally, you can garnish with additional strawberries for a more appealing presentation.
These steps transform simple ingredients into a glorious cake that is as much a feast for the eyes as it is for the palate.
- Prep Time: 30 minutes
- Cook Time: 0 minutes
Nutrition
- Serving Size: 12
- Calories: 300 kcal
- Fat: 18g
- Protein: 2g