
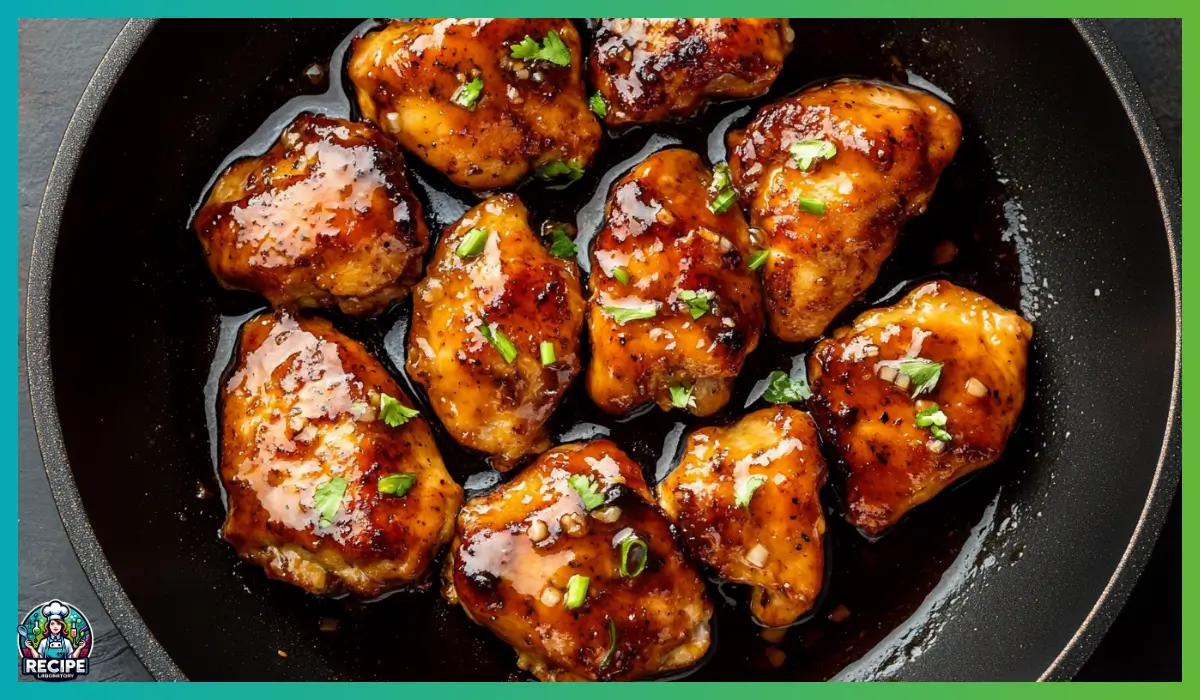
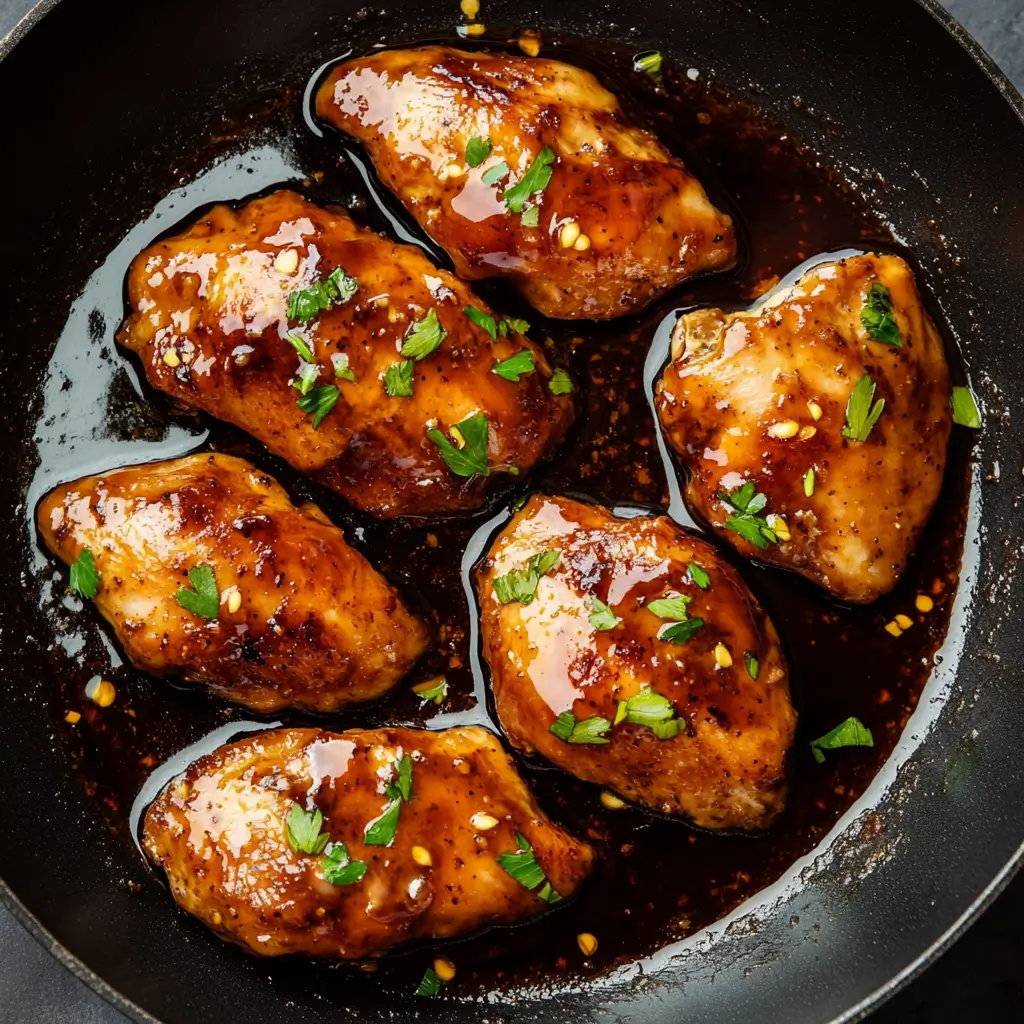
There’s just something magical about a dish that brings together sweet, savory, and garlicky goodness in one skillet. That’s exactly what this Sticky Garlic Honey Chicken delivers—a golden, pan-seared chicken with a thick, glossy sauce that clings to every bite. It’s the kind of recipe that looks like you spent hours in the kitchen, but really, it comes together in less than 30 minutes. That’s what makes it a total weeknight hero.
This dish has become a staple in my home. It’s fast, flavorful, and everyone—kids and adults alike—cleans their plate. The combination of honey, soy sauce, and garlic creates a sticky glaze that’s rich but not overpowering. It’s perfectly balanced with a touch of acidity from lemon juice or apple cider vinegar, which cuts through the sweetness and lifts the flavors. And when you add the warm sear of the chicken and the subtle butteriness from the pan-fry, the entire meal comes together in the most satisfying way.
One of the reasons I keep coming back to this recipe is how versatile it is. You can serve it with rice, noodles, or even tuck it into a warm flatbread with a crisp slaw on the side. It’s also easy to adapt depending on what you have in the fridge. And because the sauce is made with pantry staples like soy sauce, honey, broth, and garlic, you’re never more than a few steps away from a delicious dinner.
I first made this recipe on a busy Tuesday night when I had no dinner plan and a pack of chicken breasts in the fridge. With a few simple ingredients and some quick thinking, this saucy, flavorful chicken was born—and my family’s been requesting it regularly ever since. Whether you’re cooking for one, a partner, or a whole family, this recipe will quickly earn a permanent spot in your rotation.
Why You’ll Love This Sticky Garlic Honey Chicken Recipe
If you’re looking for a new favorite chicken dish that’s easy to make but doesn’t skimp on flavor, you’re going to fall hard for this sticky garlic honey chicken. There are so many reasons this dish shines in the kitchen and on the dinner table.
First of all, it’s incredibly easy. With just a handful of basic ingredients and one skillet, you can create a dinner that feels elevated and comforting. You don’t need any special techniques or equipment. Even if you’re new to cooking, this is a dish you can absolutely handle—and feel proud of.
Secondly, it’s loaded with flavor. The garlic in the sauce infuses it with a deep, savory backbone. The honey adds just the right touch of sweetness without making the dish cloying. The soy sauce adds umami and saltiness, while the lemon juice or apple cider vinegar brightens the whole thing up. And because the chicken is pan-seared before being finished in the oven, you get that beautiful caramelized crust that locks in moisture and creates extra flavor.
Another reason to love this recipe is how family-friendly it is. Kids love it because of the sweet and sticky glaze, while adults appreciate the richness and the balance of flavors. It’s not spicy, which makes it perfect for picky eaters, but it’s easy to add a little kick with chili flakes or hot sauce if you like things bolder.
It’s also super flexible. You can serve it over a bed of fluffy white rice, with roasted vegetables, or even slice it up and throw it in a wrap or salad. And if you double the sauce (which I often do), it makes a fantastic glaze for grilled vegetables or tofu.
Finally, cleanup is a breeze. Since the whole thing comes together in one skillet, you’re not left with a mountain of dishes. Less time scrubbing means more time enjoying your meal—and maybe even grabbing a second helping.
Health Benefits of this Sticky Garlic Honey Chicken
This sticky garlic honey chicken might taste indulgent, but it actually packs in several health benefits, especially when you prepare it mindfully. Let’s take a closer look at why this dish is a win not only for your tastebuds but for your body too.
To start with, chicken breast is a lean source of protein, making it a great choice for building and maintaining muscle, supporting healthy metabolism, and keeping you full for longer periods of time. When cooked without heavy breading or deep frying, chicken remains a wholesome option in most balanced diets.
Garlic, a key ingredient in the sauce, does more than add flavor. It has been shown to support heart health, lower cholesterol levels, and even boost immune function. Using fresh garlic cloves enhances the nutritional profile of the dish, giving it a boost of antioxidants and anti-inflammatory compounds.
Honey, while a natural sweetener, also contains antioxidants and has antibacterial properties. Unlike refined sugar, it offers trace nutrients and is less likely to spike your blood sugar as quickly. When used in moderation, honey can be a part of a healthy diet.
Soy sauce adds umami and depth to the sauce, but by using a low-sodium version, you significantly reduce the salt content of the meal. This makes the dish friendlier for those watching their sodium intake, without compromising on taste.
Additionally, this dish includes lemon juice or apple cider vinegar, both of which support digestion and offer small amounts of vitamin C. The acidity helps balance the sweetness and adds a fresh brightness to the dish.
Finally, if you serve this chicken with a side of steamed vegetables or a whole grain like brown rice or quinoa, you’ll be adding fiber, vitamins, and minerals to round out your meal. The result is a balanced plate with protein, complex carbs, and healthy fats—all in one satisfying dish.
Preparation Time, Servings, and Nutritional Information
One of the things that makes this recipe so appealing is its speed and simplicity. Even on the busiest weeknights, you can get a delicious dinner on the table in under 30 minutes.
Preparation Time:
Prep Time: 10 minutes
Cook Time: 15–18 minutes
Total Time: 25–28 minutes
Servings:
This recipe serves 4 people generously. You can easily scale it up for a larger group or double the batch to have leftovers the next day.
Nutritional Information (Per Serving):
Calories: Approximately 380
Protein: 30g
Carbohydrates: 18g
Fat: 20g
Saturated Fat: 6g
Sugar: 12g
Fiber: 0g
Sodium: 450mg (with low-sodium soy sauce)
Please note that the nutritional content may vary slightly based on specific ingredient brands and any substitutions you make. For example, using a sugar-free honey alternative or swapping butter for a different fat can adjust the calorie and fat content.
Ingredients List
Here’s everything you’ll need to make this flavorful, sticky garlic honey chicken. Each ingredient plays a role in creating the delicious balance of sweet, savory, and tangy.
For the Chicken:
- 2 large chicken breasts (cut in half horizontally to create 4 thin cutlets): This ensures even cooking and a quicker sear.
- 2 tablespoons olive oil: Used for searing the chicken, it adds flavor and helps form that beautiful golden crust.
- 1 tablespoon butter: Adds richness and helps the chicken brown evenly.
- Salt and pepper to taste: Essential for seasoning the chicken before searing.
- Chopped scallions (optional garnish): These add a pop of freshness and color to the final dish.
For the Sticky Garlic Honey Sauce:
- 3 tablespoons low-sodium soy sauce: Provides that deep, umami flavor without overpowering the dish with salt.
- ¼ cup honey: The sweetness that makes the sauce sticky and caramelized, balancing the garlic and soy sauce.
- ¼ cup chicken broth: Adds moisture and depth to the sauce. Use low-sodium for better control over salt content.
- ½ tablespoon lemon juice or apple cider vinegar: Adds acidity to cut through the sweetness and brighten the flavor.
- 4 garlic cloves, minced: Brings warmth and depth to the sauce—fresh garlic is key here.
- 1 tablespoon cornstarch: Used to thicken the sauce into that gorgeous, glossy glaze.
Optional additions include chili flakes for heat, a splash of sesame oil for nutty depth, or fresh ginger for extra zing. These aren’t necessary, but they’re fun ways to experiment once you’ve mastered the base version.
Step-By-Step Cooking Instructions
Making sticky garlic honey chicken is a straightforward process, but a few careful steps ensure that the chicken stays tender and the sauce turns out perfectly glossy and flavorful.
1. Prep the Chicken
Start by cutting your chicken breasts in half horizontally to create four thin cutlets. This not only speeds up the cooking process but also ensures even browning. Pat the cutlets dry with a paper towel—this helps the seasoning stick and encourages better caramelization in the pan.
Season both sides of the chicken with salt and pepper. Don’t go overboard—remember, the sauce will add more seasoning later on.
2. Mix the Sauce
In a small bowl or liquid measuring cup, combine the soy sauce, honey, chicken broth, lemon juice or apple cider vinegar, and minced garlic. Whisk everything together until fully combined.
In a separate small dish, mix the cornstarch with one tablespoon of water to create a slurry. Set this aside for now. You’ll add it later to thicken the sauce.
3. Sear the Chicken
Heat the olive oil and butter in a large oven-safe skillet over medium-high heat. Once the butter is melted and the pan is hot (you’ll see a shimmer on the surface), carefully add the chicken cutlets.
Let them sear undisturbed for about 4–5 minutes on the first side. This helps develop a golden, flavorful crust. Flip and cook for another 4–5 minutes on the second side, until the chicken is nearly cooked through. Internal temperature should be about 155°F at this point.
Remove the pan from heat momentarily.
4. Add the Sauce
Give the sauce another quick whisk, then pour it into the skillet with the chicken. It should start to bubble right away from the residual heat in the pan.
Let it simmer for about 30 seconds, spooning some of the sauce over the chicken as it cooks. This gives the chicken a head start in soaking up the flavors.
5. Add the Cornstarch Slurry
Pour in the cornstarch slurry and stir it into the sauce gently. This will help the sauce thicken into that classic sticky glaze. You should see it begin to bubble and tighten up after about 30 seconds.
6. Bake to Finish
Transfer the skillet to a preheated oven at 400°F. Bake for 4–5 minutes, or until the chicken reaches 165°F internally and the sauce is thick and glossy.
If you don’t have an oven-safe skillet, you can transfer everything to a baking dish at this point. Just be sure to scrape all the sauce from the pan.
7. Rest and Garnish
Once the chicken is done, remove the skillet from the oven and let it rest for a few minutes. This allows the juices to redistribute and keeps the chicken moist.
Garnish with chopped scallions for a fresh, vibrant finish.
8. Serve and Enjoy
Serve the chicken hot, spooning extra sauce from the skillet over the top. Pair with your favorite side dishes and dig in.
How to Serve
Serving sticky garlic honey chicken is just as fun as making it. The glossy sauce, the tender chicken, and the bold, sweet-savory flavor combo all come together beautifully with the right pairings on the plate. While this dish is the star of the show, choosing the right accompaniments can take it from great to unforgettable.
The most classic and comforting way to serve this dish is over a bed of fluffy white rice. The sauce soaks into the grains, creating a sweet and savory foundation that balances the richness of the chicken. If you want to elevate it just a bit more, try using jasmine or basmati rice, which both offer a lovely aromatic backdrop.
If you’re trying to keep things lighter or add more fiber to your meal, brown rice or quinoa are excellent choices. These whole grains soak up the sauce well while providing a slightly nutty flavor and satisfying texture.
Another popular option is to serve the chicken alongside stir-fried or steamed vegetables. Broccoli, snap peas, carrots, bok choy, and green beans all pair beautifully with the sticky sauce. Their bright colors and crisp textures provide a contrast to the tender chicken, making the meal feel vibrant and well-rounded.
For a more low-carb option, try pairing the chicken with cauliflower rice or zucchini noodles. The bold sauce really shines against these mild bases, and they’re both quick to prepare.
If you’re looking for a creative twist, you can slice the chicken thinly and use it as a filling for wraps or lettuce cups. Add a crunchy slaw, a drizzle of sauce, and some sesame seeds, and you’ve got a fun, handheld version of the dish that’s perfect for lunch or a party platter.
Lastly, this dish can also shine in a rice bowl or grain bowl format. Layer cooked grains, sliced chicken, a mix of roasted or raw veggies, and top it all with extra sauce and chopped scallions for a well-balanced, Instagram-worthy meal that hits every note—crunchy, saucy, fresh, and hearty.
No matter how you serve it, the key is to let the sauce be the centerpiece. It’s bold, glossy, and full of flavor, and it’s meant to be soaked up and savored.
Pairing Suggestions
While sticky garlic honey chicken can certainly stand on its own, the right pairings elevate it into a full-fledged meal. Whether you’re looking for simple sides, hearty carbs, or something to sip alongside, these ideas will help round out your plate beautifully.
Starches and Grains
Start with a base that can soak up the rich, sticky sauce. White rice is a classic pairing, and for good reason—it’s simple, neutral, and comforting. Basmati and jasmine rice offer a more aromatic experience, while brown rice adds a nutty depth and extra fiber. Quinoa works especially well if you’re going for a higher-protein grain, and it brings a lovely texture contrast to the smooth sauce and tender chicken.
For something a little different, try serving the chicken with rice noodles or even soba noodles. Toss the cooked noodles with a touch of sesame oil and a pinch of salt, then lay the glazed chicken right on top.
Vegetables
Vegetables not only balance the richness of the sauce but also add color, crunch, and nutrients to the plate. A stir-fry of bell peppers, snow peas, carrots, and mushrooms adds texture and soaks up the sauce like a dream. Roasted vegetables like broccoli, Brussels sprouts, or cauliflower also work beautifully, especially when finished with a drizzle of olive oil and a squeeze of lemon.
If you want something super light, try a side of steamed bok choy or sautéed spinach. Their mild flavors let the chicken take center stage while adding freshness to the dish.
Salads and Slaws
For a refreshing contrast, serve your sticky chicken with a simple side salad. A cucumber salad with a light vinegar dressing adds a nice bite, while a tangy cabbage slaw brings crunch and color. Try tossing shredded carrots and cabbage with lime juice, honey, and sesame oil for an Asian-inspired slaw that perfectly complements the dish.
Beverages
For drinks, water with lemon is always a refreshing choice, but if you’re serving guests or looking for something a bit more special, try a sparkling water with a splash of ginger syrup or citrus juice. For a cozy evening, a warm mug of green tea pairs beautifully with the sweet and savory notes of the dish.
For Kids
When serving kids, keep it simple. A side of buttery noodles, mashed potatoes, or plain white rice is always a win. Add some steamed carrots or peas, and you’ve got a balanced, kid-approved plate that’s full of flavor but not too adventurous.
Storage, Freezing & Reheating Instructions
One of the best things about sticky garlic honey chicken is how well it stores. If you’re into meal prepping or just want to enjoy leftovers the next day, this dish holds up beautifully.
Storage Instructions
Once the chicken has cooled, transfer it to an airtight container. Pour any remaining sauce over the top to keep it moist during storage. Refrigerate within two hours of cooking for food safety. The chicken will stay fresh in the refrigerator for up to 3 days.
Freezing Instructions
To freeze, allow the chicken to cool completely. Store the cutlets in a single layer in a freezer-safe container or resealable freezer bag. If you have extra sauce, store it separately or pour it over the chicken before freezing. Be sure to label the container with the date. The chicken can be frozen for up to 3 months.
To prevent freezer burn and preserve flavor, you might consider wrapping the chicken in parchment paper before placing it in the freezer bag. You can also freeze individual portions for easier reheating later.
Reheating Instructions
For the best texture, reheat the chicken in the oven. Preheat your oven to 350°F (175°C), place the chicken in an oven-safe dish, cover loosely with foil to retain moisture, and bake for 10–15 minutes, or until heated through.
You can also reheat it on the stovetop over medium heat in a covered skillet. Add a splash of water or broth to loosen the sauce and prevent it from sticking or drying out.
Microwaving is the quickest method, but it may result in a slightly drier texture. If using the microwave, cover the chicken and reheat in 30-second intervals until warm, adding a teaspoon of water or broth if needed to refresh the sauce.
Common Mistakes to Avoid
Even though this recipe is simple, a few small missteps can affect the final outcome. Here are the most common mistakes and how to avoid them to ensure success every time.
1. Not Slicing the Chicken Thinly Enough
If the chicken breasts are too thick, they won’t cook evenly during searing and baking. This can result in overcooked edges and undercooked centers. Always slice the chicken horizontally to create thin, even cutlets. This helps them cook quickly and evenly.
2. Overcrowding the Pan
When searing the chicken, avoid packing too many pieces into the skillet. Overcrowding traps steam and prevents the chicken from browning properly. If needed, cook the chicken in batches and combine everything in the skillet before adding the sauce.
3. Using High-Sodium Soy Sauce
Standard soy sauce can make the dish too salty, especially once reduced into a glaze. Always use low-sodium soy sauce to maintain balance. You can always adjust seasoning later if needed.
4. Skipping the Cornstarch Slurry
The cornstarch slurry is key for thickening the sauce into a rich glaze. If you skip it, the sauce may remain watery and won’t cling to the chicken as well. Be sure to whisk it in and give the sauce time to bubble and reduce slightly.
5. Overcooking the Chicken
Overcooked chicken becomes dry and chewy. Use a meat thermometer to check for doneness—165°F is the safe internal temperature for chicken. Remember, the chicken will continue cooking slightly as it rests, so remove it from the oven just as it reaches temperature.
6. Not Letting the Chicken Rest
Just like with any cooked meat, letting your chicken rest after baking allows the juices to redistribute. Cutting into it too soon can cause the juices to run out, leaving the meat dry. Let it rest for at least 5 minutes before serving.
7. Burning the Garlic
Garlic burns quickly, especially over high heat. Since the garlic is part of the sauce in this recipe, make sure you don’t add it directly to the hot oil before the sauce ingredients are combined. Burned garlic can make the dish bitter.
8. Forgetting to Taste as You Go
Taste your sauce before pouring it into the skillet. You might prefer it slightly tangier, sweeter, or saltier. Adjusting before cooking makes it easier to balance the flavors to your liking.
Pro Tips
To make the most of your sticky garlic honey chicken and ensure it turns out perfect every single time, here are some tried-and-true pro tips. These little tweaks and kitchen strategies can take your cooking game to the next level—especially with a dish as deceptively simple as this one.
1. Pat the Chicken Dry Before Cooking
This one might seem small, but it makes a big difference. Before seasoning the chicken, use paper towels to pat it completely dry. Moisture on the surface of the chicken prevents it from getting that gorgeous golden sear. By removing the moisture, you’re helping it develop that beautiful crust we all love in pan-seared proteins.
2. Don’t Rush the Sear
It can be tempting to flip the chicken early, especially when you’re hungry or in a hurry. But resist the urge. Give each side a solid 4–5 minutes without moving it. This allows the meat to naturally release from the pan once it’s developed a proper crust. If it’s sticking, it’s not ready to flip yet.
3. Use an Oven-Safe Skillet
If you have one, an oven-safe skillet (like cast iron or stainless steel) will streamline the process beautifully. You can sear your chicken on the stovetop, add the sauce, and finish everything in the oven without dirtying another dish. Plus, oven-safe skillets retain heat well, helping the sauce bubble and thicken evenly.
4. Add Fresh Elements for Balance
Once you’ve mastered the basics, elevate your dish with a few finishing touches. A sprinkle of chopped scallions or cilantro adds freshness and color. A squeeze of fresh lemon or a dash of sesame oil right before serving can brighten the dish and add layers of flavor.
5. Double the Sauce
If you love extra sauce with your rice or veggies, go ahead and double the sauce ingredients. It scales easily, and any extra can be stored in the fridge and drizzled over grilled meats, roasted vegetables, or even used as a dipping sauce. Just don’t forget to adjust the cornstarch slurry accordingly so the sauce thickens properly.
6. Use a Thermometer for Perfect Doneness
Investing in an instant-read thermometer takes the guesswork out of cooking chicken. You want to remove the chicken from the oven when it hits 165°F in the thickest part. That way, it stays juicy and safe to eat, with no chance of overcooking.
7. Let the Sauce Bubble for Depth
Letting the sauce simmer and reduce slightly before baking intensifies its flavor. Give it at least 30 seconds on the stove after you add the ingredients—long enough for the garlic to bloom and the flavors to come together before you finish it in the oven.
8. Reheat Gently
If you’re enjoying leftovers, reheat them gently with a splash of water or broth. This helps loosen the sauce and prevents it from getting too sticky or drying out. Always cover the chicken while reheating to retain moisture.
9. Slice the Chicken Before Serving for Presentation
For a more elegant presentation—especially if you’re serving guests—slice the cooked chicken on a bias before plating. Then drizzle the sauce over the slices and garnish. It looks beautiful, and it’s easier to eat, too.
10. Make It Your Own
Once you’ve mastered the basic recipe, don’t be afraid to experiment. Try adding ginger to the sauce for an aromatic kick. Or sprinkle toasted sesame seeds on top for crunch. You can even swap in boneless chicken thighs if you prefer darker meat.
With these pro tips in your back pocket, you’ll not only master this recipe but be able to make it your own with confidence and creativity.
Frequently Asked Questions (FAQs)
Can I use chicken thighs instead of chicken breasts?
Absolutely. Boneless, skinless chicken thighs work wonderfully in this recipe. They tend to be more forgiving and stay juicy even if slightly overcooked. Just be aware that thighs may take a few extra minutes in the oven, so use a thermometer to check doneness.
What if I don’t have an oven-safe skillet?
No worries! After searing the chicken and adding the sauce, you can carefully transfer everything to a baking dish and place it in the oven. Just be sure to scrape all the delicious sauce into the dish with the chicken.
Can I make this dish ahead of time?
Yes, you can prepare the chicken and sauce ahead of time. Cook the chicken, cool it, and refrigerate. When you’re ready to serve, reheat the chicken in the sauce in the oven or on the stovetop until warmed through and the sauce thickens again.
How do I make it spicier?
If you want to add some heat, a pinch of red pepper flakes, a dash of hot sauce, or a chopped chili pepper in the sauce will do the trick. Add it to taste based on your heat preference.
Can I use bottled garlic or garlic powder instead of fresh?
Fresh garlic is definitely best for this recipe, as it adds depth and that signature aroma to the sauce. However, if you’re in a pinch, ½ teaspoon of garlic powder per clove can be substituted. Just note that the flavor won’t be quite as bold.
What if I don’t have cornstarch?
You can use arrowroot powder or tapioca starch as a substitute. Flour can also work in a pinch, though it may not create the same glossy finish. If using flour, double the amount and cook the sauce a bit longer to remove the raw taste.
How can I keep the chicken from drying out?
Make sure you don’t overcook it. Use a thermometer to remove the chicken as soon as it reaches 165°F. Also, letting it rest after baking allows the juices to redistribute, keeping the meat moist.
Can I freeze the leftovers with the sauce?
Yes, both the chicken and sauce freeze well. Let everything cool completely, then store in an airtight, freezer-safe container. When ready to eat, thaw overnight in the fridge and reheat gently, adding a splash of water if needed.
Is this recipe gluten-free?
As written, it’s not gluten-free due to the soy sauce. However, you can easily make it gluten-free by using tamari or a gluten-free soy sauce alternative.
What sides go best with this dish?
This chicken pairs wonderfully with rice, noodles, stir-fried or steamed vegetables, or even a fresh slaw. For something heartier, try garlic mashed potatoes or a grain bowl with roasted veggies.
Conclusion & Call to Action
Sticky garlic honey chicken is one of those rare recipes that checks all the boxes: easy, quick, packed with flavor, and totally crowd-pleasing. Whether you’re a beginner cook looking for something foolproof or a seasoned home chef wanting a new staple, this dish fits beautifully into your weeknight dinner lineup.
Its simple preparation belies the depth of flavor it delivers. Between the crispy golden sear, the garlicky honey glaze, and the final finishing touch in the oven, each bite is loaded with flavor, texture, and heartwarming goodness. It’s the kind of dish that makes you feel like a rockstar in the kitchen, even if you’re working with pantry staples on a random Tuesday night.
If you’ve been searching for a go-to chicken recipe that’s fast, flexible, and absolutely delicious, this is it. I hope it becomes one of those meals you look forward to making again and again—whether it’s for a cozy family dinner, a quick meal prep session, or an impressive but easy dish to serve to friends.
So now it’s your turn! Head into the kitchen, grab your skillet, and let the magic happen. I’d love to know how it turns out for you—feel free to leave a comment, ask a question, or share your own twist on the recipe. If you’re on social media, tag your dish so I can see your delicious creations.
Happy cooking, and enjoy every sticky, garlicky, honey-kissed bite.
Print
Sticky Garlic Honey Chicken – Quick and Easy Skillet Dinner
- Total Time: 25–28 minutes
- Yield: Serves 4
- Diet: Halal
Description
This sticky garlic honey chicken is a fast, flavor-packed skillet dinner that brings sweet, savory, and garlicky goodness to your table in under 30 minutes. With juicy seared chicken and a glossy glaze made from pantry staples, it’s perfect for weeknights, meal prep, or casual entertaining.
Ingredients
-
2 large chicken breasts, halved into 4 cutlets
-
Salt and pepper, to taste
-
2 tbsp olive oil
-
1 tbsp butter
-
Chopped scallions (for garnish)
For the Sauce:
-
3 tbsp low-sodium soy sauce
-
¼ cup honey
-
¼ cup chicken broth
-
½ tbsp lemon juice or apple cider vinegar
-
4 garlic cloves, minced
-
1 tbsp cornstarch + 1 tbsp water (slurry)
Instructions
-
Slice chicken into thin cutlets and pat dry. Season with salt and pepper.
-
In a bowl, whisk together soy sauce, honey, broth, lemon juice, and garlic. Set aside.
-
Heat olive oil and butter in a skillet. Sear chicken 4–5 mins per side until golden.
-
Pour sauce into skillet and let bubble for 30 seconds. Add cornstarch slurry. Stir to thicken.
-
Transfer skillet to a preheated oven at 400°F and bake 4–5 minutes or until chicken reaches 165°F.
-
Rest chicken before serving. Spoon sauce on top and garnish with scallions.
Notes
-
Make it spicier by adding chili flakes.
-
Substitute tamari for gluten-free.
-
Use chicken thighs if you prefer dark meat.
- Prep Time: 10 minutes
- Cook Time: 15–18 minutes
- Category: Main Course
- Method: Stovetop + Oven
- Cuisine: Asian-Inspired