
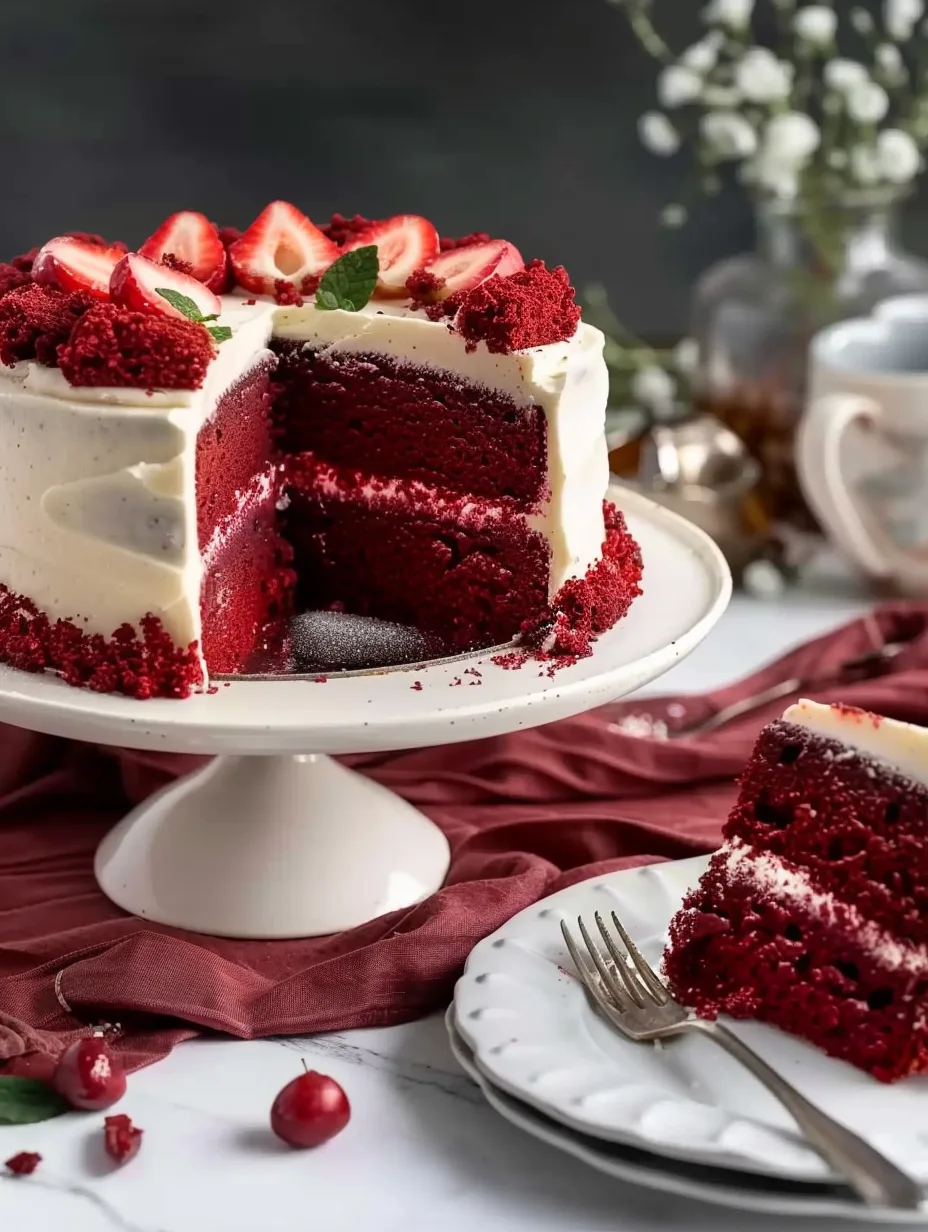
Signature Red Velvet Cake is a delightful treat that combines rich flavors with a stunning appearance. This cake, known for its vibrant red color and velvety texture, is a favorite at celebrations and gatherings. The unique blend of cocoa and buttermilk creates a deliciously moist cake that will leave your guests asking for seconds. Whether it’s for a birthday, anniversary, or just a special occasion, this cake is sure to make a lasting impression.
When you think of Signature Red Velvet Cake, you might picture a beautifully frosted masterpiece, adorned with cream cheese icing and perhaps a few decorative sprinkles. The first bite reveals a soft, tender crumb that melts in your mouth, balanced perfectly with the tangy sweetness of the frosting. It’s not just dessert; it’s an experience that brings joy and celebration to the table.
In this article, we will explore why this recipe is so beloved, how to prepare it, and tips for serving it perfectly. With its stunning presentation and incredible flavor, Signature Red Velvet Cake is a must-try for anyone who loves baking or simply enjoys great food. Let’s dive into the details of this amazing cake and discover how to make it shine at your next event!
Why You’ll Love This Recipe
There are countless reasons to fall head over heels for Signature Red Velvet Cake. Here are just a few:
1. Eye-Catching Appearance: The vibrant red color makes this cake a showstopper at any gathering.
2. Irresistible Flavor: The combination of cocoa powder and buttermilk creates a unique flavor profile that’s both sweet and tangy.
3. Versatile Frosting Options: While cream cheese frosting is a classic choice, you can also try buttercream or whipped cream for a different twist.
4. Perfect for Celebrations: Whether it’s a birthday or a holiday, this cake adds a festive touch to any occasion.
5. Easy to Customize: Add chocolate chips, nuts, or even a hint of spice to personalize your cake.
6. Family Tradition: This recipe can become a cherished family favorite, passed down through generations.
With all these appealing aspects, it’s no wonder that Signature Red Velvet Cake has become a staple for celebrations. Its delightful taste and stunning appearance make it a go-to choice for any baker.
Preparation and Cooking Time
Creating your own Signature Red Velvet Cake is a rewarding experience that generally takes about 2 hours from start to finish. Here’s a breakdown of the time involved:
– Preparation Time: 30 minutes
– Cooking Time: 30-35 minutes
– Cooling Time: 30 minutes
– Frosting Time: 15-20 minutes
These times may vary slightly depending on your kitchen experience and tools, but this estimate provides a solid framework to work with.
Ingredients
– 2 ½ cups all-purpose flour
– 1 ½ cups granulated sugar
– 1 teaspoon baking soda
– 1 teaspoon salt
– 1 tablespoon unsweetened cocoa powder
– 1 ½ cups vegetable oil
– 1 cup buttermilk, room temperature
– 2 large eggs, room temperature
– 2 tablespoons red food coloring
– 1 teaspoon vanilla extract
– 1 teaspoon white vinegar
For the Cream Cheese Frosting:
– 1 cup cream cheese, softened
– ½ cup unsalted butter, softened
– 4 cups powdered sugar
– 1 teaspoon vanilla extract
– A pinch of salt
Step-by-Step Instructions
Follow these simple steps to create your Signature Red Velvet Cake:
1. Preheat the Oven: Preheat your oven to 350°F (175°C). Grease and flour two 9-inch round cake pans.
2. Mix Dry Ingredients: In a large bowl, sift together the flour, sugar, baking soda, salt, and cocoa powder.
3. Combine Wet Ingredients: In another bowl, whisk together the vegetable oil, buttermilk, eggs, food coloring, vanilla extract, and vinegar until well combined.
4. Mix Together: Gradually add the wet ingredients to the dry ingredients, stirring until smooth and no lumps remain.
5. Pour Batter: Divide the batter evenly between the prepared cake pans.
6. Bake: Place in the preheated oven and bake for 30-35 minutes, or until a toothpick inserted into the center comes out clean.
7. Cool: Remove from the oven and let the cakes cool in the pans for about 30 minutes. Then, transfer them to wire racks to cool completely.
8. Make Frosting: In a mixing bowl, beat together the softened cream cheese and butter until smooth. Gradually add the powdered sugar, vanilla extract, and salt, mixing until creamy.
9. Frost the Cake: Once the cakes are completely cool, place one layer on a serving platter. Spread a layer of cream cheese frosting on top. Add the second layer and frost the top and sides of the cake.
10. Decorate: Optionally, you can decorate with sprinkles or chocolate shavings for an extra touch.
These steps will guide you in creating a stunning Signature Red Velvet Cake that will wow your guests!
How to Serve
To make your Signature Red Velvet Cake truly memorable, consider these serving tips:
1. Presentation Matters: Use a decorative cake stand to elevate the cake’s appearance. A simple garnish, like fresh berries or edible flowers, can also enhance its look.
2. Slice Size: Serve generous slices, but not too large. Smaller portions encourage guests to go back for seconds.
3. Accompaniments: Pair your cake with a scoop of vanilla ice cream or a dollop of whipped cream to add an extra indulgent touch.
4. Beverage Pairing: Serve with a hot cup of coffee or a glass of dessert wine to complement the rich flavors of the cake.
5. Storage Tips: If you have leftovers, store the cake in an airtight container in the refrigerator for up to 4 days. Allow it to come to room temperature before serving again for the best taste.
By following these serving suggestions, you’ll impress your guests and create a delightful experience that centers around your incredible Signature Red Velvet Cake!
Additional Tips
– Use Quality Ingredients: For the best flavor, opt for high-quality cocoa powder and real buttermilk. This will enhance the cake’s taste and texture.
– Room Temperature Ingredients: Ensure your eggs and buttermilk are at room temperature before mixing. This helps create a smoother batter and better rise.
– Don’t Overmix: When combining the wet and dry ingredients, mix just until incorporated. Overmixing can lead to a dense cake.
– Test for Doneness: Use a toothpick to check if the cake is done. If it comes out clean or with a few crumbs, your cake is ready.
– Chill the Frosting: If your frosting is too soft to spread, refrigerate it for about 15 minutes. This will help it firm up for easier application.
Recipe Variation
Feel free to switch things up! Here are a few variations to try:
1. Nut-Free Version: Omit any nuts from the frosting or replace them with crushed graham crackers for a different texture.
2. Different Flavor Cake: Swap out the red food coloring for another food coloring for a different colored cake, or use vanilla extract instead of cocoa for a vanilla red velvet cake.
3. Spice It Up: Add a pinch of cinnamon or nutmeg to the dry ingredients for a warm spice flavor that complements the sweetness.
4. Layered Cake: Create a multi-layered cake by baking additional cake layers and alternating frosting between them.
5. Chocolate Lovers Twist: Incorporate chocolate chips into the batter for an extra chocolatey kick.
Freezing and Storage
– Storage: Keep the cake covered in the refrigerator to maintain its freshness. It should last 4-5 days.
– Freezing: You can freeze slices of the cake for up to 3 months. Ensure they are well-wrapped in plastic wrap and then placed in an airtight container to prevent freezer burn.
– Thawing: To enjoy frozen slices, remove them from the freezer and let them thaw in the refrigerator overnight.
Special Equipment
You will need a few essential tools to prepare this cake successfully:
– Mixing bowls for combining ingredients
– Electric mixer for whipping up the frosting
– Measuring cups and spoons for accurate ingredient measurements
– Two 9-inch round cake pans for baking
– Wire racks for cooling the cakes
– Offset spatula for frosting the cake smoothly
Frequently Asked Questions
How do I know when the cake is done baking?
Insert a toothpick into the center; if it comes out clean or with a few moist crumbs, the cake is ready.
Can I make this cake ahead of time?
Yes, you can prepare it a day before serving. Letting the cake sit allows the flavors to meld beautifully.
Is this cake suitable for dietary restrictions?
You can adapt the recipe by using gluten-free flour for a gluten-free option.
Can I eliminate the vinegar?
The vinegar helps react with the baking soda, creating a lighter texture. However, you can substitute it with lemon juice if desired.
Can I make a sheet cake version?
Absolutely! Simply pour the batter into a greased 9×13-inch baking pan and adjust the baking time accordingly.
Conclusion
Signature Red Velvet Cake is a true celebration of flavor and beauty. With its moist, tender crumb and striking red hue, it stands out at any occasion. The creamy frosting adds a delightful touch, making each slice an indulgent treat. Whether you’re baking for a special event or just because, this cake is sure to impress your guests and create lasting memories. Try this recipe today, and enjoy the deliciousness that is Signature Red Velvet Cake!
Signature Red Velvet Cake: An Incredible Ultimate Recipe
- Total Time: 1 hour 5 minutes
Ingredients
– 2 ½ cups all-purpose flour
– 1 ½ cups granulated sugar
– 1 teaspoon baking soda
– 1 teaspoon salt
– 1 tablespoon unsweetened cocoa powder
– 1 ½ cups vegetable oil
– 1 cup buttermilk, room temperature
– 2 large eggs, room temperature
– 2 tablespoons red food coloring
– 1 teaspoon vanilla extract
– 1 teaspoon white vinegar
Instructions
Follow these simple steps to create your Signature Red Velvet Cake:
1. Preheat the Oven: Preheat your oven to 350°F (175°C). Grease and flour two 9-inch round cake pans.
2. Mix Dry Ingredients: In a large bowl, sift together the flour, sugar, baking soda, salt, and cocoa powder.
3. Combine Wet Ingredients: In another bowl, whisk together the vegetable oil, buttermilk, eggs, food coloring, vanilla extract, and vinegar until well combined.
4. Mix Together: Gradually add the wet ingredients to the dry ingredients, stirring until smooth and no lumps remain.
5. Pour Batter: Divide the batter evenly between the prepared cake pans.
6. Bake: Place in the preheated oven and bake for 30-35 minutes, or until a toothpick inserted into the center comes out clean.
7. Cool: Remove from the oven and let the cakes cool in the pans for about 30 minutes. Then, transfer them to wire racks to cool completely.
8. Make Frosting: In a mixing bowl, beat together the softened cream cheese and butter until smooth. Gradually add the powdered sugar, vanilla extract, and salt, mixing until creamy.
9. Frost the Cake: Once the cakes are completely cool, place one layer on a serving platter. Spread a layer of cream cheese frosting on top. Add the second layer and frost the top and sides of the cake.
10. Decorate: Optionally, you can decorate with sprinkles or chocolate shavings for an extra touch.
These steps will guide you in creating a stunning Signature Red Velvet Cake that will wow your guests!
- Prep Time: 30 minutes
- Cook Time: 35 minutes
Nutrition
- Serving Size: 12
- Calories: 450 kcal
- Fat: 20g
- Protein: 6g