
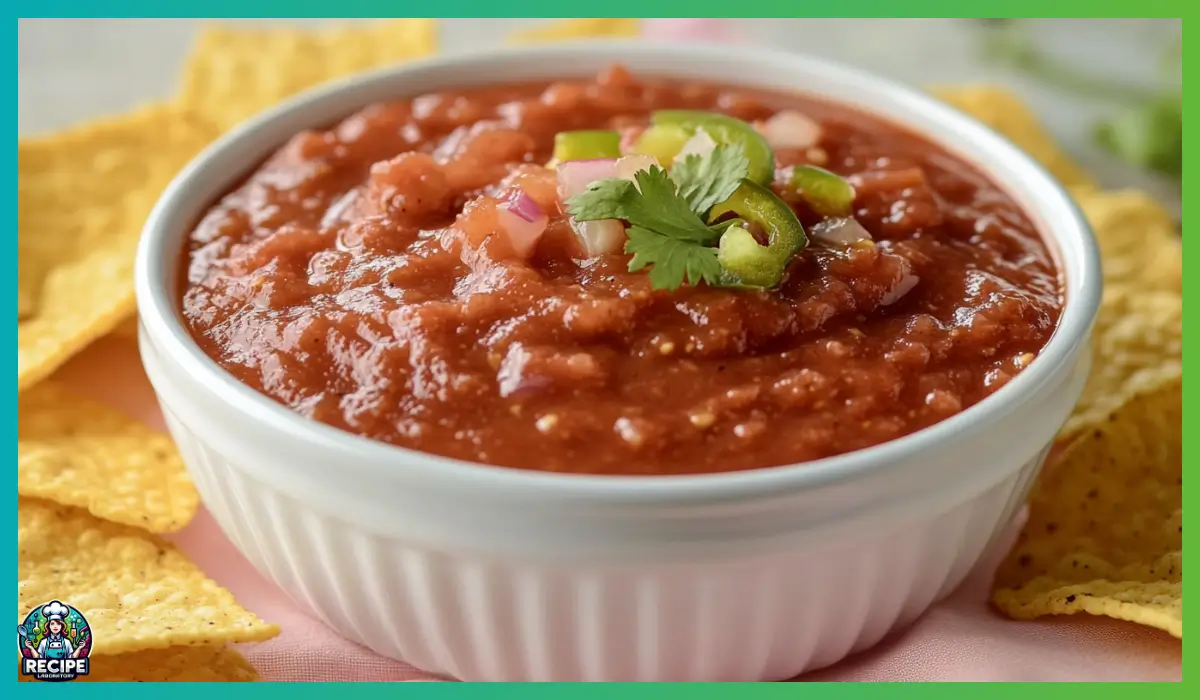
There’s something so deeply satisfying about diving into a bowl of fresh, flavorful salsa—especially when it’s homemade. If you’ve ever been to a Mexican restaurant and found yourself completely obsessed with the free chips and salsa before the actual meal even arrives, then you know exactly what kind of srestaurant-style salsa we’re talking about here. That smooth, slightly chunky, zippy blend of tomatoes, green chiles, onions, and just the right amount of heat—it’s addictive in the best way.
But here’s the great news: you don’t need to dine out to enjoy it. You can make that same restaurant-style salsa right in your own kitchen, and honestly, it’s so easy you’ll wonder why you haven’t done it sooner. This recipe uses simple pantry staples and a blender. That’s it. No roasting, no stovetop, no complicated steps. Just real ingredients blended into bold, crave-worthy perfection.
What makes this salsa so special isn’t just how good it tastes—it’s how versatile and approachable it is. Whether you’re a seasoned home cook or someone who’s just dipping their toes into the kitchen, this recipe is completely doable. Even better, you can customize it to your liking. Want it spicier? Add more jalapeños. Prefer it tangier? Squeeze in a bit more lime juice. You’re in control.
This salsa has become a staple in my kitchen—not just for dipping chips, but for topping grilled chicken, spooning onto rice bowls, and even using as a marinade. It’s one of those recipes that seems so simple on paper but delivers every single time.
And honestly, once you taste it, you might find yourself keeping a jar of it in the fridge at all times. Because nothing beats the bright, bold punch of freshly blended tomatoes, green chiles, onions, lime, and spice—all coming together in one glorious bowl.
Why You’ll Love This restaurant-style salsa Recipe
This restaurant-style salsa recipe isn’t just delicious—it’s a total game-changer. First off, it’s incredibly easy to make. We’re talking 10 minutes from start to finish, and that includes the cleanup. All you need is a blender or a food processor, and you’re halfway there.
One of the standout reasons you’ll absolutely love this salsa is its flavor profile. It strikes that perfect balance between tangy, spicy, and savory. The sweetness of the Vidalia onion pairs beautifully with the acidity of the tomatoes and the mild heat of the green chiles and jalapeños. Add in a splash of lime juice and a hint of sugar to round things out, and you’ve got a dip that’s incredibly vibrant and satisfying.
Beyond flavor, the texture is spot-on. You can blend it until smooth if you’re into a more velvety finish, or keep it slightly chunky for that rustic, hearty feel. Either way, it clings beautifully to chips without being too runny or overly thick.
Another reason to love this salsa? It’s totally customizable. Want a smoky twist? Add a roasted poblano or chipotle pepper. Craving extra tang? Toss in a bit more lime. Prefer it without sugar? No problem. This recipe is a great base for all kinds of flavor experimentation.
And let’s not forget the convenience. You probably already have most of these ingredients in your pantry. Canned tomatoes, green chiles, a bit of lime juice—it’s all stuff you can keep on hand, which makes it ideal for last-minute gatherings or unexpected cravings.
Lastly, this salsa is a hit with everyone. Kids love the mild heat, adults appreciate the depth of flavor, and it fits perfectly into everything from taco night to picnic spreads. It’s the kind of recipe that once you make it, you’ll be asked to bring it to every party.
Health Benefits of this restaurant-style salsa
While salsa is undeniably delicious, it also brings a surprising number of health benefits to the table. It’s one of those rare dishes that feels indulgent while actually being really good for you. Let’s take a closer look at why this homemade salsa is not just tasty, but nourishing as well.
To start, tomatoes are a superstar ingredient. Packed with antioxidants—most notably lycopene—they’re known for supporting heart health, reducing inflammation, and even helping protect against certain types of cancers. Lycopene is most available to the body when tomatoes are cooked, but even in raw or canned form, it still provides excellent benefits.
Then we have onions and garlic. Both are known for their immune-boosting properties. Onions contain quercetin, an antioxidant that may help reduce inflammation and lower blood pressure. Garlic, even in its powdered form, adds flavor and also contributes antibacterial and antiviral properties.
Jalapeños and green chiles are more than just a source of heat. These peppers are rich in vitamin C and capsaicin—the compound that gives them their signature kick. Capsaicin has been studied for its metabolism-boosting effects and potential to reduce appetite, making it a helpful addition if you’re trying to maintain a balanced diet.
Lime juice, another essential ingredient, adds more than just brightness. It’s loaded with vitamin C and can help enhance the absorption of iron from plant-based foods. It’s also known to support digestion and detoxification.
Because this salsa is blended and served raw, all of these nutrients remain intact. Unlike cooked sauces, you’re preserving the full vitamin and mineral content, giving your body a boost with every bite.
And here’s the cherry on top: this salsa is naturally low in fat, free of added oils, and low in calories. So whether you’re following a specific dietary lifestyle or just trying to eat a little cleaner, this recipe fits beautifully into a health-conscious kitchen.
Preparation Time, Servings, and Nutritional Information
When it comes to convenience, this salsa recipe checks all the boxes. You don’t need hours in the kitchen or a long list of ingredients. Just a handful of pantry staples, a blender, and about ten minutes of your time.
Preparation Time:
Prep Time: 10 minutes
Chill Time (optional but recommended): 2 hours
Total Time: 10 minutes (plus chilling)
Servings:
This recipe makes approximately 4 to 5 cups of salsa, which easily serves 8 to 10 people as an appetizer or snack. It’s perfect for family movie nights, parties, or meal prep for the week.
Nutritional Information (Per ¼ Cup Serving):
Calories: 20
Total Fat: 0g
Saturated Fat: 0g
Cholesterol: 0mg
Sodium: 190mg
Carbohydrates: 4g
Fiber: 1g
Sugar: 2g
Protein: 0g
Vitamin C: 15% of Daily Value
Vitamin A: 10% of Daily Value
Iron: 2% of Daily Value
Not only is this salsa low in calories and completely free of unhealthy fats, but it’s also rich in essential nutrients from the vegetables and spices. If you’re watching your sodium intake, you can reduce the amount of salt or use a low-sodium variety of canned tomatoes.
Also worth noting is that this recipe is naturally vegan, dairy-free, gluten-free, and halal. There are no animal products or additives, making it a great fit for a variety of dietary needs.
And if you’re meal-prepping or planning ahead for a party, this salsa holds up beautifully. In fact, the flavor deepens over time, making it even more delicious the next day.
Ingredients List of this restaurant-style salsa
The beauty of this recipe is how it transforms a few basic ingredients into a flavor-packed salsa that rivals anything you’d find in a restaurant. Let’s break down exactly what you’ll need and why each component matters.
¼ large sweet white onion (Vidalia recommended):
Vidalia onions are mild, sweet, and don’t overpower the salsa. They blend seamlessly into the mixture and add a subtle natural sweetness that balances the acidity of the tomatoes.
1 tablespoon canned diced jalapeño:
This gives the salsa its gentle heat. Canned jalapeños are softer and more mellow than fresh ones, making them perfect if you want that spice without going overboard. If you love it extra spicy, feel free to toss in more or swap in a fresh pepper.
2 (4 oz) cans green chiles:
Green chiles add depth and smokiness without too much heat. They also contribute a little texture and bright flavor that complements the tomatoes.
2 (14 oz) cans diced tomatoes (drain one of them):
Using canned tomatoes keeps things simple and consistent. Draining one can reduces excess liquid, so your salsa isn’t too watery. Go for fire-roasted tomatoes if you want a smokier edge.
¾ teaspoon garlic salt:
Garlic salt provides both garlicky flavor and seasoning in one step. It’s more balanced than using raw garlic and helps round out the salsa’s overall taste.
¾ teaspoon cumin:
Cumin brings a warm, earthy undertone that grounds the brightness of the other ingredients. It’s subtle but essential.
¾ teaspoon sugar:
Just a touch of sugar helps to mellow out the acidity from the tomatoes and lime, creating a more balanced flavor.
½ teaspoon salt:
Additional salt helps to enhance all the other flavors in the salsa. You can adjust this to taste.
¼ teaspoon garlic powder:
This boosts the garlicky flavor just a bit more without overpowering anything.
2 teaspoons lime juice:
Lime juice brings a fresh, zesty kick that makes the salsa pop. It brightens up the entire mixture and adds that unmistakable citrus note.
That’s it! Every item on this list plays a key role. And best of all, these ingredients are easy to find, budget-friendly, and pantry-staple approved.
Step-By-Step Cooking Instructions of this restaurant-style salsa
Making this restaurant-style salsa is almost unbelievably easy, but don’t let the simplicity fool you—the flavor is anything but basic. Whether this is your first time making homemade salsa or you’ve dabbled in similar recipes before, these step-by-step instructions will walk you through the entire process with extra tips to help you get it just right.
Step 1: Prepare Your Blender or Food Processor
Start by setting up your blender or food processor. Either will work perfectly, so use what you have. If you’re using a high-powered blender, you can get a smoother, almost restaurant-perfect consistency. If you prefer a chunkier salsa or want more control over texture, a food processor may be the better option.
Step 2: Add the Onion and Jalapeños First
Add ¼ of a large sweet white onion and 1 tablespoon of canned diced jalapeños to the blender or food processor. This step is key because blending the onion and jalapeño first allows them to break down completely and infuse the salsa with their aromatic flavor.
Pro tip: If your onion seems particularly sharp, you can soak it in cold water for 5 minutes before adding it to mellow out its bite.
Pulse a few times until the onion and jalapeño are finely diced but not pureed. You want them to be small enough to blend evenly once the rest of the ingredients are added.
Step 3: Add the Remaining Ingredients
Next, add the following ingredients to your blender:
- 2 (4 oz) cans of green chiles
- 2 (14 oz) cans of diced tomatoes, draining one of them to control the water content
- ¾ teaspoon garlic salt
- ¾ teaspoon cumin
- ¾ teaspoon sugar
- ½ teaspoon salt
- ¼ teaspoon garlic powder
- 2 teaspoons lime juice
Why drain one can of tomatoes? Because it prevents the salsa from becoming too runny. You still get the moisture and flavor from the other can, but draining one balances the consistency beautifully.
Step 4: Blend Until Desired Consistency is Reached
Now it’s time to blend. Pulse the ingredients together in short bursts, checking the texture between pulses. If you prefer a smoother salsa (like what you’d get at your favorite taco joint), keep blending until everything is well combined and almost velvety.
For a chunkier, more rustic texture, stop blending while you can still see tiny bits of onion and pepper. There’s no right or wrong here—it’s completely up to your personal taste.
Pro tip: Always blend in stages. Over-blending can cause the salsa to lose its distinct textures and flavors. If you accidentally over-blend, don’t worry—the taste will still be fantastic.
Step 5: Taste and Adjust Seasoning
Once the salsa is blended to your liking, it’s time to taste it. This is your chance to fine-tune the flavor. Add more lime juice for extra brightness, a pinch more salt if needed, or even a little extra cumin for a deeper, earthier note.
Want more heat? Add a bit more canned jalapeño or even a few red pepper flakes. Prefer a sweeter balance? Another tiny pinch of sugar can smooth out the acidity.
Step 6: Chill for Best Flavor
Technically, you can serve the salsa right away—and it’ll still be amazing. But for truly next-level flavor, let it chill in the fridge for at least two hours. This rest time allows all the ingredients to marry, deepening the overall taste.
Pour the finished salsa into an airtight container or mason jar and refrigerate. When you pull it out later, you’ll notice how much brighter and more balanced the flavors have become.
Step 7: Serve and Enjoy
Once chilled, give your salsa a quick stir and serve it with crispy tortilla chips, on tacos, or as a vibrant topping for grilled meats or rice bowls.
Bonus Tips for Extra Flavor:
- Add a handful of fresh cilantro for herbaceous depth.
- A clove of fresh garlic can replace the garlic powder if you love bold garlic flavor.
- Roast your onion or jalapeño beforehand for a smoky twist.
With just a few minutes and a blender, you’ll have a batch of homemade salsa that’s vibrant, flavorful, and better than anything you can buy in a jar.

How to Serve this restaurant-style salsa
The beauty of this salsa is in how endlessly versatile it is. Sure, it’s perfect as a dip, but it can do so much more than just pair with chips. Let’s talk about all the delicious ways you can serve this restaurant-style salsa and make every meal feel like a party.
Classic Tortilla Chip Dip
First and foremost, grab a bowl of salty, crispy tortilla chips and go to town. This salsa was practically made for scooping, and its smooth-yet-textured consistency makes it cling beautifully to each chip. It’s the ultimate crowd-pleaser for parties, BBQs, and movie nights.
Taco Topper
Spoon this salsa over your favorite tacos—chicken, beef, shrimp, or even vegetarian. It adds a burst of freshness and heat that enhances the savory fillings. A generous drizzle across the top just takes things to the next level.
Grilled Chicken or Steak Garnish
Tired of the same old grilled proteins? Use this salsa as a bright, bold garnish. It brings moisture, flavor, and color to plain chicken breasts or steaks. You could even spoon it over shredded chicken or beef for instant taco filling.
Burrito and Rice Bowl Enhancer
Add a few spoonfuls to burrito bowls, rice dishes, or even inside wraps. The acidity and spices cut through rich ingredients like beans, rice, and cheese, making every bite taste more layered and complete.
Breakfast Game-Changer
Try it on eggs—yes, really. Whether it’s scrambled eggs, omelets, or a sunny-side-up situation, a scoop of salsa adds zing and brightness to your breakfast plate. It’s especially tasty on huevos rancheros or a breakfast burrito.
Appetizer or Snack Board Addition
Include it as part of a larger spread with guacamole, sour cream, spicy hummus, and veggies. It rounds out the flavor palette and adds color and freshness to your board.
Pairing Suggestions
This salsa’s zesty, tangy profile makes it an ideal match for a variety of dishes and drinks. Whether you’re putting together a full meal or planning a party spread, these pairing suggestions will help you build an unforgettable flavor experience.
Perfect Foods to Pair With This Salsa:
Tortilla Chips and Guacamole: The classic trifecta—salsa, guac, and chips—is hard to beat. The creamy avocado complements the salsa’s acidity and spice beautifully.
Street-Style Tacos: Whether filled with seasoned ground beef, shredded chicken, or grilled vegetables, tacos are a natural match. Add a drizzle of this salsa for that extra layer of brightness.
Mexican Rice and Beans: Scoop the salsa on top of warm rice or beans for a simple but flavor-packed side dish. The moisture from the salsa keeps everything feeling fresh and juicy.
Burritos and Wraps: Use this salsa as a spread inside wraps, burritos, or quesadillas. It replaces heavier sauces and gives the filling a fresh kick.
Grilled Meats: This salsa shines next to grilled chicken thighs, steak strips, or even turkey burgers. Its acidic base balances out the smoky char of grilled proteins.
Baked Potatoes or Sweet Potatoes: Try using this salsa as a topping for a baked potato with some cheese and sour cream. It brings brightness and a little heat.
Cilantro Lime Rice or Quinoa: A spoonful of this salsa over fluffy rice or grain bowls adds flavor and moisture, especially when combined with black beans, corn, and chopped greens.
Suggested Beverages (non-alcoholic and halal-friendly):
Sparkling Limeade: The tartness echoes the citrus notes in the salsa while the bubbles cleanse the palate.
Mint Iced Tea: A cool, refreshing tea with mint balances out the heat from the jalapeños and adds a fresh herbal layer.
Hibiscus Agua Fresca: Slightly sweet and floral, it’s a beautiful contrast to the spice and savory richness of the salsa.
Storage, Freezing & Reheating Instructions
One of the best things about this restaurant-style salsa is that it stores like a dream. Whether you’ve made a double batch for meal prep or just have leftovers from a party, you’ll be happy to know this salsa holds up really well in both the fridge and freezer.
Storing in the Fridge:
Once your salsa is blended to perfection, transfer it to an airtight container or a glass jar with a tight-fitting lid. A mason jar is ideal, but any clean, food-safe container will do. Refrigerate immediately. It’s best to let it chill for at least two hours before serving, as this resting time allows the flavors to fully develop and meld together.
Your salsa will stay fresh in the refrigerator for up to 5 days. Each day, the flavors intensify just a bit more, making it even more delicious. If separation occurs—which is totally normal—just give it a quick stir before serving.
Freezing Instructions:
If you’ve made more than you can use within a few days, freezing your salsa is a great option. While the texture may change slightly after thawing (it might become a little more watery), the flavor remains delicious.
To freeze:
- Pour the salsa into freezer-safe containers or resealable freezer bags.
- Leave about an inch of space at the top to allow for expansion.
- Label the container with the date and freeze for up to 3 months.
When you’re ready to use it, thaw the salsa in the refrigerator overnight. Once thawed, give it a stir and, if needed, pulse it in the blender for a few seconds to refresh the consistency.
Can You Reheat Salsa?
Technically, you could warm salsa for certain dishes like huevos rancheros or baked enchiladas, but this particular salsa is meant to be served cold or at room temperature. Heating it may cause the fresh flavors to mellow out and the texture to change.
For best results, stick to serving it chilled or just slightly warmed by letting it sit out at room temperature for about 15 minutes before serving.
Common Mistakes to Avoid
While this salsa recipe is wonderfully straightforward, there are still a few easy-to-make mistakes that can affect the final flavor or texture. Let’s walk through the most common pitfalls and how to steer clear of them so your salsa turns out perfectly every time.
1. Using All the Tomato Liquid:
Not draining one of the cans of diced tomatoes can lead to an overly watery salsa. While it may seem like a small detail, skipping this step can result in a runny texture that won’t cling well to chips and feels less satisfying overall.
2. Over-Blending the Salsa:
It’s tempting to hit the blend button and let the machine do its thing, but over-blending can result in a salsa that’s too smooth and sauce-like. For a more authentic texture, pulse the ingredients in stages and stop once it reaches your desired consistency. Remember, you can always blend more, but you can’t un-blend once it’s too smooth.
3. Not Tasting Before Serving:
Flavor varies with ingredients like canned tomatoes and lime juice, so it’s important to taste your salsa and make adjustments before calling it done. You might need a touch more salt, a splash of lime, or an extra pinch of sugar depending on your specific ingredients.
4. Skipping the Chill Time:
While it’s totally fine to eat this salsa right after making it, giving it time to chill allows the flavors to blend and deepen. Even just 30 minutes in the fridge makes a noticeable difference. Two hours? Even better.
5. Using a Harsh Onion Variety:
Stick with a sweet white onion like Vidalia. Yellow or red onions can be too strong and overpowering in raw preparations. If a stronger onion is all you have, soak it in cold water for 5-10 minutes before blending to soften its sharpness.
Avoiding these simple mistakes ensures your salsa turns out bright, balanced, and totally irresistible.
Pro Tips
Once you’ve made this salsa once or twice, you’ll see how easy it is to start putting your own spin on it. But if you want to make the absolute most of every batch, these pro tips will take your salsa game to the next level.
1. Roast for Smoky Flavor:
If you love a deeper, smokier flavor, try roasting your onion, jalapeño, or even one can of the tomatoes before blending. Simply broil or grill them until lightly charred, then blend as usual. The difference is subtle but delicious.
2. Use Fire-Roasted Tomatoes:
Fire-roasted canned tomatoes bring a smoky, complex taste that regular diced tomatoes don’t quite match. They’re a great shortcut for adding depth without any extra work.
3. Add Fresh Cilantro at the End:
If you’re a cilantro fan, wait to add it until after the salsa is blended. Chop it finely and stir it in just before serving to preserve its fresh, herbal flavor.
4. Balance Acidity with a Touch of Sweet:
Tomatoes and lime juice bring a lot of acid to the mix. If your salsa ever tastes too sharp or acidic, a tiny pinch of sugar can mellow it out and balance the flavors.
5. Don’t Skip the Lime Juice:
Lime juice doesn’t just add tang—it also brightens the entire dish and ties all the other flavors together. Fresh is best, but bottled works fine in a pinch.
6. Chill for the Full Flavor Experience:
It can’t be said enough: giving your salsa time to rest in the fridge brings all the flavors into harmony. It’s worth the wait.
7. Try a Hand Blender for Control:
If you like your salsa somewhere between chunky and smooth, a hand immersion blender gives you more control over texture compared to a full-size blender.
With these tips in mind, each batch of salsa you make will be even better than the last.
Frequently Asked Questions (FAQs)
Can I use fresh tomatoes instead of canned?
Yes, you can substitute fresh tomatoes, especially in peak tomato season. Use about 3 cups of chopped ripe tomatoes. Keep in mind that fresh tomatoes have more water, so you might need to strain some liquid or add a bit more salt to bring out their flavor.
Can I make this salsa without a blender?
Absolutely. While a blender or food processor makes things faster, you can finely chop all the ingredients by hand for a rustic, pico de gallo-style salsa. Just be prepared for a chunkier result.
How spicy is this salsa?
This salsa has a mild to medium heat level. The canned jalapeños and green chiles bring some kick without overwhelming the palate. You can easily adjust the spice by adding more jalapeños or using fresh hot peppers.
Is this salsa gluten-free?
Yes, every ingredient in this salsa is naturally gluten-free. Just double-check your canned goods to ensure there are no added thickeners or flavorings.
Is this recipe halal?
Yes, this salsa is 100% halal. There are no alcohol-based ingredients or animal-derived products.
Can I add other vegetables or herbs?
Sure! Fresh cilantro, green onions, or even roasted red peppers are great additions. Just make sure you adjust the seasoning to account for the added volume.
How long does this salsa last in the fridge?
Stored properly in an airtight container, it will stay fresh for up to 5 days. The flavor often improves after a day or two.
Can I freeze this salsa?
Yes, it freezes well. Use freezer-safe containers and thaw overnight in the fridge before serving. Stir well after thawing to restore consistency.
Do I need to peel the tomatoes?
No peeling necessary if you’re using canned tomatoes. If using fresh ones, you can blanch and peel them for a smoother texture, but it’s optional.
Can I make this ahead of time?
Definitely! In fact, it’s encouraged. Making the salsa a day in advance enhances the flavor and makes your prep easier on party day.
Conclusion & Call to Action
By now, you’ve seen just how simple, flavorful, and versatile this homemade restaurant-style salsa can be. It’s one of those recipes that seems almost too easy, yet it delivers bold, fresh, and totally satisfying results every single time. With just a handful of pantry ingredients and a quick blend in the food processor or blender, you’ve got a salsa that rivals anything you’d find at your favorite local taqueria.
Whether you’re serving it with crispy tortilla chips for a snack, spooning it over tacos on taco night, or using it to elevate your rice bowls and grilled chicken, this salsa adds instant brightness and depth to any meal. It’s also a great go-to for meal prep or party planning—just whip up a batch, store it in the fridge, and you’re ready to wow everyone who dips into it.
What’s even better is that this salsa is naturally healthy, halal, gluten-free, vegan, and totally customizable. You can make it as spicy or as mild as you like, add herbs or roasted vegetables for variety, or use it as a base for even more sauces and marinades. It’s a foundation recipe that invites creativity while still being a rockstar on its own.
So here’s your invitation: get blending. Make a batch, taste it, tweak it to your liking, and let it chill until you’re ready to serve. Once you try this homemade version, you’ll find it tough to go back to the store-bought jars again.
And I’d love to hear how your salsa turns out! Did you make any fun variations? Did your friends and family love it as much as mine do? Don’t keep it to yourself—share your experience in the comments below, and tag me in your salsa creations on social media. I love seeing how this recipe makes its way into your kitchens.
Now go grab those chips. Salsa night just got a serious upgrade.
Print
Restaurant-Style Salsa Recipe – Easy Homemade Salsa in 10 Minutes
- Total Time: 10 minutes (plus 2 hours optional chill)
- Yield: 4 to 5 cups (8–10 servings) 1x
- Diet: Vegan
Description
This restaurant-style salsa is bright, bold, and irresistibly fresh—made with canned tomatoes, green chiles, sweet onion, and a hint of lime in just 10 minutes!
Ingredients
-
¼ large sweet white onion (Vidalia recommended)
-
1 tablespoon canned diced jalapeño
-
2 (4 oz) cans green chiles
-
2 (14 oz) cans diced tomatoes (drain one)
-
¾ teaspoon garlic salt
-
¾ teaspoon cumin
-
¾ teaspoon sugar
-
½ teaspoon salt
-
¼ teaspoon garlic powder
-
2 teaspoons lime juice
Instructions
-
Add onion and jalapeño to a blender or food processor. Pulse until finely diced.
-
Add remaining ingredients to the blender.
-
Blend until desired consistency is reached.
-
Taste and adjust seasoning if needed.
-
Chill for at least 2 hours before serving for best flavor.
-
Serve with tortilla chips or as a topping.
Notes
-
For chunkier salsa, pulse instead of fully blending.
-
Chill time enhances flavor but is optional.
-
Add fresh cilantro or roasted peppers for variations.
- Prep Time: 10 minutes
- Cook Time: 0 minutes
- Category: Appetizer, Dip, Condiment
- Method: Blended
- Cuisine: Mexican-Inspired