
Pita Pizza is a fantastic way to enjoy all the flavors of traditional pizza in a healthier, more versatile format. This dish is not only quick and easy to prepare, but it also allows you to customize each pizza to satisfy various tastes and dietary preferences. Whether you’re looking for a quick snack, a fun family dinner, or a creative way to use up leftovers, Pita Pizza checks all the boxes. With its crispy texture and endless topping possibilities, this dish is sure to become a favorite in your household.
Imagine biting into a freshly baked Pita Pizza, where the warm, soft pita bread serves as the perfect base for a symphony of flavors. Topped with your favorite ingredients, each bite is a delightful combination of textures and tastes. It’s a dish that invites creativity, allowing you to experiment with flavors from different cuisines. From classic margherita to spicy buffalo chicken, the variations are truly endless.
In this article, we’ll explore why you’ll love making Pita Pizza at home, the preparation and cooking time, a list of ingredients you’ll need, step-by-step instructions, and tips on how to serve it perfectly. Whether you’re a seasoned chef or a kitchen newbie, the amazing flavors and simple process of making Pita Pizza will inspire you to get cooking!
Why You’ll Love This Recipe
There are countless reasons to fall in love with Pita Pizza, making it a go-to recipe for any occasion. Here are just a few reasons why this dish stands out:
1. Quick and Easy: Pita Pizza can be prepared in just a matter of minutes. Perfect for busy weeknights or last-minute gatherings.
2. Customizable: With endless topping options, you can easily cater to different dietary preferences, including vegetarian and gluten-free options.
3. Healthier Alternative: Using whole wheat or low-carb pitas can make this a healthier choice compared to traditional pizza.
4. Kid-Friendly: Children love helping to create their own personal pizzas, making it a fun family activity.
5. Perfect for Meal Prep: You can prepare several pita pizzas ahead of time and store them for quick meals throughout the week.
6. Delicious Flavor Combinations: From savory to spicy, the flavor possibilities are endless, ensuring everyone finds something they love.
With so many reasons to love this dish, it’s no wonder that Pita Pizza is becoming a household favorite!
Preparation and Cooking Time
When it comes to making Pita Pizza, time is on your side. Here’s a breakdown of the time needed:
– Preparation Time: 10-15 minutes
– Cooking Time: 10-12 minutes
– Total Time: Approximately 20-30 minutes
These times may vary slightly based on your toppings and oven, but this framework should give you a good estimate to work with.
Ingredients
– 4 whole wheat or regular pita breads
– 1 cup pizza sauce (store-bought or homemade)
– 2 cups shredded mozzarella cheese
– 1 cup assorted toppings (pepperoni, bell peppers, onions, mushrooms, olives, etc.)
– 1 teaspoon dried oregano
– 1 teaspoon garlic powder
– Olive oil (for brushing)
– Fresh basil leaves (optional, for garnish)
Step-by-Step Instructions
Creating delicious Pita Pizza at home is a straightforward process. Follow these easy steps:
1. Preheat the Oven: Preheat your oven to 400°F (200°C).
2. Prepare Pitas: Place the pita breads on a baking sheet. If desired, brush each pita lightly with olive oil for extra crispiness.
3. Add Sauce: Spread a generous amount of pizza sauce on each pita, leaving a small border around the edge.
4. Sprinkle Cheese: Evenly distribute shredded mozzarella cheese over the sauce on each pita.
5. Add Toppings: Layer your choice of toppings on top of the cheese. Be creative and mix different flavors!
6. Season: Sprinkle dried oregano and garlic powder over the top for added flavor.
7. Bake: Place the baking sheet in the preheated oven and bake for 10-12 minutes, or until the cheese is bubbling and golden.
8. Cool and Slice: Remove from the oven and let it cool for a couple of minutes. Slice into wedges for easy serving.
9. Garnish: If desired, top with fresh basil leaves before serving for a pop of color and flavor.
How to Serve
To elevate your Pita Pizza experience, consider the following serving tips:
1. Presentation: Arrange the sliced pizzas on a large platter for a visually appealing display.
2. Dipping Sauces: Serve with a side of marinara or ranch dressing for dipping.
3. Accompaniments: Pair with a fresh salad or vegetable sticks for a balanced meal.
4. Garnish: Add fresh herbs or a sprinkle of crushed red pepper flakes for an extra kick.
5. Make it a Meal: Consider pairing your Pita Pizza with a light soup or appetizer for a complete dinner.
By keeping these serving tips in mind, you can create a delightful dining experience that will impress your family and friends! Enjoy the incredible flavors of your homemade Pita Pizza!
Additional Tips
– Experiment with Sauces: Instead of traditional pizza sauce, try using pesto, hummus, or even barbecue sauce for a unique twist on your Pita Pizza.
– Fresh Ingredients: Use fresh vegetables and herbs whenever possible to enhance the flavor and nutrition of your pizzas.
– Make Mini Pizzas: For a fun, party-friendly option, use smaller pita breads to create individual mini Pita Pizzas. They’re perfect for gatherings!
– Spice It Up: If you like a little heat, consider adding jalapeños or a drizzle of hot sauce before serving.
– Leftover Magic: Pita Pizzas are a great way to use up leftover meats and veggies. Get creative with your toppings based on what you have on hand.
Recipe Variation
Try these delicious Pita Pizza variations to keep things exciting:
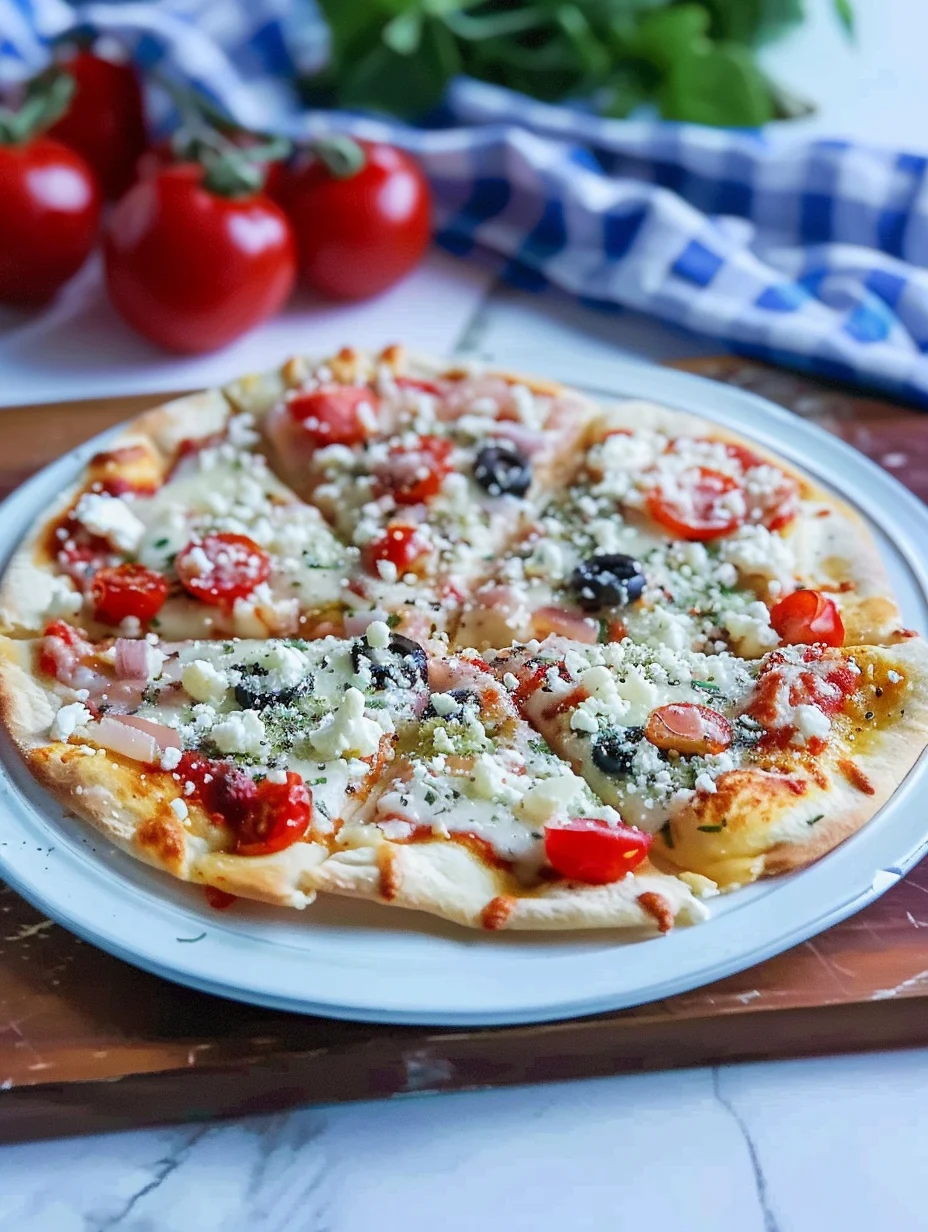
1. Mediterranean Delight: Top with feta cheese, olives, sun-dried tomatoes, and a drizzle of olive oil for a Mediterranean flair.
2. BBQ Chicken: Use shredded rotisserie chicken mixed with barbecue sauce, red onions, and cilantro for a flavorful BBQ Pita Pizza.
3. Veggie Supreme: Load up on sliced zucchini, bell peppers, spinach, and artichokes for a hearty veggie option.
4. Breakfast Pita Pizza: Use scrambled eggs, cheese, and cooked bacon or sausage for a breakfast twist on Pita Pizza.
5. Dessert Pita Pizza: Spread a layer of Nutella or cream cheese, then top with sliced bananas and strawberries for a sweet treat.
Freezing and Storage
– Storage: Keep leftover Pita Pizzas in an airtight container in the refrigerator. They will stay fresh for up to 3 days.
– Freezing: To freeze, wrap each Pita Pizza individually in plastic wrap and place them in a freezer bag. They can be frozen for up to 2 months. To reheat, bake from frozen at 400°F (200°C) for about 15-20 minutes, or until heated through.
Special Equipment
You don’t need much to whip up delicious Pita Pizza, but here are a few items that can help:
– Baking Sheet: A sturdy baking sheet is essential for placing your pita pizzas in the oven.
– Parchment Paper: Line your baking sheet with parchment paper for easier cleanup and to prevent sticking.
– Pizza Cutter: A pizza cutter makes slicing your Pita Pizza into perfect wedges easy and efficient.
– Mixing Bowl: Use a bowl for mixing any toppings, especially if you’re combining sauces or seasonings.
Frequently Asked Questions
Can I make Pita Pizza ahead of time?
Yes, you can assemble Pita Pizzas ahead of time and store them in the refrigerator for a few hours before baking. Just add a few extra minutes to the cooking time.
What if I don’t have an oven?
You can make Pita Pizza in a toaster oven or even on a grill. Just adjust the cooking time as needed.
Can I use gluten-free pita bread?
Absolutely! There are many gluten-free pita bread options available that work perfectly for this recipe.
What are some good topping combinations?
Some great combinations include pepperoni and mushrooms, spinach and ricotta, or buffalo chicken with blue cheese.
How can I make Pita Pizza crispier?
For a crispier base, try pre-baking the pita breads for 3-5 minutes before adding your toppings and baking again.
Conclusion
Pita Pizza is an incredibly versatile dish that brings the joy of pizza into a healthier and more customizable format. With quick preparation, endless topping possibilities, and the option to cater to various dietary needs, it’s no surprise that this recipe is becoming a favorite in many households. Whether you’re hosting a party, preparing a family meal, or simply looking for a fun snack, Pita Pizza is sure to impress. So gather your toppings, preheat your oven, and get ready to enjoy the delightful flavors of homemade Pita Pizza!

Pita Pizza: An Incredible Ultimate Recipe for 5 Mouthwatering Variations
- Total Time: 2 minute
Ingredients
– 4 whole wheat or regular pita breads
– 1 cup pizza sauce (store-bought or homemade)
– 2 cups shredded mozzarella cheese
– 1 cup assorted toppings (pepperoni, bell peppers, onions, mushrooms, olives, etc.)
– 1 teaspoon dried oregano
– 1 teaspoon garlic powder
– Olive oil (for brushing)
– Fresh basil leaves (optional, for garnish)
Instructions
Creating delicious Pita Pizza at home is a straightforward process. Follow these easy steps:
1. Preheat the Oven: Preheat your oven to 400°F (200°C).
2. Prepare Pitas: Place the pita breads on a baking sheet. If desired, brush each pita lightly with olive oil for extra crispiness.
3. Add Sauce: Spread a generous amount of pizza sauce on each pita, leaving a small border around the edge.
4. Sprinkle Cheese: Evenly distribute shredded mozzarella cheese over the sauce on each pita.
5. Add Toppings: Layer your choice of toppings on top of the cheese. Be creative and mix different flavors!
6. Season: Sprinkle dried oregano and garlic powder over the top for added flavor.
7. Bake: Place the baking sheet in the preheated oven and bake for 10-12 minutes, or until the cheese is bubbling and golden.
8. Cool and Slice: Remove from the oven and let it cool for a couple of minutes. Slice into wedges for easy serving.
9. Garnish: If desired, top with fresh basil leaves before serving for a pop of color and flavor.
- Prep Time: 15 minutes
- Cook Time: 10-12 minutes
Nutrition
- Serving Size: 4 servings
- Calories: 300 kcal
- Fat: 12g
- Protein: 12g