
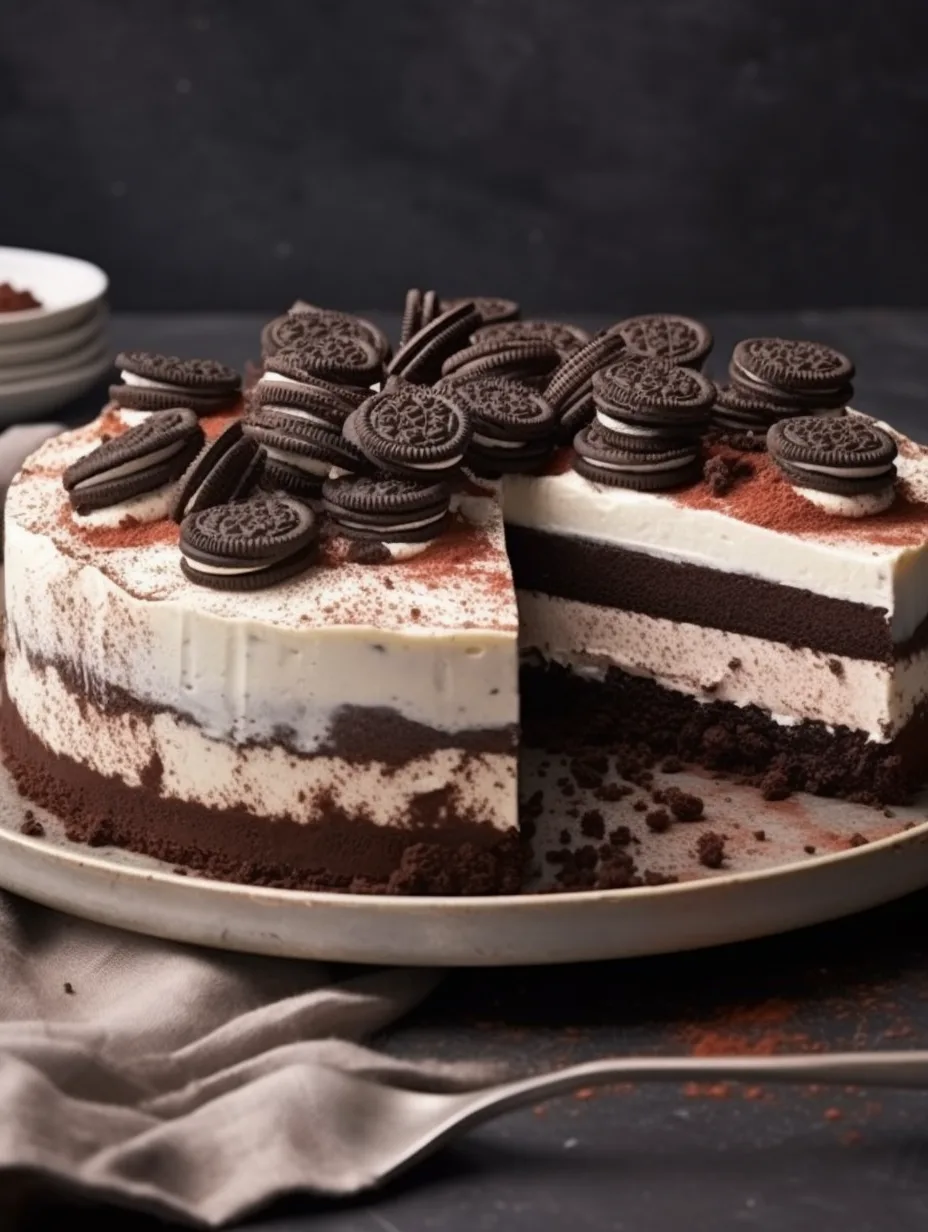
Oreo Mousse Cake is a dessert that combines luscious chocolate and creamy mousse for an incredible experience. With its layered structure and delightful flavors, this cake is a choco-lover’s dream come true. If you’re a fan of Oreos, this cake will certainly blow your mind. The rich and velvety mousse folds beautifully over a crust made from crushed cookies, making for a unique treat that is both indulgent and satisfying.
Imagine taking a bite and being greeted with the contrasting textures of the creamy mousse and the crunchy crust. Each slice of this Oreo Mousse Cake brings together the essence of chocolate cookies and creamy goodness, leaving you craving more. This phenomenal dessert is perfect for any occasion, whether it’s a birthday celebration, a dinner party, or simply to enjoy at home. In this guide, you’ll learn why this recipe is a must-try, how to prepare it, and best practices for serving it up.
Why settle for a regular chocolate cake when you can indulge in the layers of flavor offered by an Oreo Mousse Cake? Let’s explore what makes this dessert so special and how you can create it in your own kitchen.
Why You’ll Love This Recipe
Oreo Mousse Cake is not just any dessert; it’s an experience that merges the love for cookies with light and airy mousse. Here are some reasons you’ll find this recipe equally spectacular.
1. Rich Flavor: The combination of chocolate and cream takes your taste buds on a delightful journey.
2. Decadent Texture: The contrasting textures of the creamy mousse and crunchy cookie crust provide an extravagant mouthfeel.
3. Easy Preparation: Even if you’re not an expert baker, this recipe guides you through every step.
4. Perfect for Any Occasion: Whether it’s a family gathering or a festive occasion, this cake brings smiles.
5. Versatile Presentation: The beautiful layers allow for creative serving options, making it a stunning centerpiece.
6. Customizable Recipe: Feel free to make adjustments to match your preferences, such as adding whipped cream or extra toppings.
With these points in mind, it’s clear why Oreo Mousse Cake captures hearts and taste buds alike. Each bite offers a delightful mix that feels truly indulgent.
Preparation and Cooking Time
Creating this incredible Oreo Mousse Cake will require some time, but the result is well worth the effort. Here’s a breakdown of the required time to prepare and assemble this dessert:
– Preparation Time: 30 minutes
– Chilling Time: 4 hours (or overnight for best results)
– Total Time: Approximately 4 hours and 30 minutes (not including optional overnight chilling)
These estimates can vary depending on your experience and kitchen efficiency, but following this guideline will help ensure your cake turns out perfectly.
Ingredients
– For the crust:
– 24 Oreo cookies
– ½ cup unsalted butter, melted
– For the mousse:
– 2 cups heavy whipping cream
– 1 cup powdered sugar
– 1 teaspoon vanilla extract
– 8 oz cream cheese, softened
– ½ cup cocoa powder
– 1 cup chopped Oreos (for mixing in)
– For garnish:
– Additional Oreos, crushed (for topping)
– Chocolate shavings or drizzles (optional)
Step-by-Step Instructions
Creating the decadent Oreo Mousse Cake involves several straightforward steps to ensure your dessert turns out amazing. Follow these instructions carefully:
1. Preheat Oven: Preheat your oven to 350°F (175°C).
2. Prepare the Crust: In a food processor, crush the Oreo cookies until fine crumbs form. Mix the crumbs with melted butter until well combined.
3. Form the Crust: Press the cookie mixture firmly into the bottom of a 9-inch springform pan to create an even layer. Bake for about 10 minutes and then allow to cool.
4. Make the Mousse: In a large mixing bowl, beat the heavy whipping cream until soft peaks form. Gradually add powdered sugar and vanilla extract while continuing to beat until stiff peaks form.
5. Combine Cream Cheese Mixture: In another bowl, beat the softened cream cheese and cocoa powder until smooth and well-integrated.
6. Fold Mousse into Mixture: Gently fold the whipped cream into the cream cheese mixture until fully combined, using a spatula to ensure a light and airy texture.
7. Add Chopped Oreos: Carefully fold in the chopped Oreos for added texture and flavor.
8. Layer Mousse in Pan: Pour half of the mousse mixture over the cooled crust in the springform pan and smooth the top with a spatula.
9. Add Second Layer: Pour the remaining mousse mixture on top of the first layer and smooth the surface.
10. Chill in Refrigerator: Cover the pan with plastic wrap and place it in the refrigerator for at least 4 hours, or overnight if you have the time.
11. Prepare for Serving: Once set, carefully remove the sides of the springform pan. Garnish with crushed Oreos and chocolate shavings or drizzles as desired.
Following these steps will lead you to a masterpiece of a dessert that will surely be the star of any gathering.
How to Serve
Serving your Oreo Mousse Cake can be as delightful as making it. Here are some suggestions for presenting and enjoying your dessert:
1. Presentation: Place the cake on a decorative cake stand to elevate its appearance. A simple plate can also work wonders.
2. Slice Size: Cut generous slices but ensure they are manageable. Smaller slices encourage guests to return for seconds!
3. Add Toppings: Consider adding additional whipped cream or chocolate syrup on top for extra flair.
4. Pairing Beverages: Serve with milk, coffee, or dessert wine to enhance your dessert experience.
5. Accompaniments: Fresh berries or a scoop of vanilla ice cream can elevate the enjoyment of the mousse cake.
By taking into account these serving tips, you’ll create an unforgettable experience with your Oreo Mousse Cake, ensuring it’s a hit among family and friends.
Additional Tips
– Use Quality Oreos: The type of Oreos you choose can make a big difference. Opt for the classic Oreo cookies for an authentic flavor.
– Chill Right: Make sure the cake chills long enough to set properly. An overnight chill will yield the best texture.
– Don’t Rush the Folding: When combining the whipped cream with the cream cheese mixture, fold gently to maintain the light and airy texture.
– Layering: Consider adding a thin layer of chocolate ganache between the mousse layers for an extra chocolatey taste.
Recipe Variation
Feel free to get creative with your Oreo Mousse Cake! Here are a few tempting variations you can try:
1. Mint Oreo Version: Substitute regular Oreos with Mint Oreos for a refreshing twist.
2. Peanut Butter Swirl: Incorporate creamy peanut butter into the mousse for a delightful peanut butter and chocolate combination.
3. Add Fruit: Interject layers of fresh raspberries or strawberries between the mousse for a fruity surprise.
Freezing and Storage
– Storage: Your Oreo Mousse Cake can be stored in the refrigerator, covered, for up to 5 days. This will help maintain its freshness.
– Freezing: For longer preservation, freeze individual slices of cake wrapped tightly in plastic wrap and aluminum foil. It can last up to 3 months in the freezer.
Special Equipment
Certain tools can simplify your preparation process. Here’s what you’ll need:
– Stand or Hand Mixer: Use this for whipping the cream to the perfect consistency.
– 9-inch Springform Pan: Essential for easily removing the cake after it sets.
– Mixing Bowls: Multiple bowls will help keep your ingredients organized while preparing.
– Spatula: A rubber spatula is crucial for folding ingredients gently without losing air.
Frequently Asked Questions
How long should I chill the cake?
It’s best to chill the cake for at least 4 hours, but overnight chilling allows the flavors to meld beautifully.
Can I use low-fat cream cheese?
While you can, using full-fat cream cheese will yield a richer flavor and creamier texture.
Is there a way to make this gluten-free?
Absolutely! You can substitute the standard Oreos with gluten-free Oreos, ensuring a delightful dessert for gluten-sensitive guests.
Can I make this cake in advance?
Yes, this cake is perfect for making ahead of time. Preparing it a day in advance allows the flavors to develop fully.
Do I need to use a springform pan?
Using a springform pan is recommended as it allows for easy removal without damaging the cake. However, a regular cake pan can also work if you are cautious while serving.
Conclusion
The Oreo Mousse Cake is a show-stopping dessert that combines rich flavors and delightful textures. With its creamy mousse and cookie crust, it is a treat that will tantalize the taste buds of every guest. The versatility of the recipe also allows for many variations, making it perfect for any occasion. Indulge in this decadent dessert and enjoy the blissful experience it brings.

Oreo Mousse Cake: An Amazing Ultimate Recipe
- Total Time: 40 minutes
Ingredients
– For the crust:
– 24 Oreo cookies
– ½ cup unsalted butter, melted
– For the mousse:
– 2 cups heavy whipping cream
– 1 cup powdered sugar
– 1 teaspoon vanilla extract
– 8 oz cream cheese, softened
– ½ cup cocoa powder
– 1 cup chopped Oreos (for mixing in)
– For garnish:
– Additional Oreos, crushed (for topping)
– Chocolate shavings or drizzles (optional)
Instructions
Creating the decadent Oreo Mousse Cake involves several straightforward steps to ensure your dessert turns out amazing. Follow these instructions carefully:
1. Preheat Oven: Preheat your oven to 350°F (175°C).
2. Prepare the Crust: In a food processor, crush the Oreo cookies until fine crumbs form. Mix the crumbs with melted butter until well combined.
3. Form the Crust: Press the cookie mixture firmly into the bottom of a 9-inch springform pan to create an even layer. Bake for about 10 minutes and then allow to cool.
4. Make the Mousse: In a large mixing bowl, beat the heavy whipping cream until soft peaks form. Gradually add powdered sugar and vanilla extract while continuing to beat until stiff peaks form.
5. Combine Cream Cheese Mixture: In another bowl, beat the softened cream cheese and cocoa powder until smooth and well-integrated.
6. Fold Mousse into Mixture: Gently fold the whipped cream into the cream cheese mixture until fully combined, using a spatula to ensure a light and airy texture.
7. Add Chopped Oreos: Carefully fold in the chopped Oreos for added texture and flavor.
8. Layer Mousse in Pan: Pour half of the mousse mixture over the cooled crust in the springform pan and smooth the top with a spatula.
9. Add Second Layer: Pour the remaining mousse mixture on top of the first layer and smooth the surface.
10. Chill in Refrigerator: Cover the pan with plastic wrap and place it in the refrigerator for at least 4 hours, or overnight if you have the time.
11. Prepare for Serving: Once set, carefully remove the sides of the springform pan. Garnish with crushed Oreos and chocolate shavings or drizzles as desired.
Following these steps will lead you to a masterpiece of a dessert that will surely be the star of any gathering.
- Prep Time: 30 minutes
- Cook Time: 10 minutes
Nutrition
- Serving Size: 12 servings
- Calories: 480 kcal
- Fat: 32g
- Protein: 6g