
There’s something about Oreo desserts that feels like a warm invitation to slow down and savor the moment. Whether it’s the satisfying crunch of the cookie or the creamy, sweet filling tucked between those chocolatey wafers, Oreos are pure comfort. And when you fold them into a creamy pie filling and layer that into a buttery cookie crust? That’s where Oreo Icebox Pie dessert dreams come true.
This Oreo Icebox Pie is one of those recipes that hits every note just right. It’s sweet without being overly sugary, light but still indulgent, and full of that classic cookies-and-cream flavor we all know and love. Plus, it’s a no-bake dessert, which means no oven, no water baths, and no fussing with timers or temperatures. If you’re craving something easy, crowd-pleasing, and totally irresistible, you’re in the right place.
I first made this pie on a hot summer day when turning on the oven felt like an act of rebellion against my air conditioning. I wanted something rich and satisfying, but I didn’t want to spend hours in the kitchen. I remembered my love for Oreo icebox cakes and decided to take it up a notch by creating a full-blown pie. The result was a creamy, chocolate-studded masterpiece with layers of texture and flavor, and it was devoured in minutes.
This has since become a go-to dessert in our home, especially for potlucks, family gatherings, and birthdays. It’s one of those dishes that makes people stop mid-bite and say, “Wait—can I get this recipe?” Whether you’re an experienced baker or just getting started in the kitchen, this Oreo Icebox Pie is easy enough for anyone to make and delicious enough to impress even the toughest dessert critics.
So grab a pack of Oreos (or two—you’ll need them), some heavy cream, and a mixing bowl. Let’s make something wonderful together.
Why You’ll Love This Oreo Icebox Pie Recipe
There are a million reasons to love this Oreo Icebox Pie, but let’s break it down into the ones that really matter when you’re deciding what dessert to whip up this weekend.
First of all, it’s incredibly easy. There’s no baking required, no complicated steps, and no special techniques. If you can mix and chill, you can make this pie. It’s beginner-friendly and basically foolproof, which makes it perfect for busy weeknights, holidays, or when you want to treat yourself to something sweet without breaking a sweat.
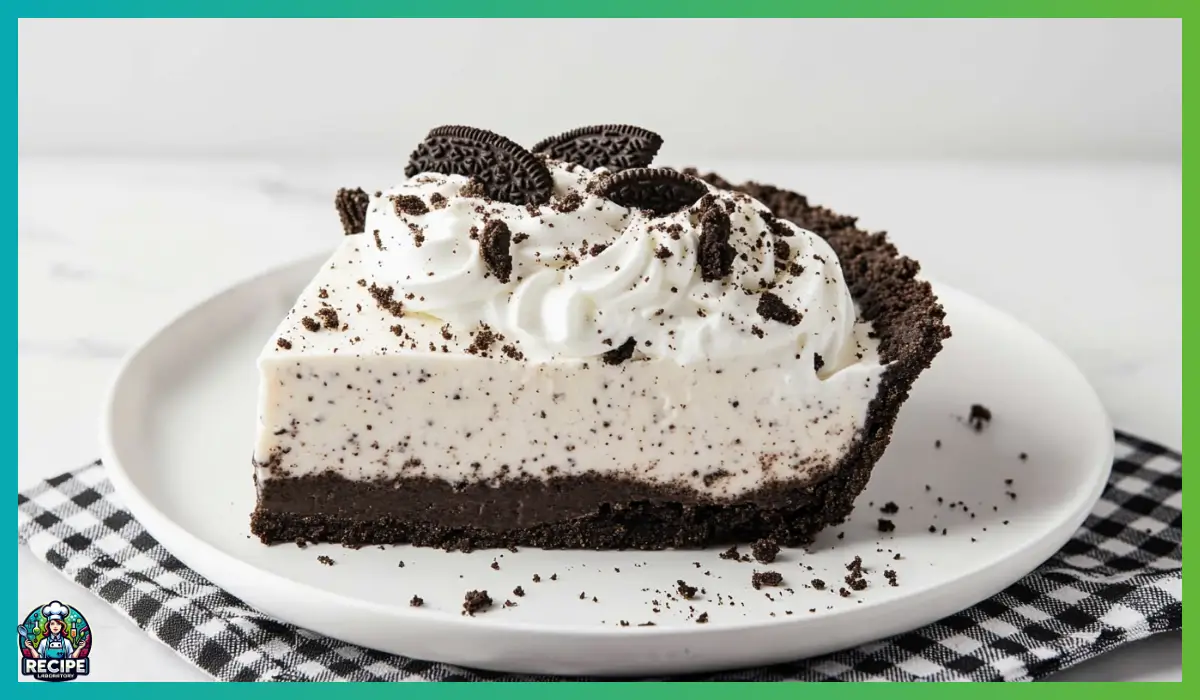
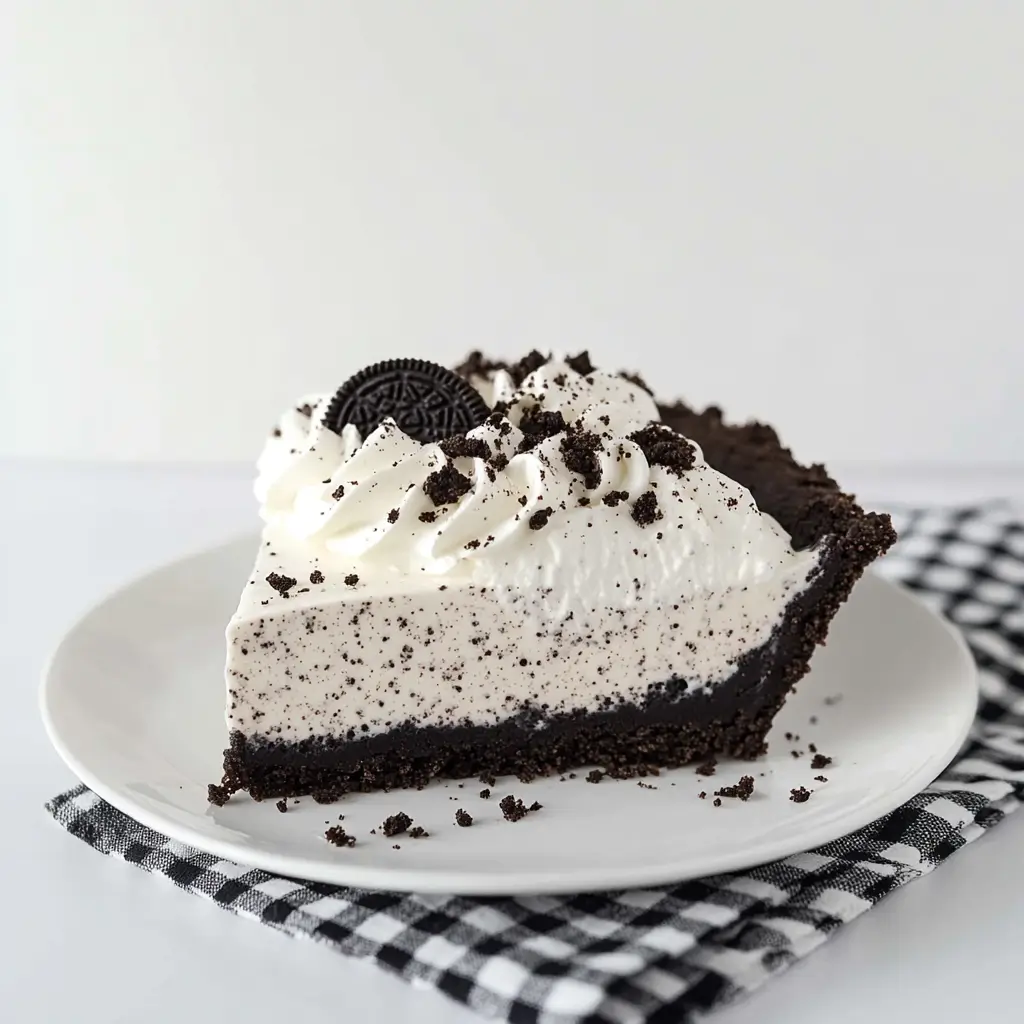
Second, it’s got that unbeatable texture contrast. The crust is buttery and just slightly crunchy thanks to crushed Oreos and melted butter. The filling is rich and fluffy, with bits of Oreo throughout that soften just enough to become almost cake-like. And the topping—light, airy whipped cream with a sprinkle of crushed cookies—brings everything together into one harmonious, cookies-and-cream cloud of goodness.
Third, it’s crowd-pleasing. Kids love it. Adults ask for seconds. It travels well, stores easily, and can be made ahead of time. That’s basically the trifecta of dessert success. You can serve it at birthday parties, backyard BBQs, office potlucks, or bring it along to a holiday dinner and watch it disappear.
What makes this pie especially great is how customizable it is. Want to swap vanilla pudding for chocolate? Go for it. Want to use golden Oreos instead of classic? That works too. Want to throw in some mini chocolate chips or drizzle chocolate sauce on top? You’ve got options.
Finally, there’s the flavor. It’s everything you want in an Oreo dessert—sweet, creamy, chocolatey, and deeply satisfying. Each bite melts in your mouth, and the balance of textures keeps it interesting all the way through. It’s comfort food in dessert form, and it never gets old.
Health Benefits
Okay, let’s be honest—Oreo Icebox Pie isn’t exactly a health food. But that doesn’t mean you can’t enjoy it as part of a balanced lifestyle. Let’s take a closer look at some of the ingredients and how they fit into the bigger picture.
First, heavy cream. While it’s rich in fat and calories, it’s also a great source of fat-soluble vitamins like A and D. These nutrients support immune function, vision, and bone health. When used in moderation, dairy fats can be a part of a healthy diet, especially if you’re also balancing your meals with plenty of fruits and vegetables.
Then there’s Cool Whip, which is a lighter alternative to traditional whipped cream. It adds volume and texture without too much added fat. If you prefer, you can use a homemade stabilized whipped cream with a bit of gelatin or cornstarch to control the ingredients more closely.
Oreos? Sure, they’re indulgent. But they’re also a source of joy, and that counts for something. Mental health is an essential part of wellness, and giving yourself permission to enjoy treats in moderation is key to long-term balance. Plus, when you make a dessert like this at home, you can portion it, store leftovers, and enjoy it over several days, rather than eating a high-sugar dessert in one sitting.
From a broader perspective, desserts like Oreo Icebox Pie offer a break from the usual rush. They encourage us to sit down with family or friends, savor a slice, and connect with one another. That kind of emotional nourishment is every bit as important as the nutrients on a label.
If you’re looking to lighten things up a bit, there are simple swaps you can make. Use reduced-fat Oreos or a lower-fat whipped topping. Swap in Greek yogurt for part of the whipped cream in the filling to add protein and reduce fat content. Even halving the amount of sugar in the whipped topping can help tone things down while still keeping that satisfying flavor.
At the end of the day, balance is the key to wellness. Enjoy a slice of Oreo Icebox Pie with a clear conscience, knowing that it’s okay to indulge, celebrate, and treat yourself.
Preparation Time, Servings, and Nutritional Information
Before you get started, here’s everything you need to know about how much time to set aside, how many people this pie serves, and what kind of nutritional profile to expect per slice.
Total Time Breakdown
Prep Time: 25 minutes
Chill Time: Minimum 4 hours (best after 6–8 hours)
Total Time: About 4 hours and 25 minutes (including chilling)
This is a great make-ahead dessert because the longer it chills, the better it sets. You can prep it in the morning and serve it for dinner, or even make it a day ahead.
Servings
This pie serves 8–10 people, depending on how generous your slices are. If you’re feeding a crowd, you could even slice it into 12 thinner pieces—there’s enough richness in each slice to be satisfying.
Nutrition Facts (Per Serving – based on 10 servings)
- Calories: 460
- Total Fat: 32g
- Saturated Fat: 18g
- Cholesterol: 90mg
- Sodium: 280mg
- Carbohydrates: 38g
- Sugar: 24g
- Protein: 4g
These values can vary slightly depending on which brand of ingredients you use. If you’re tracking macros or following a specific meal plan, consider using a nutrition calculator with your preferred products.
Ingredients List
Let’s break down everything you’ll need to make this dreamy Oreo Icebox Pie. You might already have some of these ingredients in your kitchen, which makes it even more convenient.
For the Crust
- 32 Oreos (about one 14.3 oz package) – Use classic Oreos with the cream filling; it helps bind the crust together and adds that signature flavor.
- 6 tablespoons unsalted butter, melted – This helps hold the crust together once chilled, and adds a rich, buttery flavor that complements the chocolate.
For the Filling
- 2 (3.4 oz) boxes instant vanilla pudding mix – This is the base of the creamy filling. Instant pudding makes the prep quick and ensures the pie sets up without needing heat.
- 3 cups heavy whipping cream – Adds richness and structure. When whipped with the pudding, it creates a thick, mousse-like texture.
- 8 oz Cool Whip, thawed – Lightens up the filling and gives it that fluffy texture we all love.
- 2 cups chopped Oreos (about 18 Oreos from a second package) – These are folded into the filling, adding bits of soft, chocolatey cookie in every bite.
For the Topping
- 1 cup heavy whipping cream – Fresh whipped cream makes this topping feel extra special.
- ¼ cup powdered sugar – Sweetens the whipped cream and helps stabilize it slightly.
- 1 teaspoon vanilla extract – Adds depth and enhances the flavor of the cream.
You’ll also want to set aside a few extra crushed Oreos to sprinkle on top as garnish—it adds that final cookies-and-cream touch that makes the pie so inviting.
Now that we’ve got everything ready, let’s move on to how to put it all together.
Step-By-Step Cooking Instructions
This Oreo Icebox Pie may look like a bakery-quality dessert, but the process is super simple. No oven, no water baths, no fancy techniques—just a few bowls, a mixer, and a refrigerator. Below is the full step-by-step breakdown so you can make this recipe confidently from start to finish.
Step 1: Prepare Your Workstation
Before you begin, make sure you have all your ingredients measured and your equipment ready. You’ll need:
- A food processor or blender
- A large mixing bowl
- A hand mixer or stand mixer
- A rubber spatula
- A 9–10 inch pie pan (a deep-dish version works best)
- Plastic wrap
Also, clear out space in your refrigerator to chill the pie undisturbed for several hours.
Step 2: Make the Oreo Crust
Start by preparing the base for your pie—the Oreo crust.
- Add 32 whole Oreos (cream filling included) to a food processor or blender.
- Pulse until the cookies are finely crushed into even crumbs. You want a texture similar to damp sand.
- Transfer the Oreo crumbs to a mixing bowl.
- Pour in the 6 tablespoons of melted butter and stir until all the crumbs are moistened. The mixture should hold together when pressed.
- Press the mixture firmly into the bottom and up the sides of your pie pan. Use the bottom of a measuring cup or a glass to smooth and compress the crust.
- Once the crust is shaped, place it in the refrigerator to chill while you prepare the filling. This step helps the crust firm up and set.
Tip: For a firmer crust, you can place it in the freezer instead of the fridge while you work on the filling.
Step 3: Make the Creamy Filling
This is where the magic happens—the light, fluffy, Oreo-studded filling that gives this pie its signature cookies-and-cream flavor.
- In a large mixing bowl, add the two boxes of instant vanilla pudding mix and the 3 cups of heavy whipping cream.
- Use an electric mixer on medium-high speed to beat the mixture until it’s thick and creamy. This will take about 3–4 minutes.
- Once the mixture is very thick (you’ll notice peaks forming), gently fold in the Cool Whip using a spatula. Mix on low speed just until combined to maintain a light texture.
- Add 2 cups of chopped Oreos to the filling and fold them in gently. You want the cookies evenly distributed, but try not to crush them too much—chunks are good.
- Take the chilled crust from the fridge and spread the filling evenly over the crust. Use the spatula to smooth the top.
- Cover the pie loosely with plastic wrap and refrigerate for at least 4 hours, though 6–8 hours or overnight is ideal for the best texture.
Tip: Avoid overmixing once you add the Oreos to preserve their texture. The more you stir, the softer they’ll become.
Step 4: Whip the Topping
The pie is delicious on its own, but the topping takes it to the next level. You’ll want to make this right before serving for the freshest results.
- Place your mixing bowl and beaters in the freezer for about 15 minutes before you begin. This helps the cream whip up faster and gives you better volume.
- Once chilled, pour 1 cup of heavy whipping cream into the bowl.
- Add ¼ cup powdered sugar and 1 teaspoon vanilla extract.
- Beat on medium-high speed until stiff peaks form. This takes about 3–5 minutes. You’ll know it’s ready when the cream holds its shape on a spoon.
- Spoon or pipe the whipped cream on top of the chilled pie, spreading it evenly or making swirls and dollops for a decorative finish.
- Sprinkle extra crushed Oreos on top for garnish.
Tip: If you’re serving this pie later in the day, you can make the whipped cream in advance and store it in a sealed container in the fridge until you’re ready to top the pie.
Step 5: Slice and Serve
Now that the pie has chilled and the topping is in place, it’s time to slice and serve.
- Use a sharp knife dipped in warm water to slice clean pieces. Wipe the knife clean between slices for neat presentation.
- Serve the pie cold, straight from the refrigerator. The texture is best when chilled, and the flavors are more pronounced.
Optional: For extra indulgence, drizzle a little chocolate syrup over the top or serve each slice with a scoop of vanilla ice cream.
And just like that, you’ve made a no-bake dessert that looks like it came from a pastry shop but took you less than 30 minutes of hands-on time.
How to Serve
This Oreo Icebox Pie is pretty versatile when it comes to serving. Whether you’re dressing it up for a dinner party or keeping it casual for a backyard get-together, there are plenty of ways to present it beautifully.
- As a make-ahead dessert for parties: This pie is perfect for entertaining. Make it the night before and top it just before serving so you’re not scrambling at the last minute. Serve chilled with a cup of coffee or tea.
- As a birthday or celebration dessert: If you’re looking for something different from traditional cake, this pie is a fun and unexpected twist. Add a few sprinkles on top to give it a festive touch.
- As an after-dinner treat: Slice it into smaller portions for a light yet satisfying ending to a heavy meal.
- For kids’ parties: Serve mini slices or use a muffin tin to create individual mini pies. It’s fun, cute, and great for little hands.
- For holidays and gatherings: Decorate the top with holiday-themed sprinkles or use seasonal Oreo varieties (like mint or red velvet) to give it a festive feel.
No matter how you serve it, keep the pie refrigerated until just before serving to maintain that light, fluffy filling and crunchy crust.
Pairing Suggestions
This dessert is rich, creamy, and sweet, so pairing it with something refreshing or a little more neutral helps balance things out. Here are a few ideas to consider:
Beverages
- Iced coffee or cold brew: The bitterness of coffee complements the sweetness of the pie beautifully.
- Milk (of any kind): A classic choice, especially if you’re serving it to kids.
- Herbal tea: Try peppermint or chamomile for a gentle, soothing pairing.
- Sparkling water with lemon or lime: A refreshing contrast that helps cleanse the palate.
Other Desserts or Additions
- Fresh berries: A small side of strawberries or raspberries offers a nice tart contrast to the sweet, creamy filling.
- Chocolate drizzle or syrup: A light drizzle over each slice adds a fancy touch and even more chocolate flavor.
- Mini chocolate chips: Sprinkle a few on top of the whipped cream for added texture and a decorative finish.
Side Treats
- Vanilla or coffee ice cream: If you want to really lean into dessert mode, a scoop on the side turns this into a full dessert plate.
- Chocolate-dipped strawberries: An elegant pairing for special occasions.
Choosing the right pairing can really enhance the dessert experience and bring out the best in every bite.
Storage, Freezing & Reheating Instructions
One of the many great things about this pie is how well it stores, which makes it perfect for prepping ahead or saving leftovers.
Storing in the Refrigerator
- Cover the pie tightly with plastic wrap or foil and store it in the refrigerator for up to 4–5 days.
- For best texture, keep it chilled until just before serving.
- If the whipped cream topping starts to soften, you can re-whip a small batch and refresh the top as needed.
Freezing the Pie
- To freeze the entire pie, place it uncovered in the freezer for 1–2 hours until the top firms up.
- Then wrap it tightly in plastic wrap followed by aluminum foil to prevent freezer burn.
- Freeze for up to 2 months.
- To thaw, transfer the pie to the fridge and let it thaw overnight. Do not thaw at room temperature, as that may cause the filling to become too soft.
Freezing Individual Slices
- Cut the pie into slices before freezing for easy grab-and-go servings.
- Wrap each slice individually in plastic wrap and store in a freezer-safe bag or container.
- Thaw in the refrigerator for a few hours before serving.
Tip: Avoid freezing with the whipped cream topping if possible. Instead, add the fresh topping after thawing for the best presentation and texture.
Common Mistakes to Avoid
Even though this Oreo Icebox Pie is a no-bake dessert and pretty simple to prepare, there are a few common pitfalls that can affect the final result. Avoiding these will ensure your pie comes out looking—and tasting—amazing every time.
Using Warm Ingredients
Always start with cold heavy cream and Cool Whip. If your cream is warm, it won’t whip properly, and your filling could end up runny instead of thick and fluffy. Likewise, thaw Cool Whip in the fridge, not on the counter, to maintain its structure.
Overmixing the Filling
When you whip the pudding and cream together, you want the mixture to be thick—but not overbeaten. If you mix it too long, it can become too stiff or start to separate. Similarly, once you add the Cool Whip and chopped Oreos, mix just until everything is combined. Overmixing at this stage can crush the cookies and deflate the airy texture of the filling.
Not Letting the Pie Chill Long Enough
This might be the biggest mistake of all. Oreo Icebox Pie needs at least 4 hours in the refrigerator to set properly, but ideally, you should give it 6–8 hours or even overnight. If you try to slice into it too soon, the filling may be too soft and won’t hold its shape. Patience really pays off here.
Skipping the Chilled Bowl for Whipped Cream
It might seem like a small step, but using a chilled bowl and beaters makes a big difference when making whipped cream. Cold equipment helps the cream whip faster and more evenly, resulting in those perfect, fluffy peaks that make the topping so impressive.
Not Crushing the Oreos Enough for the Crust
You want a fine, even crumb for your crust—think of the texture of wet sand. If your crumbs are too chunky, the crust won’t hold together well. Make sure you blend the cookies (cream included) thoroughly so that the butter can bind the mixture and form a solid base.
Forgetting to Press the Crust Firmly
Another crust-related mistake is not pressing it firmly enough into the pie pan. Use the back of a spoon or a flat-bottomed glass to press it down evenly and tightly. This helps prevent the crust from crumbling when you slice the pie.
Serving the Pie Too Warm
Because this is a chilled dessert, serving it at the right temperature is key. If the pie gets too warm, the filling and whipped topping can start to soften or melt. Always serve directly from the fridge and keep any leftovers refrigerated.
By keeping these tips in mind and avoiding these common mistakes, you’re setting yourself up for pie perfection—smooth, creamy, sliceable, and delicious every time.
Pro Tips
Want to take your Oreo Icebox Pie to the next level? Here are some insider tips that will elevate your dessert game and help you customize the recipe to suit your taste or occasion.
Use Double-Stuf Oreos for Extra Richness
If you’re a fan of creamy fillings, try using Double-Stuf Oreos for the crust and the filling mix-ins. The extra cream adds richness and makes the overall texture even more indulgent.
Pulse, Don’t Blend the Oreos
When making the crust, use the pulse function on your food processor to crush the Oreos. This helps prevent over-processing, which can turn the cookies into paste. You want a fine crumb—not cookie butter.
Add a Touch of Salt
A pinch of salt in the crust or the filling can really bring out the flavors. Salt balances the sweetness and adds a subtle depth that makes the pie even more delicious.
Make It in a Springform Pan
Want clean, bakery-style slices? Try making this pie in a springform pan. Once the pie is set, you can remove the sides and reveal perfectly smooth edges. It also makes serving a little easier.
Chill Your Serving Knife
Dip your knife in hot water, wipe it dry, and slice. This simple trick helps you cut neat, clean slices without dragging through the filling. Repeat the process between each slice for best results.
Try Flavored Pudding Mixes
Vanilla pudding is the classic base, but don’t be afraid to experiment. Cheesecake-flavored pudding adds a tangy twist, while chocolate pudding doubles down on the Oreo-chocolate combo. You can even layer two flavors for a fun visual and taste experience.
Stabilize the Whipped Cream (Optional)
If you’re making the whipped cream topping ahead of time or transporting the pie, you can stabilize the cream to help it hold its shape. Add 1 tablespoon of instant pudding mix or 1 teaspoon of cornstarch when whipping. It won’t change the flavor but will help the whipped cream last longer.
Create Oreo Art on Top
Use halved Oreos, mini Oreos, or crushed Oreos arranged in a pattern to decorate the top of your pie. This not only makes it look impressive but also gives people a hint of the flavor inside.
Add Texture with Toppings
For some extra crunch, consider adding chopped nuts, chocolate chips, or crushed toffee on top. These little add-ons bring texture and flair without much effort.
Make Individual Servings
If you’re hosting a party, try assembling the dessert in small jars or ramekins instead of a traditional pie pan. Not only does this make for adorable presentation, but it also makes serving a breeze.
These pro tips let you personalize your pie and troubleshoot before any issues arise. Whether you’re a first-time pie maker or a seasoned dessert lover, these small upgrades can make a big difference.
Frequently Asked Questions (FAQs)
Let’s answer some of the most common questions people have when making Oreo Icebox Pie. Whether you’re prepping for a party or just curious about ingredient swaps, this section covers it all.
Can I use store-brand sandwich cookies instead of Oreos?
Yes, absolutely. While the flavor may differ slightly depending on the brand, most store-brand chocolate sandwich cookies will work just fine. Just make sure they have a similar cream-to-cookie ratio so your crust and filling textures stay consistent.
Can I make this pie ahead of time?
Yes, and in fact, it’s even better when made ahead. The pie needs time to set in the fridge, so making it the night before is ideal. You can make it up to two days in advance—just hold off on adding the whipped cream topping until closer to serving for best results.
What can I use instead of Cool Whip?
If you prefer not to use Cool Whip, you can substitute with freshly whipped cream. Use 1 cup of heavy whipping cream, whipped with 2 tablespoons of powdered sugar and ½ teaspoon of vanilla extract. Keep in mind that fresh whipped cream is less stable than Cool Whip, so it’s best served the same day.
Can I make this recipe gluten-free?
Yes. Simply use gluten-free chocolate sandwich cookies in place of Oreos. Many brands offer gluten-free options that taste very similar to the original, and they work well in both the crust and filling.
Is it possible to make this pie dairy-free?
You can adapt it, though it may require a few ingredient changes. Use dairy-free whipping cream (such as coconut cream or almond-based alternatives), a dairy-free whipped topping, and plant-based pudding mix. Be sure to also choose dairy-free sandwich cookies.
How do I keep the crust from getting soggy?
The crust holds up well thanks to the high fat content in the butter and cookie filling. However, if you’re worried about sogginess, you can freeze the crust for 30 minutes before adding the filling. This helps it stay crisp longer.
Can I use chocolate pudding instead of vanilla?
Definitely. Chocolate pudding gives the pie an even richer flavor. You could also do a layer of chocolate and a layer of vanilla for a beautiful swirl effect.
Can I freeze this pie after it’s made?
Yes, you can freeze the pie. Just wrap it tightly and avoid adding the whipped topping until after it’s thawed. Let it thaw in the fridge overnight before serving. If you add the topping beforehand, it may separate when thawing.
Why is my filling runny?
This usually means the pudding and cream mixture wasn’t beaten long enough. Make sure you whip the cream and pudding together until the mixture is very thick before adding Cool Whip. Also, don’t skip the chill time—it needs at least 4 hours to firm up.
Can I make this in a rectangular baking dish?
Yes. A 9×13-inch baking dish works well, especially if you want to make bars instead of slices. Just press the crust evenly into the bottom and spread the filling on top. It’s great for potlucks or larger gatherings.
Conclusion & Call to Action
By now, you’ve got everything you need to create what might just become your new go-to dessert: Oreo Icebox Pie. It’s rich, creamy, and full of cookies-and-cream flavor. But beyond the taste, what makes this pie truly special is how easy it is to pull together and how much joy it brings to any occasion. Whether you’re serving it at a birthday party, bringing it to a family potluck, or enjoying a slice quietly on a weeknight after dinner, this pie delivers every single time.
It’s also one of those desserts that invites creativity. You can swap out ingredients, adjust the toppings, or play around with presentation to make it your own. Even better, it’s forgiving enough for beginner bakers and satisfying enough for seasoned cooks to appreciate. If you’ve ever felt intimidated by homemade desserts, this is the perfect recipe to start with. You don’t need any fancy tools, you won’t need to turn on your oven, and there’s no tricky timing to worry about. Just mix, chill, and enjoy.
And now it’s your turn. You’ve read the tips, reviewed the steps, and explored all the variations and serving ideas. So why not try it out? Clear some space in your fridge, pick up a couple packs of Oreos, and whip up this delicious pie. You’ll be amazed by how easy it is—and even more amazed when your friends and family go back for seconds (and maybe thirds).
Once you’ve made your Oreo Icebox Pie, I’d love to hear how it turned out. Did you put your own spin on it? Did you serve it at a special occasion? Drop a comment below with your experience or questions. If you’re on social media, share a photo of your pie and tag me so I can see your beautiful creation. Nothing makes me happier than seeing these recipes come to life in your kitchens.
Thanks for spending time here and letting me share one of my favorite no-bake desserts with you. I hope this pie becomes a cherished staple in your home just like it has in mine. Happy no-baking, and enjoy every creamy, cookie-filled bite.
Print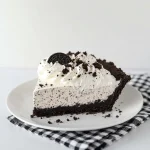
Oreo Icebox Pie – Easy No-Bake Dessert with Whipped Cream
- Total Time: 4 hours 25 minutes (including chilling)
- Yield: 4-6 servings 1x
- Diet: Vegetarian
Description
A rich, creamy, and indulgent no-bake Oreo Icebox Pie layered with a buttery Oreo crust, fluffy vanilla pudding, whipped cream, and crushed Oreos. Perfect for parties, potlucks, or whenever you crave an easy, crowd-pleasing dessert.
Ingredients
For the Crust:
-
32 Oreos (with cream)
-
6 tablespoons unsalted butter, melted
For the Filling:
-
2 (3.4 oz) boxes instant vanilla pudding mix
-
3 cups heavy whipping cream
-
8 oz Cool Whip, thawed
-
2 cups chopped Oreos (about 18 cookies)
For the Topping:
-
1 cup heavy whipping cream
-
¼ cup powdered sugar
-
1 teaspoon vanilla extract
-
Crushed Oreos for garnish
Instructions
-
Pulse Oreos in a food processor until finely crushed.
-
Mix crumbs with melted butter and press into a 9–10 inch pie dish. Chill.
-
In a large bowl, beat pudding mix and heavy cream until thick.
-
Fold in Cool Whip and chopped Oreos. Spread over crust and cover.
-
Chill for 4–8 hours or overnight.
-
Before serving, whip cream with sugar and vanilla to stiff peaks.
-
Spread or pipe over pie. Garnish with crushed Oreos and serve cold.
Notes
-
Chill the bowl before whipping cream for best volume.
-
Let pie set for at least 6 hours for cleaner slices.
-
Can substitute chocolate or cheesecake pudding.
- Prep Time: 25 minutes
- Cook Time: 0 minutes
- Category: Dessert
- Method: No-Bake
- Cuisine: American