
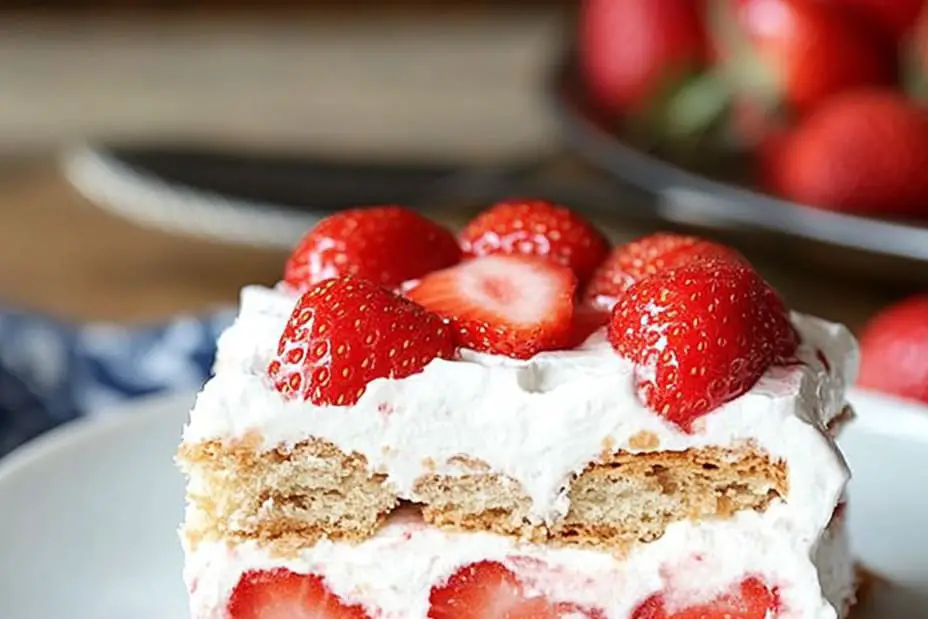
No Bake Strawberry Icebox Cake is a refreshing summer delight that captures the essence of seasonal fruit and creamy indulgence. This dessert not only tempts your taste buds but also brings a sense of joy and nostalgia with every bite. With layers of fluffy whipped cream, fresh strawberries, and graham crackers, this no-bake treat is the perfect way to embrace the warm weather while satisfying your sweet tooth. It’s an amazing alternative to traditional baked desserts that require hours of preparation and cooling time.
If you’ve never experienced the bliss of a No Bake Strawberry Icebox Cake, prepare to be dazzled. The combination of flavors and textures comes together in a way that makes everyone crave seconds. This cake is not just an easy dessert; it’s an experience that will undoubtedly impress your family and friends at any summer gathering or festive celebration. In this article, you’ll learn why this recipe is beloved, how to make it, and tips for serving it to ensure everyone enjoys a delightful summer treat.
Get ready to impress your guests and treat yourself to a wonderfully sweet ending to any meal with this No Bake Strawberry Icebox Cake. Let’s jump into the details of this incredible recipe!
Why You’ll Love This Recipe
No Bake Strawberry Icebox Cake is favored for several reasons that make it a go-to summer dessert. Here are the key factors that will make you fall head over heels for it:
1. Effortless Preparation: There’s no baking involved, making this cake easy to whip up even on a busy day.
2. Fresh Ingredients: It highlights the taste of fresh strawberries, making it a perfect way to enjoy seasonal fruits.
3. Versatile Layers: Feel free to add other berries or fruits to personalize this dessert to your liking.
4. Light and Airy Texture: The whipped cream and strawberries create a lightness that’s refreshing compared to heavier desserts.
5. No Mess, No Fuss: With minimal cleanup and straightforward steps, it’s a stress-free dessert option.
6. Great for Gatherings: This cake can serve a crowd, making it an ideal choice for parties, potlucks, and family barbecues.
Each aspect of this No Bake Strawberry Icebox Cake speaks to its universal appeal. From its refreshing taste to the ease of preparation, it’s a recipe that is bound to win hearts and fill bellies.
Preparation and Cooking Time
Creating this delightful No Bake Strawberry Icebox Cake takes about 15 minutes to prepare. Here’s the timeline broken down:
– Preparation Time: 15 minutes
– Chilling Time: 4-6 hours (or overnight for best results)
While the actual preparation is quick, the chilling time is essential for the flavors to meld and the cake to set. Plan ahead so that you have a chilled dessert ready to serve when the occasion arises!
Ingredients
– 2 cups whipped cream (or 1 tub store-bought)
– 2 cups fresh strawberries, sliced
– 1 cup graham cracker crumbs
– 1/4 cup powdered sugar
– 1 teaspoon vanilla extract
– Optional: mint leaves for garnishing
Step-by-Step Instructions
Creating a delicious No Bake Strawberry Icebox Cake can be effortless when you follow these simple steps:
1. Prepare the Cream: In a large mixing bowl, whip the cream until it forms soft peaks. Add powdered sugar and vanilla extract, then continue to whip until well combined.
2. Layer the Ingredients: In a 9×13 inch dish, spread a layer of graham cracker crumbs evenly on the bottom.
3. First Layer of Cream: Use half of the whipped cream mixture and spread it over the graham cracker layer.
4. Add Strawberries: Next, add a layer of sliced strawberries on top of the whipped cream.
5. Repeat the Layers: Repeat the process with another layer of graham cracker crumbs, followed by the remaining cream and another layer of strawberries.
6. Finish with Strawberries: Top the final layer with a few extra strawberries for a visually appealing presentation.
7. Chill: Cover the dish with plastic wrap and refrigerate for at least 4 to 6 hours, or overnight if possible, to allow the cake to set.
8. Slice and Serve: When ready to serve, cut the cake into squares and garnish with mint leaves if desired.
This straightforward process will lead to a visually stunning and delicious dessert that is refreshing and satisfying.
How to Serve
To maximize the enjoyment of your No Bake Strawberry Icebox Cake, consider the following serving tips:
1. Presentation: Serve slices on elegant dessert plates, enhancing the visual appeal.
2. Accompaniments: Pair with extra fresh strawberries or a drizzle of chocolate sauce for added flavor.
3. Serving Temperature: Ensure it is well-chilled before serving for the best taste and texture.
4. Garnish: Use mint leaves or a dusting of powdered sugar to add a finishing touch.
5. Beverage Pairing: Serve alongside lemonade, iced tea, or sparkling wine to complement the refreshing flavors of the cake.
By focusing on these details, the act of serving your No Bake Strawberry Icebox Cake will create a wonderful atmosphere, making your gathering memorable while treating guests to a delightful dessert experience.
In conclusion, the No Bake Strawberry Icebox Cake is an incredible addition to any summer menu, welcoming friends and family to indulge in a refreshing and sweet treat. Enjoy making this recipe and sharing it with loved ones!
Additional Tips
– Use Fresh Strawberries: The fresher the strawberries, the more delicious your No Bake Strawberry Icebox Cake will be. Look for vibrant red berries without any blemishes for optimal flavor.
– Chill Properly: Allow sufficient chilling time for the cake to set correctly. This helps the flavors to meld, creating a mouthwatering experience.
– Experiment with Cream: For a unique twist, consider using flavored whipped cream, such as vanilla bean or even a hint of lemon zest to brighten the taste.
– Layer Creatively: While strawberries are the star, don’t be afraid to mix in other fruits like blueberries or raspberries for a colorful layer.
– Use a Spatula: When spreading the whipped cream, use an offset spatula for a smooth layer, reducing the chance of disturbing the graham cracker base.
Recipe Variation
Feel free to get imaginative with your No Bake Strawberry Icebox Cake! Here are some variations you can try:
1. Chocolate Version: Incorporate a layer of chocolate pudding between the whipped cream and strawberries for a delightful chocolatey contrast.
2. Alternative Crunch: Instead of graham cracker crumbs, experiment with crumbled chocolate cookies or even crushed pretzels for a salty-sweet twist.
3. Vegan Option: Substitute traditional whipped cream with coconut whipped cream and swap dairy for plant-based milk in any creamy layers.
4. Citrus Twist: Add a thin layer of lemon curd alongside the strawberries for a refreshing zing.
Freezing and Storage
– Storage: To keep your No Bake Strawberry Icebox Cake fresh, cover it tightly and store it in the refrigerator. It should remain delicious for about 4-5 days.
– Freezing: This dessert can be frozen for an extended period. Wrap individual slices in plastic wrap and then place them in an airtight container for up to 3 months.
Special Equipment
Having the right tools can make preparing your No Bake Strawberry Icebox Cake a breeze. Here are some essentials you might need:
– Large mixing bowl
– Electric mixer (for whipping cream)
– 9×13 inch baking dish
– Plastic wrap (for covering during chilling)
– Offset spatula (helpful for spreading the cream smoothly)
Frequently Asked Questions
How do I know when my cake is ready to serve?
Your No Bake Strawberry Icebox Cake is ready when it has been properly chilled for at least 4-6 hours. It should hold its shape when sliced.
Can I make this cake a day ahead of time?
Absolutely! Making it a day in advance makes it a great option for gatherings. The flavors will meld overnight, enhancing the cake’s taste.
Is this dessert suitable for gluten-free diets?
Yes, you can easily make this cake gluten-free by using gluten-free graham crackers or an alternate cookie crust.
Can I replace the whipped cream with something else?
If you’re looking for a lower-calorie option, you can substitute whipped cream with low-fat yogurt or a non-dairy alternative.
Conclusion
The No Bake Strawberry Icebox Cake is a quintessential summer dessert that brings a burst of flavor and a refreshing lightness to any meal. With its simple preparation and delicious taste, this cake is certain to become a favorite among your family and friends. Its versatility allows for endless variations, making it suitable for all occasions. Share this delightful dish and create lasting memories over a sweet summer indulgence!

No Bake Strawberry Icebox Cake: An Incredible Summer Delight
- Total Time: 15 minutes
Ingredients
– 2 cups whipped cream (or 1 tub store-bought)
– 2 cups fresh strawberries, sliced
– 1 cup graham cracker crumbs
– 1/4 cup powdered sugar
– 1 teaspoon vanilla extract
– Optional: mint leaves for garnishing
Instructions
Creating a delicious No Bake Strawberry Icebox Cake can be effortless when you follow these simple steps:
1. Prepare the Cream: In a large mixing bowl, whip the cream until it forms soft peaks. Add powdered sugar and vanilla extract, then continue to whip until well combined.
2. Layer the Ingredients: In a 9×13 inch dish, spread a layer of graham cracker crumbs evenly on the bottom.
3. First Layer of Cream: Use half of the whipped cream mixture and spread it over the graham cracker layer.
4. Add Strawberries: Next, add a layer of sliced strawberries on top of the whipped cream.
5. Repeat the Layers: Repeat the process with another layer of graham cracker crumbs, followed by the remaining cream and another layer of strawberries.
6. Finish with Strawberries: Top the final layer with a few extra strawberries for a visually appealing presentation.
7. Chill: Cover the dish with plastic wrap and refrigerate for at least 4 to 6 hours, or overnight if possible, to allow the cake to set.
8. Slice and Serve: When ready to serve, cut the cake into squares and garnish with mint leaves if desired.
This straightforward process will lead to a visually stunning and delicious dessert that is refreshing and satisfying.
- Prep Time: 15 minutes
- Cook Time: 0 minutes
Nutrition
- Serving Size: 12 servings
- Calories: 250 kcal
- Fat: 12g
- Protein: 2g