
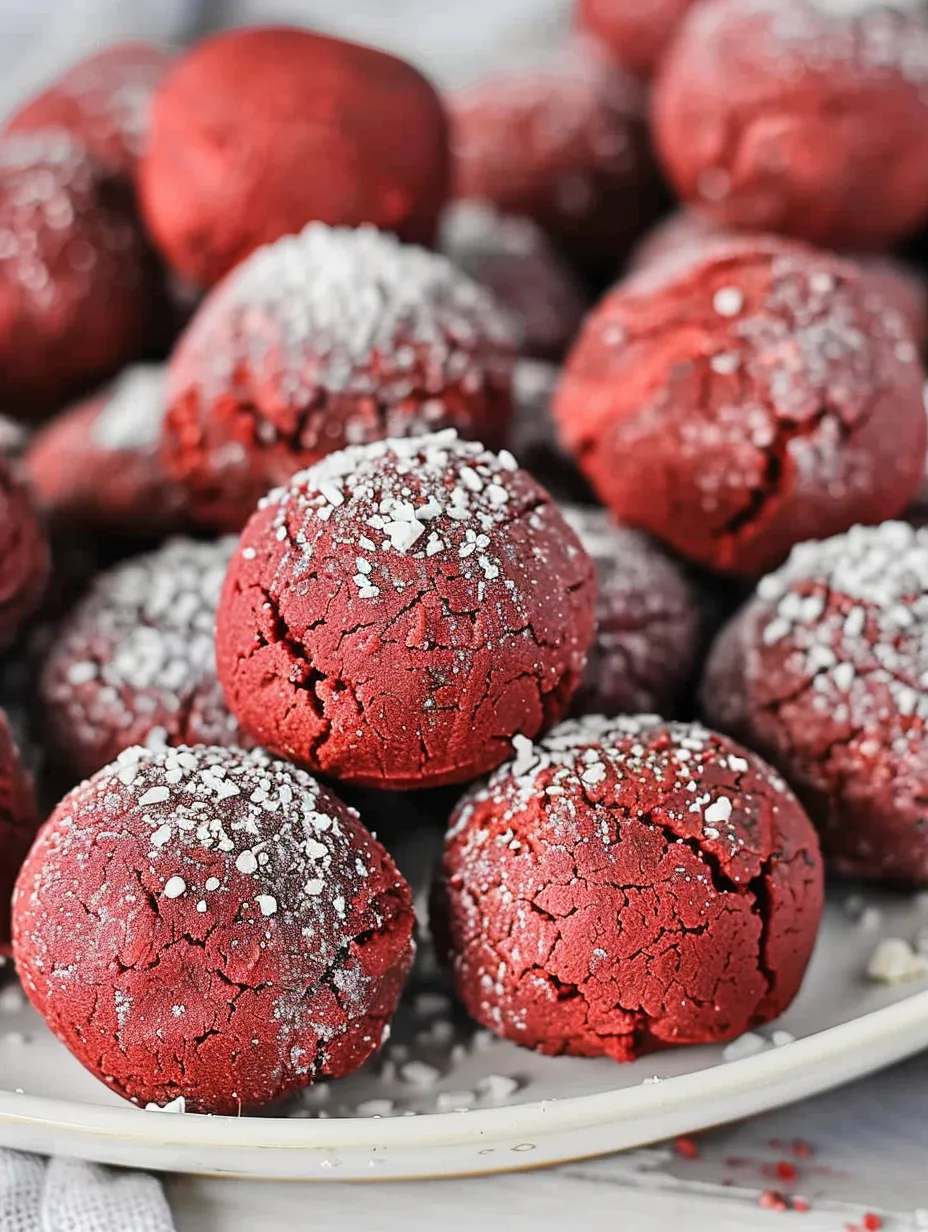
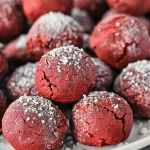
No Bake Red Velvet Cake Balls are an amazing treat that takes the beloved flavor of red velvet cake and transforms it into bite-sized delights. These cake balls combine the rich, velvety taste of red velvet with a creamy coating that makes them irresistible. Perfect for any occasion, these treats are easy to prepare and require no baking, making them a go-to dessert for busy individuals and baking enthusiasts alike. If you love red velvet cake, you’ll find these cake balls to be a wonderful alternative that captures the essence of this classic dessert.
Imagine a velvety, rich red velvet cake blended with cream cheese frosting, rolled into perfect little balls, and coated in white chocolate. The result is a delightful explosion of flavor in every bite. These No Bake Red Velvet Cake Balls are not only delicious but also visually stunning, thanks to their vibrant red color and smooth white chocolate coating. Whether you’re hosting a party, celebrating a special occasion, or simply want a sweet treat, these cake balls will surely impress.
You may wonder why these cake balls are so appealing. The answer lies in their simplicity and flavor. With just a few basic ingredients, you can create a dessert that looks and tastes gourmet. They are also highly versatile, allowing you to customize them with different coatings or toppings. Plus, they are a fantastic way to use leftover cake or cake scraps, reducing food waste while satisfying your sweet tooth. Let’s dive into what makes No Bake Red Velvet Cake Balls a must-try recipe for any dessert lover!
Why You’ll Love This Recipe
No Bake Red Velvet Cake Balls are more than just a tasty treat; they offer a unique experience that will have you coming back for more. Here are some reasons to fall in love with this recipe:
1. No Baking Required: This recipe eliminates the need for an oven, making it perfect for hot summer days or for those who are short on time.
2. Easy to Make: The straightforward steps ensure that even novice bakers can create these delicious treats without stress.
3. Versatile Flavor: You can easily modify the recipe by adding different flavorings or toppings to suit your preferences.
4. Perfect for Any Occasion: Whether it’s a birthday party, holiday gathering, or a casual get-together, these cake balls are a hit with everyone.
5. Aesthetic Appeal: The vibrant red color and smooth white chocolate coating make these cake balls visually stunning and perfect for presentation.
6. Kid-Friendly: Kids love these bite-sized treats, making them a great choice for parties or family gatherings.
With these compelling reasons, it’s easy to see why No Bake Red Velvet Cake Balls are a favorite among dessert lovers. Each bite is a delightful combination of flavors and textures that are hard to resist!
Preparation and Cooking Time
Creating No Bake Red Velvet Cake Balls is a breeze, and the time investment is minimal. Here’s a breakdown of the preparation and chilling times:
– Preparation Time: 20 minutes
– Chilling Time: 1 hour
– Total Time: 1 hour 20 minutes
These times may vary slightly based on your kitchen setup and experience, but this framework should give you a good estimate for planning your dessert-making session.
Ingredients
– 1 box red velvet cake mix
– 1/2 cup vegetable oil
– 3 large eggs
– 1/2 cup cream cheese frosting (store-bought or homemade)
– 1 cup white chocolate chips
– 1 tablespoon vegetable shortening (optional for melting chocolate)
– Sprinkles or crushed nuts for garnish (optional)
Step-by-Step Instructions
Making No Bake Red Velvet Cake Balls is simple and fun! Follow these steps for delicious results:
1. Prepare the Cake Mix: In a large mixing bowl, combine the red velvet cake mix, vegetable oil, and eggs. Mix until fully combined.
2. Bake the Cake: Pour the batter into a greased 9×13 inch baking dish. Bake according to package instructions until a toothpick comes out clean. Let it cool completely.
3. Crumble the Cake: Once cooled, crumble the red velvet cake into a large mixing bowl. Aim for fine crumbs to ensure smooth cake balls.
4. Add Frosting: Add the cream cheese frosting to the crumbled cake and mix until well combined. The mixture should be moist enough to hold its shape.
5. Form the Balls: Using your hands, scoop out small amounts of the mixture and roll them into balls about 1 inch in diameter. Place them on a baking sheet lined with parchment paper.
6. Chill the Cake Balls: Refrigerate the formed cake balls for at least 30 minutes to help them firm up.
7. Melt the Chocolate: In a microwave-safe bowl, melt the white chocolate chips with optional vegetable shortening in 30-second intervals, stirring in between until smooth.
8. Coat the Cake Balls: Dip each chilled cake ball into the melted white chocolate, ensuring it is fully coated. Use a fork to lift them out and let excess chocolate drip off.
9. Garnish: Place the coated cake balls back on the parchment paper. If desired, sprinkle with crushed nuts or colorful sprinkles before the chocolate sets.
10. Chill Again: Return the cake balls to the refrigerator for an additional 30 minutes to allow the chocolate to harden.
By following these steps, you’ll create delightful No Bake Red Velvet Cake Balls that are sure to impress!
How to Serve
Serving No Bake Red Velvet Cake Balls can be as simple or elaborate as you wish. Here are some tips to make your presentation shine:
1. Presentation: Arrange the cake balls on a decorative platter or tiered stand for an eye-catching display.
2. Accompaniments: Serve with whipped cream, fresh berries, or a drizzle of chocolate sauce for added flavor and elegance.
3. Portion Control: Offer them as bite-sized treats to encourage guests to take more than one!
4. Flavor Pairing: These cake balls pair wonderfully with coffee, tea, or even a glass of milk for a comforting treat.
By considering these serving suggestions, you can elevate the experience of enjoying your No Bake Red Velvet Cake Balls, making them a memorable treat for any gathering. Enjoy!
Additional Tips
– Use Quality Ingredients: For the best flavor, opt for high-quality red velvet cake mix and cream cheese frosting. Fresh ingredients make a noticeable difference.
– Roll Evenly: Ensure all cake balls are the same size for uniform baking and presentation. This helps with even coating and makes them visually appealing.
– Experiment with Coatings: Besides white chocolate, try dark chocolate, milk chocolate, or even colorful candy melts for different looks and tastes.
– Customize Toppings: Get creative with sprinkles, crushed cookies, or edible glitter to enhance the visual appeal of your cake balls.
– Serve at Room Temperature: Allow the cake balls to sit at room temperature for a few minutes before serving. This enhances the flavor and texture.
Recipe Variation
Feel free to switch things up! Here are a few variations to try:
1. Lemon Zest Addition: Add a teaspoon of lemon zest to the cream cheese frosting for a zesty twist on the classic flavor.
2. Nutty Red Velvet Cake Balls: Incorporate finely chopped nuts, such as walnuts or pecans, into the cake mixture for added flavor and crunch.
3. Chocolate Ganache Coating: Instead of white chocolate, coat the cake balls in a rich chocolate ganache for a decadent finish.
4. Red Velvet Cheesecake Balls: Mix in some softened cream cheese into the cake mixture for a creamier texture that resembles cheesecake.
Freezing and Storage
– Storage: Keep the No Bake Red Velvet Cake Balls in an airtight container in the refrigerator. They will stay fresh for up to 5 days.
– Freezing: For longer storage, you can freeze the cake balls. Place them in a single layer on a baking sheet until solid, then transfer to a freezer-safe bag. They can be frozen for up to 3 months. Thaw in the refrigerator before serving.
Special Equipment
You will need a few essential tools to prepare these delightful cake balls successfully:
– Mixing bowls
– Spoon or cookie scoop for portioning
– Baking sheet lined with parchment paper
– Microwave-safe bowl for melting chocolate
– Fork or dipping tool for coating
Frequently Asked Questions
How do I know when the cake balls are ready to coat?
The cake balls should be firm to the touch after chilling. They should hold their shape but be soft enough to bite into.
Can I make these cake balls ahead of time?
Absolutely! You can make and chill the cake balls a day in advance. Just coat them in chocolate closer to serving time for the best results.
Are these cake balls gluten-free?
To make them gluten-free, use a gluten-free red velvet cake mix. Always check labels to ensure all ingredients meet your dietary needs.
What can I use if I don’t have cream cheese frosting?
You can substitute any frosting you like, such as buttercream or whipped cream. However, cream cheese frosting complements the red velvet flavor perfectly.
Can I use a different cake flavor?
Yes! You can experiment with different cake mixes, such as chocolate or vanilla, to create variations of these cake balls.
Conclusion
No Bake Red Velvet Cake Balls are not just a dessert; they are an experience that combines convenience with indulgence. With their rich flavor and stunning appearance, these cake balls make for a perfect treat for any occasion. Whether you’re celebrating a special event or just satisfying your sweet tooth, these cake balls are sure to impress. Easy to make and delightful to eat, they offer a unique twist on the classic red velvet cake that everyone will love!
No Bake Red Velvet Cake Balls: An Incredible Ultimate Recipe
- Total Time: 15 minutes
Ingredients
– 1 box red velvet cake mix
– 1/2 cup vegetable oil
– 3 large eggs
– 1/2 cup cream cheese frosting (store-bought or homemade)
– 1 cup white chocolate chips
– 1 tablespoon vegetable shortening (optional for melting chocolate)
– Sprinkles or crushed nuts for garnish (optional)
Instructions
Making No Bake Red Velvet Cake Balls is simple and fun! Follow these steps for delicious results:
1. Prepare the Cake Mix: In a large mixing bowl, combine the red velvet cake mix, vegetable oil, and eggs. Mix until fully combined.
2. Bake the Cake: Pour the batter into a greased 9×13 inch baking dish. Bake according to package instructions until a toothpick comes out clean. Let it cool completely.
3. Crumble the Cake: Once cooled, crumble the red velvet cake into a large mixing bowl. Aim for fine crumbs to ensure smooth cake balls.
4. Add Frosting: Add the cream cheese frosting to the crumbled cake and mix until well combined. The mixture should be moist enough to hold its shape.
5. Form the Balls: Using your hands, scoop out small amounts of the mixture and roll them into balls about 1 inch in diameter. Place them on a baking sheet lined with parchment paper.
6. Chill the Cake Balls: Refrigerate the formed cake balls for at least 30 minutes to help them firm up.
7. Melt the Chocolate: In a microwave-safe bowl, melt the white chocolate chips with optional vegetable shortening in 30-second intervals, stirring in between until smooth.
8. Coat the Cake Balls: Dip each chilled cake ball into the melted white chocolate, ensuring it is fully coated. Use a fork to lift them out and let excess chocolate drip off.
9. Garnish: Place the coated cake balls back on the parchment paper. If desired, sprinkle with crushed nuts or colorful sprinkles before the chocolate sets.
10. Chill Again: Return the cake balls to the refrigerator for an additional 30 minutes to allow the chocolate to harden.
By following these steps, you’ll create delightful No Bake Red Velvet Cake Balls that are sure to impress!
- Prep Time: 15 minutes
- Cook Time: 0 minutes
Nutrition
- Serving Size: 24 cake balls
- Calories: 120 kcal
- Fat: 6g
- Protein: 2g