
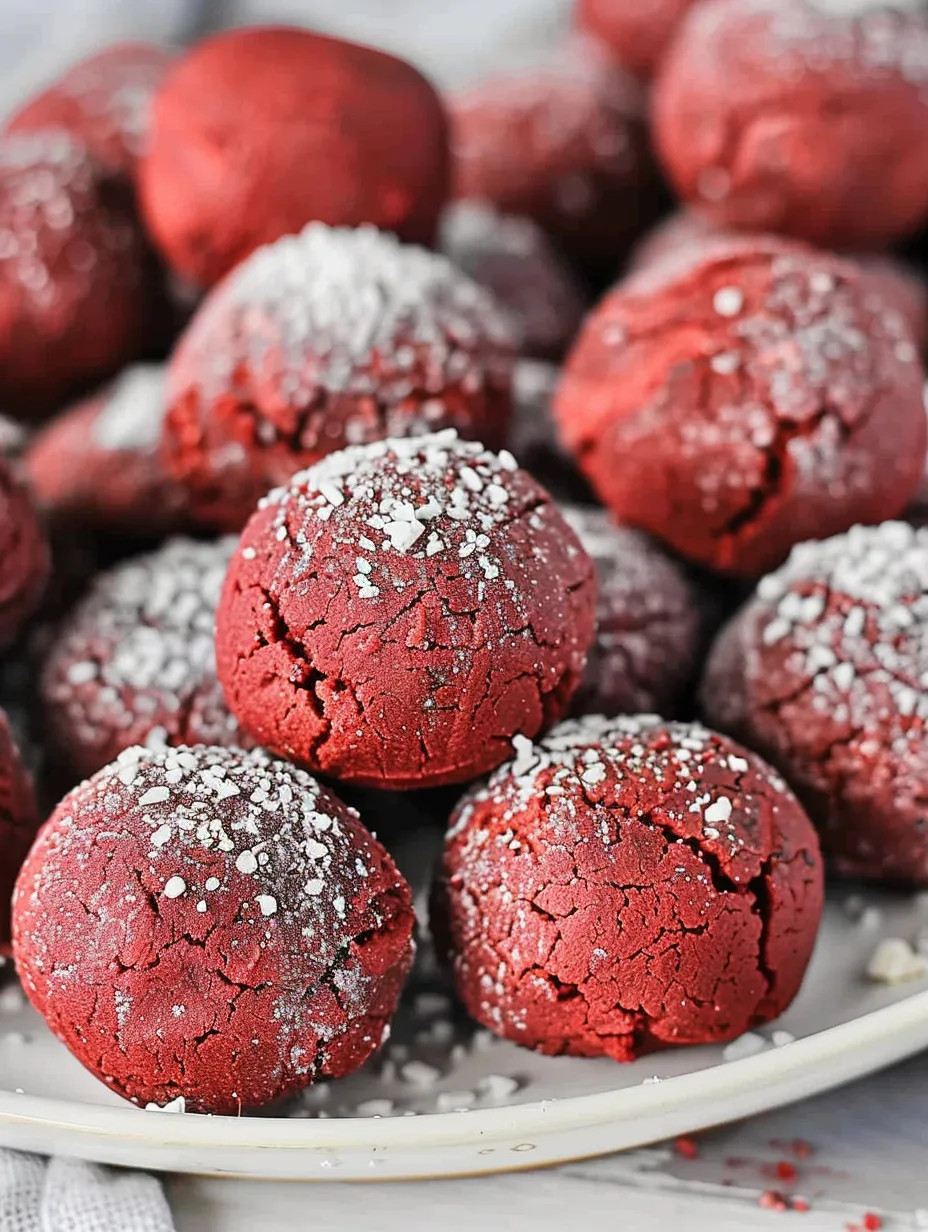
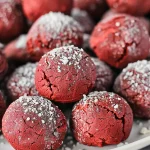
No Bake Red Velvet Cake Balls are an amazing treat that combines the rich flavors of red velvet cake with the convenience of no-bake preparation. These delightful bites are perfect for any occasion, bringing a burst of color and a mouthwatering taste to your dessert table. With their soft, creamy texture and festive appearance, these cake balls are sure to impress your friends and family.
Imagine indulging in a sweet, velvety treat that requires no oven time while still delivering an incredible flavor experience. No Bake Red Velvet Cake Balls make this dream a reality. They are perfect for gatherings, parties, or simply as a sweet reward after a long day. In this article, you will find everything you need to know about making these delicious cake balls, including the reasons you’ll love this recipe, preparation times, a comprehensive ingredient list, and step-by-step instructions.
If you’re ready to dive into the world of no-bake desserts, the No Bake Red Velvet Cake Balls will not only meet your expectations but exceed them. Let’s explore this incredible recipe that promises to be a hit with everyone!
Why You’ll Love This Recipe
No Bake Red Velvet Cake Balls are a delightful fusion of fun and flavor. Here are some reasons why you will fall in love with this recipe:
1. No Baking Required: As the name suggests, this recipe requires no baking. It’s perfect for those who may not have the time or desire to turn on the oven.
2. Quick and Easy: With straightforward steps, you can whip up these cake balls in no time, making them an ideal last-minute treat.
3. Gorgeous Presentation: The vibrant red color and white chocolate coating make these cake balls visually stunning, perfect for parties or celebrations.
4. Rich Flavor: The combination of red velvet cake flavor and cream cheese frosting creates a deliciously rich taste that is hard to resist.
5. Customizable: Feel free to add your favorite toppings or even experiment with different types of chocolate coatings.
6. Perfect for Any Occasion: Whether it’s a birthday party, holiday gathering, or a simple treat for yourself, these cake balls fit the bill perfectly.
These features make No Bake Red Velvet Cake Balls not just a dessert, but a delightful experience that satisfies both your sweet tooth and your love for convenience.
Preparation and Cooking Time
Creating No Bake Red Velvet Cake Balls is a breeze and doesn’t take much time at all. Here’s a breakdown of the time required for this delightful recipe:
– Preparation Time: 30 minutes
– Chilling Time: 1 hour
– Total Time: 1 hour and 30 minutes
These times may vary slightly based on your experience in the kitchen, but this guide should give you a solid estimate for planning your dessert preparation.
Ingredients
– 1 box red velvet cake mix
– 1/2 cup unsalted butter, softened
– 1/2 cup cream cheese frosting
– 1 teaspoon vanilla extract
– 2 cups powdered sugar
– 8 ounces white chocolate, melted
– Sprinkles or additional toppings (optional)
Step-by-Step Instructions
Creating No Bake Red Velvet Cake Balls is straightforward if you follow these simple steps:
1. Prepare the Cake Mix: In a large mixing bowl, combine the red velvet cake mix and softened butter. Mix until well combined and crumbly.
2. Add Frosting: Stir in the cream cheese frosting and vanilla extract until the mixture is smooth and well incorporated.
3. Form the Balls: Using your hands, take small portions of the mixture and roll them into balls, about 1 inch in diameter. Place them on a parchment-lined baking sheet.
4. Chill: Refrigerate the cake balls for about 30 minutes, allowing them to firm up.
5. Melt the Chocolate: While the cake balls are chilling, melt the white chocolate in a microwave-safe bowl. Heat in short bursts, stirring in between until smooth.
6. Coat the Cake Balls: Dip each chilled cake ball into the melted white chocolate, ensuring they are fully coated. Use a fork to lift them out and tap off any excess chocolate.
7. Add Toppings: If desired, sprinkle with additional toppings while the chocolate is still wet.
8. Set: Place the coated cake balls back on the parchment-lined sheet and refrigerate until the chocolate has set, about 30 minutes more.
These steps will guide you in creating the incredible No Bake Red Velvet Cake Balls effortlessly.
How to Serve
To make your No Bake Red Velvet Cake Balls truly shine, consider the following serving suggestions:
1. Presentation: Arrange the cake balls on a decorative platter or cake stand to create an eye-catching display for your guests.
2. Garnish: Enhance their appearance with additional sprinkles, edible glitter, or drizzles of chocolate for a more festive touch.
3. Portion Control: Serve them in small, individual cups or on a tiered tray, allowing guests to easily grab their favorite treat.
4. Pairing: These cake balls pair wonderfully with coffee, tea, or even a glass of dessert wine for an indulgent experience.
5. Storage: Keep any leftovers in an airtight container in the refrigerator for up to one week, ensuring they stay fresh and delicious.
By putting thought into how you serve No Bake Red Velvet Cake Balls, you elevate the entire experience, making it memorable for you and your guests. Enjoy these delectable treats and watch as they become the star of your dessert table!
Additional Tips
– Use Quality Ingredients: For the best flavor, opt for high-quality red velvet cake mix and cream cheese frosting. This will enhance the overall taste of your cake balls.
– Chill Properly: Ensure that the cake balls are thoroughly chilled before dipping them in chocolate. This will help maintain their shape and ensure a smooth coating.
– Experiment with Coatings: While white chocolate is traditional, you can also try dark chocolate or milk chocolate for a different flavor profile.
Recipe Variation
Feel free to switch things up! Here are a few variations to try:
1. Cheesecake Style: Incorporate a layer of cheesecake filling into the cake balls for a creamy surprise.
2. Nutty Crunch: Add finely chopped nuts or crushed cookies to the mixture for added texture and flavor.
3. Flavor Infusion: Mix in a few drops of almond or mint extract to introduce a new flavor dimension to your cake balls.
Freezing and Storage
– Storage: Keep the cake balls in an airtight container in the refrigerator. They will stay fresh for up to one week.
– Freezing: You can freeze the cake balls for up to three months. Ensure they are well-wrapped to avoid freezer burn. When ready to enjoy, let them thaw in the refrigerator.
Special Equipment
You will need a few essential tools to prepare these cake balls successfully:
– Mixing bowls
– Electric mixer or spatula for mixing
– Baking sheet lined with parchment paper
– Microwave-safe bowl for melting chocolate
– Fork for dipping the cake balls
Frequently Asked Questions
Can I use a different cake mix?
Yes, you can substitute the red velvet cake mix with chocolate, vanilla, or any flavor you prefer.
How long do these cake balls last?
When stored properly in an airtight container, they can last up to one week in the refrigerator or three months in the freezer.
Can I make these cake balls without cream cheese frosting?
Absolutely! You can use any frosting of your choice, or even a combination of cream cheese and another flavor for a twist.
What can I use instead of white chocolate for coating?
You can use milk chocolate, dark chocolate, or even colored candy melts for a fun appearance.
Can I add food coloring to the chocolate coating?
Yes, feel free to add gel food coloring to the melted chocolate for a festive touch!
Conclusion
No Bake Red Velvet Cake Balls are a delightful treat that combines ease with impressive flavor. Their rich red velvet flavor, paired with the creamy texture of frosting and the sweetness of chocolate coating, makes them a favorite for any gathering. With the flexibility to customize and serve in various ways, these cake balls are sure to be a hit at your next event. Enjoy making and sharing these delicious bites with friends and family!
No Bake Red Velvet Cake Balls: An Incredible Ultimate Recipe
- Total Time: 30 minutes
Ingredients
– 1 box red velvet cake mix
– 1/2 cup unsalted butter, softened
– 1/2 cup cream cheese frosting
– 1 teaspoon vanilla extract
– 2 cups powdered sugar
– 8 ounces white chocolate, melted
– Sprinkles or additional toppings (optional)
Instructions
Creating No Bake Red Velvet Cake Balls is straightforward if you follow these simple steps:
1. Prepare the Cake Mix: In a large mixing bowl, combine the red velvet cake mix and softened butter. Mix until well combined and crumbly.
2. Add Frosting: Stir in the cream cheese frosting and vanilla extract until the mixture is smooth and well incorporated.
3. Form the Balls: Using your hands, take small portions of the mixture and roll them into balls, about 1 inch in diameter. Place them on a parchment-lined baking sheet.
4. Chill: Refrigerate the cake balls for about 30 minutes, allowing them to firm up.
5. Melt the Chocolate: While the cake balls are chilling, melt the white chocolate in a microwave-safe bowl. Heat in short bursts, stirring in between until smooth.
6. Coat the Cake Balls: Dip each chilled cake ball into the melted white chocolate, ensuring they are fully coated. Use a fork to lift them out and tap off any excess chocolate.
7. Add Toppings: If desired, sprinkle with additional toppings while the chocolate is still wet.
8. Set: Place the coated cake balls back on the parchment-lined sheet and refrigerate until the chocolate has set, about 30 minutes more.
These steps will guide you in creating the incredible No Bake Red Velvet Cake Balls effortlessly.
- Prep Time: 30 minutes
- Cook Time: 0 minutes
Nutrition
- Serving Size: 24 cake balls
- Calories: 120 kcal
- Fat: 6g
- Protein: 1g