
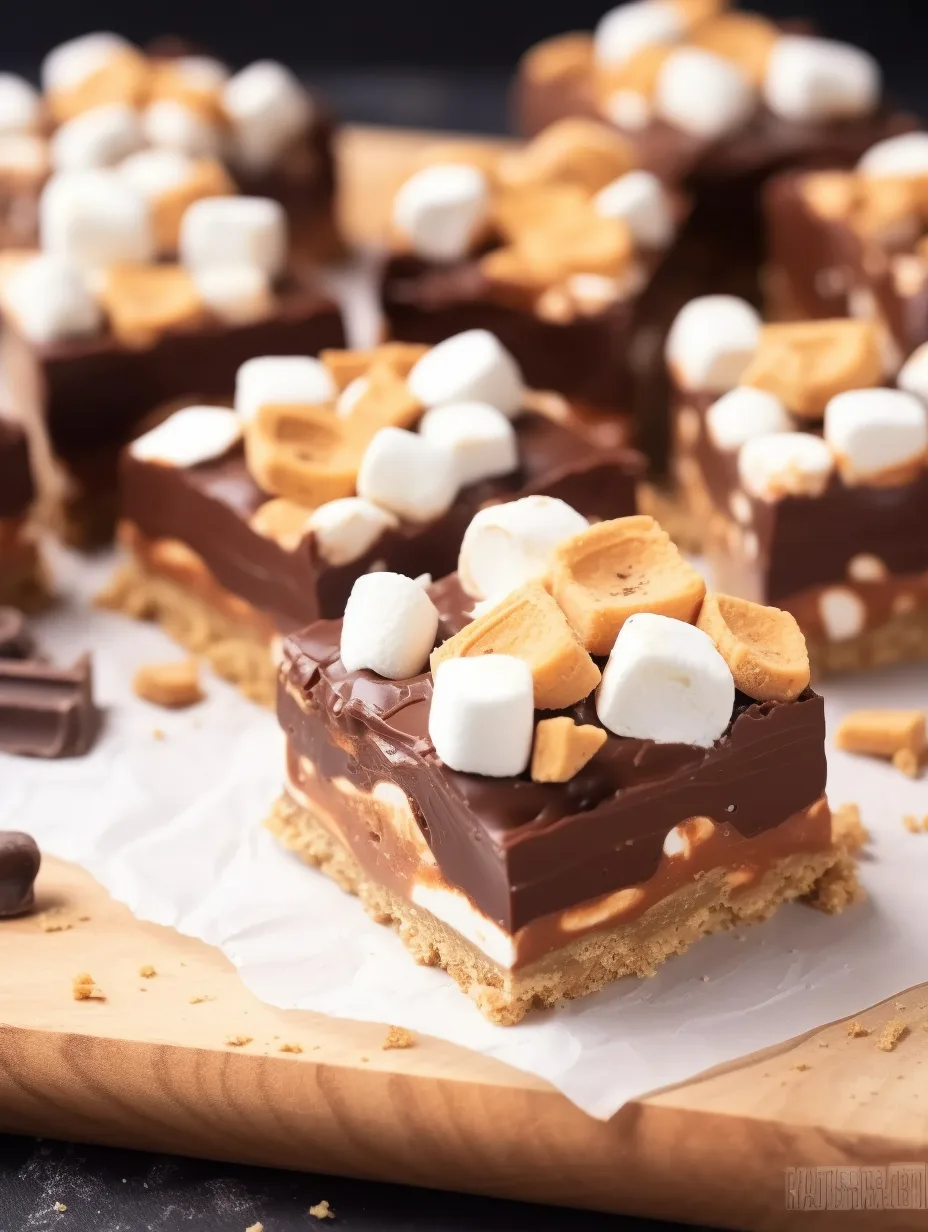
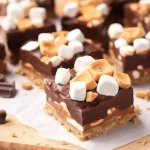
No Bake Peanut Butter S’mores Bars are an amazing treat that combines the classic flavors of peanut butter, chocolate, and marshmallows into one delicious dessert. These bars are not only easy to make but also a crowd-pleaser that everyone will adore. Imagine biting into a rich, creamy layer of peanut butter, combined with chocolate and crunchy graham crackers, topped with fluffy marshmallows. It’s pure indulgence without ever needing to turn on the oven.
Whether you’re having a summer barbecue, a cozy night in, or a festive gathering, these bars are the perfect sweet snack to impress your friends and family. No more worrying about getting messy with traditional s’mores by the campfire; with these No Bake Peanut Butter S’mores Bars, you can enjoy all those delightful flavors without the hassle.
What makes this recipe truly incredible is the simplicity of its preparation. You can easily whip it up in less than an hour, leaving you more time to savor the good vibes and company of your loved ones. The combination of textures—creamy, crunchy, and gooey—results in a satisfaction that is hard to resist. By the end of this article, you will know exactly how to recreate this fantastic dessert in your own kitchen.
Let’s dive deeper into why you’ll absolutely love making No Bake Peanut Butter S’mores Bars at home.
Why You’ll Love This Recipe
No Bake Peanut Butter S’mores Bars combine a variety of beloved flavors and textures, making them an irresistible treat for people of all ages. Here are several reasons why you will fall in love with this recipe:
1. Quick and Easy – The bars come together in no time. There’s no baking, making it a hassle-free cooking experience.
2. Family-Friendly – Kids will adore this recipe and can even help mix the ingredients. It’s a perfect family activity.
3. No Special Equipment Needed – You just need a mixing bowl, a spatula, and a baking dish; no fancy gadgets necessary.
4. Make Ahead – These bars can be prepared in advance and stored in the refrigerator, which is great for planning gatherings.
5. Decadent Flavor – The combination of peanut butter and chocolate is divine, while the marshmallows add a delightful fluffiness.
6. Customizable – If you want to switch things up, you can add nuts, swap the peanut butter for almond butter, or even drizzle caramel on top.
Given these points, it’s easy to see why No Bake Peanut Butter S’mores Bars are a home run in the dessert department!
Preparation and Cooking Time
Getting started on your No Bake Peanut Butter S’mores Bars doesn’t require much time. Here’s a breakdown of the time it will take to prepare this delightful treat:
– Preparation Time: 15 minutes
– Chilling Time: 30-60 minutes
– Total Time: 45-75 minutes
The cooling period is crucial because it allows the bars to set properly, ensuring they hold their shape when cut. Make sure you allocate enough time for chilling them before serving.
Ingredients
– 1 ½ cups graham cracker crumbs
– ½ cup unsweetened cocoa powder
– 1 cup creamy peanut butter
– ½ cup granulated sugar
– ½ cup unsalted butter, melted
– 1 cup mini marshmallows
– 1 cup semi-sweet chocolate chips
– Additional mini marshmallows for topping (optional)
Step-by-Step Instructions
This simple recipe is composed of just a few straightforward steps. Follow these instructions to create your No Bake Peanut Butter S’mores Bars:
1. Prepare Your Dish: Line an 8×8-inch baking dish with parchment paper for easy removal of the bars later.
2. Mix Dry Ingredients: In a large bowl, combine graham cracker crumbs and cocoa powder. Stir well.
3. Combine Wet Ingredients: In another bowl, mix creamy peanut butter, melted butter, and granulated sugar. Stir until completely smooth.
4. Combine Mixtures: Gradually add the dry ingredients to the peanut butter mixture. Stir until the mixture is fully combined and thick.
5. Add Marshmallows: Gently fold in mini marshmallows to create a delightful texture.
6. Transfer to Dish: Pour the mixture into the prepared baking dish. Press down firmly to create an even layer.
7. Melt Chocolate: In a microwave-safe bowl, melt the semi-sweet chocolate chips in 30-second intervals, stirring in between until smooth.
8. Spread Chocolate: Pour the melted chocolate over the mixture in the baking dish, spreading it evenly with a spatula.
9. Add Extra Marshmallows: If desired, sprinkle additional mini marshmallows on top of the melted chocolate for extra flair.
10. Chill: Place the baking dish in the refrigerator for at least 30-60 minutes or until solid.
11. Cut and Serve: Once set, lift the bars out of the dish using the parchment paper, cut into squares, and enjoy!
How to Serve
Presenting your No Bake Peanut Butter S’mores Bars effectively will elevate the experience for everyone. Here’s how to serve them:
1. Plating: Cut the bars into neat squares and arrange them on a decorative platter for an appealing look.
2. Garnish: Drizzle extra chocolate or caramel sauce on top for a gourmet touch.
3. Side Pairings: Consider serving alongside fresh fruit, whipped cream, or a scoop of vanilla ice cream to balance the sweetness.
4. Perfect for Sharing: These bars are ideal for potlucks, picnics, or birthday parties, as they can be easily transported and shared.
5. Serving Suggestions: Pair with milk, coffee, or even a dessert wine for added indulgence.
With these serving tips, your No Bake Peanut Butter S’mores Bars will not only taste incredible but also look amazing on any table. Enjoy the delightful smiles you will create with this fantastic dessert!
Additional Tips
– Use Quality Ingredients: Opt for high-quality peanut butter and chocolate chips to enhance the overall flavor profile of your No Bake Peanut Butter S’mores Bars.
– Let It Chill: Allow sufficient chilling time for the bars to firm adequately. This will help them hold their shape when cutting.
– Decorate Creatively: Consider adding a sprinkle of sea salt on top of the chocolate layer for a delightful contrast in flavors.
– Cut Carefully: Use a sharp knife to cut your bars for cleaner edges. A warm knife can make cutting even easier.
– Make it Fun: Involve kids in the preparation by letting them help with mixing and assembling.
Recipe Variation
Feel free to get creative! Here are several variations to try with your No Bake Peanut Butter S’mores Bars:
1. Nutty Crunch: Fold in some crushed nuts, like walnuts or almonds, into the mixture before chilling for an extra crunch.
2. Flavor Swap: Substitute the peanut butter with almond butter or sunbutter for a different nutty flavor profile.
3. S’mores Style: Introduce a layer of crushed graham crackers on top of the melted chocolate for added texture that resembles traditional s’mores.
4. Chocolate Lovers: Add additional layers of chocolate by mixing in some chunks of chocolate or using chocolate syrup drizzled on top.
5. Fruit Add-ins: Include chopped banana or sliced strawberries to create a fresh fruit contrast with the rich flavors.
Freezing and Storage
To keep your No Bake Peanut Butter S’mores Bars fresh, follow these storage tips:
– Refrigeration: Store the bars in an airtight container in the refrigerator. They should last for up to a week.
– Freezing: For longer storage, you can freeze the bars. Wrap them individually in plastic wrap and place them in a freezer-safe container. They can be frozen for up to three months.
– Thawing: To enjoy, simply remove from the freezer and allow them to thaw in the refrigerator for a few hours before serving.
Special Equipment
No fancy gadgets are needed! However, here are some basic tools that will help in making your No Bake Peanut Butter S’mores Bars:
– Mixing Bowls: A set of various sizes is ideal for combining ingredients.
– Spatula: Perfect for mixing and spreading the chocolate layer smoothly.
– Baking Dish: An 8×8-inch dish lined with parchment paper for easy removal.
– Microwave-Safe Bowl: For melting chocolate easily and safely.
Frequently Asked Questions
Can I use crunchy peanut butter?
Yes! Crunchy peanut butter can add an interesting texture to your bars.
How long should I chill the bars?
Chill for at least 30-60 minutes, but longer chilling helps them set better.
Can I make these bars in advance?
Absolutely! They store well and can be made one or two days ahead of time.
What can I use instead of marshmallows?
Consider using mini marshmallow fluff for a smoother texture, or try using chocolate-covered marshmallows.
Are there any gluten-free options?
You can use gluten-free graham cracker crumbs or substitute with crushed gluten-free cookies.
Conclusion
No Bake Peanut Butter S’mores Bars are an unparalleled treat that combines the joy of classic s’mores with the creaminess of peanut butter. With a straightforward recipe and endless customization options, these bars are bound to become a favorite among friends and family. Whether enjoyed at a gathering or as a sweet snack at home, they provide sheer bliss with every bite. Making these bars is not just a cooking task; it’s an invitation to indulge in a delightful dessert that everyone will love!
No Bake Peanut Butter S’mores Bars: The Incredible Ultimate Recipe
- Total Time: 15 minutes
Ingredients
– 1 ½ cups graham cracker crumbs
– ½ cup unsweetened cocoa powder
– 1 cup creamy peanut butter
– ½ cup granulated sugar
– ½ cup unsalted butter, melted
– 1 cup mini marshmallows
– 1 cup semi-sweet chocolate chips
– Additional mini marshmallows for topping (optional)
Instructions
This simple recipe is composed of just a few straightforward steps. Follow these instructions to create your No Bake Peanut Butter S’mores Bars:
1. Prepare Your Dish: Line an 8×8-inch baking dish with parchment paper for easy removal of the bars later.
2. Mix Dry Ingredients: In a large bowl, combine graham cracker crumbs and cocoa powder. Stir well.
3. Combine Wet Ingredients: In another bowl, mix creamy peanut butter, melted butter, and granulated sugar. Stir until completely smooth.
4. Combine Mixtures: Gradually add the dry ingredients to the peanut butter mixture. Stir until the mixture is fully combined and thick.
5. Add Marshmallows: Gently fold in mini marshmallows to create a delightful texture.
6. Transfer to Dish: Pour the mixture into the prepared baking dish. Press down firmly to create an even layer.
7. Melt Chocolate: In a microwave-safe bowl, melt the semi-sweet chocolate chips in 30-second intervals, stirring in between until smooth.
8. Spread Chocolate: Pour the melted chocolate over the mixture in the baking dish, spreading it evenly with a spatula.
9. Add Extra Marshmallows: If desired, sprinkle additional mini marshmallows on top of the melted chocolate for extra flair.
10. Chill: Place the baking dish in the refrigerator for at least 30-60 minutes or until solid.
11. Cut and Serve: Once set, lift the bars out of the dish using the parchment paper, cut into squares, and enjoy!
- Prep Time: 15 minutes
- Cook Time: 0 minutes
Nutrition
- Serving Size: 16 squares
- Calories: 200 kcal
- Fat: 10g
- Protein: 4g