
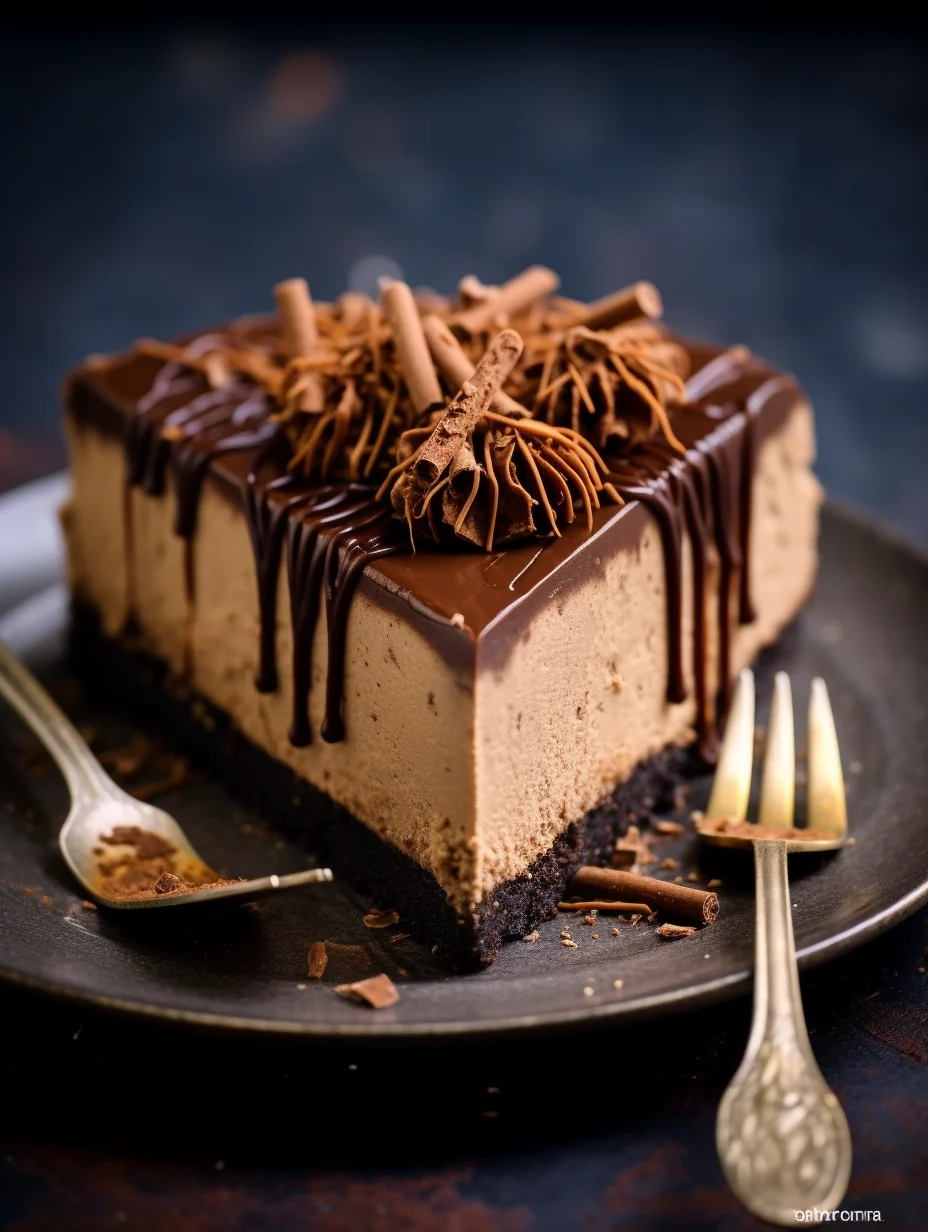
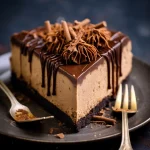
No-Bake Espresso Chocolate Cheesecake is a delightful dessert that will sweep you off your feet. This decadent treat marries the robust flavors of espresso with the rich creaminess of chocolate and cheesecake, creating a dessert experience that is simply unmatched. Perfect for celebrations, dinner parties, or just a cozy night at home, this cheesecake offers a blissful balance of sweetness and depth that is sure to impress.
Imagine sinking your fork into a smooth, velvety slice of cheesecake, the espresso flavor dancing on your palate while the chocolate indulgently coats your taste buds. If you are someone who appreciates the finer things in life, particularly when it comes to dessert, this recipe is a must-try. With its no-bake nature, it simplifies the process while still delivering an amazing outcome. In this article, you’ll discover why this recipe is so beloved, how to prepare it efficiently, and the best ways to serve it to friends and family.
From the moment you start preparing the No-Bake Espresso Chocolate Cheesecake, you will find that it’s an accessible yet utterly impressive dessert. Perfect for both novice cooks and seasoned chefs, it requires minimal ingredients and effort but boasts maximum flavor. Whether it’s a surprise for a loved one or a treat for yourself, this cheesecake promises to elevate any occasion. So, let’s get right into what makes this recipe so extraordinary!
Why You’ll Love This Recipe
The No-Bake Espresso Chocolate Cheesecake combines various elements that make it irresistible. Here are a few reasons that will make you fall in love with this dessert:
1. Rich Flavor Profile: The combination of espresso and chocolate creates an indulgent treat that’s hard to resist, catering to coffee lovers and dessert enthusiasts alike.
2. No Oven Required: This cheesecake doesn’t need baking! This makes it a convenient dessert option, especially during warmer months when turning on the oven can heat up the kitchen.
3. Simple Ingredients: Using straightforward ingredients means you’re likely to have most of them on hand, allowing for spontaneous dessert-making opportunities.
4. Textural Delight: The smooth, creamy filling pairs wonderfully with a crumbly crust, providing a sensory experience that is enjoyable with every bite.
5. Visually Stunning: The final presentation of the cheesecake, especially when topped with cocoa powder or fresh berries, makes it a stunning centerpiece for any dessert table.
6. Perfect for Any Occasion: Be it a birthday, anniversary, or just a film night at home, this cheesecake fits all settings and will be a crowd-pleaser.
Given these delightful features, it’s no wonder that the No-Bake Espresso Chocolate Cheesecake is gaining popularity among dessert lovers everywhere. Each bite of this cheesecake transports you to dessert heaven!
Preparation and Cooking Time
Creating the No-Bake Espresso Chocolate Cheesecake takes minimal time and effort. Here’s a breakdown of what you can expect:
– Preparation Time: 20-30 minutes
– Chilling Time: 4-6 hours (or overnight for best results)
These times can vary slightly based on your kitchen equipment and the chilling space available, but this guide provides a comprehensive idea of the commitment involved in making this delectable treat.
Ingredients
– 1 and 1/2 cups graham cracker crumbs
– 1/2 cup unsweetened cocoa powder
– 1/2 cup unsalted butter, melted
– 1 cup granulated sugar
– 16 ounces cream cheese, softened
– 1/2 cup sour cream
– 1 cup heavy whipping cream
– 1/2 cup espresso or strong coffee, cooled
– 1 teaspoon vanilla extract
– A pinch of salt
– Cocoa powder for dusting (optional)
– Chocolate shavings for garnish (optional)
Step-by-Step Instructions
Making the No-Bake Espresso Chocolate Cheesecake is straightforward. Just follow these simple steps:
1. Prepare the Crust: In a mixing bowl, combine the graham cracker crumbs, cocoa powder, and melted butter. Mix until the mixture resembles wet sand.
2. Form the Crust: Press the crumb mixture evenly into the bottom of a 9-inch springform pan. Use the back of a measuring cup for a flat and compact crust.
3. Chill the Crust: Place the crust in the refrigerator for about 15-20 minutes to firm up while you prepare the filling.
4. Make the Filling: In a large bowl, beat the softened cream cheese and granulated sugar together until smooth and creamy.
5. Add Sour Cream: Mix in the sour cream, white sugar, espresso, vanilla extract, and a pinch of salt. Beat until the mixture is well combined and smooth.
6. Whip the Cream: In a separate bowl, whip the heavy cream until stiff peaks form. This will add a light texture to your filling.
7. Combine Mixtures: Gently fold the whipped cream into the espresso chocolate mixture until no white streaks remain. Be careful not to deflate the whipped cream.
8. Fill the Crust: Pour the filling into the chilled crust, smoothing it out evenly with a spatula.
9. Chill the Cheesecake: Cover the cheesecake and refrigerate for at least 4-6 hours, or overnight if possible. This allows it to set properly.
10. Garnish & Serve: Once fully set, dust the top with cocoa powder and garnish with chocolate shavings if desired. Carefully remove the sides of the springform pan, slice, and serve.
These instructions will guide you in effortlessly creating this incredible dessert that is bound to delight everyone!
How to Serve
To enhance the experience of your No-Bake Espresso Chocolate Cheesecake, consider the following serving suggestions:
1. Chill Before Serving: Ensure that the cheesecake is well-chilled for the best texture.
2. Presentation Matters: Use a cake stand to elevate the cheesecake. A minimalistic approach can create a sophisticated look.
3. Pair with Accompaniments: Consider serving alongside fresh berries, whipped cream, or a scoop of vanilla ice cream to contrast the rich flavors.
4. Coffee Pairing: Given the espresso flavor, serving with a cup of coffee or espresso can create a perfect match.
5. Slice Size: Offer generous slices, keeping in mind that this cheesecake is very rich. Smaller slices encourage guests to enjoy seconds!
By focusing on how you serve your cheesecake, you can create an even more memorable presentation that complements the dessert’s incredible flavors. Enjoy sharing your creation with family and friends!
Additional Tips
– Use Quality Ingredients: For the best flavor, opt for high-quality cream cheese, cocoa powder, and espresso. These ingredients make a notable difference in the final taste.
– Chill for Optimal Flavor: Allow the cheesecake to chill for a longer time (up to overnight) for enhanced flavor integration. The longer it sits, the better the flavors meld together.
– Experiment with Toppings: While cocoa powder and chocolate shavings are classic choices, consider fresh berries, crushed nuts, or even a drizzle of caramel sauce for added flair.
– Check Consistency: If the filling seems too thin after mixing, whip it longer until it reaches a thicker consistency. This ensures a perfect slice when serving.
Recipe Variation
Feel free to customize your No-Bake Espresso Chocolate Cheesecake! Here are some variations to try:
1. Add Liqueur: For an adult twist, incorporate coffee liqueur or Baileys into the filling for an additional depth of flavor.
2. Nut Crust Option: Substitute graham cracker crumbs with crushed nuts (like almonds or hazelnuts) for a gluten-free crust or a different flavor profile.
3. Flavored Cream Cheese: Experiment with flavored cream cheese, such as chocolate or coffee-flavored varieties, to enhance the overall taste.
4. Layering Flavors: Create a layered cheesecake by adding a layer of fruit puree (like raspberry or strawberry) between the crust and the filling for a fruity surprise.
Freezing and Storage
– Storage: Keep the cheesecake in an airtight container in the refrigerator for up to 5 days. Ensure it is covered to prevent it from absorbing odors.
– Freezing: This cheesecake freezes well. Slice it into individual servings, wrap each piece tightly in plastic wrap, and then place them in a freezer-safe container. It will retain quality for up to 3 months.
Special Equipment
To successfully create this No-Bake Espresso Chocolate Cheesecake, you’ll need some essential kitchen tools:
– Mixing Bowls: For combining ingredients efficiently.
– Electric Mixer: To achieve a fluffy whipped cream and perfectly smooth filling.
– Spatula: For spreading the filling evenly in the crust.
– 9-Inch Springform Pan: Essential for easy removal of the cheesecake once set.
– Measuring Cups and Spoons: Accurate measurements ensure the right balance of flavors.
Frequently Asked Questions
Can I use instant coffee instead of espresso?
Yes, you can use instant coffee granules dissolved in water. Just ensure it’s strong for a robust flavour.
Can I substitute cream cheese with a dairy alternative?
Certainly! Use a vegan cream cheese substitute for a dairy-free version, but keep in mind the flavor may vary slightly.
Is it necessary to use sour cream?
While sour cream adds a lovely tanginess and creaminess, you can substitute it with Greek yogurt if desired.
How do I maintain the cheesecake’s shape when slicing?
Warm a knife under hot water, dry it, then slice the cheesecake for clean cuts. It helps in maintaining the shape of each slice.
Can I make individual servings instead of a whole cheesecake?
Absolutely! Use small cups or jars to create individual servings, adjusting the crust and filling proportions accordingly.
Conclusion
The No-Bake Espresso Chocolate Cheesecake is a delightful and indulgent dessert that’s sure to impress your guests and satisfy your sweet tooth. This creamy, coffee-infused treat embodies rich flavors and stunning presentation, making it perfect for any occasion. Plus, its no-bake nature makes it an effortless option for both novice and experienced bakers. Whether enjoyed alone or shared with loved ones, this cheesecake is sure to become a beloved recipe in your dessert repertoire.
No-Bake Espresso Chocolate Cheesecake: An Incredible Ultimate Recipe
- Total Time: 15 minutes
Ingredients
– 1 and 1/2 cups graham cracker crumbs
– 1/2 cup unsweetened cocoa powder
– 1/2 cup unsalted butter, melted
– 1 cup granulated sugar
– 16 ounces cream cheese, softened
– 1/2 cup sour cream
– 1 cup heavy whipping cream
– 1/2 cup espresso or strong coffee, cooled
– 1 teaspoon vanilla extract
– A pinch of salt
– Cocoa powder for dusting (optional)
– Chocolate shavings for garnish (optional)
Instructions
Making the No-Bake Espresso Chocolate Cheesecake is straightforward. Just follow these simple steps:
1. Prepare the Crust: In a mixing bowl, combine the graham cracker crumbs, cocoa powder, and melted butter. Mix until the mixture resembles wet sand.
2. Form the Crust: Press the crumb mixture evenly into the bottom of a 9-inch springform pan. Use the back of a measuring cup for a flat and compact crust.
3. Chill the Crust: Place the crust in the refrigerator for about 15-20 minutes to firm up while you prepare the filling.
4. Make the Filling: In a large bowl, beat the softened cream cheese and granulated sugar together until smooth and creamy.
5. Add Sour Cream: Mix in the sour cream, white sugar, espresso, vanilla extract, and a pinch of salt. Beat until the mixture is well combined and smooth.
6. Whip the Cream: In a separate bowl, whip the heavy cream until stiff peaks form. This will add a light texture to your filling.
7. Combine Mixtures: Gently fold the whipped cream into the espresso chocolate mixture until no white streaks remain. Be careful not to deflate the whipped cream.
8. Fill the Crust: Pour the filling into the chilled crust, smoothing it out evenly with a spatula.
9. Chill the Cheesecake: Cover the cheesecake and refrigerate for at least 4-6 hours, or overnight if possible. This allows it to set properly.
10. Garnish & Serve: Once fully set, dust the top with cocoa powder and garnish with chocolate shavings if desired. Carefully remove the sides of the springform pan, slice, and serve.
These instructions will guide you in effortlessly creating this incredible dessert that is bound to delight everyone!
- Prep Time: 15 minutes
- Cook Time: 0 minutes
Nutrition
- Serving Size: 12
- Calories: 350 kcal
- Fat: 25g
- Protein: 5g