
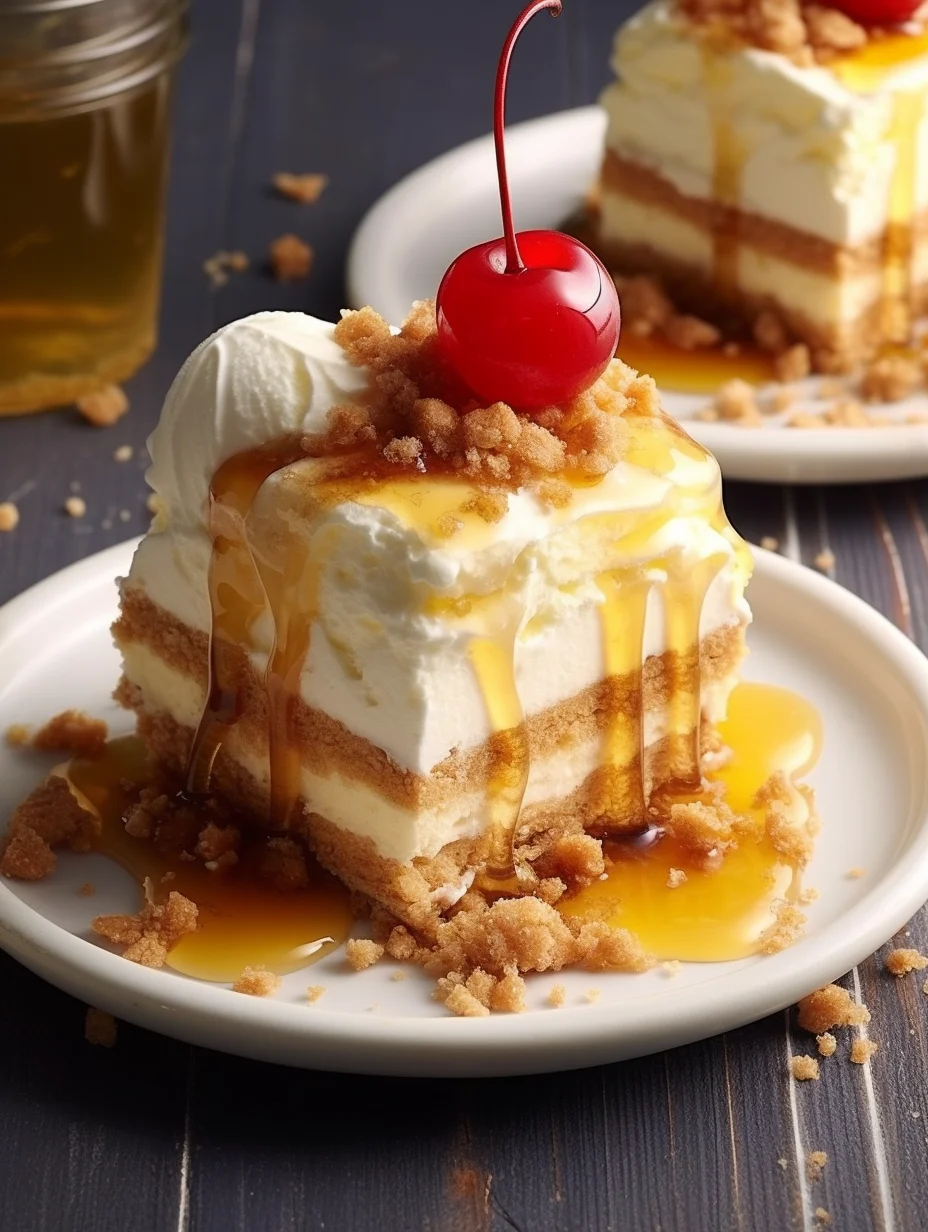
Fried Ice Cream Dessert Bars are a delightful twist on the classic dessert that will transform any ordinary occasion into a memorable celebration. This unique treat brings together creamy, cold ice cream with a crunchy, golden-brown exterior that is simply irresistible. Imagine the first bite, where the cool, velvety ice cream contrasts beautifully with the crispy coating — absolutely amazing!
These dessert bars are perfect for gatherings, parties, or just a relaxing night in. Once you bite into the combination of flavors and textures, your taste buds will thank you. Not only are Fried Ice Cream Dessert Bars fun to make, but they’re also enjoyable to serve. The joy of watching your loved ones savor these treats is truly priceless.
In this article, you’ll discover why these dessert bars are phenomenal, how to prepare them efficiently, and impressive serving suggestions to elevate your dessert game. You’ll learn that with just a handful of ingredients and straightforward steps, you can whip up this indulgent creation at home. Get ready to embark on this mouthwatering adventure!
Why You’ll Love This Recipe
Fried Ice Cream Dessert Bars are much more than a simple dessert. Here are a few reasons that make this recipe a must-try:
1. Unique Flavor: The blend of warm, crunchy coating and cold ice cream creates a flavor explosion in your mouth.
2. Easy to Make: The step-by-step instructions simplify the preparation process, making it beginner-friendly.
3. Customizable: Personalize your dessert bars with different flavors and toppings to suit your taste.
4. Perfect for Any Occasion: Whether it’s a birthday party or a family gathering, these bars are sure to impress everyone.
5. Fun to Serve: Watching your friends or family take that first bite of these delicious bars is an amazing experience.
With all these qualities combined, it’s clear that Fried Ice Cream Dessert Bars will become a favorite in your dessert rotation!
Preparation and Cooking Time
Creating these delightful Fried Ice Cream Dessert Bars is straightforward and doesn’t take too long. Here’s a breakdown of the time needed:
– Preparation Time: 30 minutes
– Freezing Time: 2 hours (or longer for firmer texture)
– Cooking Time: 10 minutes
– Total Time: Approximately 2 hours and 40 minutes (including freezing)
Keep in mind that the freezing time is essential for achieving that perfect texture. So, plan ahead to give them adequate time to chill!
Ingredients
– 4 cups vanilla ice cream (or your favorite flavor)
– 2 cups crushed cornflakes
– ½ cup all-purpose flour
– 1 egg
– 1 teaspoon vanilla extract
– ½ teaspoon ground cinnamon
– ½ cup sugar
– Vegetable oil (for frying)
– Optional toppings: chocolate syrup, caramel sauce, whipped cream, or chopped nuts
Step-by-Step Instructions
Follow these easy steps to create your Fried Ice Cream Dessert Bars:
1. Scoop Ice Cream: Scoop the ice cream into small round balls (about 2 inches in diameter) and place them on a baking sheet lined with parchment paper.
2. Freeze: Place the baking sheet in the freezer for at least 2 hours to allow the ice cream to firm up.
3. Prepare Cornflake Coating: In a large bowl, combine the crushed cornflakes, ground cinnamon, and half of the sugar.
4. Make Egg Mixture: In a separate bowl, beat the egg and add the vanilla extract.
5. Coat Ice Cream Balls: Once the ice cream is solid, dip each ball into the flour, covering completely. Then, dip it into the egg mixture, and finally coat it with the cornflake mixture, pressing gently to ensure a good coating.
6. Freeze Again: Place the coated ice cream balls back in the freezer for an additional 30 minutes before frying.
7. Heat Oil: In a deep skillet or pot, heat about 2 inches of vegetable oil over medium heat until it reaches 350°F (175°C).
8. Fry Ice Cream: Fry the coated ice cream balls, a few at a time, for about 10-15 seconds or until golden brown. Keep a close eye on them to prevent excessive browning.
9. Drain Excess Oil: Use a slotted spoon to remove the fried balls and place them on a plate lined with paper towels to absorb excess oil.
10. Serve: Allow them to cool for a minute or two before serving with your favorite toppings.
With these straightforward instructions, you’ll be well on your way to making these incredible Fried Ice Cream Dessert Bars!
How to Serve
Presentation is key when serving Fried Ice Cream Dessert Bars. Here are some creative serving suggestions to elevate your dessert experience:
1. Plating: Arrange the bars on a colorful or elegant serving platter to catch the eye.
2. Toppings: Drizzle with chocolate syrup or caramel sauce to enhance the flavor and add a visually appealing touch. Consider adding a generous dollop of whipped cream for added richness.
3. Garnish: Sprinkle chopped nuts or colorful sprinkles on top to bring a festive vibe.
4. Pairing: Serve alongside fresh berries or a scoop of fruit sorbet for a refreshing contrast.
5. Serving Size: Keep them small! Cut the bars into bite-sized pieces for easy enjoyment, encouraging guests to take seconds.
By following these tips, you’re not just serving dessert; you’re creating a delightful experience that will leave everyone wanting more!
Additional Tips
– Use High-Quality Ice Cream: For the best results, choose a premium ice cream with natural ingredients and rich flavor.
– Freeze Properly: Make sure ice cream balls are well-frozen. This is vital for achieving a crispy coating when frying.
– Adjust Coating: Experiment with different coatings like crushed nuts or cookies to add variety and texture to your dessert bars.
Recipe Variation
Get creative with these Fried Ice Cream Dessert Bars by trying some of these variations:
1. Chocolate Variation: Use chocolate ice cream instead of vanilla for a rich, chocolatey twist. You could also mix in chocolate chips.
2. Fruit-Flavored Bars: Substitute vanilla ice cream for fruit-flavored options, such as strawberry or mango, to add a refreshing touch.
3. Tropical Delight: Incorporate shredded coconut in the coating for an island-inspired dessert that pairs perfectly with vanilla or coconut ice cream.
Freezing and Storage
– Storage: Store leftover Fried Ice Cream Dessert Bars in an airtight container in the freezer. They will maintain their quality for up to one week.
– Freezing: If prepared but uncooked, you can freeze the coated ice cream bars before frying. Place them on a parchment-lined sheet and wrap tightly. They will last for about 3 months in the freezer.
Special Equipment
To make these Fried Ice Cream Dessert Bars, you will need the following equipment:
– Baking sheet: For freezing the ice cream balls.
– Deep frying pan or pot: To hold the oil for frying.
– Slotted spoon: For lifting the fried bars from the oil.
– Parchment paper: To line the baking sheet for freezing ice cream.
Frequently Asked Questions
Can I use non-dairy ice cream?
Yes, non-dairy or vegan ice cream options work well for this recipe.
What happens if I don’t freeze the ice cream long enough?
If the ice cream isn’t frozen adequately, it may melt too quickly during frying, resulting in a messy texture.
Can I fry these bars in an air fryer?
Yes, you can use an air fryer for a healthier option. Adjust the cooking time according to your air fryer’s instructions.
How do I know when the oil is ready for frying?
To check if oil is ready, you can drop a small piece of bread into the oil. If it sizzles and browns in about 60 seconds, the oil is hot enough.
What are some great topping ideas?
Some delicious options include whipped cream, sprinkles, fresh fruit, or different flavored syrups for extra flavor.
Conclusion
Fried Ice Cream Dessert Bars are a fantastic way to bring excitement to any dessert table. Their irresistible combination of warm, golden coating and cold ice cream creates a treat that can’t be ignored. These bars are perfect not only because they are incredibly delicious but also because they are fun to make with family or friends. Let your creativity shine by customizing the flavors and toppings to create a truly unique dessert experience. Indulging in these dessert bars is sure to become a cherished tradition in your home!
Fried Ice Cream Dessert Bars: An Amazing Ultimate Recipe
- Total Time: 40 minutes
Ingredients
– 4 cups vanilla ice cream (or your favorite flavor)
– 2 cups crushed cornflakes
– ½ cup all-purpose flour
– 1 egg
– 1 teaspoon vanilla extract
– ½ teaspoon ground cinnamon
– ½ cup sugar
– Vegetable oil (for frying)
– Optional toppings: chocolate syrup, caramel sauce, whipped cream, or chopped nuts
Instructions
Follow these easy steps to create your Fried Ice Cream Dessert Bars:
1. Scoop Ice Cream: Scoop the ice cream into small round balls (about 2 inches in diameter) and place them on a baking sheet lined with parchment paper.
2. Freeze: Place the baking sheet in the freezer for at least 2 hours to allow the ice cream to firm up.
3. Prepare Cornflake Coating: In a large bowl, combine the crushed cornflakes, ground cinnamon, and half of the sugar.
4. Make Egg Mixture: In a separate bowl, beat the egg and add the vanilla extract.
5. Coat Ice Cream Balls: Once the ice cream is solid, dip each ball into the flour, covering completely. Then, dip it into the egg mixture, and finally coat it with the cornflake mixture, pressing gently to ensure a good coating.
6. Freeze Again: Place the coated ice cream balls back in the freezer for an additional 30 minutes before frying.
7. Heat Oil: In a deep skillet or pot, heat about 2 inches of vegetable oil over medium heat until it reaches 350°F (175°C).
8. Fry Ice Cream: Fry the coated ice cream balls, a few at a time, for about 10-15 seconds or until golden brown. Keep a close eye on them to prevent excessive browning.
9. Drain Excess Oil: Use a slotted spoon to remove the fried balls and place them on a plate lined with paper towels to absorb excess oil.
10. Serve: Allow them to cool for a minute or two before serving with your favorite toppings.
With these straightforward instructions, you’ll be well on your way to making these incredible Fried Ice Cream Dessert Bars!
- Prep Time: 30 minutes
- Cook Time: 10 minutes
Nutrition
- Serving Size: 8
- Calories: 250 kcal
- Fat: 10g
- Protein: 4g