
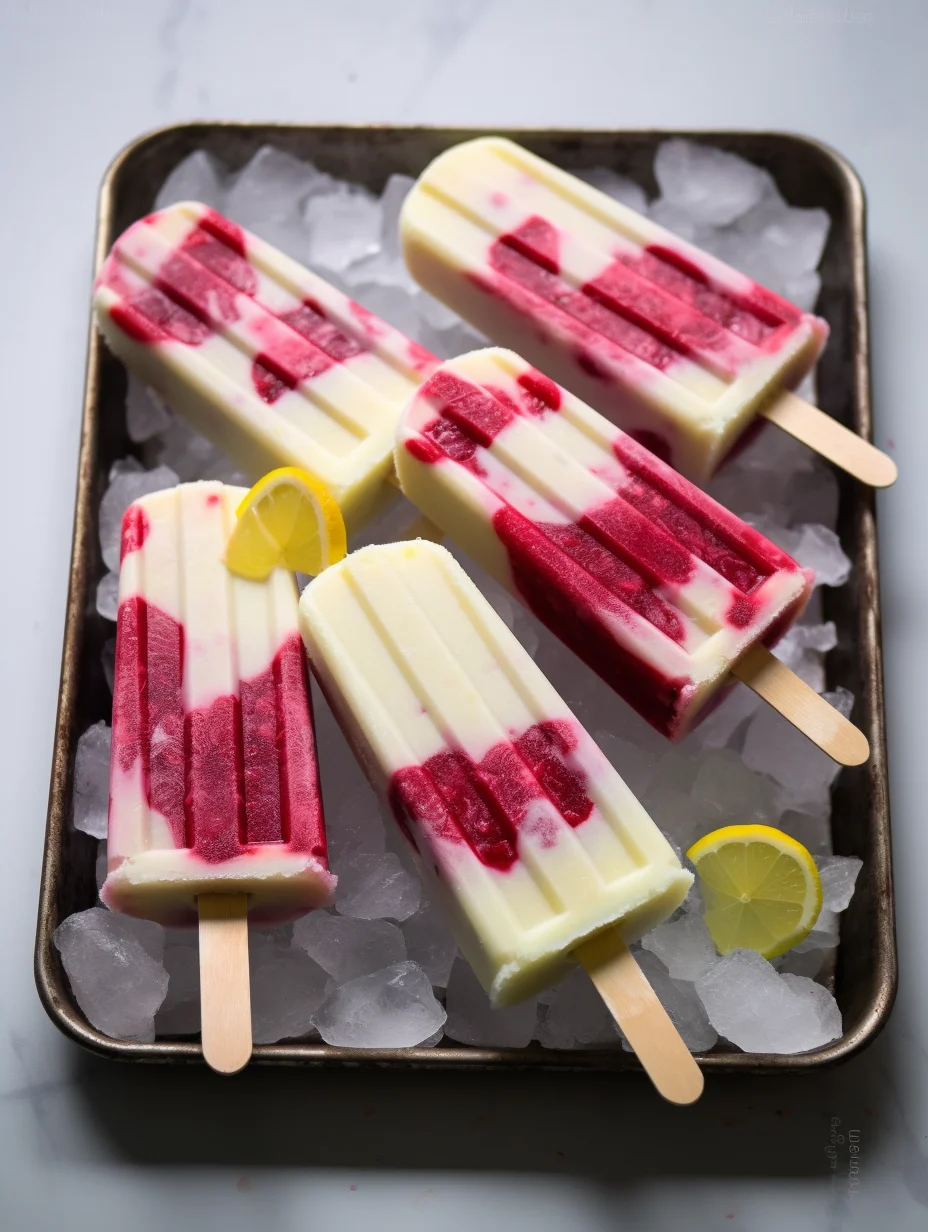
Easy Raspberry-Lemon Greek Yogurt Popsicles Recipe is a refreshing way to cool off during warm weather. Bursting with tangy lemon and sweet berries, these popsicles combine health and indulgence in each frozen bite. Made with creamy Greek yogurt, this dessert is not only delicious but also packed with protein, making it an excellent treat for everyone. They are perfect for hot summer afternoons, after-school snacks, or as a guilt-free dessert. The vibrant colors and flavors make these popsicles not only delightful to eat but also fun to prepare!
If you’re looking for an effortless, healthy dessert option that your family will love, this raspberry-lemon popsicle recipe is just the ticket. The combination of fresh raspberries and zingy lemon brings about a tantalizing tartness that contrasts perfectly with the creamy yogurt. In addition, these popsicles are quick to make and require minimal ingredients. You’ll find them a wonderful addition to your summer repertoire, and they’re sure to impress your friends and family.
Let’s dive deeper into why this Easy Raspberry-Lemon Greek Yogurt Popsicles Recipe should be on your list, how to make it, and tips for serving it best!
Why You’ll Love This Recipe
There are several reasons to love this Easy Raspberry-Lemon Greek Yogurt Popsicles Recipe. Here’s why you’ll fall head over heels:
1. Health Benefits: Greek yogurt is rich in protein and probiotics, making these popsicles a nutritious choice while still being a tasty dessert.
2. Quick and Easy: With only a few simple steps, you can whip up a batch in no time. Perfect for busy days!
3. No Added Sugars: This recipe allows the natural sweetness of fruit to shine through without the need for added sugars or syrups.
4. Perfect for Kids: The bright colors and fruity flavors make these popsicles appealing to children, encouraging them to enjoy healthy treats.
5. Versatile Ingredients: You can easily modify the flavor by substituting other fruits or adding sweeteners of your choice.
6. Great for Meal Prep: Make a large batch and store them in the freezer for quick access whenever a sweet craving strikes.
With these benefits, it’s easy to see why this popsicle recipe is a must-try for anyone looking to enjoy a delightful summer treat!
Preparation and Cooking Time
To make these Easy Raspberry-Lemon Greek Yogurt Popsicles, the total time involved is minimal, allowing you to enjoy them in no time. Here’s a quick breakdown:
– Preparation Time: 10 minutes
– Freezing Time: 4-6 hours (or overnight for best results)
Just a little bit of preparation will reward you with delicious popsicles that are ideal for hot weather!
Ingredients
– 2 cups fresh raspberries
– 1 cup plain Greek yogurt
– 1/2 cup freshly squeezed lemon juice
– 1/4 cup honey or maple syrup (adjustable based on sweetness preference)
– 1 teaspoon vanilla extract
– Optional: Fresh mint leaves for garnish
Step-by-Step Instructions
Creating the Easy Raspberry-Lemon Greek Yogurt Popsicles is a straightforward process. Follow these steps for delicious results:
1. Blend Raspberries: Place the fresh raspberries in a blender and blend until smooth. You can strain the mixture if you prefer a smoother texture.
2. Mix Yogurt Mixture: In a separate bowl, combine the Greek yogurt, lemon juice, honey or maple syrup, and vanilla extract. Stir well until all ingredients are fully incorporated.
3. Layer Ingredients: In popsicle molds, start by adding a layer of the raspberry puree. Follow it with a layer of the yogurt mixture. Alternate layers until the molds are nearly full, finishing with the yogurt mixture on top.
4. Insert Sticks: Place the popsicle sticks into the molds, ensuring they are centered.
5. Freeze: Cover the molds with a lid or plastic wrap and freeze for 4-6 hours or until completely solid. For the best results, freeze them overnight.
After the freezing time is complete, you’ll have a batch of deliciously creamy and fruity popsicles ready to enjoy!
How to Serve
Serving your Easy Raspberry-Lemon Greek Yogurt Popsicles can be as creative as you like. Here are some ideas to elevate your presentation:
1. Serve with Fresh Berries: Pair the popsicles with a handful of fresh raspberries or slices of lemon for an appealing and colorful plate.
2. Garnish: Consider adding a sprig of fresh mint on the side to enhance the flavor and add a pop of green to the presentation.
3. Drizzle of Honey: For an added touch of sweetness, a light drizzle of honey or a sprinkle of crushed nuts on top can make your popsicles even more enjoyable.
4. Elegant Display: Arrange the popsicles on a beautiful platter or in a tall glass filled with ice for a fresh and summery display at parties or gatherings.
5. Embedded Fruits: Before freezing, you can add small pieces of fruit into the yogurt or raspberry layers for an unexpected surprise.
These tips will not only make your Easy Raspberry-Lemon Greek Yogurt Popsicles visually appealing but also enhance the overall experience of enjoying this delightful treat.
Additional Tips
– Choose Fresh Raspberries: For the best flavor and texture, opt for ripe and fresh raspberries. They will add a vibrant taste to your popsicles.
– Experiment with Sweetness: Depending on the tartness of your raspberries, you may want to adjust the amount of honey or maple syrup to suit your taste buds.
– Taste Test the Mixture: Before freezing, use a small spoon to taste the yogurt mixture. This will allow you to adjust the sweetness or tartness as desired.
– Make it a Fun Activity: Invite kids to help in the kitchen! Let them layer the fruit and yogurt for a fun family activity.
– Avoid Freezer Burn: Ensure that your popsicle molds are tightly sealed or covered with plastic wrap to prevent freezer burn, preserving the popsicles’ flavor and texture.
Recipe Variation
Feel free to get creative with your Easy Raspberry-Lemon Greek Yogurt Popsicles! Here are some delicious variations:
1. Mixed Berry Delight: Substitute raspberries with a mix of strawberries, blueberries, and blackberries for an explosion of berry flavors.
2. Citrus Twist: Add a splash of orange juice to the yogurt mixture for an extra citrus kick and a fun color.
3. Coconut Dream: Incorporate shredded coconut into the yogurt mixture for a tropical flair that complements the raspberries and lemon.
4. Chocolate Drizzle: After freezing, dip your popsicles in melted dark chocolate for a decadent treat.
5. Creamy Banana Layer: Blend a ripe banana into the yogurt mixture for added creaminess and natural sweetness.
Freezing and Storage
– Storage: If you’re making a large batch, store your popsicles in an airtight container in the freezer. They will stay fresh for about 3 months.
– Removal: To easily remove the popsicles, run warm water over the outside of the molds for a few seconds. This will help release them without breaking.
– Keep Them Covered: Always cover unused molds with a lid or plastic wrap to protect them from freezer odors.
Special Equipment
You will need a few essential tools to make these delightful popsicles:
– Blender: A standard countertop blender will do the trick for making the raspberry puree.
– Popsicle Molds: Opt for silicone molds for easier removal, or any traditional popsicle molds you have on hand.
– Popsicle Sticks: Make sure to have sturdy sticks that will hold up during freezing.
– Mixing Bowls: Use these for blending the yogurt mixture separately.
Frequently Asked Questions
Can I use frozen raspberries instead of fresh?
Yes, frozen raspberries can work as well! Just let them thaw slightly before blending to make them easier to puree.
How can I prevent the popsicles from sticking to the molds?
Ensure that the molds are adequately coated with a thin layer of cooking spray or warm them slightly before trying to remove the popsicles.
Can I make these popsicles dairy-free?
Absolutely! You can replace Greek yogurt with dairy-free yogurt, such as coconut or almond yogurt, for a vegan option.
What can I use instead of honey/maple syrup?
If you’re seeking an alternative sweetener, consider using agave syrup or even a stevia blend, adjusting to taste.
How long do the popsicles take to freeze?
Typically, they need at least 4-6 hours to freeze completely, but for optimal results, freezing them overnight is recommended.
Conclusion
The Easy Raspberry-Lemon Greek Yogurt Popsicles Recipe is the perfect way to stay cool during hot summer days while enjoying a nutritious treat. Not only are these popsicles easy to make, but their delightful combination of tangy lemon and sweet raspberry flavors will leave you wanting more. These popsicles are healthy, versatile, and fun to create, making them an ideal dessert for kids and adults alike. Whether you enjoy them by the poolside or as an after-school snack, these popsicles are sure to bring a smile to everyone’s face!

Easy Raspberry-Lemon Greek Yogurt Popsicles Recipe: An Incredible 5-Step Guide
- Total Time: 17 minute
Ingredients
– 2 cups fresh raspberries
– 1 cup plain Greek yogurt
– 1/2 cup freshly squeezed lemon juice
– 1/4 cup honey or maple syrup (adjustable based on sweetness preference)
– 1 teaspoon vanilla extract
– Optional: Fresh mint leaves for garnish
Instructions
Creating the Easy Raspberry-Lemon Greek Yogurt Popsicles is a straightforward process. Follow these steps for delicious results:
1. Blend Raspberries: Place the fresh raspberries in a blender and blend until smooth. You can strain the mixture if you prefer a smoother texture.
2. Mix Yogurt Mixture: In a separate bowl, combine the Greek yogurt, lemon juice, honey or maple syrup, and vanilla extract. Stir well until all ingredients are fully incorporated.
3. Layer Ingredients: In popsicle molds, start by adding a layer of the raspberry puree. Follow it with a layer of the yogurt mixture. Alternate layers until the molds are nearly full, finishing with the yogurt mixture on top.
4. Insert Sticks: Place the popsicle sticks into the molds, ensuring they are centered.
5. Freeze: Cover the molds with a lid or plastic wrap and freeze for 4-6 hours or until completely solid. For the best results, freeze them overnight.
After the freezing time is complete, you’ll have a batch of deliciously creamy and fruity popsicles ready to enjoy!
- Prep Time: 15 minutes
- Cook Time: Total Time: 4-6 hours (freezing time)
Nutrition
- Serving Size: 6 popsicles
- Calories: 75 kcal (per popsicle)
- Fat: 1g
- Protein: 3g