
Drumstick Frozen Dessert is a delightful way to cool off during hot days or simply indulge in a sweet treat. This iconic dessert, with its perfect combination of creamy ice cream and crunchy cone, has long been a favorite among dessert lovers. The exciting twist of chocolate coating and a nutty finish makes it an irresistible option. If you’ve ever been captivated by the charm of a Drumstick, you know how it instantly brings joy to any occasion.
Imagine the first time you unwrap one of these delightful treats. The chocolate shell cracks open as you take a bite, revealing the smooth ice cream within. Each layer offers a new texture and taste, from the creamy interior to the satisfying crunch of the cone. It’s not just a dessert; it’s a joyful experience that many cherish from childhood to adulthood.
In this guide, we’ll explore why you’ll love making Drumstick Frozen Dessert at home, how to prepare and cook it, and tips for serving it to friends and family. Whether you’re a seasoned chef or a novice in the kitchen, this incredible recipe will have everyone begging for more. Let’s dive into what makes this classic dessert so special!
Why You’ll Love This Recipe
Drumstick Frozen Dessert is loved for a variety of reasons that go beyond its taste. Here are some compelling points that make this dessert a must-try:
1. Easy to Make – With straightforward steps and readily available ingredients, creating Drumstick Frozen Dessert is simpler than you think.
2. Customizable Flavors – You can tailor the flavors of ice cream and toppings to suit your preferences, ensuring each cone is unique.
3. Fun for All Ages – This dessert appeals to both kids and adults. It’s a delightful treat that evokes nostalgia while still feeling fresh and exciting.
4. Ideal for Gatherings – Drumstick Frozen Dessert can be a hit at parties, picnics, and family gatherings, bringing people together.
5. Make-Ahead Solution – Prepare them in advance, and simply store them in your freezer for instant desserts when cravings strike.
6. Delicious Crunch – The combination of a crunchy cone and smooth ice cream creates a satisfying contrast that keeps you coming back for more.
With these fantastic aspects in mind, it’s clear why everyone loves Drumstick Frozen Dessert. Each bite is a celebration of flavors and textures!
Preparation and Cooking Time
Preparing Drumstick Frozen Dessert is quick and easy, making it a perfect option for any time. Here’s a breakdown of the time you’ll need:
– Preparation Time: 20 minutes
– Freezing Time: 4 hours (or until solid)
– Total Time: 4 hours and 20 minutes
Keep in mind that while the preparation is relatively short, the freezing time is crucial for ensuring that your dessert sets properly. You’ll want to plan ahead, so they are ready to serve at the perfect moment.
Ingredients
– 4 cups of ice cream (your choice of flavor)
– 8 sugar cones
– 1 cup of chocolate chips (for the coating)
– 1 tablespoon of coconut oil (to thin out the chocolate)
– ½ cup of chopped nuts (optional, for topping)
– Whipped cream (for serving, optional)
– Sprinkles (for garnish, optional)
Step-by-Step Instructions
To create Drumstick Frozen Dessert, follow these simple steps:
1. Prepare the Ice Cream: Allow the ice cream to soften at room temperature for about 10 minutes. This makes it easier to scoop.
2. Scoop Ice Cream into Cones: Using a large ice cream scoop, fill each sugar cone with ice cream, packing it firmly but leaving some space at the top.
3. Freeze the Cones: Place the filled cones upright in a cup or muffin tin and freeze for about 2 hours or until firm.
4. Melt the Chocolate: In a microwave-safe bowl, combine chocolate chips and coconut oil. Microwave in short bursts, stirring in between, until melted and smooth.
5. Dip Ice Cream Cones: Once the ice cream is firm, remove the cones from the freezer. Dip each cone into the melted chocolate, allowing it to coat the ice cream and cone. You can use a spoon to help if needed.
6. Add Nuts (if desired): Immediately after dipping, sprinkle chopped nuts onto the chocolate while it’s still wet.
7. Return to Freezer: Place the dipped cones back in the freezer for at least 2 more hours to allow the chocolate to harden completely.
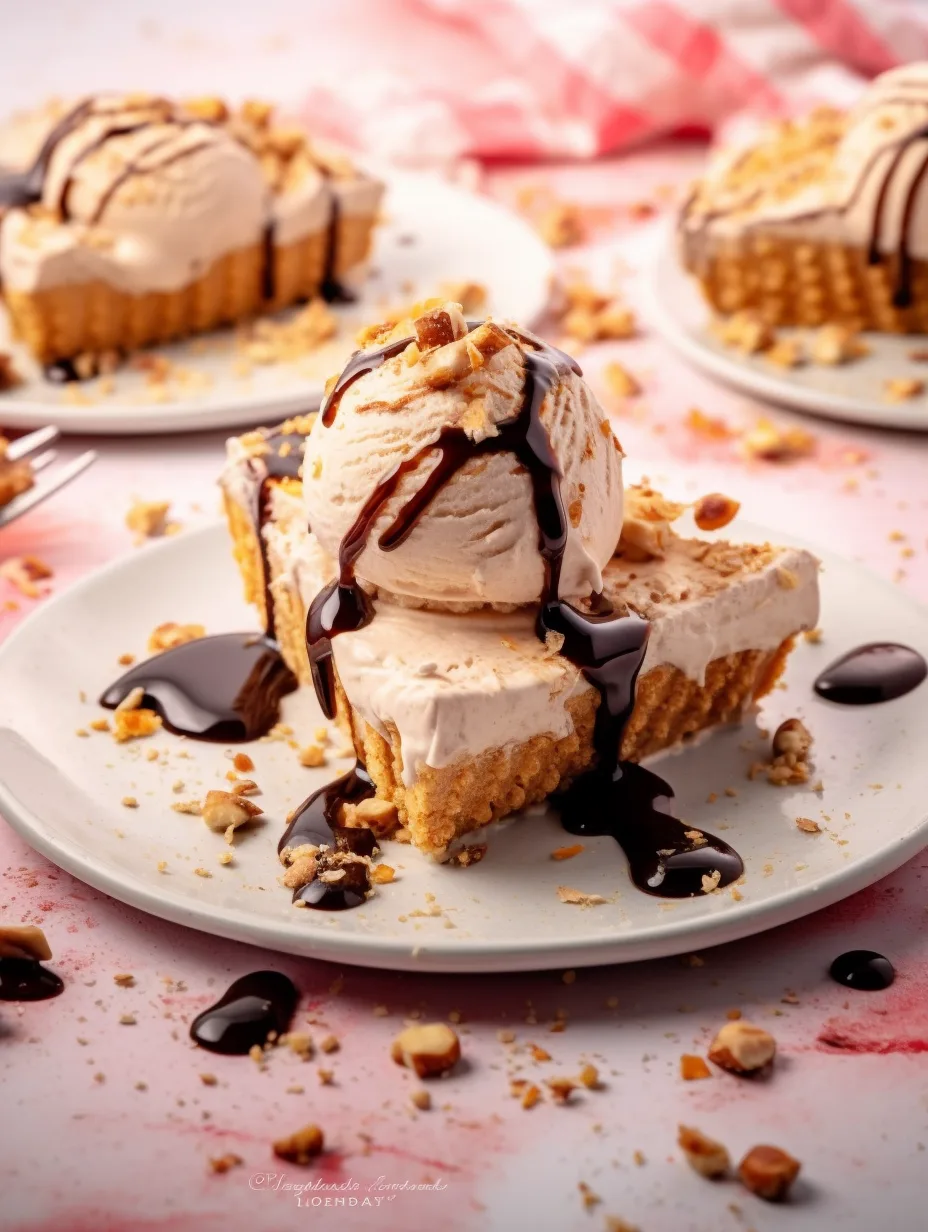
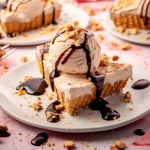
8. Serve: Once the chocolate is set, you can serve the Drumstick Frozen Desserts as they are or add whipped cream and sprinkles for an extra touch.
These steps ensure that your Drumstick Frozen Dessert turns out perfectly every time!
How to Serve
When it’s time to serve your Drumstick Frozen Dessert, consider these tips to make the experience memorable:
1. Presentation: Arrange the cones on a decorative platter. This makes for an appealing display that will entice your guests.
2. Garnishes: Add whipped cream on top of each cone and sprinkle with colorful sprinkles or crushed nuts for an extra pop of color and flavor.
3. Temperature Awareness: Since these desserts are frozen, serving them right after removing them from the freezer ensures they’ll maintain their shape and not melt too quickly.
4. Serving Suggestions: Pair the cones with fresh fruit or chocolate sauce on the side for an enhanced dessert experience.
5. Personal Touch: Encourage guests to customize their cones at a dessert bar with various toppings like chocolate syrup, caramel, or additional nuts.
By taking these steps, you can ensure that your Drumstick Frozen Desserts not only taste incredible but also look fantastic when presented to family and friends. The joy they’ll bring will make any gathering unforgettable!
Additional Tips
– Use High-Quality Ice Cream: For the best flavor, choose a premium ice cream brand. They often contain higher milk content and fewer artificial ingredients.
– Experiment with Cone Types: While sugar cones are traditional, try waffle cones or even pretzel cones for a different taste.
– Serve Immediately: Drumstick Frozen Deserts are best enjoyed fresh, so serve them shortly after taking them out of the freezer to maintain their texture.
– Add a Layer of Sauce: Before you freeze the filled cones, consider adding a layer of fudge or caramel sauce in the cone for an extra flavor boost.
– Decorate the Chocolate: Before the chocolate sets, sprinkle the tops with crushed cookies, colorful candies, or coconut flakes for added decoration.
Recipe Variation
Get creative with these delightful variations:
1. Fruit-Infused Dessert: Add small pieces of fruit, like strawberry or banana, in the ice cream before filling the cones for a fruity twist.
2. Different Chocolate Coatings: Instead of plain chocolate, use white chocolate or dark chocolate mixed with flavored extracts like mint or orange.
3. Healthier Option: Swap regular sugar cones for whole grain cones and use lower-calorie ice cream for a lighter version.
4. Vegan Drumsticks: Use dairy-free ice cream and chocolates to create a vegan-friendly version that everyone can enjoy.
5. Ice Cream Sandwiches: Instead of cones, scoop your favorite ice cream between two cookies, dip in chocolate, and then freeze for a unique take.
Freezing and Storage
– Storage: Drumstick Frozen Desserts can be stored in an airtight container in the freezer for up to two weeks. For best results, wrap each cone individually with plastic wrap.
– Thawing: When ready to enjoy, let them sit at room temperature for a few minutes so the chocolate can soften slightly, making it easier to bite into. Avoid leaving them out too long to prevent melting.
Special Equipment
To ensure your Drumstick Frozen Dessert turns out perfectly, you may need the following tools:
– Ice Cream Scooper: A large scoop helps in filling the cones efficiently and evenly.
– Cup or Muffin Tin: This will securely hold the cones upright while they freeze.
– Microwave-Safe Bowl: For melting chocolate without any hassle.
– Spatula: Useful for spreading and helping with the chocolate coating.
– Baking Sheet: If making multiple cones, you can also use this for placing the filled cones before they go into the freezer.
Frequently Asked Questions
How can I prevent the chocolate from cracking?
Let the chocolate cool slightly before dipping the frozen cone. A slower melting method can help create a sturdier coating.
Can I use homemade ice cream for this recipe?
Absolutely! Homemade ice cream adds a personal touch and allows you to control the flavors and ingredients.
Is it possible to double the recipe?
Yes, simply multiply each ingredient by the number of servings you’d like, but make sure you have enough freezer space for the extra cones.
What if I don’t have coconut oil?
You can use vegetable oil or even butter as a substitute for thinning the chocolate, though coconut oil adds a nice flavor.
Can I make these a day ahead?
Yes! They can be made ahead of time and stored in the freezer. Just ensure they are sealed properly to avoid freezer burn.
Conclusion
Drumstick Frozen Dessert is not only a treat; it’s an experience that captures the essence of summer and fun gatherings. By making these at home, you not only control the ingredients but also get to indulge in your favorite flavors. Whether you’re hosting a party or enjoying a quiet evening, this classic dessert will surely impress. So gather your ingredients and get ready to savor every delightful bite!
Drumstick Frozen Dessert: An Incredible Ultimate Treat
- Total Time: 4 hours 15 minutes
Ingredients
– 4 cups of ice cream (your choice of flavor)
– 8 sugar cones
– 1 cup of chocolate chips (for the coating)
– 1 tablespoon of coconut oil (to thin out the chocolate)
– ½ cup of chopped nuts (optional, for topping)
– Whipped cream (for serving, optional)
– Sprinkles (for garnish, optional)
Instructions
To create Drumstick Frozen Dessert, follow these simple steps:
1. Prepare the Ice Cream: Allow the ice cream to soften at room temperature for about 10 minutes. This makes it easier to scoop.
2. Scoop Ice Cream into Cones: Using a large ice cream scoop, fill each sugar cone with ice cream, packing it firmly but leaving some space at the top.
3. Freeze the Cones: Place the filled cones upright in a cup or muffin tin and freeze for about 2 hours or until firm.
4. Melt the Chocolate: In a microwave-safe bowl, combine chocolate chips and coconut oil. Microwave in short bursts, stirring in between, until melted and smooth.
5. Dip Ice Cream Cones: Once the ice cream is firm, remove the cones from the freezer. Dip each cone into the melted chocolate, allowing it to coat the ice cream and cone. You can use a spoon to help if needed.
6. Add Nuts (if desired): Immediately after dipping, sprinkle chopped nuts onto the chocolate while it’s still wet.
7. Return to Freezer: Place the dipped cones back in the freezer for at least 2 more hours to allow the chocolate to harden completely.
8. Serve: Once the chocolate is set, you can serve the Drumstick Frozen Desserts as they are or add whipped cream and sprinkles for an extra touch.
These steps ensure that your Drumstick Frozen Dessert turns out perfectly every time!
- Prep Time: 15 minutes
- Cook Time: 4 hours
Nutrition
- Serving Size: 8
- Calories: 280 kcal
- Fat: 14g
- Protein: 4g