
DIY charcuterie cups are an amazing way to elevate your appetizer game at any gathering. Whether it’s a casual get-together, a holiday party, or a sophisticated wine tasting, charcuterie cups offer not just versatility but also an eye-catching presentation. These portable snack ideas are not only delicious but also customizable to suit any dietary preference, making them incredibly popular among food enthusiasts.
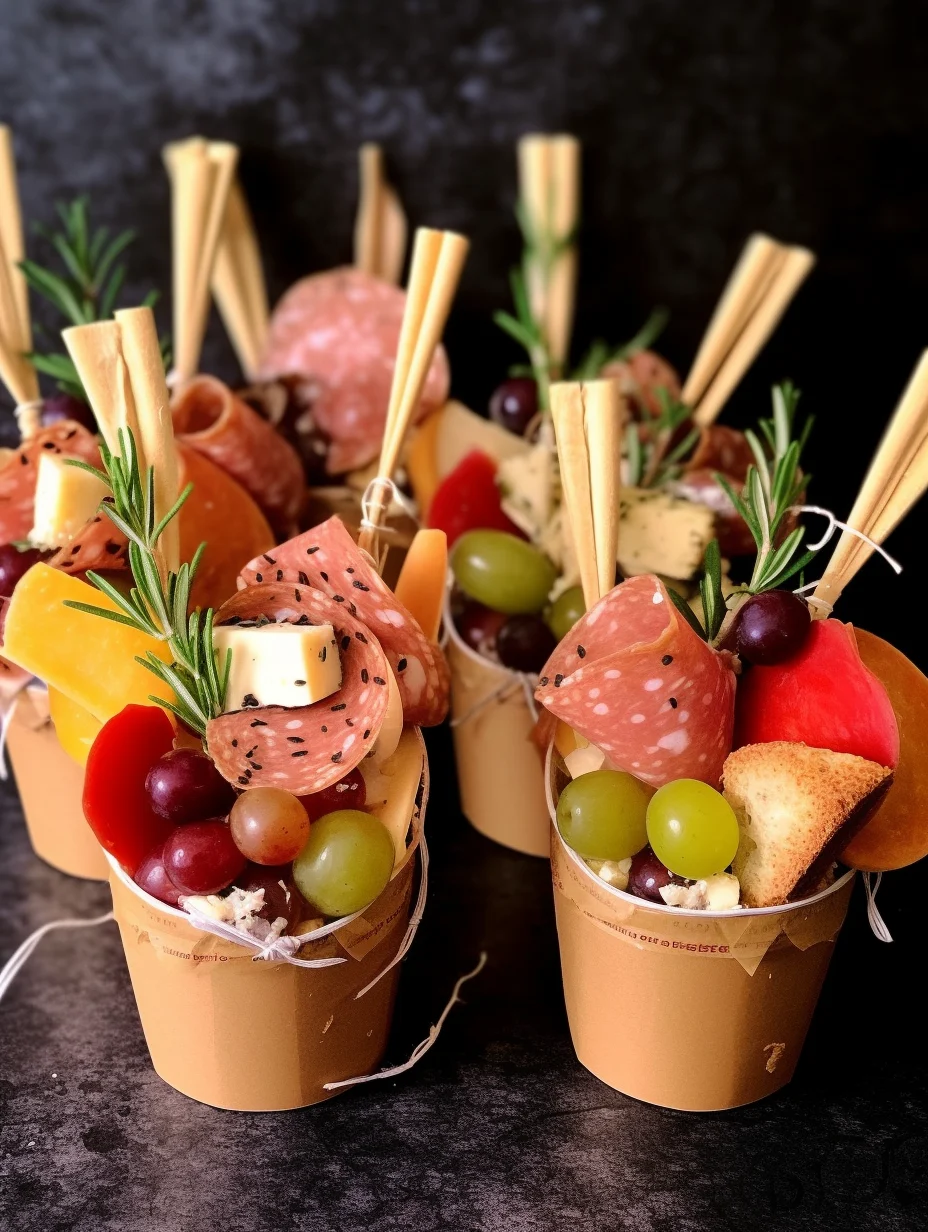
Picture this: beautiful individual servings filled with a medley of cured meats, cheeses, fruits, nuts, and a variety of condiments. Each cup is curated to provide a burst of flavors, textures, and colors that will impress your guests. This ultimate guide will show you not just how to create delightful DIY charcuterie cups but also why they’re a must-try for your next event.
If you’re searching for an easy yet elegant way to serve hors d’oeuvres, look no further. DIY charcuterie cups can cater to any taste or occasion, empowering your creativity while simplifying preparation. These cups not only make it easy for guests to grab a bite but also keep your table neat and organized. Let’s dive into why you’ll love this idea and how to prepare these delightful culinary treats.
Why You’ll Love This Recipe
DIY charcuterie cups offer a multitude of benefits that make them a favorite among hosts. Here are several reasons you’ll love creating these flavorful masterpieces:
1. Customizable Options: You can mix and match ingredients to cater to different tastes and dietary restrictions.
2. Easy to Prepare: Preparing individual cups can be done in advance, simplifying your party planning.
3. Minimal Cleanup: No need for serving platters—each guest has their own cup, which makes for easy serving and clean-up.
4. Visual Appeal: Colorful ingredients arranged in cups create an attractive centerpiece for your table.
5. Interactive Experience: Guests can create their own combinations, allowing for more personal enjoyment of flavors.
6. Perfect for Any Occasion: Whether it’s a birthday party, wedding, or simple family dinner, charcuterie cups can be tailored to fit the mood.
With so many appealing aspects, it’s clear why DIY charcuterie cups are a popular choice among hosts looking to impress.
Preparation and Cooking Time
Preparing DIY charcuterie cups is quick and straightforward. Here’s a breakdown of the time you’ll need:
– Preparation Time: 30 minutes
– Assembly Time: 15 minutes
– Total Time: 45 minutes
This timeframe can vary based on how elaborate you choose to make your cups, but you can easily have them ready in under an hour.
Ingredients
– Cured meats (salami, prosciutto, pepperoni)
– Variety of cheeses (cheddar, gouda, brie)
– Fresh fruits (grapes, apple slices, berries)
– Nuts (almonds, walnuts, pistachios)
– Dried fruits (apricots, cranberries)
– Crackers or breadsticks
– Condiments (honey, mustard, hummus)
– Additionally, cups (disposable or reusable) and toothpicks for serving
Step-by-Step Instructions
Creating these DIY charcuterie cups involves simple steps, making it a fun and interactive process. Here’s how to assemble them:
1. Gather Ingredients: Collect all your ingredients and prep them as needed. Slice cheeses, wash fruits, and arrange them for easy access.
2. Choose Your Cup: Pick a cup size that suits your event. Clear plastic cups are great for visibility, while small mason jars add charm.
3. Layer the Ingredients: Start with a base layer of cured meats. You can fold or stack them to maximize space and make them visually appealing.
4. Add Cheese: Cut your cheese into bite-sized chunks and place them next to the meats. Mixing different textures adds interest.
5. Incorporate Fruits: Fill in gaps with fresh fruits for a burst of flavor and color. Use grapes whole or apple slices to create contrast.
6. Sprinkle in Nuts: Add a handful of nuts for crunch. They can either be in the cup or on the side, depending on how you want to arrange it.
7. Dried Fruits and Crackers: Tuck in a few pieces of dried fruit and some crackers or breadsticks to round out the cup and offer variety.
8. Finishing Touches: Include small containers of condiments on top or side, ensuring they are secured if the cups are transported.
9. Garnish (Optional): Add fresh herbs like rosemary or mint for a pop of color and aroma.
How to Serve
To ensure your DIY charcuterie cups shine at your gathering, here are some serving tips:
1. Display Creatively: Arrange the cups on a tiered stand or a wooden board to create a stunning visual effect.
2. Label Options: Use small signs to label different ingredients, especially if they cater to specific dietary needs (e.g., vegetarian, gluten-free).
3. Pair with Beverages: Offer a selection of drinks that complement the flavors in your cups, such as wine, cocktails, or non-alcoholic options.
4. Portions: Keep the portions manageable. Smaller cups encourage guests to try more than one flavor combination.
5. Encourage Mixing: Let guests know they can mix and match ingredients for a unique bite. This interaction makes for a more enjoyable experience.
By following these simple steps for preparation and service, your DIY charcuterie cups are sure to be a hit at your gathering, providing a delightful culinary experience for all guests!
Additional Tips
– Use Fresh Ingredients: Fresh produce not only enhances flavor but also increases the visual appeal of your charcuterie cups.
– Invest in Quality Cups: Opt for sturdy, transparent cups to showcase your beautifully arranged ingredients.
– Consider Seasonal Themes: Tailor your ingredients to the season; use pumpkin spice for fall or fresh berries in summer.
– Personalize for Guests: If you know your guests’ preferences, customize cups to cater to their tastes, ensuring everyone has something they love.
– Keep It Balanced: Strive for a balance of flavors—pair savory with sweet and crunchy with creamy for a delightful experience.
Recipe Variation
Feel free to mix things up with these tasty variations:
1. Vegan Option: Substitute cured meats with marinated vegetables and use plant-based cheese.
2. Mediterranean Twist: Incorporate olives, feta, and pita chips with hummus for a Mediterranean flair.
3. Sweet Treat: Create dessert charcuterie cups using chocolate, marshmallows, fruit, and candy.
Freezing and Storage
– Storage: Store assembled charcuterie cups in the refrigerator for best flavor and freshness. Enjoy within 48 hours.
– Freezing: Although it’s not advised to freeze assembled cups, you can prepare individual ingredients in advance. Freeze meats, cheeses, and fruits in airtight containers for up to 3 months.
Special Equipment
While you don’t need much, here are a few items to make your preparation easier:
– Clear plastic or glass cups
– Platter or tiered stand for a beautiful presentation
– Sharp knife for cutting cheese and fruits
– Small containers or cups for condiments
– Spoons or toothpicks for serving
Frequently Asked Questions
Can I prepare the cups in advance?
Yes, you can assemble the cups a few hours ahead of time, but it’s best to add fruits just before serving to maintain freshness.
What can I use instead of cured meats?
You can use alternatives like roasted vegetables or smoked tofu as substitutes to cater to vegetarian or vegan guests.
How many cups should I prepare?
Plan for at least 1-2 cups per guest, depending on the overall menu, to ensure everyone has enough to try.
Can these cups be made gluten-free?
Absolutely! Just choose gluten-free crackers or omit them altogether for a gluten-free option.
What if I have nut allergies among my guests?
Simply leave out the nuts or replace them with seeds, such as pumpkin or sunflower seeds.
Conclusion
DIY charcuterie cups are a fantastic addition to any gathering. They are versatile, easy to prepare, and beautifully presented, allowing for a delightful culinary experience tailored to each guest’s tastes. Whether you choose to create traditional flavors or explore new innovative combinations, these cups promise to impress and satisfy. With some creativity and a few quality ingredients, you’ll create an eye-catching, flavorful display that everyone will love!

DIY Charcuterie Cups: An Amazing Ultimate Guide to 7 Unique Ideas
- Total Time: 15 minutes
Ingredients
– Cured meats (salami, prosciutto, pepperoni)
– Variety of cheeses (cheddar, gouda, brie)
– Fresh fruits (grapes, apple slices, berries)
– Nuts (almonds, walnuts, pistachios)
– Dried fruits (apricots, cranberries)
– Crackers or breadsticks
– Condiments (honey, mustard, hummus)
– Additionally, cups (disposable or reusable) and toothpicks for serving
Instructions
Creating these DIY charcuterie cups involves simple steps, making it a fun and interactive process. Here’s how to assemble them:
1. Gather Ingredients: Collect all your ingredients and prep them as needed. Slice cheeses, wash fruits, and arrange them for easy access.
2. Choose Your Cup: Pick a cup size that suits your event. Clear plastic cups are great for visibility, while small mason jars add charm.
3. Layer the Ingredients: Start with a base layer of cured meats. You can fold or stack them to maximize space and make them visually appealing.
4. Add Cheese: Cut your cheese into bite-sized chunks and place them next to the meats. Mixing different textures adds interest.
5. Incorporate Fruits: Fill in gaps with fresh fruits for a burst of flavor and color. Use grapes whole or apple slices to create contrast.
6. Sprinkle in Nuts: Add a handful of nuts for crunch. They can either be in the cup or on the side, depending on how you want to arrange it.
7. Dried Fruits and Crackers: Tuck in a few pieces of dried fruit and some crackers or breadsticks to round out the cup and offer variety.
8. Finishing Touches: Include small containers of condiments on top or side, ensuring they are secured if the cups are transported.
9. Garnish (Optional): Add fresh herbs like rosemary or mint for a pop of color and aroma.
How to Serve
To ensure your DIY charcuterie cups shine at your gathering, here are some serving tips:
1. Display Creatively: Arrange the cups on a tiered stand or a wooden board to create a stunning visual effect.
2. Label Options: Use small signs to label different ingredients, especially if they cater to specific dietary needs (e.g., vegetarian, gluten-free).
3. Pair with Beverages: Offer a selection of drinks that complement the flavors in your cups, such as wine, cocktails, or non-alcoholic options.
4. Portions: Keep the portions manageable. Smaller cups encourage guests to try more than one flavor combination.
5. Encourage Mixing: Let guests know they can mix and match ingredients for a unique bite. This interaction makes for a more enjoyable experience.
By following these simple steps for preparation and service, your DIY charcuterie cups are sure to be a hit at your gathering, providing a delightful culinary experience for all guests!
- Prep Time: 15 minutes
- Cook Time: 0 minutes
Nutrition
- Serving Size: 6 cups
- Calories: 320 kcal
- Fat: 20g
- Protein: 15g