
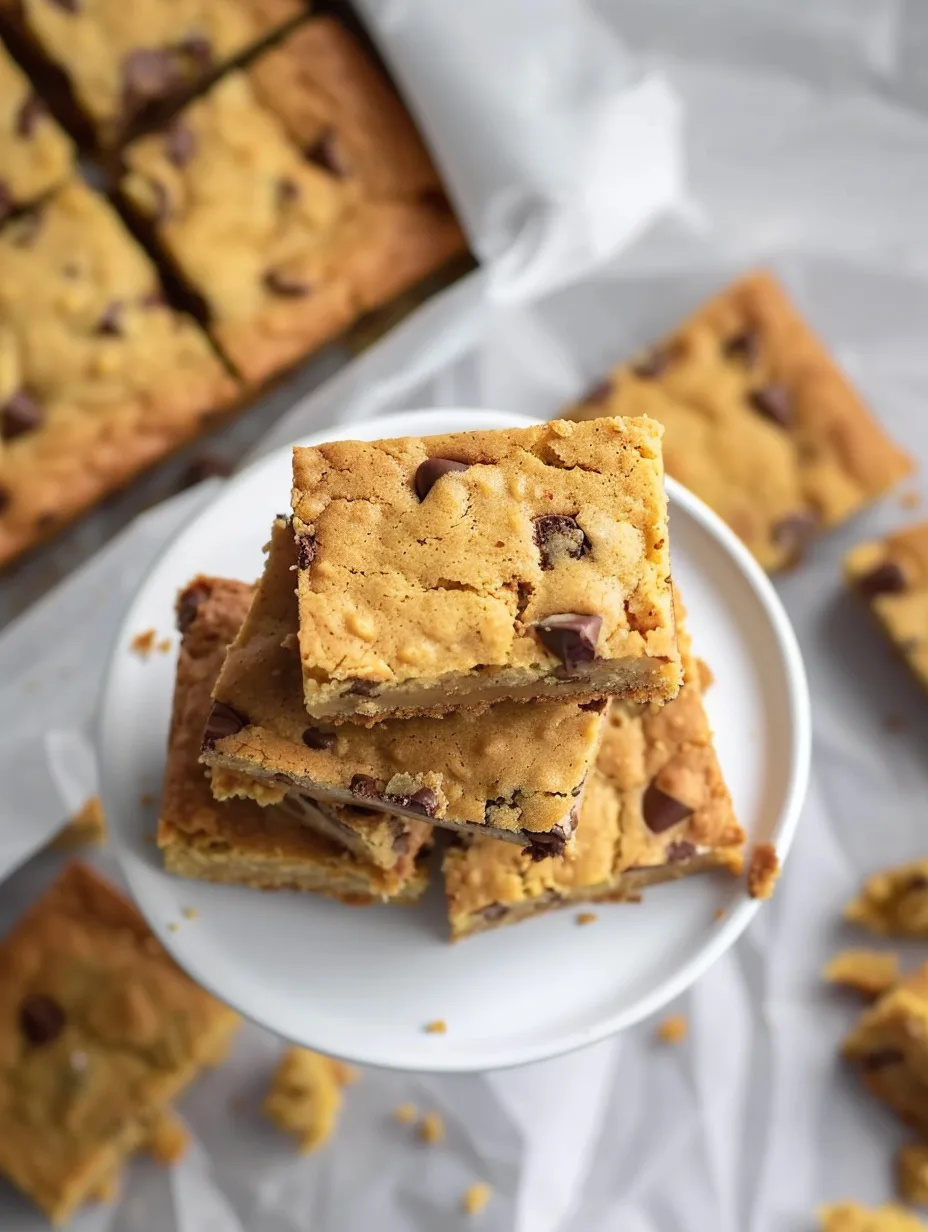
Cutting cookie bars is a delightful way to enjoy the classic taste of cookies in a convenient form. These bars combine the chewy goodness of cookies with the ease of cutting and serving. With a few simple ingredients and minimal prep time, you can create an amazing dessert that will impress your family and friends. The best part? They are versatile and can be customized with your favorite mix-ins, making them perfect for any occasion.
When you take a bite of these cutting cookie bars, you’ll experience the melt-in-your-mouth texture and rich flavors that make them a beloved treat. Whether you’re hosting a gathering or just want to indulge in a sweet snack, these bars deliver on taste and simplicity. In this guide, you’ll discover why this recipe stands out, how to easily prepare it, and tips on serving it to maximize enjoyment.
Get ready to learn about the wonderful world of cutting cookie bars, a treat that will surely become a favorite in your household!
Why You’ll Love This Recipe
Cutting cookie bars have many qualities that make them a must-try dessert. Here are several reasons why you’ll fall in love with this recipe:
1. Quick and Easy: Preparation is straightforward, making these bars perfect for both beginner and experienced bakers.
2. Minimal Ingredients: Most ingredients are pantry staples, so you can whip them up any time you crave something sweet.
3. Customizable: Add your favorite mix-ins such as nuts, chocolate chips, or dried fruits to create a unique flavor profile.
4. Perfect for Sharing: The bars are easy to cut into portions, making them ideal for parties, potlucks, or family gatherings.
5. Deliciously Chewy: The texture is chewy and satisfying, offering a delightful contrast to the crisp edges.
6. Lasting Freshness: These bars stay fresh for several days, making them perfect for meal prep or snacking throughout the week.
With these appealing features, you’ll see why cutting cookie bars are a favorite for many dessert lovers. Each bite is a delightful experience that is sure to bring smiles and satisfaction!
Preparation and Cooking Time
In total, preparing cutting cookie bars will take about 1 hour, including prep and baking time. Here’s a breakdown of the time required:
– Preparation Time: 15 minutes
– Cooking Time: 25–30 minutes
– Cooling Time: 15–20 minutes
These times may vary based on your kitchen equipment and personal experience, but they provide a solid estimate for planning.
Ingredients
– 2 cups all-purpose flour
– 1 cup brown sugar, packed
– 1/2 cup granulated sugar
– 1/2 cup unsalted butter, softened
– 2 large eggs
– 1 teaspoon vanilla extract
– 1/2 teaspoon baking soda
– 1/2 teaspoon salt
– 1 cup chocolate chips (or your favorite mix-ins)
– 1/2 cup nuts, chopped (optional)
Step-by-Step Instructions
Creating cutting cookie bars is a breeze when you follow these simple steps:
1. Preheat Oven: Preheat your oven to 350°F (175°C). Grease or line a 9×13-inch baking pan with parchment paper.
2. Mix Wet Ingredients: In a large bowl, cream together the softened butter, brown sugar, and granulated sugar until smooth. Beat in the eggs one at a time, then add the vanilla extract.
3. Combine Dry Ingredients: In another bowl, whisk together the flour, baking soda, and salt.
4. Combine Mixtures: Gradually add the dry ingredients to the wet mixture, stirring until just combined.
5. Add Mix-ins: Fold in the chocolate chips and nuts, if using. Ensure they are evenly distributed throughout the dough.
6. Spread Batter: Pour the batter into the prepared baking pan, spreading it evenly.
7. Bake: Bake for 25–30 minutes, or until the edges are golden brown and a toothpick inserted in the center comes out clean.
8. Cool: Remove from the oven and let the bars cool in the pan for about 15 minutes. Then, transfer them to a wire rack to cool completely.
9. Cut Bars: Once cooled, cut into squares or rectangles, depending on your preference.
These steps will guide you through creating incredible cutting cookie bars that everyone will love!
How to Serve
When serving cutting cookie bars, consider the following tips for an enjoyable experience:
1. Presentation: Arrange the bars on a colorful platter or cake stand to make them visually appealing.
2. Accompaniments: Serve with a scoop of ice cream or a dollop of whipped cream for added indulgence.
3. Flavor Pairings: Pair with coffee, milk, or a glass of cold almond milk to enhance the flavors.
4. Storage Tips: Store leftover bars in an airtight container at room temperature for up to a week or refrigerate them for longer freshness.
By putting thought into how you serve cutting cookie bars, you elevate the dessert experience, making it even more enjoyable for everyone!
Additional Tips
– Use Fresh Ingredients: For the best taste, ensure your ingredients are fresh, especially the eggs and butter.
– Don’t Overmix: When combining wet and dry ingredients, mix until just combined. Overmixing can lead to tough cookie bars.
– Test for Doneness: The edges should be golden brown, and a toothpick inserted into the center should come out clean or with a few moist crumbs.
– Cool Completely: Allow the cookie bars to cool completely before cutting. This helps them set and makes slicing easier.
Recipe Variation
Experimenting with different flavors and textures can enhance your cutting cookie bars. Here are some fun variations to try:
1. Peanut Butter Swirl: Add dollops of peanut butter to the batter before baking and swirl it in for a delicious twist.
2. Oatmeal Cookie Bars: Replace 1 cup of flour with oats for a heartier version. These bars will have a delightful chewy texture.
3. Brownie Layer: Create a layered dessert by adding a brownie layer beneath the cookie dough for a decadent treat.
4. Seasonal Flavors: Incorporate seasonal ingredients like pumpkin puree in the fall or crushed peppermint candies during the winter holidays.
Freezing and Storage
– Storage: Keep the cutting cookie bars in an airtight container at room temperature for up to one week. This helps retain their chewy texture.
– Freezing: To freeze, cut the bars into portions and wrap each piece individually in plastic wrap. Place them in a freezer-safe bag or container. They can be frozen for up to three months. When ready to enjoy, thaw at room temperature or heat briefly in the microwave.
Special Equipment
To make the process easier, consider using the following tools:
– Mixing Bowls: Use medium to large bowls for mixing ingredients.
– Spatula: A rubber spatula is great for folding in mix-ins without overmixing the batter.
– Baking Pan: A 9×13-inch baking pan is ideal for this recipe, providing enough space for even baking.
– Parchment Paper: Lining the baking pan with parchment paper makes it easier to remove the bars once they are baked.
Frequently Asked Questions
Can I use a different type of flour?
Yes, you can substitute all-purpose flour with whole wheat flour for a healthier option. However, it may change the texture slightly.
What if I don’t have eggs?
You can use flax eggs or unsweetened applesauce as a substitute for eggs. Use 1/4 cup of applesauce for each egg.
Can I add frosting?
Absolutely! These bars are delicious with a drizzle of chocolate or a simple cream cheese frosting on top.
How do I know when they are done baking?
Check for a golden brown edge and a toothpick inserted in the center should come out clean or with a few crumbs.
What can I do if my bars are too dry?
If your bars turn out dry, consider adding a scoop of ice cream or a drizzle of melted chocolate on top when serving.
Conclusion
Cutting cookie bars are a versatile and delicious dessert that can easily become a staple in your kitchen. With their chewy texture and customizable flavors, they are perfect for any occasion. Whether you enjoy them plain, with mix-ins, or as part of a layered dessert, these bars are sure to please everyone. Plus, the easy preparation and minimal ingredients make them accessible for bakers of all skill levels. Get ready to impress your friends and family with this incredible recipe!
Cutting Cookie Bars: An Incredible Ultimate Recipe for Everyone
- Total Time: 35 minute
Ingredients
– 2 cups all-purpose flour
– 1 cup brown sugar, packed
– 1/2 cup granulated sugar
– 1/2 cup unsalted butter, softened
– 2 large eggs
– 1 teaspoon vanilla extract
– 1/2 teaspoon baking soda
– 1/2 teaspoon salt
– 1 cup chocolate chips (or your favorite mix-ins)
– 1/2 cup nuts, chopped (optional)
Instructions
Creating cutting cookie bars is a breeze when you follow these simple steps:
1. Preheat Oven: Preheat your oven to 350°F (175°C). Grease or line a 9×13-inch baking pan with parchment paper.
2. Mix Wet Ingredients: In a large bowl, cream together the softened butter, brown sugar, and granulated sugar until smooth. Beat in the eggs one at a time, then add the vanilla extract.
3. Combine Dry Ingredients: In another bowl, whisk together the flour, baking soda, and salt.
4. Combine Mixtures: Gradually add the dry ingredients to the wet mixture, stirring until just combined.
5. Add Mix-ins: Fold in the chocolate chips and nuts, if using. Ensure they are evenly distributed throughout the dough.
6. Spread Batter: Pour the batter into the prepared baking pan, spreading it evenly.
7. Bake: Bake for 25–30 minutes, or until the edges are golden brown and a toothpick inserted in the center comes out clean.
8. Cool: Remove from the oven and let the bars cool in the pan for about 15 minutes. Then, transfer them to a wire rack to cool completely.
9. Cut Bars: Once cooled, cut into squares or rectangles, depending on your preference.
These steps will guide you through creating incredible cutting cookie bars that everyone will love!
- Prep Time: 15 minutes
- Cook Time: 25–30 minutes
Nutrition
- Serving Size: 12 bars
- Calories: 220 kcal
- Fat: 10g
- Protein: 3g