

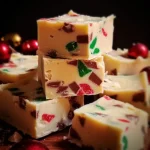
Christmas Fudge is a delightful treat that embodies the spirit of the holiday season. This rich, creamy confection is not only a favorite among families but also an incredible gift that brings joy to friends and loved ones. With its velvety texture and decadent flavors, this fudge captures the essence of Christmas, making it a must-have in your festive dessert lineup. Whether you’re making it for a holiday party, gifting it to neighbors, or just indulging yourself, Christmas Fudge is sure to impress.
The process of making Christmas Fudge is simple and rewarding. Imagine the moment when you take that first bite; the smooth chocolate melting in your mouth creates an experience that is both comforting and nostalgic. This recipe is designed for everyone, from beginners to seasoned bakers, allowing you to create a sweet treat that is sure to become a cherished tradition in your household.
In this guide, we will explore why you’ll love this Christmas Fudge recipe, the preparation and cooking times, the ingredients needed, and step-by-step instructions to ensure your fudge turns out perfect every time. Get ready to make this amazing holiday dessert that will surely become a staple in your festive celebrations!
Why You’ll Love This Recipe
Christmas Fudge is not just any dessert; it’s an experience that brings warmth and joy to any gathering. Here are a few reasons why you’ll fall in love with this recipe:
1. Quick and Easy: This fudge can be made in under an hour, making it perfect for last-minute holiday preparations.
2. Customizable: Feel free to add nuts, dried fruits, or candy canes for a personal touch.
3. Perfect Gift: Packaged beautifully, Christmas Fudge makes a thoughtful gift for friends and family.
4. Crowd-Pleaser: Everyone loves fudge! It’s a hit with both kids and adults alike.
5. Great for Holiday Parties: This treat is ideal for holiday gatherings and is sure to impress your guests.
6. No Baking Required: Simply melt and mix; there’s no need for an oven.
With these highlights, you can see why Christmas Fudge is a beloved holiday classic!
Preparation and Cooking Time
Making Christmas Fudge is a straightforward process that doesn’t take much time. Here’s a breakdown of the time required:
– Preparation Time: 15 minutes
– Cooking Time: 10 minutes
– Setting Time: 2 hours
Overall, you can expect to spend about 2 hours and 25 minutes creating this amazing holiday treat.
Ingredients
– 2 cups semi-sweet chocolate chips
– 1 cup sweetened condensed milk
– 2 tablespoons unsalted butter
– 1 teaspoon vanilla extract
– 1 cup chopped nuts (optional)
– 1 cup crushed candy canes (optional)
– Pinch of salt
Step-by-Step Instructions
Creating delicious Christmas Fudge is a simple process. Just follow these steps:
1. Prepare the Pan: Line an 8-inch square baking dish with parchment paper, leaving some overhang for easy removal.
2. Combine Ingredients: In a medium saucepan, combine the semi-sweet chocolate chips, sweetened condensed milk, unsalted butter, and a pinch of salt.
3. Melt: Over medium heat, stir the mixture continuously until it is smooth and fully melted.
4. Add Vanilla: Remove from heat and stir in the vanilla extract until well combined.
5. Mix in Add-ins: If using nuts or crushed candy canes, fold them into the mixture now.
6. Pour: Pour the fudge mixture into the prepared baking dish, spreading it evenly.
7. Cool: Allow the fudge to cool at room temperature for about 10 minutes, and then refrigerate for 2 hours or until set.
8. Cut: Once set, lift the fudge out of the pan using the parchment overhang and cut it into squares.
9. Store: Store the fudge in an airtight container at room temperature or in the fridge for up to 2 weeks.
Following these steps will help you create the most amazing Christmas Fudge that everyone will love.
How to Serve
When it comes to serving your Christmas Fudge, consider these delightful options:
1. Presentation: Arrange the fudge squares on a festive platter or tiered stand for an attractive display.
2. Gift Packaging: Wrap individual pieces in decorative cellophane or place them in festive tins for gifting.
3. Pair with Drinks: Serve alongside hot cocoa, coffee, or even a glass of milk for a delightful pairing.
4. Garnish: Dust with powdered sugar or drizzle with melted chocolate for an extra special touch.
5. Mix and Match: Serve alongside other holiday treats like cookies or brownies to create a dessert platter.
By paying attention to how you serve the Christmas Fudge, you can enhance the overall experience, making it even more memorable for your guests!
Additional Tips
– Use High-Quality Chocolate: For the best flavor, opt for premium semi-sweet chocolate chips. They will enhance the richness of your fudge.
– Don’t Rush the Cooling: Allow the fudge to cool completely at room temperature before refrigerating. This helps it set properly.
– Experiment with Flavors: Consider adding a pinch of cinnamon or a few drops of peppermint extract for a festive twist.
– Cut with Warm Knife: To achieve clean edges, warm your knife under hot water before slicing the fudge into squares.
– Keep it Airtight: To maintain freshness, store the fudge in an airtight container, especially if you live in a humid area.
Recipe Variation
Get creative with these fun variations to customize your Christmas Fudge:
1. Marshmallow Swirl: Fold in mini marshmallows before pouring into the pan for a delightful chewy texture.
2. Peanut Butter Fudge: Substitute half of the chocolate chips with peanut butter chips for a nutty flavor.
3. Mint Chocolate Fudge: Add crushed peppermint candies and a few drops of mint extract for a refreshing taste.
4. White Chocolate Fudge: Replace semi-sweet chocolate with white chocolate chips for a sweeter, creamier version.
5. Spiced Nut Fudge: Incorporate walnuts or pecans sprinkled with a dash of nutmeg for a holiday-inspired flavor.
Freezing and Storage
– Storage: Keep your Christmas Fudge in an airtight container at room temperature for up to two weeks.
– Refrigeration: If you prefer it chilled, you can store it in the refrigerator, where it will last up to three weeks.
– Freezing: To freeze, cut the fudge into squares and wrap each piece individually in plastic wrap. Place them in a freezer-safe bag or container. They can be frozen for up to three months. To enjoy, simply thaw at room temperature.
Special Equipment
While making Christmas Fudge is straightforward, having the right tools can streamline the process:
– Medium Saucepan: Essential for melting the chocolate and mixing ingredients.
– Rubber Spatula: Useful for scraping down the sides of the pan and ensuring everything is well combined.
– Parchment Paper: Makes it easy to lift the fudge out of the pan for cutting.
– Sharp Knife: For slicing the fudge into neat squares.
– Measuring Cups and Spoons: Accurate measurements are key to achieving the perfect fudge consistency.
Frequently Asked Questions
Can I use milk chocolate instead of semi-sweet?
Yes, you can use milk chocolate, but the fudge will be sweeter. Adjust your sugar levels accordingly.
What if my fudge doesn’t set?
If your fudge is too soft, try placing it back in the refrigerator for a few more hours. You can also reheat it gently and add more chocolate to thicken it.
Can I add other flavors to my fudge?
Absolutely! You can experiment with various extracts, like almond or coconut, to personalize your fudge.
How do I know when my fudge is ready?
The fudge is ready when it’s thick and holds its shape. It should be shiny and smooth after cooling.
Is this recipe suitable for kids to help with?
Yes, this recipe is simple and fun for kids to help with. Just supervise during the melting process to ensure safety.
Conclusion
Christmas Fudge is an exceptional treat that captures the joy of the holiday season. With its rich, creamy texture and customizable flavors, it’s bound to be a hit at any celebration. Whether you’re making it for family gatherings, gifting it to friends, or indulging in a sweet treat yourself, this recipe is sure to impress. Embrace the festive spirit and create memorable moments with this delightful dessert.
Christmas Fudge: An Amazing Ultimate Recipe for the Holidays
- Total Time: 25 minutes
Ingredients
– 2 cups semi-sweet chocolate chips
– 1 cup sweetened condensed milk
– 2 tablespoons unsalted butter
– 1 teaspoon vanilla extract
– 1 cup chopped nuts (optional)
– 1 cup crushed candy canes (optional)
– Pinch of salt
Instructions
Creating delicious Christmas Fudge is a simple process. Just follow these steps:
1. Prepare the Pan: Line an 8-inch square baking dish with parchment paper, leaving some overhang for easy removal.
2. Combine Ingredients: In a medium saucepan, combine the semi-sweet chocolate chips, sweetened condensed milk, unsalted butter, and a pinch of salt.
3. Melt: Over medium heat, stir the mixture continuously until it is smooth and fully melted.
4. Add Vanilla: Remove from heat and stir in the vanilla extract until well combined.
5. Mix in Add-ins: If using nuts or crushed candy canes, fold them into the mixture now.
6. Pour: Pour the fudge mixture into the prepared baking dish, spreading it evenly.
7. Cool: Allow the fudge to cool at room temperature for about 10 minutes, and then refrigerate for 2 hours or until set.
8. Cut: Once set, lift the fudge out of the pan using the parchment overhang and cut it into squares.
9. Store: Store the fudge in an airtight container at room temperature or in the fridge for up to 2 weeks.
Following these steps will help you create the most amazing Christmas Fudge that everyone will love.
- Prep Time: 15 minutes
- Cook Time: 10 minutes
Nutrition
- Serving Size: 16 squares
- Calories: 130 kcal
- Fat: 7g
- Protein: 2g