
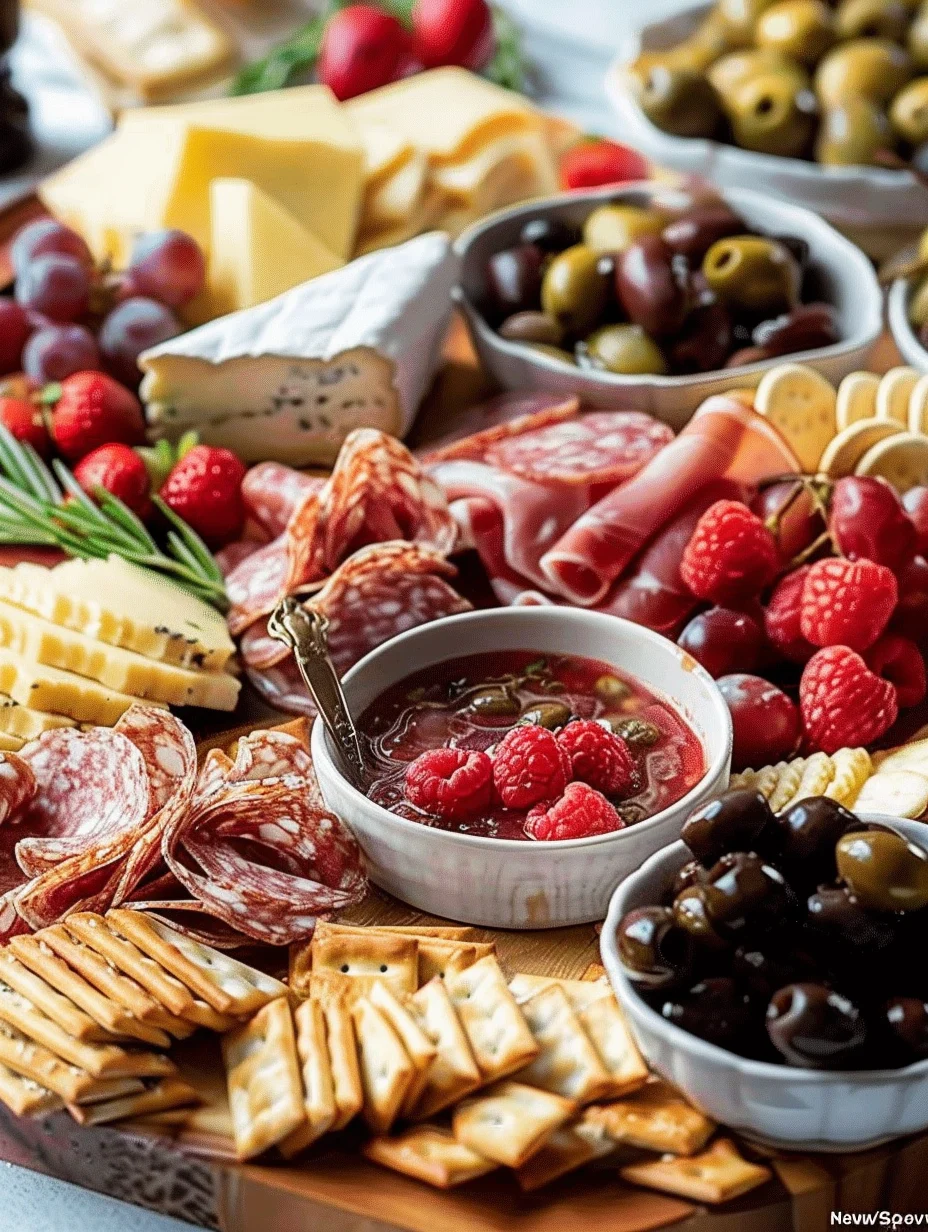
Christmas Charcuterie Board is a delightful way to celebrate the holiday season. This festive spread brings together an array of flavors, colors, and textures that can impress your guests and create lasting memories. Imagine a beautifully arranged board filled with cured meats, artisanal cheeses, seasonal fruits, and festive garnishes. It’s a visual feast that not only looks amazing but also satisfies a variety of tastes.
Creating a Christmas charcuterie board is not just about the food; it’s about the experience of gathering around a table with loved ones. It allows for interaction and conversation while enjoying delicious bites. The charm of a charcuterie board lies in its versatility. You can customize it based on your preferences, dietary restrictions, and what’s in season.
Whether you’re hosting a festive gathering or looking for a unique gift idea, a Christmas charcuterie board can be the centerpiece of your celebration. In this guide, you will discover why this board is a must-have for the holidays, how to prepare one, and tips for serving it to perfection. Let’s dive into the details of creating an unforgettable Christmas charcuterie board!
Why You’ll Love This Recipe
A Christmas charcuterie board is loved by many for several reasons. Here are some of the key benefits that make this festive platter a favorite:
1. Visual Appeal – The vibrant colors and various textures make for an eye-catching display that enhances any gathering.
2. Variety of Flavors – With a mix of savory and sweet options, there’s something for everyone to enjoy.
3. Easy to Prepare – Assembling a charcuterie board requires minimal cooking, making it a stress-free option for busy hosts.
4. Customizable – You can tailor the ingredients to suit your guests’ preferences, including vegetarian or gluten-free options.
5. Interactive Dining Experience – Guests can graze at their leisure, making it a relaxed and social dining experience.
6. Perfect for Any Occasion – While ideal for Christmas, this board can be adapted for birthdays, anniversaries, or casual get-togethers.
Given these reasons, it’s clear why a Christmas charcuterie board is a hit during the holiday season. Each bite offers a delightful combination of flavors and textures that can elevate your festive celebrations!
Preparation and Cooking Time
Creating a Christmas charcuterie board is a quick and enjoyable process. Here’s a breakdown of the time you’ll need:
– Preparation Time: 30-45 minutes
– Assembly Time: 15-20 minutes
The total time will vary based on your familiarity with the ingredients and how elaborate you want your board to be.
Ingredients
– Assorted cured meats (e.g., prosciutto, salami, chorizo)
– A variety of cheeses (e.g., brie, cheddar, goat cheese)
– Seasonal fruits (e.g., grapes, figs, pomegranate seeds)
– Assorted nuts (e.g., almonds, walnuts)
– Olives and pickles
– Bread and crackers (e.g., baguette slices, water crackers)
– Fresh herbs (e.g., rosemary, thyme) for garnish
– Honey or jam for sweetness
Step-by-Step Instructions
Creating a Christmas charcuterie board involves a few straightforward steps. Follow these instructions to assemble your board:
1. Select Your Board: Choose a wooden or slate board that is large enough to hold all your ingredients.
2. Arrange the Cheeses: Start by placing the cheeses on the board. Cut some into slices or wedges for easy serving.
3. Add the Meats: Layer the cured meats around the cheeses. You can roll or fold them for a more visually appealing presentation.
4. Incorporate the Fruits: Fill in gaps with seasonal fruits. Place them in clusters or scatter them throughout the board.
5. Include Nuts and Olives: Add small bowls or piles of nuts and olives for texture and flavor contrast.
6. Add Bread and Crackers: Arrange slices of bread and crackers on one side of the board, leaving space for guests to grab easily.
7. Garnish and Finish: Sprinkle fresh herbs around the board and add small jars of honey or jam for a sweet touch.
By following these simple steps, you’ll create an incredible Christmas charcuterie board that is sure to impress!
How to Serve
When it comes to serving your Christmas charcuterie board, consider these tips to enhance the experience:
1. Presentation: Use a large table or kitchen island to display the board, allowing guests to gather around and enjoy.
2. Accompaniments: Offer a selection of beverages like wine, cider, or festive cocktails to pair with the board.
3. Utensils: Provide small plates, napkins, and toothpicks or cheese knives for easy serving.
4. Encourage Sharing: Encourage guests to mix and match flavors by trying different combinations of meats, cheeses, and fruits.
5. Leftovers: If there are leftovers, store them in airtight containers to enjoy later or use in other dishes.
By considering these serving tips, you’ll create a memorable and enjoyable experience for your guests during the festive season.
Additional Tips
– Use High-Quality Ingredients: For the best flavors, opt for artisanal cheeses and high-quality cured meats. Fresh, seasonal fruits also make a significant difference.
– Plan Ahead: Prepare some ingredients, like cheese and meats, a day before your gathering. This will save you time on the day of the event.
– Balance Flavors: Ensure you have a good mix of savory and sweet items. This balance will cater to a wide range of tastes.
– Consider Dietary Restrictions: Always inquire about your guests’ dietary preferences to ensure everyone can enjoy the charcuterie board.
– Use Seasonal Decor: Enhance your board’s presentation with seasonal decorations like pinecones, holly, or festive napkins.
Recipe Variation
Feel free to get creative with your Christmas charcuterie board! Here are some variations to consider:
1. Vegan Option: Replace cured meats with roasted vegetables, marinated tofu, or vegan cheeses for a plant-based alternative.
2. Themed Boards: Create a board inspired by different cuisines, such as Italian with antipasto elements or a Mediterranean twist with hummus and pita.
3. Sweet Charcuterie Board: Focus on desserts by including chocolates, pastries, dried fruits, and sweet spreads instead of savory items.
Freezing and Storage
– Storage: To maintain freshness, keep the remaining ingredients in airtight containers in the refrigerator. Most items should last for 2-3 days.
– Freezing: While it’s not recommended to freeze the entire charcuterie board, you can freeze certain components like nuts or homemade spreads for longer preservation.
Special Equipment
You don’t need much special equipment to create a Christmas charcuterie board, but having a few items will help:
– Large wooden or slate board: A sturdy base is essential for presenting your ingredients.
– Cheese knife: This will help cut and serve various cheeses effortlessly.
– Small bowls: Use these for olives, nuts, or spreads to keep things organized.
– Tongs or toothpicks: These make it easy for guests to serve themselves.
Frequently Asked Questions
What can I substitute for cheese?
If you prefer to avoid cheese, consider using spreads like hummus, guacamole, or dairy-free cheese alternatives.
How do I keep the board fresh longer?
Cover the board with plastic wrap if it needs to sit out, or store any leftovers in airtight containers.
Can I prepare the board the night before?
Yes, you can prepare most components ahead of time, but it’s best to assemble the board close to serving for optimal freshness.
What drinks pair well with a charcuterie board?
Wine, craft beers, sparkling cider, or even holiday-themed cocktails complement the flavors beautifully.
How do I make it more festive?
Incorporate seasonal items like cranberries, candy canes, or even edible glitter to add a festive touch to your charcuterie board.
Conclusion
A Christmas charcuterie board is not only a feast for the eyes but also a delightful way to celebrate the holiday season with family and friends. By selecting high-quality ingredients and arranging them thoughtfully, you can create a memorable centerpiece for your gatherings. With the flexibility to customize based on preferences and dietary needs, this festive board can cater to everyone. Whether you’re hosting a large gathering or an intimate dinner, a Christmas charcuterie board will surely be a hit!

Christmas Charcuterie Board: An Amazing Ultimate Guide to 7 Steps
- Total Time: 15 minutes
Ingredients
– Assorted cured meats (e.g., prosciutto, salami, chorizo)
– A variety of cheeses (e.g., brie, cheddar, goat cheese)
– Seasonal fruits (e.g., grapes, figs, pomegranate seeds)
– Assorted nuts (e.g., almonds, walnuts)
– Olives and pickles
– Bread and crackers (e.g., baguette slices, water crackers)
– Fresh herbs (e.g., rosemary, thyme) for garnish
– Honey or jam for sweetness
Instructions
Creating a Christmas charcuterie board involves a few straightforward steps. Follow these instructions to assemble your board:
1. Select Your Board: Choose a wooden or slate board that is large enough to hold all your ingredients.
2. Arrange the Cheeses: Start by placing the cheeses on the board. Cut some into slices or wedges for easy serving.
3. Add the Meats: Layer the cured meats around the cheeses. You can roll or fold them for a more visually appealing presentation.
4. Incorporate the Fruits: Fill in gaps with seasonal fruits. Place them in clusters or scatter them throughout the board.
5. Include Nuts and Olives: Add small bowls or piles of nuts and olives for texture and flavor contrast.
6. Add Bread and Crackers: Arrange slices of bread and crackers on one side of the board, leaving space for guests to grab easily.
7. Garnish and Finish: Sprinkle fresh herbs around the board and add small jars of honey or jam for a sweet touch.
By following these simple steps, you’ll create an incredible Christmas charcuterie board that is sure to impress!
- Prep Time: 15 minutes
- Cook Time: 0 minutes
Nutrition
- Serving Size: 6-8
- Calories: 350 kcal
- Fat: 25g
- Protein: 15g