
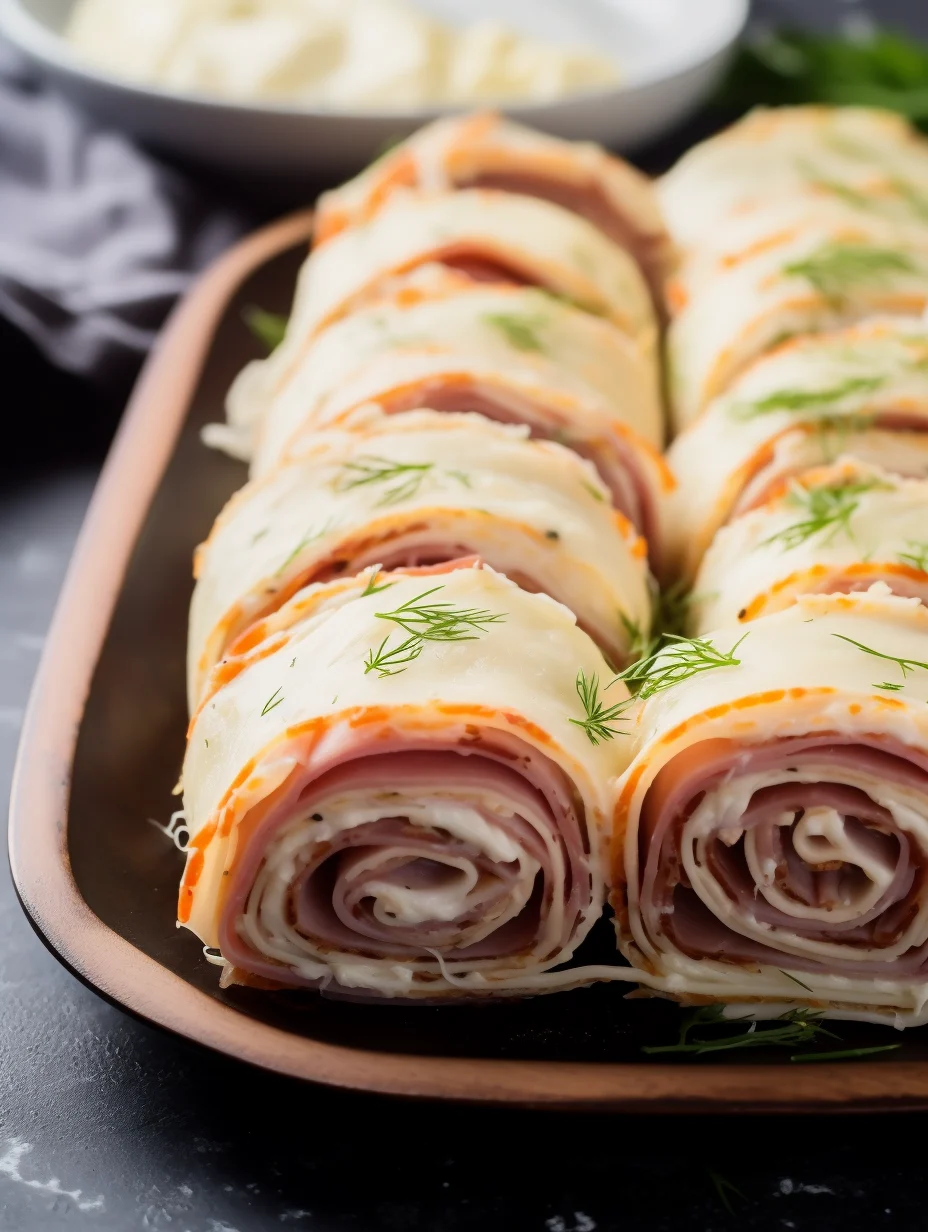
Cheese and Meat Roll-Ups are an amazing way to enjoy a delightful blend of flavors in a simple, yet elegant dish. These tasty treats are perfect for parties, snacks, or even a light meal. Imagine biting into a savory roll filled with rich cheese and tender meats, all wrapped up in a neat, bite-sized package. This recipe showcases how easy it is to create an impressive dish that will wow your friends and family. Whether you’re hosting a gathering or just want a delicious snack, Cheese and Meat Roll-Ups are sure to please.
If you’re looking for an effortless yet stunning addition to your appetizer spread, look no further. Cheese and Meat Roll-Ups are not only delicious but also incredibly versatile. You can customize them with your favorite cheeses and meats, making them suitable for any palate. The combination of textures and flavors creates an unforgettable experience that will leave everyone asking for more.
In this article, you will discover why Cheese and Meat Roll-Ups are a fantastic choice for any occasion. You’ll learn how to prepare them quickly, the ingredients you’ll need, and step-by-step instructions to ensure your success. Let’s dive into the world of these incredible roll-ups and see how easy it is to create this ultimate dish!
Why You’ll Love This Recipe
Cheese and Meat Roll-Ups offer a unique combination of flavors and textures that will keep you coming back for more. Here are some reasons why this recipe is a must-try:
1. Simple Ingredients: Most ingredients are easy to find and may already be in your kitchen.
2. Quick Preparation: You can whip these roll-ups together in no time.
3. Versatile: Customize the ingredients to suit your taste preferences.
4. Perfect for Any Occasion: These roll-ups are great for parties, game days, or even as a quick lunch.
5. Kid-Friendly: They make for a fun and interactive snack for children.
6. Impressive Presentation: Serve them on a platter for an elegant touch.
With these advantages, it’s easy to see why Cheese and Meat Roll-Ups have become a favorite among many. Their delightful taste and appealing appearance make them a great choice for any gathering or occasion.
Preparation and Cooking Time
Preparing Cheese and Meat Roll-Ups is quick and straightforward. Here’s how the time breaks down:
– Preparation Time: 15 minutes
– Cooking Time: 10 minutes (if using cooked meats)
– Total Time: 25 minutes
These times may vary slightly based on your experience and kitchen setup, but this framework should serve as a good estimate.
Ingredients
– 8 slices of deli meat (ham, turkey, or roast beef)
– 8 slices of cheese (cheddar, mozzarella, or Swiss)
– 1 tablespoon mustard (optional)
– 1 tablespoon mayonnaise (optional)
– Fresh herbs (like parsley or basil) for garnish (optional)
Step-by-Step Instructions
Creating Cheese and Meat Roll-Ups is simple when you follow these steps:
1. Prepare Your Workspace: Gather all your ingredients and tools, including a cutting board and a sharp knife.
2. Lay Out the Deli Meat: Place a slice of deli meat flat on the cutting board.
3. Add the Cheese: Lay a slice of cheese on top of the deli meat.
4. Spread Condiments: If desired, spread mustard or mayonnaise on top of the cheese.
5. Roll It Up: Starting at one end, tightly roll the meat and cheese together.
6. Slice: Use a sharp knife to cut the roll into bite-sized pieces.
7. Garnish: If desired, sprinkle fresh herbs on top for added flavor and presentation.
8. Repeat: Continue the process with the remaining ingredients until you’ve made all your roll-ups.
9. Serve: Arrange the roll-ups on a platter for serving.
With these straightforward steps, you’ll have delicious Cheese and Meat Roll-Ups ready to enjoy in no time!
How to Serve
To make the most of your Cheese and Meat Roll-Ups, consider these serving suggestions:
1. Presentation: Arrange the roll-ups on a decorative platter for an appealing display.
2. Dipping Sauces: Provide a selection of dipping sauces, such as ranch dressing or a spicy mustard.
3. Pairing: Serve alongside fresh vegetable sticks or a simple salad for a balanced meal.
4. Garnishing: Add fresh herbs or cherry tomatoes for a pop of color.
5. Make it Interactive: Allow guests to create their own roll-ups by providing various meats, cheeses, and toppings.
By putting thought into how you serve Cheese and Meat Roll-Ups, you can create a delightful experience that everyone will enjoy.
Additional Tips
– Experiment with Cheese: Try different types of cheese like pepper jack for a spicy kick or goat cheese for a tangy flavor.
– Use Fresh Ingredients: Fresh herbs or quality deli meats can elevate the taste of your roll-ups.
– Make Ahead: Prepare the roll-ups in advance and store them in the refrigerator. They taste great chilled.
– Add Veggies: Incorporate thinly sliced vegetables like bell peppers or cucumbers for added crunch and nutrition.
– Keep it Simple: If you’re short on time, skip the condiments and enjoy the natural flavors of the meat and cheese.
Recipe Variation
Feel free to get creative with your Cheese and Meat Roll-Ups! Here are some variations to consider:
1. Mediterranean Twist: Use feta cheese, olives, and sun-dried tomatoes for a Mediterranean flavor profile.
2. Spicy Roll-Ups: Add jalapeños or sriracha sauce to the mustard or mayonnaise for an extra kick.
3. Breakfast Roll-Ups: Substitute the deli meats with scrambled eggs and add a slice of cheese for a hearty breakfast option.
4. Sweet and Savory: Incorporate a thin layer of honey or fig spread for a sweet contrast to the savory meats and cheeses.
Freezing and Storage
– Storage: Keep the roll-ups in an airtight container in the refrigerator for up to 3 days. They are best enjoyed fresh, but they can still taste good after a short period.
– Freezing: To freeze, wrap each roll-up tightly in plastic wrap and place them in a freezer-safe container. They can last for up to 2 months. Thaw in the refrigerator before serving.
Special Equipment
To make the preparation of Cheese and Meat Roll-Ups easier, consider having the following tools handy:
– Cutting Board: A sturdy surface to assemble the roll-ups.
– Sharp Knife: For slicing the roll-ups into bite-sized pieces.
– Plastic Wrap or Containers: For storing any leftovers or to keep the roll-ups fresh before serving.
Frequently Asked Questions
Can I use other meats besides deli meats?
Yes, feel free to use cooked chicken, bacon, or even seafood like smoked salmon for a different flavor.
How can I make these roll-ups more filling?
You can add some avocado or a layer of hummus inside for creaminess and added nutrients.
Are Cheese and Meat Roll-Ups suitable for gluten-free diets?
Yes, just ensure that the deli meats and any additional condiments you use are gluten-free.
Can I make these roll-ups vegetarian?
Absolutely! Use roasted vegetables or plant-based deli slices as a substitute for meat.
What dipping sauces work well with these roll-ups?
Ranch dressing, honey mustard, or a spicy aioli are great choices.
Conclusion
Cheese and Meat Roll-Ups are a versatile and delightful dish that can cater to a wide range of tastes and occasions. Whether you’re preparing them for a party or enjoying them as a quick snack, their simplicity and flavor make them a must-try. With endless possibilities for customization and easy preparation, this dish is sure to become a favorite in your household. So gather your ingredients, follow the steps, and enjoy these tasty roll-ups at your next gathering!

Cheese and Meat Roll-Ups: An Incredible Ultimate Recipe
- Total Time: 25 minutes
Ingredients
– 8 slices of deli meat (ham, turkey, or roast beef)
– 8 slices of cheese (cheddar, mozzarella, or Swiss)
– 1 tablespoon mustard (optional)
– 1 tablespoon mayonnaise (optional)
– Fresh herbs (like parsley or basil) for garnish (optional)
Instructions
Creating Cheese and Meat Roll-Ups is simple when you follow these steps:
1. Prepare Your Workspace: Gather all your ingredients and tools, including a cutting board and a sharp knife.
2. Lay Out the Deli Meat: Place a slice of deli meat flat on the cutting board.
3. Add the Cheese: Lay a slice of cheese on top of the deli meat.
4. Spread Condiments: If desired, spread mustard or mayonnaise on top of the cheese.
5. Roll It Up: Starting at one end, tightly roll the meat and cheese together.
6. Slice: Use a sharp knife to cut the roll into bite-sized pieces.
7. Garnish: If desired, sprinkle fresh herbs on top for added flavor and presentation.
8. Repeat: Continue the process with the remaining ingredients until you’ve made all your roll-ups.
9. Serve: Arrange the roll-ups on a platter for serving.
With these straightforward steps, you’ll have delicious Cheese and Meat Roll-Ups ready to enjoy in no time!
- Prep Time: 15 minutes
- Cook Time: 10 minutes
Nutrition
- Serving Size: 8 roll-ups
- Calories: 250 kcal
- Fat: 18g
- Protein: 20g