
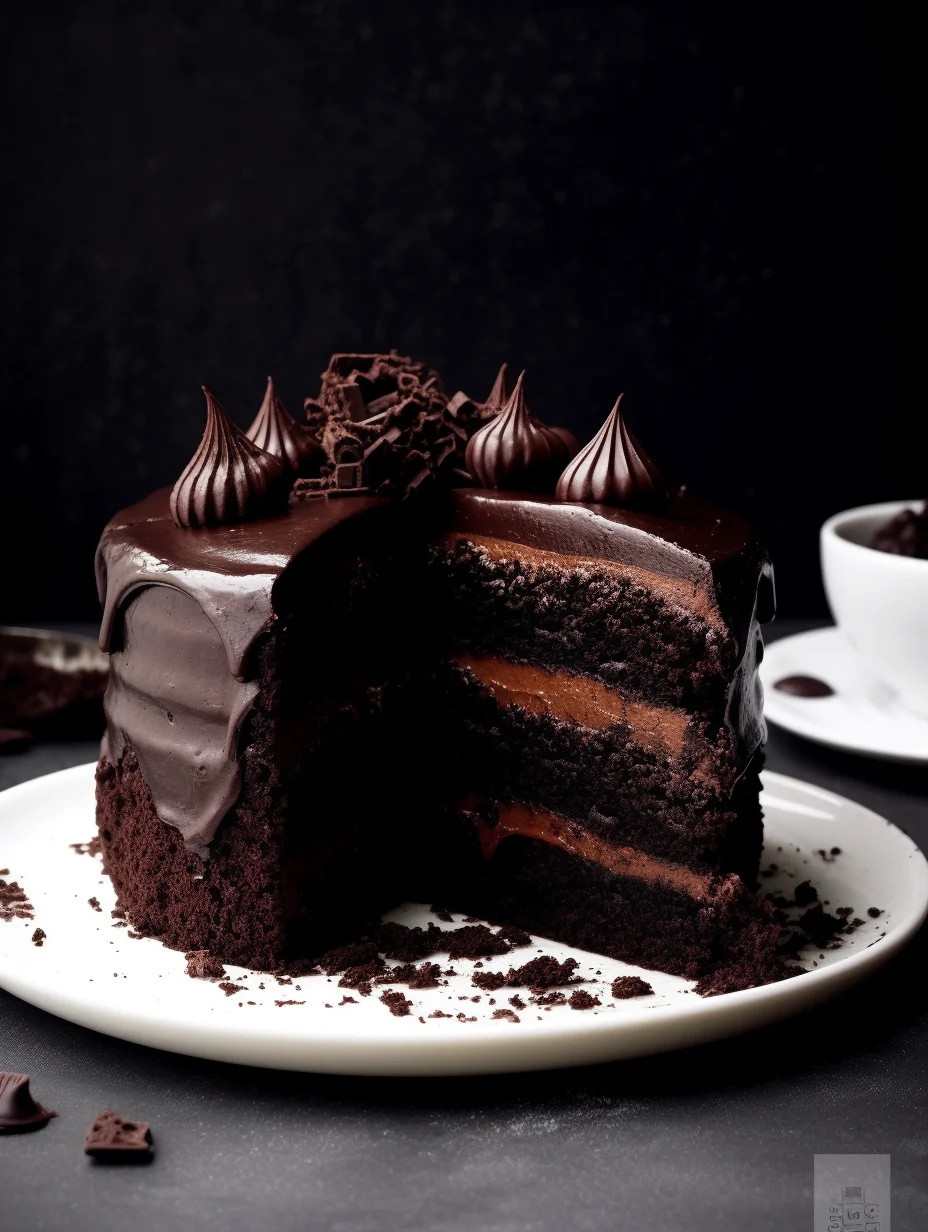
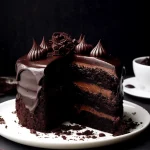
Blackout Chocolate Cake is a dessert that captivates chocolate lovers with its deep, rich flavor and velvety texture. This cake stands out because it showcases chocolate in all its glorious forms, creating an unforgettable experience for anyone lucky enough to indulge. With layers of moist chocolate cake, fudgy frosting, and an optional chocolate ganache, this recipe is nothing short of a chocolate lover’s dream. It’s perfect for birthdays, celebrations, or just when you want to treat yourself to something truly extraordinary.
Imagine serving a slice of this cake, its rich, dark color calling to you. Each bite is a delightful explosion of chocolate that melts in your mouth, reminding you why chocolate has a special place in our hearts. As we explore this incredible recipe, you’ll discover why it has garnered such a loyal following among bakers and dessert enthusiasts alike.
This cake is more than just a treat; it’s a celebration of chocolate in its most decadent form. If you’re ready to wow your friends and family, follow this guide to create your very own Blackout Chocolate Cake. Let’s dive into what makes this dessert so amazing!
Why You’ll Love This Recipe
Here are several reasons that make this Blackout Chocolate Cake an irresistible choice:
1. Rich and Decadent Flavor: Each layer is packed with rich chocolate goodness that chocolate lovers simply adore.
2. Easy to Make: Despite its impressive appearance, the process is straightforward and perfect for both novice and experienced bakers.
3. Versatile Dessert: This cake can serve as an impressive centerpiece for any occasion, or simply to satisfy your chocolate cravings.
4. Multiple Textures: The combination of cake, frosting, and optional ganache creates a delightful mix of textures, enhancing the overall experience.
5. Customizable: Feel free to add nuts, fruits, or other flavors to make this cake uniquely yours.
With these points in mind, it’s clear why Blackout Chocolate Cake is a favorite for many. The layers, the flavors, and the satisfaction of creating something so delicious all contribute to the joy this cake brings.
Preparation and Cooking Time
The total time needed to prepare the Blackout Chocolate Cake is approximately 1 hour and 45 minutes, which includes both preparation and baking time. Here’s a breakdown of the timings:
– Preparation Time: 30 minutes
– Cooking Time: 30-35 minutes
– Cooling Time: 30-40 minutes
While these times might vary slightly depending on your kitchen skills and equipment, this estimate should give you a good idea of what to expect.
Ingredients
– 2 cups all-purpose flour
– 1 ¾ cups granulated sugar
– ¾ cup unsweetened cocoa powder
– 1 ½ teaspoons baking powder
– 1 ½ teaspoons baking soda
– ¾ teaspoon salt
– 2 large eggs
– 1 cup whole milk
– ½ cup vegetable oil
– 2 teaspoons vanilla extract
– 1 cup boiling water
– 1 cup semi-sweet chocolate chips (optional, for the ganache)
– 1 cup heavy cream (optional, for the ganache)
– Powdered sugar, for dusting (optional)
Step-by-Step Instructions
Creating the incredible Blackout Chocolate Cake is fairly simple when you follow these steps:
1. Preheat Your Oven: Start by preheating your oven to 350°F (175°C). Grease and flour two 9-inch round cake pans.
2. Mix Dry Ingredients: In a large mixing bowl, combine the flour, granulated sugar, cocoa powder, baking powder, baking soda, and salt. Sift these ingredients to ensure they’re well blended.
3. Combine Wet Ingredients: In another bowl, beat together the eggs, milk, vegetable oil, and vanilla extract until smooth.
4. Combine Mixtures: Gradually add the wet mixture to the dry ingredients, mixing until just combined. Avoid overmixing.
5. Add Boiling Water: Carefully stir in the boiling water. This will thin the batter, but it’s normal.
6. Divide Batter: Pour the batter evenly into the prepared cake pans.
7. Bake: Place the pans in the oven and bake for 30-35 minutes. A toothpick inserted into the center should come out clean.
8. Cool: Once baked, remove from the oven and let the cakes cool in their pans for about 10 minutes. Then, transfer them to a wire rack to cool completely.
9. Prepare Optional Ganache: If you’re making a chocolate ganache, bring the heavy cream to a simmer. Pour it over the chocolate chips and let it sit for 5 minutes. Stir until smooth.
10. Frost the Cake: Once the cakes are completely cooled, frost the top of one layer, and then stack the second layer on top. Frost the sides and top as desired.
11. Add Final Touches: If using ganache, pour it over the top, allowing it to drip down the sides. Dust with powdered sugar if desired.
By adhering to these steps, you will create an impressive Blackout Chocolate Cake that is both delicious and beautiful.
How to Serve
When it comes to serving your amazing Blackout Chocolate Cake, consider the following tips to enhance the overall experience:
1. Presentation: Use a beautiful cake stand to showcase your masterpiece. A few fresh berries or edible flowers can add a pop of color.
2. Accompaniments: Pair your cake with a scoop of vanilla ice cream or a dollop of whipped cream for a delightful contrast to the rich chocolate.
3. Slice Size: Serve generous slices that will invite seconds without overwhelming your guests. Smaller, rich pieces can be satisfying.
4. Beverage Pairing: Complement this decadent treat with a rich cup of coffee or a sweet dessert wine for the perfect pairing.
By focusing on these elements, you’ll not only serve a delicious cake but also create a memorable dining experience for all who enjoy your Blackout Chocolate Cake.
Additional Tips
– Use Quality Cocoa Powder: The flavor of your Blackout Chocolate Cake will greatly depend on the quality of the cocoa powder. Opt for a premium brand for a rich taste.
– Measure Accurately: Precision is key in baking. Make sure to measure your ingredients accurately for the best results.
– Layer with Intention: Take time when frosting each layer to ensure a smooth and even finish.
– Cool Completely Before Frosting: Allow the cakes to cool fully to prevent the frosting from melting.
– Customize Your Frosting: Don’t hesitate to mix flavors into your frosting for a unique twist, such as espresso or orange zest.
Recipe Variation
There are many fun and delicious ways to customize the Blackout Chocolate Cake recipe. Here are a few variations to consider:
1. Peppermint Twist: Add peppermint extract to the frosting for a minty flavor.
2. Spicy Chocolate: Incorporate a pinch of cayenne pepper or chili powder into the batter for a spicy kick that complements the chocolate.
3. Layer Cake: Instead of round layers, bake the batter in a rectangular pan, layer with frosting, and serve as a sheet cake for a simpler presentation.
4. Vegan Option: Substitute eggs with flaxseed meal mixed with water and use almond milk instead of whole milk for a vegan version.
5. Nutty Crunch: Add chopped walnuts or pecans in between the layers for extra texture.
Freezing and Storage
– Storage: Store any remaining Blackout Chocolate Cake covered in the refrigerator. It will maintain its freshness for about 4-5 days.
– Freezing: You can freeze the cake in slices for up to 3 months. Ensure each slice is well-wrapped in plastic wrap and placed in an airtight container to prevent freezer burn.
– Thawing: When ready to enjoy, thaw the cake in the refrigerator overnight before serving.
Special Equipment
To successfully create your Blackout Chocolate Cake, gather the following essential tools:
– Large mixing bowls for combining ingredients
– An electric mixer for batter and frosting
– Measuring cups and spoons for accurate ingredient measurements
– Two 9-inch round cake pans to bake the layers
– A wire rack for cooling the cakes properly
– Spatula or offset knife for frosting
– Optional: Piping bag for decorative frosting techniques
Frequently Asked Questions
How do I know when the cake is done baking?
Insert a toothpick into the center of the cake; if it comes out clean or with a few crumbs, the cake is done.
Can I make this cake ahead of time?
Yes, you can bake the layers a day in advance. Wrap them tightly and refrigerate until ready to frost and serve.
Is this cake suitable for dietary restrictions?
Yes, by using gluten-free flour or alternative sweeteners, this cake can be adapted to fit various dietary needs.
Can I eliminate the ganache topping?
Absolutely! The cake is deliciously rich on its own. You can choose to just use frosting if preferred.
What are the best frostings to pair with this cake?
Besides chocolate frosting, cream cheese frosting, or mocha frosting are great options that complement the rich chocolate flavor.
Conclusion
The Blackout Chocolate Cake is a dessert that promises to be a crowd-pleaser. Its layers of moist cake and rich frosting are not just for special occasions; it’s perfect for any moment when you crave something sweet and indulgent. Whether you enjoy it as is or with a twist, this cake delivers an unforgettable chocolate experience.
Blackout Chocolate Cake: An Incredible Ultimate Recipe
- Total Time: 28 minute
Ingredients
– 2 cups all-purpose flour
– 1 ¾ cups granulated sugar
– ¾ cup unsweetened cocoa powder
– 1 ½ teaspoons baking powder
– 1 ½ teaspoons baking soda
– ¾ teaspoon salt
– 2 large eggs
– 1 cup whole milk
– ½ cup vegetable oil
– 2 teaspoons vanilla extract
– 1 cup boiling water
– 1 cup semi-sweet chocolate chips (optional, for the ganache)
– 1 cup heavy cream (optional, for the ganache)
– Powdered sugar, for dusting (optional)
Instructions
Creating the incredible Blackout Chocolate Cake is fairly simple when you follow these steps:
1. Preheat Your Oven: Start by preheating your oven to 350°F (175°C). Grease and flour two 9-inch round cake pans.
2. Mix Dry Ingredients: In a large mixing bowl, combine the flour, granulated sugar, cocoa powder, baking powder, baking soda, and salt. Sift these ingredients to ensure they’re well blended.
3. Combine Wet Ingredients: In another bowl, beat together the eggs, milk, vegetable oil, and vanilla extract until smooth.
4. Combine Mixtures: Gradually add the wet mixture to the dry ingredients, mixing until just combined. Avoid overmixing.
5. Add Boiling Water: Carefully stir in the boiling water. This will thin the batter, but it’s normal.
6. Divide Batter: Pour the batter evenly into the prepared cake pans.
7. Bake: Place the pans in the oven and bake for 30-35 minutes. A toothpick inserted into the center should come out clean.
8. Cool: Once baked, remove from the oven and let the cakes cool in their pans for about 10 minutes. Then, transfer them to a wire rack to cool completely.
9. Prepare Optional Ganache: If you’re making a chocolate ganache, bring the heavy cream to a simmer. Pour it over the chocolate chips and let it sit for 5 minutes. Stir until smooth.
10. Frost the Cake: Once the cakes are completely cooled, frost the top of one layer, and then stack the second layer on top. Frost the sides and top as desired.
11. Add Final Touches: If using ganache, pour it over the top, allowing it to drip down the sides. Dust with powdered sugar if desired.
By adhering to these steps, you will create an impressive Blackout Chocolate Cake that is both delicious and beautiful.
- Prep Time: 30 minutes
- Cook Time: 30-35 minutes
Nutrition
- Serving Size: 12 servings
- Calories: 550 kcal
- Fat: 25g
- Protein: 8g