
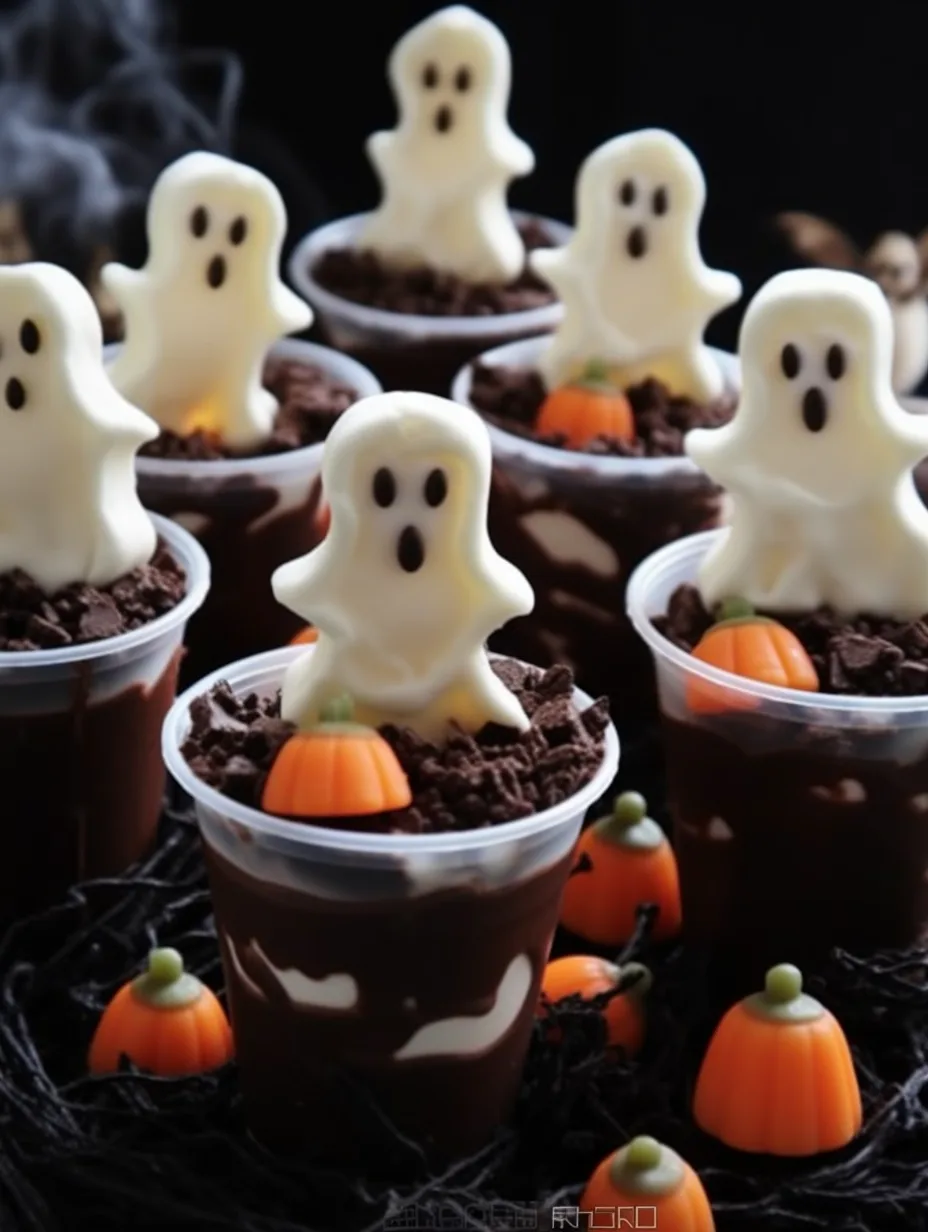
Graveyard Pudding Cups are a delightful and spooky treat that will enthrall your family and friends. This playful dessert is perfect for Halloween festivities, themed parties, or any occasion where fun is a priority. Picture layers of chocolate pudding, crushed cookies, and gummy worms – it’s an amazing combination that brings out the kid in everyone. With its creativity and whimsical presentation, this recipe promises to be a hit, sparking joy and laughter around the table.
If you’ve never made Graveyard Pudding Cups before, you’re in for an extraordinary experience! These cups not only taste delicious, but they also serve as a canvas for creativity. You can get the kids involved in creating personalized versions based on their preferences. Whether it’s more chocolate, different types of candy, or even adding a unique twist, the possibilities are endless! Fun, easy to prepare, and aesthetically pleasing, these pudding cups will be a highlight of any gathering.
Every layer of this dessert is an exciting surprise waiting to be discovered. The creamy pudding perfectly contrasts with the crunchy cookie “dirt,” while the gummy worms add a playful touch that’s sure to delight. With a simple recipe that comes together quickly, you’ll find that making Graveyard Pudding Cups is both enjoyable and rewarding. Let’s dive deeper and explore why you’ll love making this spooky dessert!
Why You’ll Love This Recipe
Graveyard Pudding Cups are an incredible treat that combines fun and flavor in perfect harmony. Here are a few reasons why this recipe is a must-try:
1. Interactive Fun: This dessert is a fantastic hands-on experience. You can involve children in the preparation, allowing them to personalize their cups.
2. Easy to Prepare: With a straightforward method, even novice cooks can achieve impressive results. Minimal cooking skills are required.
3. No Baking Required: Save time and effort! This recipe doesn’t involve baking, making it perfect for last-minute treats.
4. Customizable: You can easily adapt the ingredients based on your tastes, dietary restrictions, or the type of event.
5. Visually Appealing: The whimsical presentation will captivate anyone’s attention. It’s perfect for social media sharing!
6. Delicious Layers: The combination of chocolate, cream, and cookies creates a delightful taste and texture experience.
With these attributes, Graveyard Pudding Cups are not just a dessert; they’re an experience that will give everyone a reason to smile!
Preparation and Cooking Time
Preparing Graveyard Pudding Cups is a delightful process that requires minimal time. Here’s what’s involved:
– Preparation Time: 15 minutes
– Chilling Time: 1 hour
– Total Time: 1 hour and 15 minutes
These times may vary based on your familiarity with the recipe, but they serve as a good guideline to help you plan.
Ingredients
– 2 cups chocolate pudding (instant or homemade)
– 1 ½ cups crushed chocolate sandwich cookies
– 1 cup whipped topping (like Cool Whip)
– 12 gummy worms
– 8 small cups or jars for serving
– Edible decorations (optional: spooky candies or cookie tombstones)
Step-by-Step Instructions
Creating your own Graveyard Pudding Cups is a simple and fun process. Just follow these easy steps:
1. Prepare Pudding: If using instant pudding, follow the package instructions to make it. Allow it to set for about 5-10 minutes.
2. Crush Cookies: In a zip-top bag, crush the chocolate sandwich cookies until they resemble dirt. You can use a rolling pin for this.
3. Layer Pudding: In each cup or jar, add a layer of chocolate pudding, filling each about one-third full.
4. Add Cookies: Sprinkle a generous layer of crushed cookies on top of the pudding, resembling “dirt.”
5. Add More Pudding: Top the cookie layer with another layer of chocolate pudding, filling each cup to about two-thirds full.
6. Whipped Topping Layer: Add a layer of whipped topping on top of the pudding, smoothing it out nicely.
7. Decorate with Cookies: Sprinkle a final layer of crushed cookies on top of the whipped topping, creating the appearance of dirt.
8. Add Gummy Worms: Place a gummy worm on top of each cup, letting it drape over the sides for a spooky effect.
9. Chill: Refrigerate the cups for at least an hour before serving, allowing the flavors to meld.
10. Final Touches (optional): Before serving, feel free to add any additional edible decorations like tiny cookie tombstones or candy eyes.
With these straightforward steps, you’re just a short time away from serving an incredible dessert!
How to Serve
When it comes to serving your Graveyard Pudding Cups, presentation and creativity can elevate the experience:
1. Display Attractively: Arrange the cups on a decorative platter or a spooky-themed tablecloth for a festive touch.
2. Personalization: Allow guests to choose their own toppings if you’ve prepared additional candies or decorations.
3. Spooky Accents: Use Halloween-themed accessories like mini pumpkins or fake spiders to complement the dessert display.
4. Serving Size: Serve smaller portions, allowing guests to enjoy multiple treats without feeling overwhelmed.
5. Pair with Drinks: Consider serving with themed drinks such as a spooky punch or warm apple cider to complete the experience.
By putting thought into the presentation and serving style, Graveyard Pudding Cups become not just a treat, but an unforgettable part of your gathering!
Additional Tips
– Use Fresh Ingredients: Always choose fresh ingredients for the best flavor. Fresh whipped topping and new packages of pudding mix can make a significant difference.
– Customize Textures: Consider adding different toppings. For instance, crushed pretzels can provide a salty crunch that complements the sweetness of the pudding.
– Experiment with Flavors: Don’t hesitate to swap chocolate pudding for flavors like vanilla, butterscotch, or even pumpkin spice for a fall-themed variation.
– Serve with a Spoon: For an interactive dessert, provide small spoons for each cup. Let guests dig into their creations for a more engaging experience.
Recipe Variation
Explore various options to put a fun twist on Graveyard Pudding Cups:
1. Vegan Version: Use plant-based pudding and whipped topping, along with vegan cookies.
2. Gluten-Free Option: Choose gluten-free chocolate sandwich cookies to make the dessert suitable for gluten-sensitive guests.
3. Seasonal Themes: For a Halloween crowd, consider incorporating ghost-shaped meringues or chocolate spiders atop the cups.
4. Layer It Up: Add additional layers of fruit like strawberries or bananas for a natural sweetness that pairs well with the creamy pudding.
Freezing and Storage
– Storage: Keep the pudding cups covered in the refrigerator. They are best enjoyed within 2-3 days but can last up to a week if sealed properly.
– Freezing: While the pudding cups are not ideal for freezing due to the whipped topping, you can freeze the components separately. Thaw them in the refrigerator when ready to assemble.
Special Equipment
To whip up these delightful Graveyard Pudding Cups, you’ll need a few essential items:
– Mixing bowls for combining ingredients.
– A zip-top bag for crushing cookies.
– A spoon for layering and decoration.
– Small cups or jars for serving your spooky creations.
Frequently Asked Questions
Can I use homemade pudding instead of instant?
Yes, homemade pudding will work perfectly and can offer an even richer flavor.
How can I make this dessert healthier?
Consider using low-sugar pudding and whipped topping. Additionally, you can include fruits for natural sweetness.
Can children participate in making these cups?
Absolutely! Kids can help with layering and decorating, making it a fun family activity.
What if I don’t have chocolate sandwich cookies?
You can easily replace them with vanilla sandwich cookies or even graham crackers for different flavor profiles.
Can I make these pudding cups the night before?
Yes, making them in advance allows the flavors to meld and can save you time on the day of your event.
Conclusion
Graveyard Pudding Cups are not just a treat; they are a delightful adventure into creativity and fun. With layers of chocolate pudding, crushed cookies, and whimsical decorations, this dessert adds an extraordinary touch to any gathering. Whether you serve them at Halloween or as a playful dessert for any occasion, they’re sure to impress. Encourage family and friends to embrace their creativity while enjoying this delectable dessert!
Graveyard Pudding Cups: An Amazing Ultimate Recipe
- Total Time: 15 minutes
Ingredients
– 2 cups chocolate pudding (instant or homemade)
– 1 ½ cups crushed chocolate sandwich cookies
– 1 cup whipped topping (like Cool Whip)
– 12 gummy worms
– 8 small cups or jars for serving
– Edible decorations (optional: spooky candies or cookie tombstones)
Instructions
Creating your own Graveyard Pudding Cups is a simple and fun process. Just follow these easy steps:
1. Prepare Pudding: If using instant pudding, follow the package instructions to make it. Allow it to set for about 5-10 minutes.
2. Crush Cookies: In a zip-top bag, crush the chocolate sandwich cookies until they resemble dirt. You can use a rolling pin for this.
3. Layer Pudding: In each cup or jar, add a layer of chocolate pudding, filling each about one-third full.
4. Add Cookies: Sprinkle a generous layer of crushed cookies on top of the pudding, resembling “dirt.”
5. Add More Pudding: Top the cookie layer with another layer of chocolate pudding, filling each cup to about two-thirds full.
6. Whipped Topping Layer: Add a layer of whipped topping on top of the pudding, smoothing it out nicely.
7. Decorate with Cookies: Sprinkle a final layer of crushed cookies on top of the whipped topping, creating the appearance of dirt.
8. Add Gummy Worms: Place a gummy worm on top of each cup, letting it drape over the sides for a spooky effect.
9. Chill: Refrigerate the cups for at least an hour before serving, allowing the flavors to meld.
10. Final Touches (optional): Before serving, feel free to add any additional edible decorations like tiny cookie tombstones or candy eyes.
With these straightforward steps, you’re just a short time away from serving an incredible dessert!
- Prep Time: 15 minutes
- Cook Time: 0 minutes
Nutrition
- Serving Size: 8 cups
- Calories: 200 kcal
- Fat: 10g
- Protein: 2g