
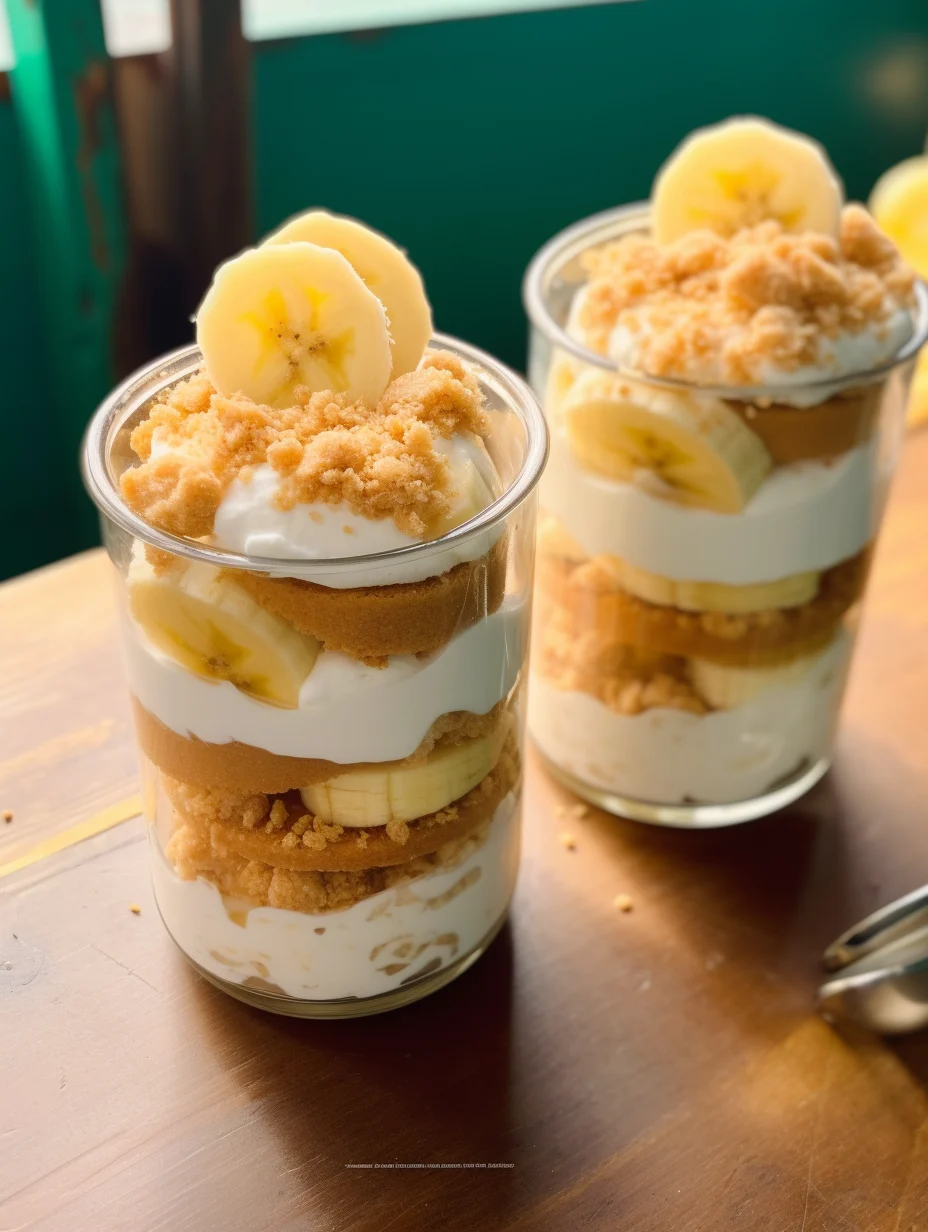
Banana Cream Pie Jars are an amazing twist on a classic dessert that will delight your taste buds. Imagine layers of creamy banana pudding, fluffy whipped cream, and crunchy graham cracker crumbs in a simple jar presentation. This recipe transforms the beloved Banana Cream Pie into an easy-to-serve treat perfect for gatherings, picnics, or quiet nights at home. The best part? You’ll have an exquisite dessert ready to impress your family and friends without the hassle of baking a full pie.
If you’ve ever experienced the joy of digging into a Banana Cream Pie, you know just how incredible this dessert can be. Fluffy cream, sweet bananas, and buttery crust create a symphony of flavors and textures that leave a lasting impression. However, traditional pies can be cumbersome to make at times. With Banana Cream Pie Jars, all the classic flavors are reimagined in an adorable and portable format—making it a stress-free option for any occasion.
Preparing Banana Cream Pie Jars is not just about the taste; it’s about the experience as well. Each jar is a visual delight, showcasing beautiful layers that create anticipation with every spoonful. In this article, you’ll discover why this recipe is so special, how to whip it up efficiently, and tips on serving the jars perfectly to amplify the taste and presentation!
Why You’ll Love This Recipe
Banana Cream Pie Jars are more than just a delicious dessert; they offer many benefits that ensure you’ll love making and sharing them. Here are some reasons why this recipe is a crowd-pleaser:
1. Layered Delight: The beautiful layers make for an aesthetically pleasing presentation.
2. No Baking Required: Skip the baking and enjoy a no-fuss dessert that saves time.
3. Portable Treats: Easy to transport for picnics or parties, making sharing effortless.
4. Endless Customization: Adjust the toppings or ingredients to suit personal preferences.
5. Quick to Assemble: A straightforward recipe that can be put together within minutes.
6. Perfect for Any Occasion: Be it a casual weeknight dinner or a festive celebration, these jars fit in beautifully.
With these enticing reasons, it’s no wonder why Banana Cream Pie Jars have become a favorite among dessert lovers. Each bite reveals layers of flavor that not only satisfy your sweet tooth but also evoke warmth and nostalgia!
Preparation and Cooking Time
Creating Banana Cream Pie Jars can be a quick and fun project. The overall time to prepare these delicious treats is approximately 30 to 40 minutes. Here’s how it breaks down:
– Preparation Time: 15 minutes
– Chilling Time: 15-30 minutes (to allow the pudding to set)
– Total Time: About 30-40 minutes
These times will vary based on your familiarity with the ingredients and equipment, but this framework should serve you well.
Ingredients
– 2 ripe bananas, sliced
– 2 cups instant vanilla pudding mix
– 4 cups cold milk
– 1 teaspoon vanilla extract
– 2 cups whipped cream (store-bought or homemade)
– 1 cup graham cracker crumbs
– ¼ cup granulated sugar (optional)
– Additional banana slices and whipped cream for topping
Step-by-Step Instructions
Making Banana Cream Pie Jars is straightforward and enjoyable! Just follow these easy steps to create your delightful desserts:
1. Prepare the Pudding: In a large mixing bowl, whisk together the instant vanilla pudding mix and cold milk until it thickens, about 2-3 minutes.
2. Flavor the Pudding: Add vanilla extract to the pudding mixture and stir well to incorporate.
3. Fold in Whipped Cream: Carefully fold in the whipped cream until the mixture is well combined and fluffy. This step gives your pudding a delightful lightness.
4. Layer the Ingredients: In your chosen jars, start with a layer of graham cracker crumbs at the bottom (approximately 2 tablespoons).
5. Add Pudding: Spoon a layer of the prepared pudding over the graham cracker crumbs until the jars are about halfway full.
6. Add Banana Slices: Place a few banana slices on top of the pudding layer to add flavor and texture.
7. Repeat Layers: Repeat the layers (graham cracker crumbs, pudding, and bananas) until the jars are nearly full, leaving room for the final whipped cream topping.
8. Top with Whipped Cream: Finish each jar with a generous dollop of whipped cream.
9. Garnish: Add additional banana slices and a sprinkle of graham cracker crumbs on top for a polished presentation.
10. Chill: Refrigerate the jars for about 15-30 minutes before serving to let the flavors meld and the pudding set.
How to Serve
Serving Banana Cream Pie Jars can be both fun and elegant, creating a memorable experience for your guests. Consider these ideas:
1. Presentation: Arrange jars on a beautiful tray or pedestal for an eye-catching display that enhances their visual appeal.
2. Accompaniments: Pair with chocolate shavings, caramel sauce, or a sprinkle of cinnamon for a unique twist.
3. Serve with Spoons: Provide decorative spoons for a delightful eating experience.
4. Fun Alternatives: For added excitement, consider varying the layering techniques or even using different flavored pudding mixes.
By thoughtfully considering how you serve the jars, you elevate the entire experience, making it unforgettable for everyone enjoying your delicious Banana Cream Pie Jars.
Additional Tips
– Use Ripe Bananas: Ensure your bananas are perfectly ripe. They should be yellow with brown spots for the best natural sweetness and flavor.
– Chill the Jars: After assembling, chilling the jars for at least 15 minutes enhances the flavors and allows the pudding to set correctly.
– Garnish Creatively: Don’t hesitate to get creative with your garnishes; a sprinkle of toasted coconut or a drizzle of caramel can elevate your dessert.
– Keep It Light: When folding in the whipped cream, use a gentle hand to maintain the fluffiness of the mixture.
Recipe Variation
Feel free to experiment with different flavors! Here are some fun variations to try:
1. Chocolate Banana Cream Pie Jars: Use chocolate pudding instead of vanilla for a chocolaty twist.
2. Peanut Butter Banana Cream: Add a layer of peanut butter between the banana slices for a rich and nutty flavor.
3. Almond Joy-Inspired: Incorporate shredded coconut and chopped almonds in the layering for a tropical feel.
4. Vegan Version: Substitute dairy ingredients with plant-based milk, dairy-free whipped cream, and vegan graham crackers for a vegan-friendly treat.
Freezing and Storage
– Storage: Keep your assembled Banana Cream Pie Jars in the refrigerator to maintain freshness. They should last about 3-4 days.
– Freezing: While it’s best to enjoy these jars fresh, you can freeze components separately. Pudding can be frozen for up to a month but will change texture. It’s best to layer bananas and whipped cream fresh before serving.
Special Equipment
To prepare your Banana Cream Pie Jars efficiently, consider having the following equipment on hand:
– Mixing bowls
– Whisk for blending pudding
– Spatula for folding whipped cream
– Jars or cups for layering your dessert
– Measuring cups for precise ingredient portions
Frequently Asked Questions
How can I make my Banana Cream Pie Jars more flavorful?
Incorporate a splash of rum or banana liqueur into the pudding mixture to elevate the flavor.
Can I prepare Banana Cream Pie Jars in advance?
Absolutely! You can assemble the jars a few hours ahead and keep them in the fridge until serving time.
What substitutions can I make if I’m out of graham crackers?
You can substitute graham crackers with crushed cookies, like Oreos or vanilla wafers. They will provide a unique flavor and texture.
Is it necessary to leave out the bananas before serving?
For optimal freshness, add banana slices just before serving to avoid browning.
Can I make smaller servings?
Yes! You can use smaller jars or cups to create mini Banana Cream Pie Jars that are perfect for individual servings.
Conclusion
Banana Cream Pie Jars offer a delightful twist on a classic dessert, perfect for any occasion. Their easy assembly and beautiful presentation make them a standout treat for gatherings or quiet evenings at home. With endless possibilities for variations and personal touches, you’re sure to create a treat that will both amaze and satisfy your guests.
Banana Cream Pie Jars: An Incredible Ultimate Recipe for 8
- Total Time: 15 minutes
Ingredients
– 2 ripe bananas, sliced
– 2 cups instant vanilla pudding mix
– 4 cups cold milk
– 1 teaspoon vanilla extract
– 2 cups whipped cream (store-bought or homemade)
– 1 cup graham cracker crumbs
– ¼ cup granulated sugar (optional)
– Additional banana slices and whipped cream for topping
Instructions
Making Banana Cream Pie Jars is straightforward and enjoyable! Just follow these easy steps to create your delightful desserts:
1. Prepare the Pudding: In a large mixing bowl, whisk together the instant vanilla pudding mix and cold milk until it thickens, about 2-3 minutes.
2. Flavor the Pudding: Add vanilla extract to the pudding mixture and stir well to incorporate.
3. Fold in Whipped Cream: Carefully fold in the whipped cream until the mixture is well combined and fluffy. This step gives your pudding a delightful lightness.
4. Layer the Ingredients: In your chosen jars, start with a layer of graham cracker crumbs at the bottom (approximately 2 tablespoons).
5. Add Pudding: Spoon a layer of the prepared pudding over the graham cracker crumbs until the jars are about halfway full.
6. Add Banana Slices: Place a few banana slices on top of the pudding layer to add flavor and texture.
7. Repeat Layers: Repeat the layers (graham cracker crumbs, pudding, and bananas) until the jars are nearly full, leaving room for the final whipped cream topping.
8. Top with Whipped Cream: Finish each jar with a generous dollop of whipped cream.
9. Garnish: Add additional banana slices and a sprinkle of graham cracker crumbs on top for a polished presentation.
10. Chill: Refrigerate the jars for about 15-30 minutes before serving to let the flavors meld and the pudding set.
- Prep Time: 15 minutes
- Cook Time: 0 minutes
Nutrition
- Serving Size: 8
- Calories: 250 kcal
- Fat: 10g
- Protein: 3g