
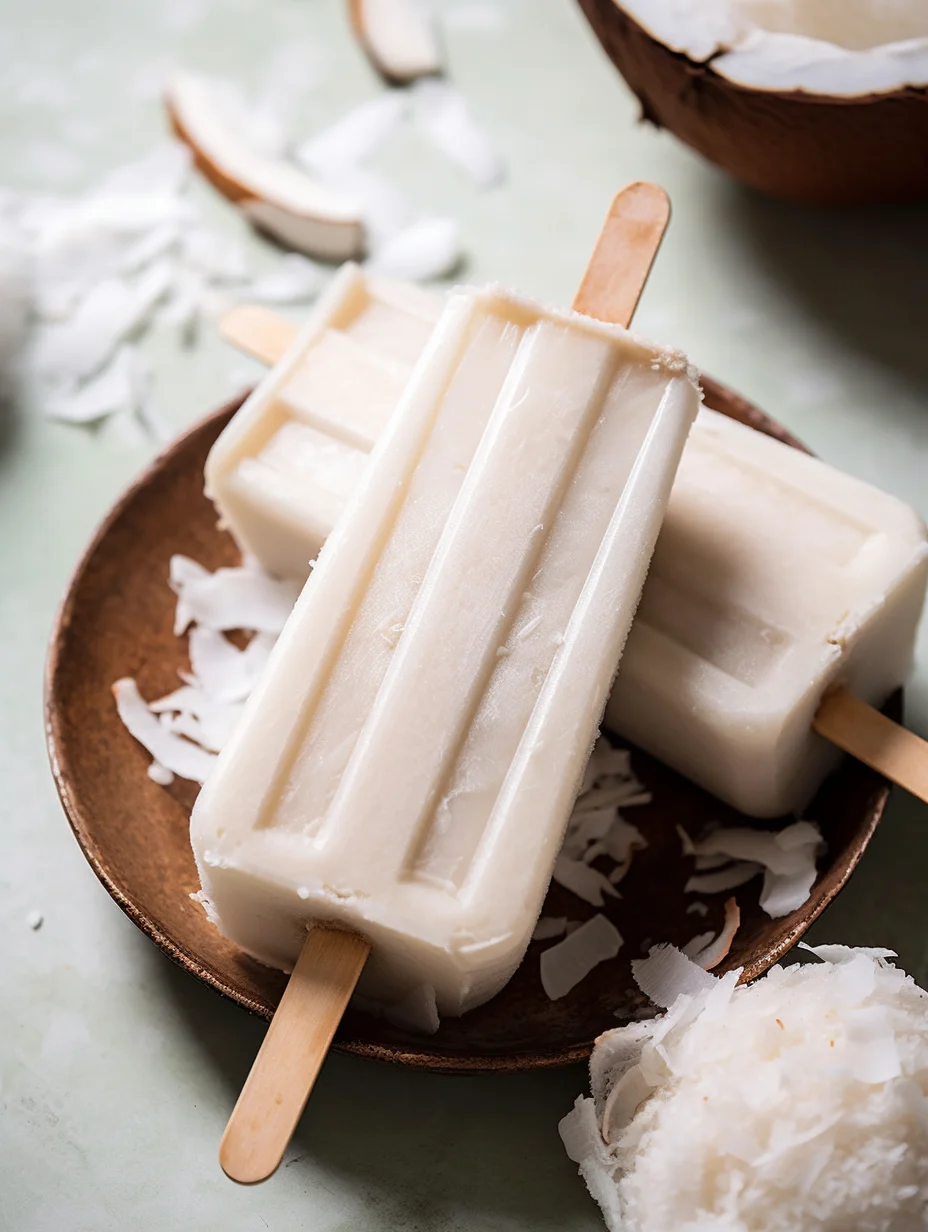
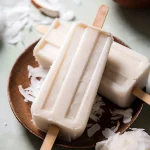
Coconut Popsicles are a delightful way to cool off during those hot summer days. They combine the rich, creamy flavor of coconut with a refreshing frozen treat. If you’ve ever craved something simple yet satisfying, these popsicles are the answer. With just a few ingredients and a little bit of patience, you will create an amazing dessert that everyone will love.
Coconut Popsicles not only tickle your taste buds, but they also provide a tropical escape that feels like a mini-vacation in every bite. Imagine biting into a popsicle and being transported to a sandy beach with the calm sound of waves lapping at your feet. The balance of sweet and creamy makes these popsicles a favorite among kids and adults alike. This article will guide you through everything you need to know about making Coconut Popsicles, from why you’ll adore them to the steps for preparation.
In today’s world where everyone is on the lookout for healthier choices, these Coconut Popsicles are a fantastic alternative to store-bought frozen treats. They’re customizable, so you can experiment with different flavors and ingredients to suit your taste. Whether you’re planning a summer party or just want to enjoy a cool snack, this recipe is sure to impress. Let’s dive into what makes Coconut Popsicles an essential treat of the season.
Why You’ll Love This Recipe
Coconut Popsicles are the perfect combination of simplicity and flavor. Here are a few reasons why you will fall in love with this recipe:
1. Easy to Make: With only a handful of ingredients, you can whip these popsicles up in no time.
2. Customizable Flavor: You can mix and match various fruits with coconut to create unique flavor combinations.
3. Kid-Friendly: Kids will love these popsicles, and you can feel good knowing they are made from wholesome ingredients.
4. Healthy Option: Unlike many store-bought varieties loaded with sugars and artificial flavors, these popsicles are a refreshing yet healthy choice.
5. Perfect For Any Occasion: Whether it’s a birthday party, barbecue, or a quiet evening at home, Coconut Popsicles are always a hit.
6. Delightfully Refreshing: The creaminess of coconut combined with cold temperatures results in a delightful contrast that awakens your senses.
With these enticing qualities, you can see why Coconut Popsicles are a must-have recipe for summer. Feel free to get creative with the ingredients, as the primary focus remains on the rich taste of coconut.
Preparation and Cooking Time
The overall time to make Coconut Popsicles is relatively manageable, making it a great option for any day. Here’s what you can expect:
– Preparation Time: 15 minutes
– Freezing Time: 4-6 hours (or overnight for the best results)
– Total Time: Approximately 4 hours and 15 minutes to 6 hours and 15 minutes
The majority of the time is spent in the freezer waiting for them to harden, but the hands-on preparation is quite simple.
Ingredients
– 1 can (400 ml) of coconut milk
– 1 cup coconut water or milk
– 1/4 cup honey or agave syrup (adjust to taste)
– 1 teaspoon vanilla extract
– Optional: diced fruits like pineapple, mango, or berries
– Optional: shredded coconut for texture
Step-by-Step Instructions
Follow these straightforward steps to create your Coconut Popsicles:
1. Prepare the Mixture:
– In a mixing bowl, combine the coconut milk, coconut water (or milk), honey (or agave syrup), and vanilla extract. Mix well until fully incorporated.
2. Customize Your Popsicles:
– If you’d like to add fruits, gently fold in the diced fruits of your choice. Alternatively, you can layer the fruits at the bottom of the molds.
3. Pour into Molds:
– Carefully pour the mixture into your popsicle molds. Leave a little space at the top since the mixture may expand while freezing.
4. Insert Sticks:
– If your molds have a stick slot, insert the sticks half-way into the mixture.
5. Freeze:
– Place the molds in the freezer and let them freeze for at least 4-6 hours, or overnight for best results.
6. Unmold the Popsicles:
– Once fully frozen, remove the popsicles from the molds. If they are difficult to release, run warm water over the outside of the mold for a few seconds.
7. Serve Immediate or Store:
– Enjoy your Coconut Popsicles right away, or store them in a freezer-safe bag or container for later use.
By following these instructions, you will create refreshing Coconut Popsicles that are bound to be the highlight of any hot day.
How to Serve
Serving Coconut Popsicles can be as simple or elaborate as you wish. Here are some ideas to elevate your serving options:
1. Presentation: Use colorful plates or popsicle stands to create an appealing display. A simple garnish, like a leaf of mint or a slice of fresh fruit on the side, can enhance visual interest.
2. Accompaniments: Pair these popsicles with other tropical delights, such as fresh fruit salads, yogurt, or even a scoop of coconut sorbet for an extra treat.
3. Make it a Treat for Guests: Set up a “popsicle bar” where guests can choose additional toppings such as shredded coconut, crushed nuts, or chocolate syrup to drizzle over their popsicles.
4. Serving Size: Consider cutting the popped coconut mixture into bite-sized pieces if you prefer serving them as small cubes on a platter.
5. Occasions: These popsicles are not just for individual snacking; they can serve as a refreshing treat at gatherings, birthdays, or family barbecues, making you the star host.
By thoughtfully considering how you serve Coconut Popsicles, you maximize enjoyment for yourself and your guests, turning a simple dessert into a memorable experience. Enjoy!
Additional Tips
– Use Fresh Ingredients: Using fresh coconuts or high-quality coconut milk elevates the taste of your Coconut Popsicles.
– Experiment with Layers: Create visually appealing layers by alternating coconut mixture with blended fruits in your molds.
– Taste Before Freezing: Always taste the mixture before you freeze it to adjust sweetness if necessary.
Recipe Variation
There are plenty of ways to customize your Coconut Popsicles. Consider trying out these variations:
1. Chocolate Coconut Popsicles: Add cocoa powder or melted dark chocolate into the mixture for a rich chocolatey twist.
2. Tropical Fruit Burst: Combine blended mango or passion fruit with coconut for a refreshing tropical flavor.
3. Coconut Almond Popsicles: Incorporate almond extract along with the coconut for a nutty aroma and flavor.
Freezing and Storage
– Storage: Once made, Coconut Popsicles can be stored in an airtight container or wrapped in freezer-safe bags. They can stay fresh for up to two months.
– Freezing Tips: To prevent popsicles from sticking together, lay them flat in a single layer until frozen, then stack them once solid.
Special Equipment
While making Coconut Popsicles is simple, having the right equipment can make the process easier:
– Popsicle Molds: Invest in silicone molds, which help release the popsicles effortlessly.
– Blender: A good blender is essential for mixing the ingredients smoothly, especially if you’re adding fruits.
– Measuring Cups and Spoons: Precision helps ensure that the flavors balance perfectly in your popsicle mixture.
Frequently Asked Questions
How long can I store Coconut Popsicles?
You can store them in the freezer for up to two months without loss of flavor or texture.
Can I use any type of fruit?
Absolutely! Experiment with any fruit you like. Just remember that the riper the fruit, the sweeter your popsicle will be.
What is the best way to unmold popsicles?
Run cool, running water over the outside of the mold for a few seconds. This helps release the popsicles easily.
Can I make Coconut Popsicles without added sugar?
Yes, feel free to omit sweeteners entirely if you’re using ripe fruits or coconut, which naturally provides sweetness.
Are these popsicles vegan?
Yes, as long as you use agave syrup instead of honey, these Coconut Popsicles are a delightful vegan treat.
Conclusion
Coconut Popsicles are the ultimate frozen treat for summer. With their creamy texture and refreshing taste, they represent the perfect blend of simplicity and indulgence. This recipe not only allows you to enjoy a guilt-free dessert, but it also offers endless opportunities for creativity in flavor combination. So, gather your ingredients, use the tips and variations provided, and prepare to be delighted by your homemade coconut wonders. Your summer days just got a whole lot cooler!
Coconut Popsicles: An Incredible Ultimate Recipe for Summer
- Total Time: 37 minute
Ingredients
– 1 can (400 ml) of coconut milk
– 1 cup coconut water or milk
– 1/4 cup honey or agave syrup (adjust to taste)
– 1 teaspoon vanilla extract
– Optional: diced fruits like pineapple, mango, or berries
– Optional: shredded coconut for texture
Instructions
Follow these straightforward steps to create your Coconut Popsicles:
1. Prepare the Mixture:
– In a mixing bowl, combine the coconut milk, coconut water (or milk), honey (or agave syrup), and vanilla extract. Mix well until fully incorporated.
2. Customize Your Popsicles:
– If you’d like to add fruits, gently fold in the diced fruits of your choice. Alternatively, you can layer the fruits at the bottom of the molds.
3. Pour into Molds:
– Carefully pour the mixture into your popsicle molds. Leave a little space at the top since the mixture may expand while freezing.
4. Insert Sticks:
– If your molds have a stick slot, insert the sticks half-way into the mixture.
5. Freeze:
– Place the molds in the freezer and let them freeze for at least 4-6 hours, or overnight for best results.
6. Unmold the Popsicles:
– Once fully frozen, remove the popsicles from the molds. If they are difficult to release, run warm water over the outside of the mold for a few seconds.
7. Serve Immediate or Store:
– Enjoy your Coconut Popsicles right away, or store them in a freezer-safe bag or container for later use.
By following these instructions, you will create refreshing Coconut Popsicles that are bound to be the highlight of any hot day.
- Prep Time: 15 minutes
- Cook Time: Total Time: 4-6 hours
Nutrition
- Serving Size: 6
- Calories: 130 kcal
- Fat: 5g
- Protein: 2g