
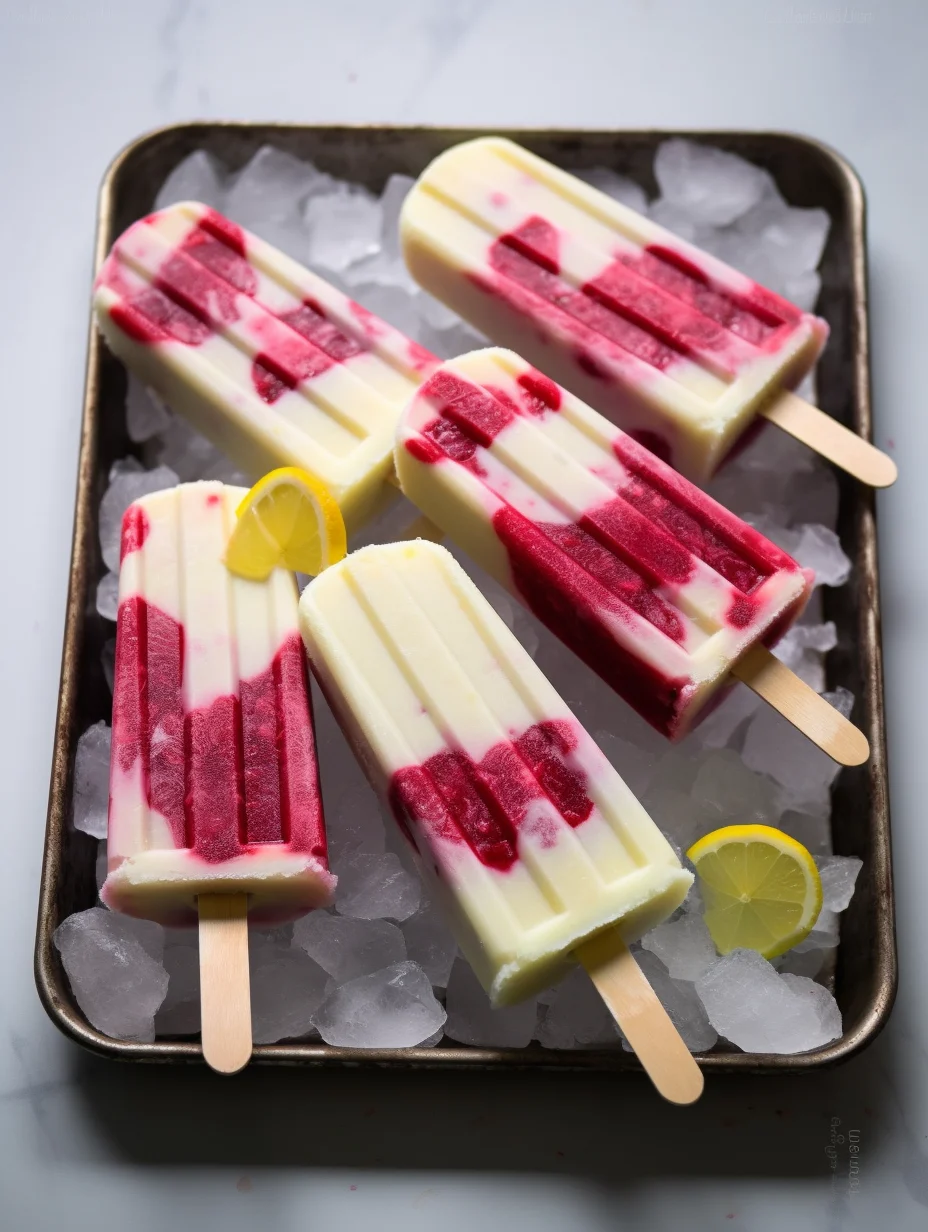
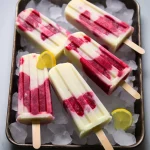
Easy Raspberry-Lemon Greek Yogurt Popsicles Recipe is a refreshing and delicious treat that’s perfect for hot summer days. If you’re craving something cool, creamy, and slightly tangy, these popsicles will surely satisfy your taste buds. Made with simple ingredients, they are easy to whip up and will impress anyone who tries them. This recipe is not just enjoyable; it’s a healthier alternative to traditional popsicles while still delivering amazing flavor and a delightful texture.
Imagine indulging in a tart yet sweet raspberry-lemon concoction that melts in your mouth. The vibrant colors and natural sweetness from the fruit combine beautifully with the creamy texture of Greek yogurt. Whether you’re looking for a fun dessert for kids, an afternoon snack, or a healthy treat to beat the heat, this recipe is perfectly versatile. In this article, we’ll explore why you’ll love this recipe, detail the preparation and cooking time, and guide you through easy-to-follow instructions.
Let’s not forget that these popsicles are also a fantastic way to get more fruits and dairy into your diet. With their bright colors and refreshing taste, they’re an easy way to encourage healthier eating for both kids and adults alike.
Why You’ll Love This Recipe
There are many reasons why Easy Raspberry-Lemon Greek Yogurt Popsicles Recipe should be on your must-try list. Here are some of the standout features that will make you fall in love with this treat:
1. Simple Ingredients – You likely have most of the ingredients needed at home.
2. Healthier Option – Made with Greek yogurt and natural fruit, they are lower in sugar compared to store-bought popsicles.
3. Vibrant Flavors – The wonderful combination of raspberry and lemon provides a refreshing symphony of taste.
4. Easy to Make – The straightforward recipe guarantees success, even for novice cooks.
5. Fun for Everyone – Perfect for kids and adults, making them great for gatherings or family snacks.
6. Perfect Summer Treat – Keeps you cool on hot days and satisfies your sweet tooth without guilt.
With all these qualities, it’s no wonder people rave about these popsicles. They are not just food; they are an enjoyable experience for your taste buds!
Preparation and Cooking Time
Gathering the ingredients and preparing Easy Raspberry-Lemon Greek Yogurt Popsicles is quick and convenient. Here’s a breakdown of the time you’ll need:
– Preparation Time: 10 minutes
– Freezing Time: 4-6 hours (or overnight)
With a prep time of just 10 minutes, these popsicles are quick and simple to make, allowing you to have a cool treat ready in no time.
Ingredients
– 2 cups Greek yogurt (plain or vanilla)
– 1 cup fresh raspberries (or frozen)
– ¼ cup honey or maple syrup (adjust for sweetness)
– 1 tablespoon lemon juice (freshly squeezed)
– Zest of 1 lemon
Step-by-Step Instructions
Making Easy Raspberry-Lemon Greek Yogurt Popsicles is an enjoyable process that anyone can follow! Here’s how to create these delightful treats:
1. Blend Ingredients: In a blender, combine the Greek yogurt, honey (or maple syrup), lemon juice, and lemon zest. Blend until smooth.
2. Prepare Raspberries: If using fresh raspberries, rinse them thoroughly. You can also use frozen raspberries directly.
3. Layering: Pour a small amount of the yogurt mixture into the popsicle molds, filling them about a quarter of the way.
4. Add Raspberries: Drop several raspberries into each mold over the yogurt layer, pressing them down slightly to release some juice.
5. Fill with Yogurt: Continue layering the yogurt mixture in the molds until nearly full, leaving a little space at the top.
6. Swirl: Use a skewer or spoon to gently swirl the raspberry juice into the yogurt mixture for a marbled effect.
7. Insert Sticks: Carefully place the popsicle sticks into the center of each mold.
8. Freeze: Place the molds in the freezer and let them freeze for at least 4-6 hours, or overnight for best results.
9. Remove from Molds: Once fully frozen, run warm water over the outside of the molds for a few seconds to help release the popsicles.
10. Serve Immediately: Enjoy these delicious popsicles right away, or store them in an airtight container in the freezer for later!
These steps are incredibly straightforward, guiding you to create delightful popsicles that are sure to impress.
How to Serve
When it comes to serving your Easy Raspberry-Lemon Greek Yogurt Popsicles, you can consider the following tips to elevate your presentation:
1. Garnish: Offer additional fresh raspberries, lemon slices, or a sprig of mint on the side for an attractive and flavorful touch.
2. Serving Style: You can serve the popsicles directly on their sticks or place them in decorative cups for a whimsical look.
3. Perfect Pairings: These popsicles go beautifully with a refreshing glass of lemonade or iced tea, enhancing the overall experience.
4. Sharing Options: For a fun treat, create a popsicle platter with a variety of flavors to cater to everyone’s tastes.
By thoughtfully considering how you serve these popsicles, you create not just a treat, but a delightful moment to share with family and friends. Enjoy the simple pleasure of a homemade popsicle that’s both delicious and good for you!
Additional Tips
– Use Fresh Ingredients: For the best flavor, try to use fresh raspberries. If fresh is not available, frozen berries work well too.
– Experiment with Sweetness: Taste the yogurt mixture before freezing. Adjust the amount of honey or maple syrup to suit your sweetness preference.
– Customize with Other Fruits: Consider adding other fruits like strawberries or blueberries for a delightful twist to the flavor.
– Blend for a Smooth Texture: Ensure you blend the ingredients well to achieve a silky, creamy popsicle that melts in your mouth.
– Enjoy with Toppings: Serve the popsicles with granola or crushed nuts on top for added texture and crunch.
Recipe Variation
Feel free to customize this Easy Raspberry-Lemon Greek Yogurt Popsicles Recipe! Here are some variations to consider:
1. Tropical Twist: Incorporate some mango or pineapple into the yogurt mixture for a tropical flavor that complements the raspberry-lemon.
2. Dairy-Free Option: Substitute the Greek yogurt with a dairy-free yogurt alternative made from coconut or almond milk.
3. Herbal Infusion: Add some chopped fresh basil or mint to the raspberry mixture for a refreshing herbal note.
4. Chocolate Delight: Drizzle some melted dark chocolate on top of the popsicles for a decadent treat.
Freezing and Storage
– Storage: These popsicles can be kept in the freezer for up to a month. Ensure they’re in an airtight container to prevent freezer burn.
– Removing from Molds: When removing the popsicles from their molds, run them under warm water to make the process smoother.
– Batch Preparation: Consider making larger batches and experimenting with different flavor variations to always have a refreshing treat on hand.
Special Equipment
To create these delightful popsicles, you’ll need some basic kitchen tools:
– Popsicle molds: Silicone molds can make it easier to remove popsicles once they’re frozen.
– Blender or food processor: For an easy and smooth mixture.
– Measuring cups and spoons: To ensure accurate ingredient amounts.
– Spatula: Useful for scraping down the sides of the blender.
Frequently Asked Questions
Can I use different fruits for this recipe?
Absolutely! While raspberries and lemons work beautifully together, feel free to experiment with your favorite fruits.
How many popsicles does this recipe yield?
This recipe typically yields about 8-10 popsicles, depending on the size of your molds.
What if I don’t have popsicle sticks?
You can use spoons as alternatives, or simply cover the molds with plastic wrap and insert the sticks once the mixture is slightly frozen.
How long do they need to freeze for?
For best results, allow the popsicles to freeze for at least 4-6 hours. Overnight is ideal to ensure they are fully set.
What can I do if my popsicles are hard to remove from the molds?
Try running warm water over the outside of the molds for a few seconds. This should loosen them up for easier removal.
Conclusion
The Easy Raspberry-Lemon Greek Yogurt Popsicles Recipe is the ultimate treat for hot summer days. With their vibrant colors, refreshing flavors, and creamy texture, these popsicles are a delightful way to beat the heat. Not only are they enjoyable, but they also offer a healthier alternative compared to traditional sugary popsicles. With simple ingredients and straightforward steps, you can create a batch of these delightful treats in no time. Whether for an afternoon snack or a fun dessert, these popsicles will surely impress anyone who tries them!
Easy Raspberry-Lemon Greek Yogurt Popsicles Recipe: An Incredible Ultimate Treat
- Total Time: 15 minutes
Ingredients
– 2 cups Greek yogurt (plain or vanilla)
– 1 cup fresh raspberries (or frozen)
– ¼ cup honey or maple syrup (adjust for sweetness)
– 1 tablespoon lemon juice (freshly squeezed)
– Zest of 1 lemon
Instructions
Making Easy Raspberry-Lemon Greek Yogurt Popsicles is an enjoyable process that anyone can follow! Here’s how to create these delightful treats:
1. Blend Ingredients: In a blender, combine the Greek yogurt, honey (or maple syrup), lemon juice, and lemon zest. Blend until smooth.
2. Prepare Raspberries: If using fresh raspberries, rinse them thoroughly. You can also use frozen raspberries directly.
3. Layering: Pour a small amount of the yogurt mixture into the popsicle molds, filling them about a quarter of the way.
4. Add Raspberries: Drop several raspberries into each mold over the yogurt layer, pressing them down slightly to release some juice.
5. Fill with Yogurt: Continue layering the yogurt mixture in the molds until nearly full, leaving a little space at the top.
6. Swirl: Use a skewer or spoon to gently swirl the raspberry juice into the yogurt mixture for a marbled effect.
7. Insert Sticks: Carefully place the popsicle sticks into the center of each mold.
8. Freeze: Place the molds in the freezer and let them freeze for at least 4-6 hours, or overnight for best results.
9. Remove from Molds: Once fully frozen, run warm water over the outside of the molds for a few seconds to help release the popsicles.
10. Serve Immediately: Enjoy these delicious popsicles right away, or store them in an airtight container in the freezer for later!
These steps are incredibly straightforward, guiding you to create delightful popsicles that are sure to impress.
- Prep Time: 15 minutes
- Cook Time: 0 minutes
Nutrition
- Serving Size: 8-10 popsicles
- Calories: 120 kcal
- Fat: 2g
- Protein: 6g