
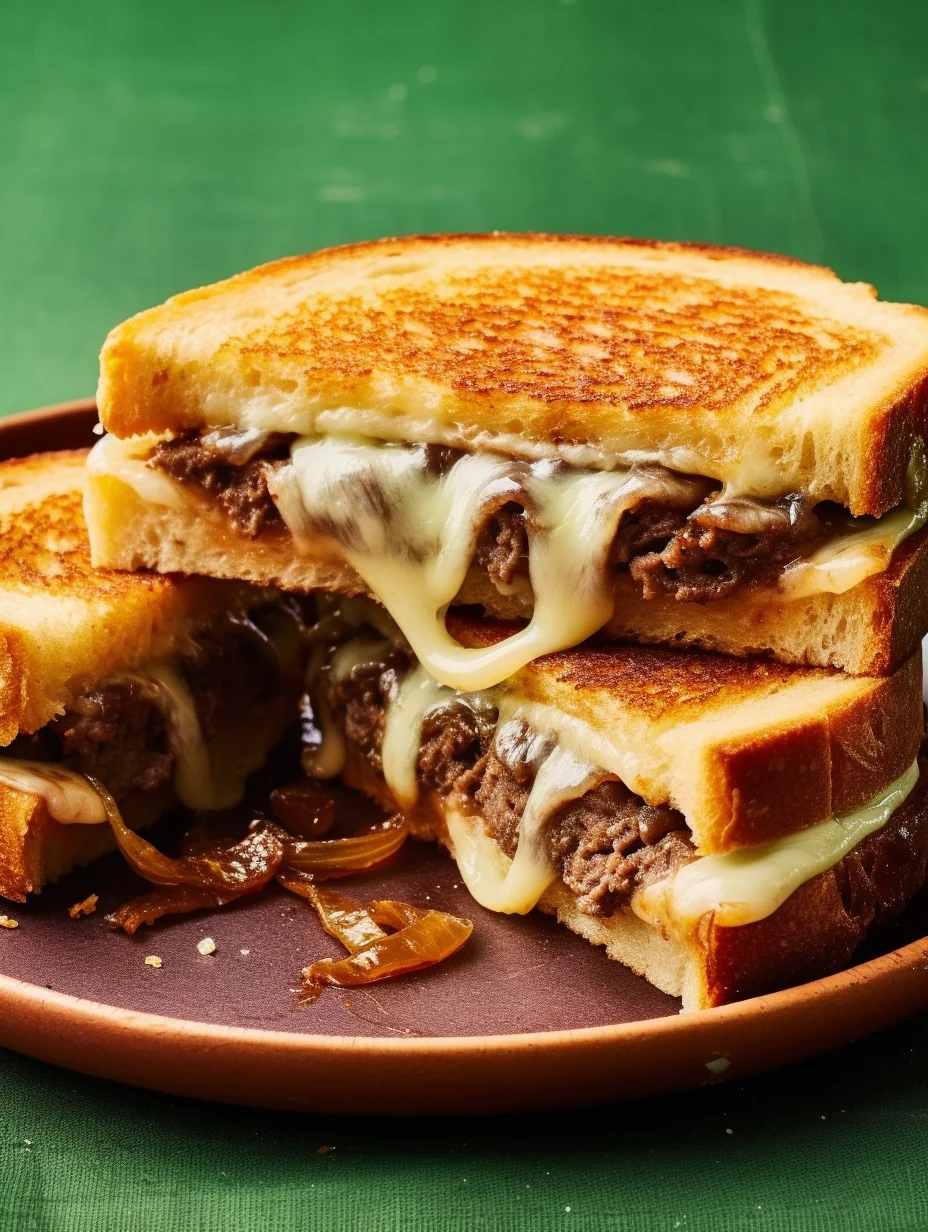
Cast-Iron Patty Melts are a wonderful twist on the classic burger, offering a mouth-watering combination of grilled flavors and melty cheese. This recipe is perfect for those cozy evenings at home and casual gatherings with friends. The unique preparation method allows the patties to achieve a satisfying crust while ensuring they remain juicy and flavorful. The savory experience of biting into a perfectly crafted patty melt is something that transcends simple comfort food; it’s a memorable culinary experience.
If you’ve never indulged in a Cast-Iron Patty Melt, you’re in for a treat. The layers of grilled onions, melted cheese, and seasoned beef come together in a way that creates an incredible burst of flavor in every bite. This recipe is designed to be straightforward, making it perfect for both beginners and seasoned cooks alike. The ease of preparation combined with the rich and satisfying taste makes it a go-to meal any day of the week.
In this guide, you will learn about the reasons why this Cast-Iron Patty Melt recipe stands out, the preparation time, the essential ingredients, and a step-by-step instruction list to create your perfect dish. Prepare to impress your family and friends with a meal that’s not only delicious but also creates lasting memories around the table.
Why You’ll Love This Recipe
The Cast-Iron Patty Melts offer a unique blend of flavors and textures that is sure to impress. Here are some reasons why you will cherish this recipe:
1. Simplicity: The ingredients are common and easy to source, allowing you to whip up a satisfying meal without the hassle.
2. Flavor Explosion: The combination of caramelized onions, melted cheese, and juicy beef delivers a flavor profile that is truly indescribable.
3. Versatility: Tailor the recipe to your preferences by choosing different cheeses or adding toppings such as pickles or spicy mustard to suit your taste.
4. Ideal for Any Occasion: Whether it’s a casual weeknight dinner or a special gathering, these patty melts fit perfectly.
5. Hearty and Filling: These sandwiches are hearty enough to serve as a stand-alone meal, making them ideal for satisfying hunger.
6. Cast-Iron Excellence: The cast-iron cooking method ensures even heat distribution and optimal caramelization, enhancing the taste.
By selecting this recipe, you’re making a choice that combines convenience with gourmet appeal. Each bite of the Cast-Iron Patty Melts will make you appreciate the beauty of simple yet delectable comfort food!
Preparation and Cooking Time
Creating your Cast-Iron Patty Melts will take approximately 30 minutes, including both preparation and cooking time. Here’s a breakdown of what to expect:
– Preparation Time: 10 minutes
– Cooking Time: 20 minutes
These times give you a solid framework, but they may vary based on your cooking experience and kitchen setup.
Ingredients
– 1 pound ground beef (80/20 blend)
– 1 medium onion, thinly sliced
– 4 slices of rye or Texas toast bread
– 4 slices American or Swiss cheese
– 2 tablespoons unsalted butter
– Salt and pepper, to taste
Step-by-Step Instructions
Follow these straightforward steps to create your Cast-Iron Patty Melts:
1. Prepare the Ingredients: Begin by slicing your onion and gathering all necessary ingredients.
2. Form the Patties: In a bowl, season the ground beef with salt and pepper. Form into two equally sized patties.
3. Heat the Skillet: Place a cast-iron skillet over medium-high heat. Add 1 tablespoon of butter to the skillet.
4. Cook the Onions: Once the butter has melted, add the sliced onions to the skillet. Stir occasionally until they caramelize, about 5-7 minutes. Remove and set aside.
5. Cook the Patties: In the same skillet, add the patties. Cook for about 4 minutes on one side before flipping.
6. Add Cheese and Onions: After flipping, place a slice of cheese on each patty and add the caramelized onions on top. Cook for an additional 4-5 minutes or until the cheese is melted and the patties reach your desired doneness.
7. Toast the Bread: While the patties are finishing cooking, spread butter on one side of each slice of bread. Place the slices butter side down on another skillet over medium heat.
8. Assemble the Sandwiches: Once the bread is golden brown, carefully place one patty on each slice. Top with the second slice of bread.
9. Grill the Toasted Sandwiches: Cook both sides of the assembled sandwiches in the skillet for a few minutes, pressing down slightly with a spatula until they are nicely browned and the cheese is melted.
10. Slice and Serve: Once golden and toasty, remove from the skillet and let it cool slightly before slicing in half for serving.
How to Serve
To elevate your Cast-Iron Patty Melts experience, consider the following serving suggestions:
1. Accompaniments: Serve with a side of crispy fries, potato chips, or a fresh salad for a complete meal.
2. Dipping Sauces: Offer condiments like ketchup, mustard, or a homemade sauce for an extra flavor boost.
3. Presentation: Use a rustic wooden platter or a stylish plate to present the melted patty melts attractively.
4. Garnishes: Fresh herbs, such as parsley or dill, can be sprinkled on top for an appealing touch.
5. Beverage Pairings: These yummy melts pair excellently with cold beers, soda, or even a glass of red wine, making your meal even more enjoyable.
With these serving ideas, you’ll delight guests and family alike with an unforgettable meal experience centered around your Cast-Iron Patty Melts!
Additional Tips
– Use Fresh Ingredients: For the best flavor, always opt for fresh onions and quality beef. The fresher the ingredients, the better the taste.
– Monitor Cheese Melting: Keep an eye on the cheese to make sure it melts perfectly without burning. A lid can help speed up the melting process.
– Customize Seasoning: Feel free to adjust the amount of salt and pepper based on your taste preferences. A pinch of garlic powder or smoked paprika can also add an extra layer of flavor.
Recipe Variation
Mix it up with these exciting variations of Cast-Iron Patty Melts:
1. Different Cheese: Swap American cheese for sharper cheddar or tangy blue cheese to alter the flavor profile.
2. Mushroom Delight: Add sautéed mushrooms for an earthy twist that complements the beef beautifully.
3. Spicy Kick: Incorporate jalapeños or a splash of hot sauce for those who love a bit of heat in their sandwich.
4. Vegan Option: Use plant-based ground meat and vegan cheese for a deliciously meat-free version.
Freezing and Storage
– Storage: Keep any leftover Cast-Iron Patty Melts wrapped tightly in the refrigerator. They will stay fresh for up to 2 days.
– Freezing: You can freeze the cooked patties (without bread) for up to 3 months. Wrap them in plastic wrap and then foil to prevent freezer burn. Thaw in the refrigerator before reheating.
Special Equipment
Having the right tools can make cooking your Cast-Iron Patty Melts easier:
– Cast-Iron Skillet: Essential for achieving that beautiful crust and even cooking.
– Spatula: A sturdy spatula is needed for flipping the patties and assembling sandwiches.
– Knife: A sharp knife for slicing onions allows for even cooking and caramelization.
Frequently Asked Questions
Can I make the patties ahead of time?
Yes, you can prepare the patties and refrigerate them before frying. Just make sure to bring them to room temperature before cooking for even doneness.
What toppings can I add to my patty melts?
Consider toppings like sliced tomatoes, lettuce, or even a fried egg for a gourmet touch.
How do I prevent the bread from getting soggy?
By toasting the bread thoroughly and ensuring that the patties aren’t overly juicy when assembled, you can maintain the bread’s texture.
Can I make this recipe on the grill?
Absolutely! You can use a grill for the patties and toast the bread separately, giving it a distinct smoky flavor.
What can I serve with Cast-Iron Patty Melts?
They pair wonderfully with a side of pickles, a fresh salad, or crispy fries for a complete meal experience.
Conclusion
Incorporating Cast-Iron Patty Melts into your culinary repertoire is a decision you won’t regret. This hearty yet satisfying dish is perfect for any occasion, whether casual family dinners or entertaining friends. With its rich flavors and easy preparation, every bite offers comfort. Once you experience making and enjoying this recipe, you may find it replacing your ordinary burger nights. Remember, this dish is not merely food; it’s a delightful journey of taste!

Cast-Iron Patty Melts: An Amazing Ultimate Recipe for All Occasions
- Total Time: 35 minutes
Ingredients
– 1 pound ground beef (80/20 blend)
– 1 medium onion, thinly sliced
– 4 slices of rye or Texas toast bread
– 4 slices American or Swiss cheese
– 2 tablespoons unsalted butter
– Salt and pepper, to taste
Instructions
Follow these straightforward steps to create your Cast-Iron Patty Melts:
1. Prepare the Ingredients: Begin by slicing your onion and gathering all necessary ingredients.
2. Form the Patties: In a bowl, season the ground beef with salt and pepper. Form into two equally sized patties.
3. Heat the Skillet: Place a cast-iron skillet over medium-high heat. Add 1 tablespoon of butter to the skillet.
4. Cook the Onions: Once the butter has melted, add the sliced onions to the skillet. Stir occasionally until they caramelize, about 5-7 minutes. Remove and set aside.
5. Cook the Patties: In the same skillet, add the patties. Cook for about 4 minutes on one side before flipping.
6. Add Cheese and Onions: After flipping, place a slice of cheese on each patty and add the caramelized onions on top. Cook for an additional 4-5 minutes or until the cheese is melted and the patties reach your desired doneness.
7. Toast the Bread: While the patties are finishing cooking, spread butter on one side of each slice of bread. Place the slices butter side down on another skillet over medium heat.
8. Assemble the Sandwiches: Once the bread is golden brown, carefully place one patty on each slice. Top with the second slice of bread.
9. Grill the Toasted Sandwiches: Cook both sides of the assembled sandwiches in the skillet for a few minutes, pressing down slightly with a spatula until they are nicely browned and the cheese is melted.
10. Slice and Serve: Once golden and toasty, remove from the skillet and let it cool slightly before slicing in half for serving.
- Prep Time: 15 minutes
- Cook Time: 20 minutes
Nutrition
- Serving Size: 2 servings
- Calories: 650 kcal
- Fat: 42g
- Protein: 36g