
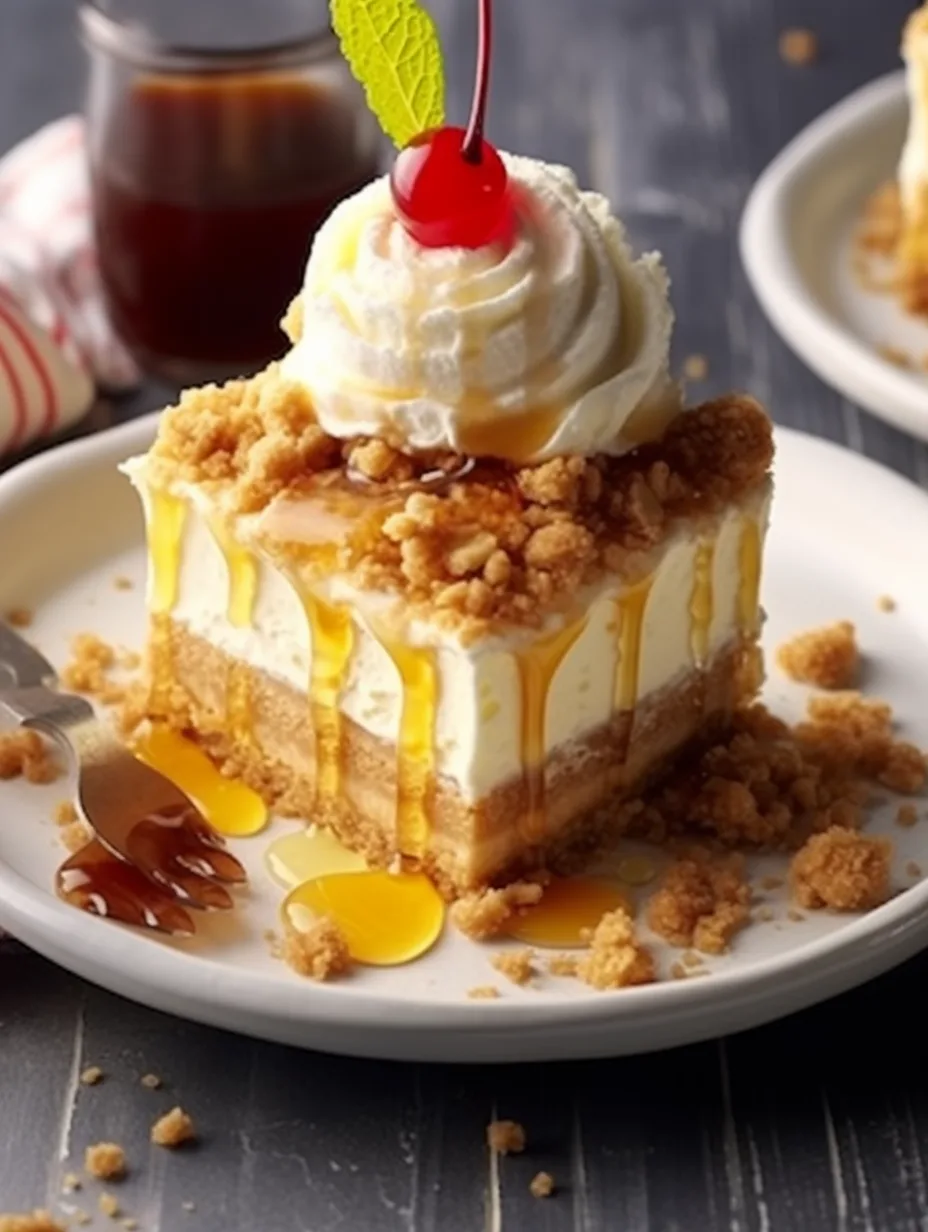
Fried Ice Cream Dessert Bars are a delightful twist on a classic treat that brings the joy of frozen dessert and the crunch of a crispy coating together in one incredible recipe. This decadent dessert captures the essence of summer nights and the thrill of indulgence in a bite-sized form. Imagine biting into a creamy, sweet ice cream center enveloped in a warm, crunchy shell that delivers a satisfying crunch with every bite. It’s nothing short of heaven!
If you’ve ever enjoyed fried ice cream in a restaurant, you might have wondered how to recreate that experience at home. The beauty of this recipe lies in its simplicity and versatility. You can customize the flavors of the ice cream and the coating to suit your taste. Whether you prefer classic vanilla or adventurous flavors like matcha or cookies and cream, this recipe is perfect for anyone, regardless of culinary experience.
In this guide, we’ll take a deep dive into why this recipe shines, how to prepare and cook it, and finally, tips on serving these delicious fried ice cream bars to your friends and family. So, let’s uncover the magic behind these amazing Fried Ice Cream Dessert Bars!
Why You’ll Love This Recipe
Creating Fried Ice Cream Dessert Bars will quickly become one of your go-to desserts. Here are some irresistible reasons to fall in love with this recipe:
1. Irresistibly Delicious: The combination of creamy ice cream and a crispy coating is undeniably satisfying.
2. Customizable Flavors: You can mix and match flavors, making this recipe unique to your tastes.
3. Perfect for Sharing: These bars are great for parties, family gatherings, or cozy evenings.
4. Simple Preparation: With straightforward steps, anyone can master this dessert, regardless of baking skills.
5. Visual Appeal: The contrast of colors and textures makes this dessert stunning on any serving table.
6. Bypass Unnecessary Frying: The use of an oven eliminates the need for deep frying while still achieving a delightful crunch.
These factors contribute to making Fried Ice Cream Dessert Bars the ultimate dessert experience that will tantalize your taste buds and impress your guests!
Preparation and Cooking Time
The preparation and cooking of Fried Ice Cream Dessert Bars take about 1 hour and 30 minutes total. Here’s the breakdown of the required times:
– Preparation Time: 30-45 minutes (includes freezing time)
– Cooking Time: 10-15 minutes
– Cooling Time: 15-20 minutes
The freezing time is crucial to ensuring the ice cream maintains its shape during cooking, so make sure to plan accordingly.
Ingredients
– 4 cups ice cream (any flavor you prefer)
– 1 cup crushed cereal (e.g., Cornflakes, Rice Krispies, or Panko breadcrumbs)
– ½ cup all-purpose flour
– 2 large eggs
– 1 teaspoon vanilla extract
– 1/2 teaspoon cinnamon (optional)
– 1 cup oil (for frying)
– Whipped cream (for serving, optional)
– Chocolate or caramel sauce (for drizzling, optional)
– Fresh fruit (for garnish, optional)
Step-by-Step Instructions
Creating Fried Ice Cream Dessert Bars is straightforward if you follow these simple steps:
1. Scoop Ice Cream: Using a cookie scoop, scoop ice cream into balls and place them on a baking sheet lined with parchment paper. Freeze for at least 1 hour until firm.
2. Prepare Coating: In a bowl, combine crushed cereal, flour, and cinnamon. Mix well.
3. Beat Eggs: In another bowl, beat the eggs with vanilla extract until fully combined.
4. Coat Ice Cream: Remove the ice cream balls from the freezer. Dip each ball into the egg mixture, then roll it in the cereal coating to ensure an even layer. For extra crunch, you can double dip: repeat the egg and then cereal coating process.
5. Freeze Again: Place the coated balls back on the baking sheet and freeze for an additional 30 minutes to set.
6. Heat Oil: In a deep pan or skillet, heat oil over medium-high heat until it’s hot but not smoking.
7. Fry Ice Cream Balls: Carefully add the ice cream balls to the hot oil, frying just 1-2 at a time to avoid overcrowding. Fry for about 10-15 seconds, or until the coating is golden brown. Remove and place on a paper towel to drain excess oil.
8. Cool Briefly: Allow the fried ice cream balls to cool for a few minutes before serving.
9. Repeat: Continue this process until all ice cream balls are fried.
10. Serve Immediately: For the best experience, serve them right away while they are still warm.
How to Serve
To make an impression with your Fried Ice Cream Dessert Bars, consider the following serving suggestions:
1. Presentation: Arrange the bars on a platter, showcasing their golden exterior to entice guests. Garnish with mint leaves or fresh fruit for extra color.
2. Sauce Drizzles: Add a drizzle of chocolate or caramel sauce on top of each bar to enhance taste and presentation.
3. Accompaniments: Serve with a dollop of whipped cream or a scoop of additional ice cream on the side for those who crave more indulgence.
4. Portioning: Cut the bars into bite-sized pieces for easier sharing, allowing guests to sample more than one flavor without overpowering their palate.
5. Beverage Pairing: Pair with sweet iced tea, coffee, or a dessert wine to balance the indulgence of the dessert.
These serving tips not only enhance the visual appeal but also elevate the overall experience for your guests, making your Fried Ice Cream Dessert Bars a memorable treat!
Additional Tips
– Experiment with Coatings: While cornflakes are popular, try crushed graham crackers or crushed pretzels for a unique twist.
– Serve with a Variety of Toppings: Offer options like sprinkles, chopped nuts, or shredded coconut for extra flair.
– Patience is Key: Ensure ice cream is frozen solid before frying to achieve the best texture.
Recipe Variation
Feel free to get creative! Here are some variations to enhance your Fried Ice Cream Dessert Bars:
1. Flavor Infusions: Incorporate extracts like almond or mint into the ice cream for a flavorful twist.
2. Spicy Kick: Add a pinch of cayenne to the coating for those who enjoy a little heat with their sweet.
3. Banana Foster Variation: Use banana ice cream with a rum-flavored glaze after frying for a tropical delight.
Freezing and Storage
– Storage: Keep leftover Fried Ice Cream Dessert Bars in an airtight container in the freezer. They will last for up to 1 week.
– Long-Term Freezing: For longer storage, wrap each bar tightly in plastic wrap and then foil to prevent freezer burn. They can last up to 3 months.
Special Equipment
To make these dessert bars, you’ll need a few essential tools:
– Cookie scoop for shaping the ice cream
– Baking sheet lined with parchment paper
– Deep frying pan or skillet
– Thermometer (optional, but helpful) for checking oil temperature
– Tongs for safe removal of fried bars
Frequently Asked Questions
Can I use store-bought ice cream for this recipe?
Yes, store-bought ice cream works perfectly for this recipe.
What if I don’t have a deep fryer?
A deep pan or a skillet works just as well for frying the ice cream bars.
Can I use gluten-free cereal?
Absolutely! Substitute with gluten-free cereal options for a delicious alternative.
How do I keep the bars from melting too quickly?
Ensure the ice cream is very firm before coating and frying; you can also keep them in the freezer until just before serving.
What should I do with leftover coating?
The leftover coating can be stored in an airtight container for future use on other desserts.
Conclusion
Fried Ice Cream Dessert Bars are a heavenly treat that combines the best of both worlds—frothy ice cream with a crispy shell. This recipe allows for endless customization, making it perfect for any gathering or a sweet night in. Your friends and family will be impressed by the delightful flavor and satisfying crunch. Get ready to indulge in this unforgettable dessert experience!
Fried Ice Cream Dessert Bars: An Amazing Ultimate Recipe
- Total Time: 40 minute
Ingredients
– 4 cups ice cream (any flavor you prefer)
– 1 cup crushed cereal (e.g., Cornflakes, Rice Krispies, or Panko breadcrumbs)
– ½ cup all-purpose flour
– 2 large eggs
– 1 teaspoon vanilla extract
– 1/2 teaspoon cinnamon (optional)
– 1 cup oil (for frying)
– Whipped cream (for serving, optional)
– Chocolate or caramel sauce (for drizzling, optional)
– Fresh fruit (for garnish, optional)
Instructions
Creating Fried Ice Cream Dessert Bars is straightforward if you follow these simple steps:
1. Scoop Ice Cream: Using a cookie scoop, scoop ice cream into balls and place them on a baking sheet lined with parchment paper. Freeze for at least 1 hour until firm.
2. Prepare Coating: In a bowl, combine crushed cereal, flour, and cinnamon. Mix well.
3. Beat Eggs: In another bowl, beat the eggs with vanilla extract until fully combined.
4. Coat Ice Cream: Remove the ice cream balls from the freezer. Dip each ball into the egg mixture, then roll it in the cereal coating to ensure an even layer. For extra crunch, you can double dip: repeat the egg and then cereal coating process.
5. Freeze Again: Place the coated balls back on the baking sheet and freeze for an additional 30 minutes to set.
6. Heat Oil: In a deep pan or skillet, heat oil over medium-high heat until it’s hot but not smoking.
7. Fry Ice Cream Balls: Carefully add the ice cream balls to the hot oil, frying just 1-2 at a time to avoid overcrowding. Fry for about 10-15 seconds, or until the coating is golden brown. Remove and place on a paper towel to drain excess oil.
8. Cool Briefly: Allow the fried ice cream balls to cool for a few minutes before serving.
9. Repeat: Continue this process until all ice cream balls are fried.
10. Serve Immediately: For the best experience, serve them right away while they are still warm.
- Prep Time: 15 minutes
- Cook Time: 10-15 minutes
Nutrition
- Serving Size: 8
- Calories: 240 kcal
- Fat: 12g
- Protein: 4g