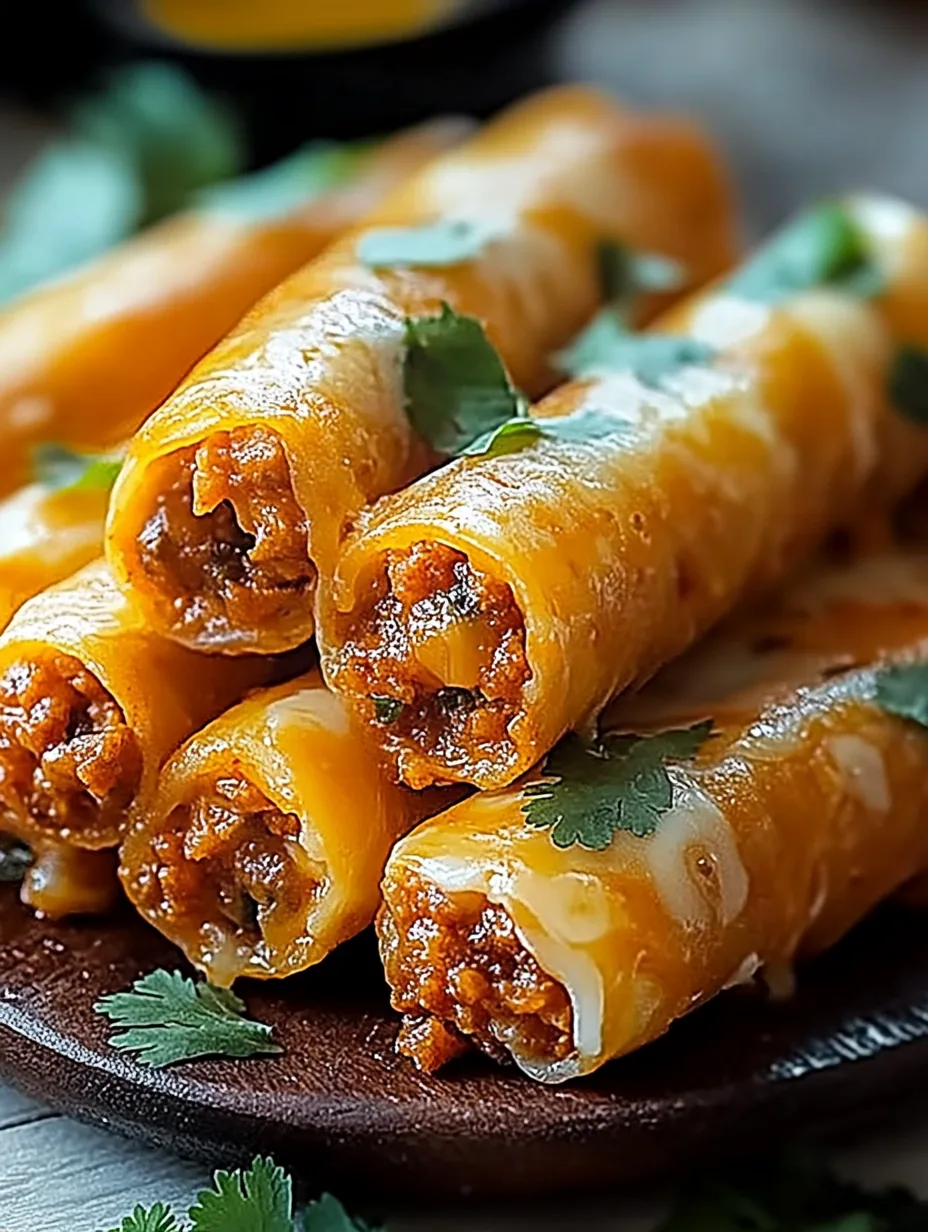
Cheesy Taco Sticks are a delightful twist on traditional taco night. Imagine sinking your teeth into a warm, cheesy, and flavorful stick reminiscent of your favorite Mexican dish, but in a fun and easy-to-eat format. These cheesy delights combine the deliciousness of tacos with the convenience of finger foods, making them an amazing snack for any occasion. Whether you’re hosting a party, enjoying family movie night, or simply craving something savory, Cheesy Taco Sticks are sure to impress.
With zesty spices, gooey cheese, and tender tortillas rolled around your choice of fillings, each bite is bursting with flavor. Whether you’re a taco enthusiast or just looking for a new recipe, you’ll find that Cheesy Taco Sticks are incredibly easy to make. The simplicity of this recipe will free up your time in the kitchen while still delivering a deliciously satisfying dish.
In this guide, you’ll learn why Cheesy Taco Sticks stand out among countless snack options, how to prepare them efficiently, and clever ideas for serving them. With a bit of creativity, you can make these sticks the star of your next gathering.
Why You’ll Love This Recipe
Cheesy Taco Sticks combine essential ingredients and flavors that everyone loves. Here are some reasons why this recipe will quickly become your favorite:
1. Versatile Ingredients: You can customize the spices and fillings to suit your taste. Use ground beef, chicken, or even black beans for a vegetarian option.
2. Perfect for Any Event: Whether it’s a casual get-together or a more formal gathering, they work wonders as appetizers or snacks.
3. Family-Friendly: Kids and adults alike will enjoy these flavors, making them a hit at family dinners or birthday parties.
4. Easy to Prepare: The recipe simplifies cooking without sacrificing flavor. You can whip them up in no time!
5. Crispy and Cheesy: Each stick boasts a delightful crunch combined with a gooey, cheesy center that few can resist.
6. Dip It Up: Cheesy Taco Sticks pair wonderfully with various dips like salsa, guacamole, or sour cream, giving everyone a chance to customize their experience.
Understanding these aspects will help you appreciate why Cheesy Taco Sticks are a standout recipe. Their delicious flavors and ease of preparation make them a reliable choice for any occasion.
Preparation and Cooking Time
Preparing Cheesy Taco Sticks takes around 30-40 minutes, from start to finish. Here’s the breakdown:
– Preparation Time: 15 minutes
– Cooking Time: 15-20 minutes
This makes for a quick and enjoyable cooking experience, allowing you to focus on the fun parts of entertaining your guests.
Ingredients
– 1 pound ground beef (or chicken/black beans)
– 1 tablespoon taco seasoning
– 1 cup shredded cheese (cheddar or Mexican blend)
– 1 package of flour tortillas (about 8-10)
– 1 cup diced tomatoes (optional)
– 1 cup shredded lettuce (optional)
– ½ cup diced onions (optional)
– Cooking spray or olive oil for brushing
– Salsa for dipping (optional)
Step-by-Step Instructions
Making Cheesy Taco Sticks is simple and fun! Just follow these steps for a tasty result:
1. Preheat the Oven: Preheat your oven to 400°F (200°C). Line a baking sheet with parchment paper.
2. Cook the Meat: In a skillet over medium heat, brown the ground beef or chicken. Drain excess fat if necessary.
3. Add Seasoning: Sprinkle the taco seasoning over the meat and stir well. Cook for another 2-3 minutes, ensuring the meat is well-coated. Remove from heat.
4. Assemble the Filling: In a bowl, combine the cooked meat with shredded cheese and optional diced tomatoes or onions if desired.
5. Prepare the Tortillas: Lay out one tortilla on a clean surface. Spoon some filling along the edge of the tortilla.
6. Roll It Up: Roll the tortilla tightly around the filling, tucking in the edges as you go.
7. Place on Baking Sheet: Stand the rolled tortilla seam-side down on the prepared baking sheet. Repeat with remaining tortillas.
8. Brush with Oil: Lightly spray or brush the tops of the rolled tortillas with olive oil or cooking spray.
9. Bake: Place the baking sheet in the oven and bake for 15-20 minutes until golden brown and crispy.
10. Cool and Slice: Remove from the oven and let cool for a few minutes. Cut into sticks and serve!
These quick and clear instructions will guide you while preparing the amazing Cheesy Taco Sticks.
How to Serve
To elevate your serving experience with Cheesy Taco Sticks, consider the following tips:
1. Presentation: Arrange the sticks on a large platter for a visually appealing display. You can garnish with fresh herbs or a sprinkle of cheese.
2. Dipping Options: Offer a variety of dips like guacamole, salsa, and sour cream. This allows guests to choose their favorites.
3. Accompany with Sides: Consider serving with a side of Mexican rice or a fresh salad for a more complete meal.
4. Garnish: Add fresh cilantro, jalapeños, or lime wedges for the guests who enjoy extra flavor.
5. Personal Touch: Encourage guests to customize their sticks with various toppings, such as diced avocado or cheese sauce, to make the experience even more enjoyable.
By keeping these serving tips in mind, you can ensure that your Cheesy Taco Sticks will not only taste great but also impress your guests with their attractive presentation.
In conclusion, Cheesy Taco Sticks are not just a meal, but an experience filled with flavor. With their incredible taste and simple preparation, they’re destined to become a staple in your kitchen. Enjoy the mix of fun, flavor, and festivity that these Cheesy Taco Sticks can bring to your cooking endeavors!
Additional Tips
– Experiment with Seasonings: Feel free to add extra spices or flavorings to the meat mixture to suit your taste buds. Ingredients like cumin, paprika, or chili powder can enhance the flavor profile.
– Serve Immediately: For the best texture, serve the Cheesy Taco Sticks right out of the oven. They are at their crispiest and most delicious when fresh.
– Pairing Suggestions: Consider complementing your Cheesy Taco Sticks with a refreshing beverage like a mango margarita or lime-infused sparkling water to balance the flavors.
– Custom Toppings: Besides dips, offer toppings like jalapeños, diced avocado, or pickled onions to take your Cheesy Taco Sticks to the next level.
Recipe Variation
Mix things up with these fun recipe variations that reinforce the versatility of Cheesy Taco Sticks:
1. Spicy Option: Add diced jalapeños or hot sauce to the meat mixture for a spicy kick that will excite your taste buds.
2. Cheesy Veggie Version: Replace the meat with sautéed bell peppers, mushrooms, and spinach for a loaded veggie stick that even meat lovers will enjoy.
3. Breakfast Taco Sticks: Substitute breakfast sausage or scrambled eggs as the main filling, paired with cheese and a sprinkle of taco seasoning for a morning twist.
4. Mini Cheesy Taco Bites: Use smaller tortillas or cut larger sticks into bite-sized pieces for mini appetizers perfect for parties.
Freezing and Storage
– Refrigeration: Store leftover Cheesy Taco Sticks in an airtight container in the refrigerator. They are best consumed within 3-4 days for optimal freshness.
– Freezing: To freeze, allow the sticks to cool completely, then wrap them individually in plastic wrap and store in a freezer-safe bag. They can last for up to 2 months in the freezer. Reheat in the oven at 375°F (190°C) until warmed through and crispy.
– Reheating Tips: For the best texture, avoid using the microwave. Instead, reheat in the oven for about 10-15 minutes to regain that crunchy exterior.
Special Equipment
To successfully prepare Cheesy Taco Sticks, you will need the following kitchen tools:
– Skillet: For browning the meat and cooking the filling.
– Baking Sheet: To place the rolled taco sticks for baking.
– Parchment Paper: To line the baking sheet and for easier cleanup.
– Sharp Knife: Useful for slicing the finished product into sticks.
– Spoon: For scooping the filling into the tortillas.
Frequently Asked Questions
Can I make Cheesy Taco Sticks ahead of time?
Yes, you can prepare the filling and roll the sticks a few hours in advance. Store them in the refrigerator until ready to bake.
What can I use instead of flour tortillas?
Consider using corn tortillas for a gluten-free option. Just keep in mind that they may be a bit different in texture.
Are these Cheesy Taco Sticks suitable for kids?
Absolutely! They are a fun and delicious snack that kids will love. Feel free to modify the spice level to make them milder if desired.
Can I bake these sticks without meat?
Yes, you can easily make a vegetarian version. Use black beans, refried beans, or sautéed vegetables for the filling.
How do I ensure my Cheesy Taco Sticks are crispy?
Avoid piling too much filling and make sure to brush the tops with oil before baking to encourage a crispy texture.
Conclusion
Cheesy Taco Sticks are a fantastic way to enjoy your favorite taco flavors in a convenient and delicious format. With their crispy exterior and gooey interior, they are perfect for parties or family gatherings. Not only are they easy to make, but they are also customizable, making them a versatile treat. Whether paired with dips or enjoyed on their own, these Cheesy Taco Sticks are sure to become a favorite in your home. Dive into this recipe and enjoy the delightful taste of taco night every day!

Cheesy Taco Sticks: An Amazing Ultimate Recipe
- Total Time: 35 minutes
Ingredients
– 1 pound ground beef (or chicken/black beans)
– 1 tablespoon taco seasoning
– 1 cup shredded cheese (cheddar or Mexican blend)
– 1 package of flour tortillas (about 8-10)
– 1 cup diced tomatoes (optional)
– 1 cup shredded lettuce (optional)
– ½ cup diced onions (optional)
– Cooking spray or olive oil for brushing
– Salsa for dipping (optional)
Instructions
Making Cheesy Taco Sticks is simple and fun! Just follow these steps for a tasty result:
1. Preheat the Oven: Preheat your oven to 400°F (200°C). Line a baking sheet with parchment paper.
2. Cook the Meat: In a skillet over medium heat, brown the ground beef or chicken. Drain excess fat if necessary.
3. Add Seasoning: Sprinkle the taco seasoning over the meat and stir well. Cook for another 2-3 minutes, ensuring the meat is well-coated. Remove from heat.
4. Assemble the Filling: In a bowl, combine the cooked meat with shredded cheese and optional diced tomatoes or onions if desired.
5. Prepare the Tortillas: Lay out one tortilla on a clean surface. Spoon some filling along the edge of the tortilla.
6. Roll It Up: Roll the tortilla tightly around the filling, tucking in the edges as you go.
7. Place on Baking Sheet: Stand the rolled tortilla seam-side down on the prepared baking sheet. Repeat with remaining tortillas.
8. Brush with Oil: Lightly spray or brush the tops of the rolled tortillas with olive oil or cooking spray.
9. Bake: Place the baking sheet in the oven and bake for 15-20 minutes until golden brown and crispy.
10. Cool and Slice: Remove from the oven and let cool for a few minutes. Cut into sticks and serve!
These quick and clear instructions will guide you while preparing the amazing Cheesy Taco Sticks.
- Prep Time: 15 minutes
- Cook Time: 20 minutes
Nutrition
- Serving Size: 8
- Calories: 300 kcal
- Fat: 12g
- Protein: 15g

