
There’s something about an old-school, no-bake dessert that brings a wave of comfort, especially when it’s made with simple pantry staples like Oreos, cream cheese, and whipped topping. This Oreo Dirt Pudding isn’t just easy to make—it’s the kind of treat that practically begs you to dig in with a big spoon. Creamy, crunchy, sweet, and playful, this dessert is a total crowd-pleaser that never fails to steal the show at any gathering.
I still remember the first time I made this. I was helping out at a family cookout on a warm spring afternoon, and we needed a quick dessert that could feed a bunch of hungry kids and adults. Someone mentioned “dirt pudding” and I had no idea what they were talking about—but once I saw how fast it disappeared from the pan, I knew it had to become part of my go-to dessert rotation. Since then, it’s been the star of birthday parties, potlucks, school events, and even a few quiet movie nights at home.
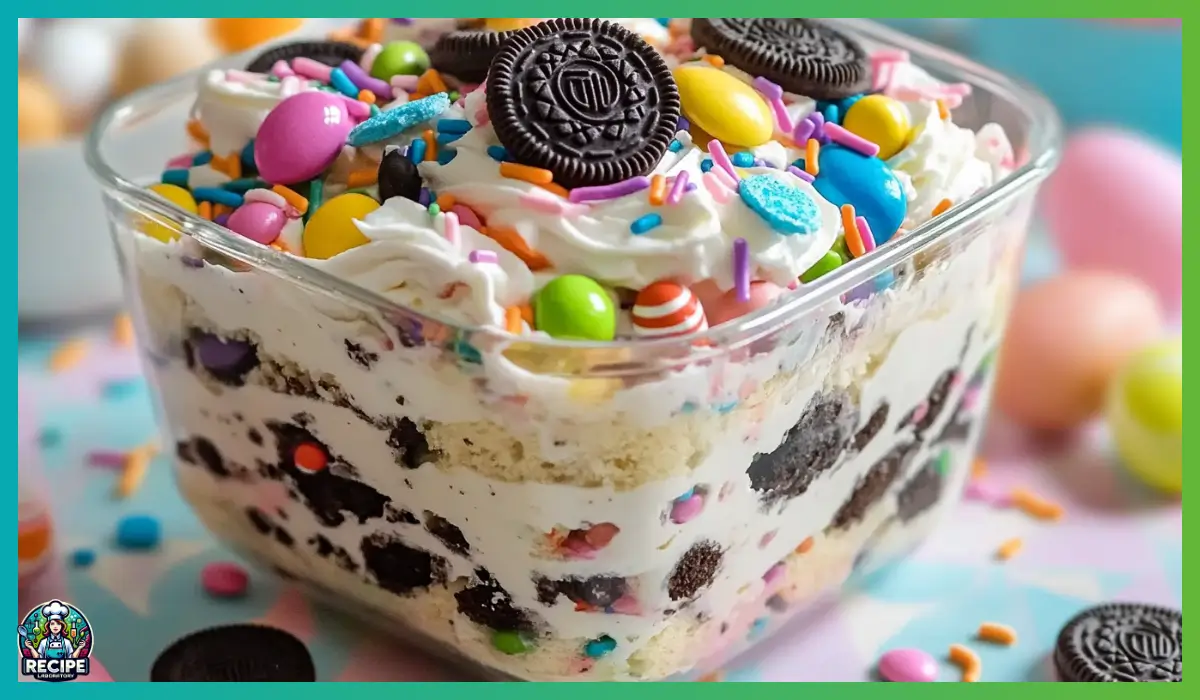
What makes this recipe extra special is how fun and versatile it is. You can dress it up for holidays (pastel M&Ms for spring, red and green for Christmas), serve it in individual cups for parties, or even layer it in a trifle dish to make it a little fancy. The texture combination is absolute perfection: soft, creamy pudding blended with a rich cream cheese filling, all layered over crushed Oreos that give it that signature crunch.
If you’ve never made a no-bake layered dessert before, don’t worry—this recipe is incredibly forgiving. It uses instant pudding, pre-made whipped topping, and just a few other ingredients. No baking, no fancy tools, and no stress. You can make it the night before, let it chill overnight, and just pull it out when you’re ready to serve.
So whether you’re an experienced home baker or just learning your way around the kitchen, this Oreo Dirt Pudding recipe is one you’ll come back to again and again. It’s simple, nostalgic, and downright delicious. Let’s dig in.
Why You’ll Love This Recipe
There are countless reasons to love this dessert, but let’s start with the most obvious one—it’s absolutely delicious. The layers of smooth vanilla pudding mixed with a tangy cream cheese blend create a creamy base that melts in your mouth, while the crushed Oreos add that signature chocolatey crunch in every bite.
One of the top reasons people adore this recipe is because it’s just so easy. You don’t need an oven. You don’t need to temper eggs or whisk anything over a double boiler. All the components come together with minimal effort and a few mixing bowls. Even if you’re not confident in your kitchen skills, this recipe will make you feel like a pro.
It’s also extremely adaptable. The pastel M&Ms add a pop of color, making it perfect for spring or Easter, but you can easily swap in other toppings depending on the occasion. Add gummy worms for a classic dirt-and-worms version that kids will love, or sprinkle on crushed chocolate bars, chocolate chips, or even toffee bits for a grown-up twist.
Another thing that makes this dessert such a hit is how well it feeds a crowd. A single 9×13-inch pan can easily serve 12 to 15 people, making it ideal for parties, potlucks, and holiday dinners. And since it’s chilled and served cold, it’s especially refreshing on warm days.
Texture-wise, it hits all the right notes. There’s the creamy smoothness from the pudding and cream cheese, the soft lightness of the whipped topping, and the crispy bite of the cookie crust. It’s layered heaven in a single dish.
Lastly, kids love it. Adults love it. Everyone loves it. And that kind of universal appeal is something special. Whether you’re making this for a birthday celebration or just because you have a sweet tooth, it’s going to be a hit every single time.
Health Benefits
Now, let’s be real—Oreo Dirt Pudding is more of an indulgence than a superfood salad. But even with its decadent layers and sweet flavors, there are still some ways you can look at it from a slightly more health-conscious perspective.
First off, portion control is easier than it might seem. Because the dessert is rich and satisfying, a small serving goes a long way. This helps curb the temptation to go overboard while still letting you enjoy something sweet and special.
Cream cheese provides a modest amount of calcium and protein, both of which are important for maintaining bone strength and keeping you full. When balanced with the lightness of the whipped topping and the dairy in the pudding, it can actually be part of a more balanced indulgence—especially when served in smaller amounts.
You can also make small swaps to lighten the recipe. For example, using reduced-fat cream cheese and light whipped topping helps lower the overall fat content. Some people even use sugar-free instant pudding or almond milk instead of whole milk to reduce the sugar and calorie count.
In addition, if you’re preparing this for a family gathering, it’s a great way to avoid store-bought desserts with long ingredient lists and preservatives. When you make it at home, you control exactly what goes into it, which gives you the flexibility to tweak the recipe to meet your own dietary goals.
And while the M&Ms and Oreos bring sweetness and crunch, they also bring joy—and that emotional benefit of eating something nostalgic and comforting can’t be discounted. Food is meant to be enjoyed, and this dessert is a lovely reminder of how a sweet treat can bring people together.
So while this may not be a “health food,” it absolutely has its place in a balanced life filled with happy moments and shared memories.
Preparation Time, Servings, and Nutritional Information
One of the biggest selling points of this recipe is just how quick it is to prepare. You don’t have to spend hours in the kitchen, and that alone makes it perfect for busy families, last-minute potlucks, or those evenings when you want to whip up something special without turning on the oven.
Total Time:
- Prep Time: 25 minutes
- Chill Time: 2 hours (minimum)
- Total Time: About 2 hours 25 minutes
Servings:
This recipe makes approximately 12–15 servings, depending on how large you cut your portions.
Nutritional Information (per serving):
- Calories: Approximately 340
- Protein: 3g
- Carbohydrates: 38g
- Sugars: 28g
- Fat: 19g
- Saturated Fat: 11g
- Sodium: 190mg
Note: Nutritional values are approximate and will vary based on brands used and portion size.
If you’re looking to lighten things up, consider using light cream cheese, reduced-fat whipped topping, or sugar-free pudding mix. These small changes can reduce the calorie count without affecting the delicious taste and texture.
Ingredients List
This Oreo Dirt Pudding recipe uses simple, easy-to-find ingredients that come together into something magical. Below is everything you’ll need to make it at home:
Base Layer:
- 1 package (14 oz) crushed Oreo cookies
- These create the “dirt” part of the pudding. You’ll use most of them for the base layer and save a handful for topping. Don’t remove the cream filling; it adds extra flavor and helps the crumbs stick together slightly.
Cream Cheese Filling:
- 8 oz cream cheese, softened
- This gives the dessert a slightly tangy, creamy richness that balances the sweetness. Let it come to room temperature for easier mixing.
- ¼ cup unsalted butter, softened
- Adds a silky texture and richness to the filling.
- 1 cup powdered sugar
- Sweetens the cream cheese mixture just enough without overpowering it.
Pudding Layer:
- 1 package (3.4 oz) instant vanilla pudding mix
- Go for instant pudding, not cook-and-serve. This helps the dessert set quickly without needing heat.
- 2 cups cold milk
- Use whole milk for a creamier texture, or substitute a lighter milk of your choice.
Topping:
- 8 oz whipped topping (like Cool Whip), thawed
- Light and fluffy, this adds volume and smoothness to the cream cheese and pudding mixture.
- 1 cup pastel M&Ms
- These are optional but highly recommended for color and crunch—perfect for spring or Easter themes.
- ½ cup mini Oreos
- Adds extra crunch and a fun finishing touch on top.
That’s it—just eight ingredients, most of which are probably already in your pantry or fridge. Now, let’s move on to how you put it all together.
Step-By-Step Cooking Instructions
Now that you’ve got your ingredients ready, it’s time to bring them all together. This no-bake dessert is a joy to make because it comes together quickly and doesn’t require any fancy techniques. Even if you’re new to the kitchen, you’ve got this. Just follow these easy steps and you’ll be rewarded with a luscious, creamy dessert that’s sure to impress.
Step 1: Crush the Oreo Cookies
Start by crushing your Oreo cookies. You’ll want to use a food processor if you have one—it’s fast and gets the crumbs nice and fine. But don’t worry if you don’t have one. You can also place the cookies in a large zip-top bag and crush them with a rolling pin or the bottom of a sturdy glass. The key is to crush them until you have a mixture of fine crumbs and some slightly larger chunks for texture.
Reserve about ½ cup of the crushed cookies and set them aside for the topping later. The rest will form the base.
Step 2: Press the Crumbs Into the Dish
Take the bulk of your crushed Oreo crumbs and spread them evenly into the bottom of a 9×13-inch dish. There’s no need to grease the pan since the cookies already have plenty of fat in the cream filling.
Using the back of a spoon or the bottom of a glass, press the crumbs down gently to form a loose crust. You’re not trying to create a solid base like a cheesecake crust—just a compact layer that gives some structure to the dessert.
Step 3: Make the Cream Cheese Filling
In a large mixing bowl, combine the softened cream cheese and the unsalted butter. Beat them together using an electric hand mixer or stand mixer until the mixture is light and fluffy. This usually takes about 2–3 minutes on medium-high speed.
Next, add the powdered sugar and mix until fully incorporated. Start on low speed to avoid a sugar cloud, then increase the speed once it starts to blend.
Finally, fold in half of the thawed whipped topping using a spatula. Don’t mix too aggressively—you want to keep some of that light, airy texture. Once the whipped topping is folded in and the mixture is smooth, set the bowl aside.
Step 4: Prepare the Pudding
In another bowl, whisk together the instant vanilla pudding mix and the cold milk. Use a handheld whisk or electric mixer on low speed and continue whisking until the pudding thickens slightly—this usually takes 2–3 minutes.
Let the pudding sit for a minute or two to fully thicken, then add it to the cream cheese mixture. Gently fold everything together until you get a uniform, creamy filling. Take your time here—you want everything to be well-blended without overmixing.
Step 5: Assemble the Dessert
Now it’s time to layer everything. Take your dish with the Oreo base and spoon the cream cheese and pudding mixture over the top. Use a spatula to spread it out evenly, making sure to reach all the edges and corners.
Once the filling is smooth and evenly distributed, spread the remaining whipped topping across the top of the pudding layer. This gives the dessert a beautiful, fluffy finish and makes a nice blank canvas for your toppings.
Step 6: Add the Toppings
Sprinkle the reserved crushed Oreo cookies over the top of the whipped topping layer. Then, scatter the pastel M&Ms and mini Oreos evenly across the surface.
You can have fun with this step—arrange the toppings in a pattern, spell out a name for a birthday party, or even use themed candy for different holidays.
Step 7: Chill Before Serving
Cover the dish with plastic wrap or a tight-fitting lid and place it in the refrigerator for at least 2 hours. This chilling time allows the layers to firm up and the flavors to meld together.
If you have the time, letting it chill overnight is even better. It gives the dessert that perfect set texture that slices beautifully and holds its shape on the plate.
Step 8: Serve and Enjoy
When you’re ready to serve, remove the dessert from the fridge, cut it into squares, and scoop them out with a serving spatula. The first piece is always a little messy—but that’s part of the fun.
Whether you serve it in bowls or on plates, you’ll love how each bite delivers a mix of smooth, creamy, crunchy, and chocolatey goodness.

How to Serve
This Oreo Dirt Pudding is a versatile dessert that works for so many occasions, and it can be served in several creative ways depending on the vibe you’re going for.
For a casual family dessert night, just scoop it straight from the pan into bowls and enjoy as-is. It’s simple, unfussy, and perfect when you’re craving something sweet and comforting.
If you’re serving this at a party or potluck, consider slicing it into neat squares and using a small spatula to plate each serving. Garnish each piece with a little extra sprinkle of crushed Oreos or a single pastel M&M for a polished look.
Want to make it extra fun for the kids? Serve it in individual plastic cups or mason jars. Layer the crushed Oreos and filling just like you would in the big pan, but in smaller portions. This not only makes serving a breeze, but it also helps with portion control.
For themed gatherings like Easter, birthday parties, or baby showers, you can customize the toppings to match. Add some pastel sprinkles, edible glitter, or even small themed candies to give it that festive touch.
If you’re aiming for a slightly more elegant presentation, layer it in a trifle bowl. The see-through sides show off the beautiful layers, and it turns a humble dessert into a centerpiece.
No matter how you serve it, one thing’s for sure—this dessert will disappear fast.
Pairing Suggestions
Oreo Dirt Pudding is sweet, rich, and creamy, so it pairs well with lighter sides and beverages that balance out its richness. Here are a few pairing ideas to make your dessert course even more enjoyable.
Beverage Pairings:
A glass of cold milk is the obvious choice—there’s just something about milk and Oreos that’s timeless. For adults, a cup of freshly brewed coffee or a light cappuccino helps cut through the sweetness and offers a warm contrast to the chilled dessert.
If you’re looking for non-caffeinated options, herbal teas like peppermint or chamomile provide a nice, mellow balance. Iced tea with a splash of lemon is also refreshing and works well at spring or summer gatherings.
Side Pairings:
This dessert is rich enough to stand on its own, but if you’re creating a dessert buffet or full spread, here are a few light options to complement it:
- A fresh fruit platter with strawberries, grapes, and melon helps cleanse the palate.
- Lemon bars or fruit tarts offer a citrusy contrast to the chocolatey richness.
- A scoop of vanilla or mint ice cream alongside a serving of dirt pudding creates a cold-and-colder duo that’s hard to resist.
Themed Pairings:
For a spring party or Easter dinner, consider pairing this with a lemony drink, like sparkling lemonade or a honey-lemon spritzer.
During the colder months, serve it after a warm and hearty dinner like baked chicken and roasted vegetables—Oreo Dirt Pudding is the perfect cool, creamy finish.
It’s also a fun finale after a kid-friendly meal like burgers or pizza. Whatever you pair it with, just make sure you leave room—everyone’s going to want a second helping.
Storage, Freezing & Reheating Instructions
One of the best things about Oreo Dirt Pudding—besides how delicious it is—is how well it stores. You can make it ahead of time, keep it chilled for later, or even freeze leftovers for future cravings. It’s the kind of dessert that fits perfectly into a busy schedule or a meal plan for entertaining guests over a few days.
Storing in the Refrigerator:
Once your dirt pudding is assembled and topped, cover the dish tightly with plastic wrap or a fitted lid. Then place it in the refrigerator. It will keep well for up to 4–5 days. This makes it a fantastic make-ahead dessert, especially if you’re preparing for an event or dinner party.
The texture may change slightly over time—the Oreos will soften a bit more with each passing day, but that just makes the dish creamier and more cohesive. In fact, many people prefer it on day two, after everything has had more time to settle and blend together.
Freezing Instructions:
Yes, you can freeze Oreo Dirt Pudding! While freezing doesn’t maintain the texture quite as well as refrigeration, it’s totally doable if you want to preserve leftovers or prep this far in advance.
To freeze, cut the dessert into individual portions and place them on a baking sheet lined with parchment paper. Freeze for about 2 hours or until solid. Then, transfer the pieces to an airtight container or freezer bag. They’ll keep in the freezer for up to 2 months.
To serve frozen dirt pudding, let the pieces thaw in the fridge overnight. The texture may be slightly softer, but the flavor will still be delicious.
Reheating (Sort Of):
Because this is a chilled dessert, you don’t really reheat it. However, if you’ve frozen a portion and want to serve it quickly, you can let it sit on the counter for about 30 minutes at room temperature or pop it into the fridge for a few hours to thaw gently.
Never microwave it—it will turn the creamy layers into a melty mess, and the texture won’t be the same.
If you’re storing leftovers that have already been served (like from individual cups or plates), cover them tightly and store in the fridge for up to 2 days. Just know that the toppings may lose a little crunch, especially the M&Ms and mini Oreos.
Common Mistakes to Avoid
Even though this recipe is incredibly simple and forgiving, there are a few common pitfalls you’ll want to steer clear of. Let’s walk through them so your dessert comes out perfect every time.
1. Not Softening the Cream Cheese or Butter:
Trying to mix cold cream cheese or butter can lead to a lumpy filling. Make sure both are at room temperature before you start. This ensures a smooth, velvety texture that blends easily with the other ingredients.
2. Overmixing the Whipped Topping:
Once you fold the whipped topping into the cream cheese mixture, be gentle. Overmixing can cause it to lose its airy, light texture and make the filling dense. Use a spatula and mix just until it’s combined.
3. Using Cook-and-Serve Pudding Instead of Instant:
This one trips people up often. Be sure you’re using instant pudding mix, not the kind that needs to be cooked on the stove. The instant version thickens quickly and gives you that smooth, fluffy texture without any heat.
4. Not Letting It Chill Long Enough:
Two hours is the minimum chill time, but longer is better. If you try to serve it too soon, the layers might not have set properly, and it can turn into a soft mess. For best results, let it chill overnight.
5. Forgetting to Reserve Cookies for the Topping:
All the crushed Oreos can look tempting when you’re building the base, but don’t forget to save some for the top! That final crunchy layer adds so much texture and visual appeal. Set aside about ½ cup before you start assembling.
6. Using Warm Milk for the Pudding:
Cold milk is essential for making the instant pudding set correctly. If your milk isn’t cold enough, the pudding might stay runny or take longer to thicken. Use milk straight from the fridge for the best consistency.
By avoiding these simple mistakes, you’ll get perfect results every time—smooth, creamy layers, the right texture, and a beautifully finished top that’s party-ready.
Pro Tips
To take your Oreo Dirt Pudding to the next level, here are a few tried-and-true tips that add extra polish and flavor. These are the little things that make a big difference in the final result.
1. Use Double-Stuf Oreos for Extra Creaminess:
If you want an even richer chocolate base, go for Double-Stuf Oreos. The added cream filling blends into the crumbs and creates a softer, more decadent layer.
2. Add a Layer of Chocolate Ganache:
This is totally optional but adds a luxurious touch. Melt a bit of semi-sweet chocolate with a splash of milk and drizzle it between the Oreo base and cream layer. It creates a chocolatey surprise that’s seriously indulgent.
3. Customize the Toppings by Season or Occasion:
Pastel M&Ms are perfect for spring, but you can switch it up depending on the time of year. Use red and green candies for the holidays, candy corn for Halloween, or rainbow sprinkles for birthdays. The possibilities are endless.
4. For Extra Texture, Toast the Oreo Crumbs:
This step is a bit unconventional but adds a surprising depth of flavor. Spread your crushed Oreos on a baking sheet and bake them at 300°F for about 5–8 minutes. Let them cool before using. It intensifies the chocolate flavor and adds a slight crispness.
5. Make It in Individual Servings for Easy Grab-and-Go Treats:
If you’re hosting a party or event, consider making this in small mason jars or plastic cups. Layer everything just as you would in a big dish, and you’ll have a mess-free dessert that’s easy for guests to enjoy without cutting or scooping.
6. Try Half Vanilla, Half Chocolate Pudding:
For a twist on the original, split the pudding mixture into two flavors. Mix one batch of vanilla and one batch of chocolate, and layer them in alternating stripes for a two-tone effect.
7. Keep It Cold Until Serving Time:
Because this dessert is best served chilled, keep it in the refrigerator until the last minute. If you’re serving outdoors, place the dish in a cooler or over a tray of ice to maintain its texture and freshness.
8. Don’t Be Afraid to Make It Your Own:
This recipe is highly customizable. Try adding chopped nuts, coconut flakes, or even layers of sliced banana for something totally different. Once you’ve made it once, you’ll start imagining all the fun variations you can create.
These pro tips can help you tweak and personalize the dessert so it’s just right for your tastes and the occasion.
Frequently Asked Questions (FAQs)
Whether you’re making Oreo Dirt Pudding for the first time or you’re a seasoned pro just looking for a refresher, these commonly asked questions can help clear up any last-minute uncertainties. Let’s walk through the most frequently asked questions to make sure your dessert turns out flawless.
Can I use store-brand cookies instead of Oreos?
Absolutely. While classic Oreos offer a specific taste and texture that people love, most store-brand chocolate sandwich cookies will work just fine. Some are even slightly less sweet, which can balance out the dessert if you find it too rich. Just make sure to use the same quantity by weight—about 14 ounces.
Can I make this dessert ahead of time?
Yes, and in fact, it’s encouraged. Oreo Dirt Pudding actually tastes better when it’s made a day ahead and given plenty of time to chill. It helps the layers firm up and lets the flavors blend beautifully. You can prepare the full dessert up to 24 hours in advance—just keep it tightly covered in the refrigerator.
Can I substitute whipped cream for whipped topping (Cool Whip)?
You can, but with a few considerations. Homemade whipped cream (made from heavy whipping cream and sugar) is a great substitute if you want a less processed option. Just be sure to whip it to stiff peaks so it holds up well in the dessert. Also, be aware that real whipped cream doesn’t have the stabilizers that Cool Whip does, so the texture may soften over time.
Can I use different pudding flavors?
Definitely. Vanilla is classic, but feel free to get creative. Chocolate, cheesecake, or even white chocolate pudding mixes all work wonderfully. You can also mix two flavors—half vanilla and half chocolate—for a layered twist.
Can I make this dessert gluten-free?
Yes, you can. Simply substitute gluten-free chocolate sandwich cookies for the Oreos. Many brands now offer gluten-free versions that taste nearly identical. Double-check that your pudding mix and whipped topping are also gluten-free to ensure the whole dessert is safe for everyone to enjoy.
What can I use instead of M&Ms for the topping?
The toppings are where you can have the most fun. Try crushed chocolate bars, sprinkles, mini marshmallows, gummy worms, crushed nuts, or chocolate chips. You can even add a drizzle of caramel or chocolate syrup to the top for extra flair.
Can I make this in a smaller dish?
Yes. If you want to make a smaller batch, halve the ingredients and use an 8×8-inch or 9×9-inch dish. You’ll still get delicious layers, just in a more compact version.
How long will leftovers keep?
Leftovers will last 4 to 5 days in the fridge. Just make sure the dish is covered tightly with plastic wrap or stored in an airtight container to keep it fresh. Over time, the cookies will soften, but the dessert will still taste delicious.
Can I freeze individual servings?
Yes, freezing individual portions is a great way to save extras. Just follow the instructions for freezing—cut into squares, freeze on a baking sheet, then transfer to containers. Let them thaw in the fridge overnight or for a few hours before enjoying.
Do I need to grease the dish before adding the Oreo crust?
Nope, no greasing required. The Oreo crumbs combined with the cream filling are moist enough to form a crust-like base that won’t stick to the pan. That said, lining the pan with parchment paper can help lift out cleaner slices if you’re looking for a neater presentation.
Conclusion & Call to Action
If you’re looking for a sweet, no-bake dessert that’s easy, nostalgic, and sure to please a crowd, Oreo Dirt Pudding checks every box. With its luscious, creamy layers and just the right amount of crunch from the crushed cookies, it’s the kind of treat people ask for again and again. Whether you serve it at a birthday party, Easter brunch, weekend barbecue, or just because you’re craving something sweet, this dessert delivers every single time.
One of the best things about this recipe is how approachable it is. You don’t need fancy tools or hard-to-find ingredients. There’s no baking involved, no complicated steps, and no risk of kitchen mishaps. It’s the perfect dessert for beginner cooks and busy hosts alike. You can even let the kids help with layering and decorating—just watch their eyes light up when it’s time to add the M&Ms.
What makes Oreo Dirt Pudding truly special is how customizable it is. Once you’ve made it once, you’ll find yourself coming back to it with new ideas. Different toppings, different puddings, a splash of creativity—this recipe welcomes it all. And while it may not be the healthiest dish on the table, it brings a kind of happiness that’s just as nourishing in its own way.
So go ahead—gather your ingredients, clear some space in the fridge, and make this dessert today. You won’t regret it. And when your friends and family ask for the recipe (because they will), you’ll be able to pass it on with confidence.
If you try this Oreo Dirt Pudding, I’d love to hear how it turned out for you. Did you add any fun toppings? Try a new twist? Snap a photo of your finished dish and share it with me—your creative spin might just inspire someone else to try it too.
Happy no-baking, and enjoy every creamy, crunchy, chocolaty bite. You deserve it.
Print
Oreo Dirt Pudding Dessert: The Best No-Bake Treat for Parties
- Total Time: 2 hours 25 minutes (including chill time)
- Yield: 12–15 servings 1x
- Diet: Vegetarian
Description
This creamy, no-bake Oreo Dirt Pudding is the ultimate crowd-pleasing dessert layered with crushed Oreos, cream cheese filling, vanilla pudding, and whipped topping. Perfect for parties, holidays, or a simple weeknight treat.
Ingredients
-
1 pkg (14 oz) crushed Oreo cookies (reserve ½ cup for topping)
-
8 oz cream cheese, softened
-
¼ cup unsalted butter, softened
-
1 cup powdered sugar
-
1 pkg (3.4 oz) instant vanilla pudding mix
-
2 cups cold milk
-
8 oz whipped topping (Cool Whip), thawed
-
1 cup pastel M&Ms
-
½ cup mini Oreos
Instructions
-
Crush Oreos; press most into the bottom of a 9×13″ dish, saving ½ cup for topping.
-
Beat cream cheese, butter, and powdered sugar until smooth. Fold in half the whipped topping.
-
In a separate bowl, whisk pudding mix with milk until thick. Let sit 2 minutes.
-
Combine pudding with cream cheese mixture and spread over Oreo crust.
-
Top with remaining whipped topping. Sprinkle reserved Oreos, M&Ms, and mini Oreos.
-
Chill for at least 2 hours before serving.
Notes
-
Use cold milk for proper pudding consistency.
-
This recipe is easily halved for a smaller serving.
-
Perfect to make ahead—chill overnight for best texture.
- Prep Time: 25 minutes
- Cook Time: 0 minutes
- Category: Dessert
- Method: No-Bake
- Cuisine: American