
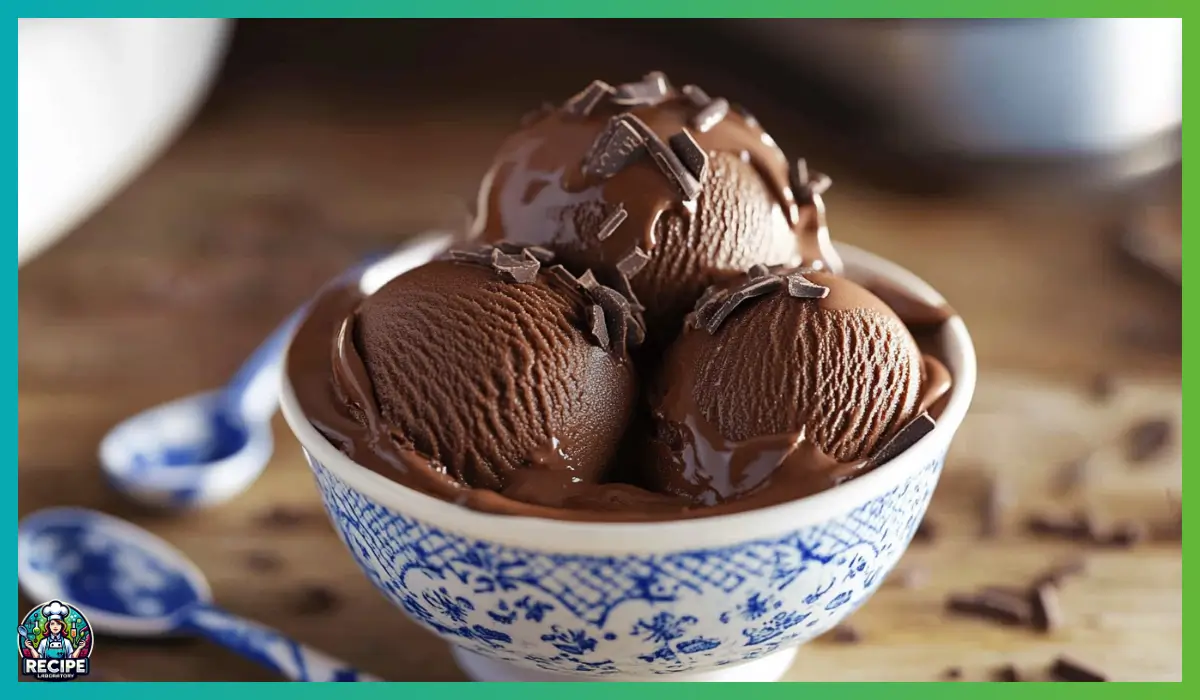
There’s something undeniably nostalgic about a scoop of chocolate ice cream. It brings back memories of sticky fingers on sunny afternoons, family barbecues ending with bowls of cold sweetness, and the pure joy of standing at the counter, waiting for the ice cream maker to work its magic. But this isn’t just any chocolate ice cream. This Homemade chocolate ice cream version is velvety smooth, deeply chocolatey, and luxuriously creamy—everything you want in a classic dessert, made even better because you made it yourself.
What makes this recipe special is how it layers flavors and textures using real ingredients. We’re talking about a rich custard base made with heavy cream and egg yolks, deeply enhanced by cocoa powder and melted chocolate. The result is an ice cream that tastes like pure, frozen chocolate mousse—soft, silky, and indulgent. And the best part? It’s surprisingly easy to make at home with just a bit of patience and love.
I first tried a version of this recipe at a friend’s backyard dinner party years ago, and I was blown away. It wasn’t icy or overly sweet, like some homemade versions can be. It was smooth, dense, and absolutely packed with chocolate flavor. After a lot of experimenting, adjusting, and testing, this recipe has become a staple in our house. It’s the kind of dessert that makes people pause mid-bite, look up, and say, “Wait, did you really make this yourself?”
If you’ve never made custard-based ice cream before, don’t worry—I’ve broken it all down step-by-step. And if you’re already comfortable with the basics, you’ll appreciate the attention to detail that elevates this chocolate ice cream to something truly unforgettable. Whether you’re making it for a special occasion or just because it’s Tuesday and you need a little joy, this recipe is going to become a go-to favorite.
Why You’ll Love This Homemade chocolate ice cream Recipe
There are so many reasons why this chocolate ice cream recipe deserves a permanent spot in your dessert rotation. First and foremost, the texture is dreamy. It’s dense without being heavy, creamy without being greasy, and silky smooth all the way through. Unlike many no-churn or quick-freeze recipes, this one uses a traditional French custard base, which results in a rich mouthfeel and an ultra-luxurious scoop every time.
Another reason to fall in love with this recipe is the depth of chocolate flavor. It doesn’t rely on just one source of chocolate, but rather layers cocoa powder and chopped semi-sweet chocolate to create a multi-dimensional taste. The cocoa provides that deep, slightly bitter backbone, while the chopped chocolate adds a softer, more rounded richness that melts perfectly into the custard. It’s like the best parts of hot cocoa, chocolate pudding, and mousse—frozen into a perfect scoop.
It’s also surprisingly simple. Even though it sounds fancy and impressive, this recipe is totally approachable. You don’t need a culinary degree or any high-tech tools. Just a saucepan, a whisk, a fine mesh strainer, and an ice cream maker (or even a loaf pan and some elbow grease if you’re going old-school).
Plus, this ice cream is super customizable. Want to add chocolate chips, crushed cookies, or a swirl of peanut butter? Go for it. Want to make it dairy-free? There are easy swaps you can try. This recipe is a base you can build on, make your own, and return to again and again.
Finally, there’s the joy factor. There’s something incredibly satisfying about scooping your own homemade ice cream from the freezer, knowing every silky spoonful is something you created. It’s a simple pleasure, but one that never gets old.
Health Benefits of this Homemade chocolate ice cream
While chocolate ice cream isn’t a health food per se, this homemade version does offer a few advantages over the store-bought kind. First off, you’re in complete control of the ingredients. There are no preservatives, artificial colors, or hard-to-pronounce additives. Just real milk, cream, eggs, sugar, cocoa, and chocolate—pure, whole ingredients you can feel good about using.
One of the standout ingredients in this recipe is cocoa powder, which happens to be rich in antioxidants. Cocoa is a great source of flavonoids, which have been shown to improve blood flow, reduce inflammation, and support heart health when consumed in moderation. The presence of semi-sweet chocolate adds even more antioxidant power, along with small amounts of iron, magnesium, and fiber.
Egg yolks, another key ingredient in this recipe, are a fantastic source of fat-soluble vitamins like vitamin D and vitamin A. They also contain choline, which supports brain health and helps with metabolism. When used in moderation, egg yolks can be part of a balanced, nourishing diet.
By making your own chocolate ice cream at home, you also avoid excessive sugar. While this recipe includes granulated sugar for sweetness and stability, it uses just enough to complement the chocolate without making the dessert overly sweet. Compared to many store-bought brands that rely on corn syrup or added sweeteners, this version is more naturally balanced.
And let’s not forget the mental health benefits. Food can be joyful and satisfying without being labeled “bad.” Sharing a homemade dessert with your loved ones, indulging in a scoop on a hot day, or treating yourself to something made with care—these are all acts of self-care in their own right.
So while it’s important to enjoy desserts like this in moderation, you can feel good about choosing a recipe that prioritizes quality ingredients and delivers satisfaction in every bite.
Preparation Time, Servings, and Nutritional Information
Before we dive into the details, let’s cover some practical info. Knowing what to expect will help you plan ahead and feel confident before you even step into the kitchen.
Total Time:
- Prep time: 30 minutes
- Chilling time: 4–12 hours (preferably overnight)
- Churning time: 20–30 minutes
- Freezing time: 4 hours (until scoopable)
- Total time from start to finish: About 8–16 hours (mostly inactive)
Servings:
This recipe makes approximately 6–8 servings, depending on portion size. If you’re scooping modest bowls, you’ll easily get 8. For larger dessert portions, plan on about 6.
Nutrition Facts (per serving):
- Calories: ~350
- Fat: 25g
- Carbohydrates: 27g
- Sugar: 24g
- Protein: 5g
- Cholesterol: 165mg
- Sodium: 40mg
Keep in mind that nutrition information is an estimate and may vary based on exact ingredients and portion sizes.
Ingredients List
Let’s take a look at what you’ll need for this luscious chocolate ice cream. Each ingredient plays an important role in creating the perfect flavor and texture, so try not to skip or substitute unless noted.
Dairy Base:
- 2 cups whole milk – Whole milk provides just the right amount of creaminess without being too heavy.
- 2 cups heavy cream – This adds richness and smoothness to the base, giving the ice cream its signature creamy texture.
Chocolate Elements:
- 1 cup unsweetened cocoa powder – Use high-quality cocoa powder like Hershey’s or another trusted brand. This gives the ice cream a deep, robust chocolate flavor.
- 2 ounces finely chopped semi-sweet chocolate – Melting this into the base helps round out the cocoa flavor and adds a luxurious, velvety finish.
Flavor Enhancers:
- 1 teaspoon vanilla extract – Vanilla balances the chocolate and adds depth. Real vanilla extract is worth it here.
Sweetener and Stabilizer:
- 1 cup granulated sugar, divided – Sugar not only sweetens the ice cream but also helps keep the texture soft and scoopable. The divided sugar is used in two different steps.
Egg Yolks:
- 5 large egg yolks – These are key to the custard base, creating a thick, creamy consistency and adding richness to the final product.
Optional but helpful tools:
- Fine mesh strainer
- Heatproof spatula
- Ice bath setup
- Ice cream maker (churn style preferred)
Now that we’ve got everything ready, let’s move into the step-by-step cooking process, where the real magic happens.
Step-By-Step Cooking Instructions
Making custard-based ice cream might seem a bit intimidating at first, especially if you’re new to the process. But once you understand the rhythm of it—whisking, tempering, straining, and chilling—it becomes second nature. Let’s walk through each step carefully so you feel confident from start to finish.
Step 1: Make the Chocolate Base
To start, grab a large, heavy-bottomed saucepan. You want something sturdy that distributes heat evenly—this helps prevent scorching.
In the saucepan, combine:
- 2 cups whole milk
- 2 cups heavy cream
- 1 cup unsweetened cocoa powder
Whisk these together thoroughly. At first, the cocoa powder might resist mixing into the liquid. Don’t worry—just keep whisking until the mixture becomes smooth and uniform. A small balloon whisk works great here.
Once combined, set the pan over medium-low heat and bring the mixture to a gentle simmer. This may take 5 to 7 minutes. Stir occasionally to prevent anything from sticking to the bottom. You’re not looking for a full boil—just gentle bubbling around the edges.
When the mixture is hot and steamy, remove the pan from the heat.
Now, stir in the chopped chocolate and vanilla extract. Use a spatula or whisk to gently incorporate:
- 2 ounces finely chopped semi-sweet chocolate
- 1 teaspoon vanilla extract
Keep stirring until the chocolate is completely melted and the mixture is velvety smooth. This base is now rich, chocolatey, and already smells amazing. Set it aside while you prep the eggs.
Step 2: Add Sugar and Simmer
Return the saucepan to medium-low heat and add:
- ¾ cup granulated sugar
Whisk to dissolve the sugar, letting the mixture come back to a gentle simmer. This step helps the sugar fully integrate into the liquid and ensures even sweetness.
As the base heats up again, continue stirring slowly. Once the sugar has dissolved and the mixture is heated through (just simmering, not boiling), remove it from the heat again.
Now comes the most important part: tempering the egg yolks.
Step 3: Temper the Egg Yolks
In a medium mixing bowl, whisk together:
- 5 large egg yolks
- Remaining ¼ cup granulated sugar
Whisk until the mixture is pale yellow and thickened slightly—this should take about 2 minutes. The sugar helps stabilize the yolks so they don’t curdle when the warm liquid is added.
Next, it’s time to temper. Slowly drizzle about ¼ cup of the hot chocolate mixture into the egg yolks, whisking constantly. This gentle addition helps bring the temperature of the eggs up gradually, so they don’t scramble.
Continue adding the hot chocolate mixture, ¼ cup at a time, whisking constantly, until about half of the hot base has been incorporated into the eggs. Then, pour the tempered yolk mixture back into the saucepan with the remaining chocolate mixture.
Whisk again to combine fully.
Step 4: Cook the Custard
Place the saucepan back on the stove over medium heat. Switch to a heatproof spatula or wooden spoon and begin stirring slowly but constantly. You want to reach the bottom and sides of the pan with each stroke to prevent sticking.
Continue stirring for 5 to 10 minutes, or until the custard thickens. It should coat the back of a spoon—this means that when you run your finger across the spoon, it leaves a clean line.
Avoid boiling the mixture, as too much heat can curdle the eggs. If you’re using a thermometer, aim for about 170°F to 175°F.
Once the custard has thickened, remove the pan from the heat immediately.
Step 5: Strain and Chill the Custard
To ensure your ice cream base is perfectly smooth, strain the hot custard through a fine mesh sieve into a clean medium bowl. This catches any tiny bits of cooked egg and gives you that ultra-silky finish.
Place the bowl in an ice bath to begin cooling it quickly. Stir the custard occasionally for the first 10–15 minutes to help it chill evenly. Once the mixture is cool to the touch, cover the bowl with plastic wrap and refrigerate for at least 4 hours, but preferably overnight.
This chilling step is essential. It allows the flavors to meld and the fat to set up properly, which helps the ice cream churn more efficiently and freeze with a smoother texture.
Step 6: Churn the Ice Cream
When the custard is fully chilled, pour it into your ice cream maker and churn according to the manufacturer’s instructions. This usually takes 20 to 30 minutes.
At this stage, the ice cream should reach a soft-serve consistency. You’ll notice it thickening steadily and forming lovely ribbons as the paddle moves through.
Resist the urge to stop too early. Let the churn run until the mixture is visibly aerated and holds its shape. That means more air has been incorporated, and the final ice cream will have the ideal texture.
If you’d like to add any mix-ins—like chocolate chips, marshmallow swirls, or crushed cookies—do it during the final few minutes of churning.
Step 7: Freeze Until Firm
Once churned, transfer the soft ice cream to a freezer-safe container. A loaf pan works well, especially if lined with parchment.
Smooth the top, press a piece of plastic wrap directly onto the surface to prevent ice crystals, and seal the container tightly.
Freeze for at least 4 hours, or until scoopable.
And that’s it—your homemade chocolate ice cream is ready to be enjoyed.

How to Serve
This ice cream is incredibly versatile and can be served in so many delicious ways. Here are just a few of our favorite serving ideas to get you started:
Serve it in a classic bowl with a drizzle of chocolate sauce or caramel for an easy but elegant dessert.
Scoop it into cones—waffle cones are especially nice—to bring back that nostalgic ice cream parlor feeling.
Use it to top warm brownies or chocolate chip cookies for the ultimate decadent treat. The contrast of warm and cold is simply irresistible.
Create your own sundae bar with whipped cream, sprinkles, chopped nuts, and cherries. It’s a fun way to entertain guests or make family dessert night feel extra special.
For something a little fancier, you can sandwich the ice cream between two homemade cookies and roll the edges in mini chocolate chips or crushed nuts.
And if you’re looking to impress, try serving a scoop alongside poached pears, grilled fruit, or even a rich chocolate cake.
No matter how you serve it, don’t forget a sprinkle of flaky sea salt—it brings out the chocolate flavor in the most wonderful way.
Pairing Suggestions
While this homemade chocolate ice cream is truly stunning all on its own, pairing it with the right accompaniments can elevate it from delicious to unforgettable. Whether you’re looking to serve it for a casual family dessert or an impressive dinner party treat, here are some thoughtful pairing ideas to bring out the best in every creamy bite.
First, let’s talk about texture contrast. Chocolate ice cream pairs beautifully with warm, chewy baked goods. Think freshly baked brownies, fudgy chocolate cake, or a warm skillet cookie. The warmth of the baked dessert creates a lovely contrast with the cold ice cream, making each spoonful an experience in itself. The cold melts slowly into the warm base, creating a rich, gooey sauce as you eat.
If you want to go the crunchy route, consider serving the ice cream with crispy elements like waffle cones, biscotti, or buttery shortbread cookies. Crushed chocolate wafer cookies or even pretzel sticks can be served on the side or sprinkled over the top for added crunch and saltiness.
For a fruity pairing, reach for berries. Fresh raspberries, strawberries, or cherries are natural partners for chocolate. Their tartness cuts through the richness of the ice cream and adds a refreshing pop of color and flavor. A spoonful of berry compote or a drizzle of raspberry coulis makes a visually stunning and tastebud-pleasing addition.
You can also take a more adventurous route with a savory twist. Try pairing your chocolate ice cream with a small pinch of chili flakes or a dusting of cinnamon. These warm spices deepen the chocolate flavor and give a gourmet edge to your dessert.
As for beverages, a warm mug of decaf coffee or hot chocolate alongside your ice cream makes for a comforting and cozy combo. If you’re serving this at a gathering and looking for a non-alcoholic option, offer guests iced espresso or a sparkling berry mocktail for balance.
And finally, don’t underestimate the power of simplicity. A scoop of this homemade chocolate ice cream served with just a small mint leaf or a light dusting of cocoa powder can be just as impactful as a more elaborate dessert.
Storage, Freezing & Reheating Instructions
Let’s be real—this ice cream is probably going to disappear fast. But if you do happen to have leftovers or if you’re making it ahead of time for a special occasion, proper storage is key to keeping that texture smooth and scoopable.
After churning your ice cream and transferring it to a freezer-safe container, press a piece of plastic wrap or parchment paper directly onto the surface of the ice cream. This minimizes air exposure and helps prevent freezer burn and unwanted ice crystals from forming.
Once sealed with a tight-fitting lid, store the container in the back of your freezer, where the temperature tends to stay the most consistent. Try to avoid the freezer door, as it gets warmer every time you open and close it.
Your chocolate ice cream will keep beautifully in the freezer for about 2 weeks. After that, it may start to lose some of its flavor and creamy texture, though it will still be safe to eat.
When it comes time to serve, let the ice cream sit at room temperature for about 5–10 minutes. This softens it just enough to make scooping easier, especially since homemade ice cream doesn’t contain commercial softeners.
If your ice cream has been stored for a while and has developed a few ice crystals on top, just scrape away the top layer before scooping—it’s a quick fix to restore that ultra-creamy texture underneath.
As for reheating, well…this is ice cream! There’s no reheating needed, of course, but you can repurpose it creatively. If you find yourself with a bit too much ice cream leftover, blend it into a milkshake or use it as a base for a frozen hot chocolate. You can even sandwich it between pancakes or waffles for a next-level breakfast-for-dessert moment.
Common Mistakes to Avoid
Making ice cream from scratch isn’t difficult, but there are a few common missteps that can throw things off. Knowing these ahead of time will help you avoid frustration and ensure success every time.
Overheating the custard: This is one of the most common issues. If your custard boils or gets too hot, the eggs can scramble and ruin the texture. Always cook it over medium or medium-low heat, stir constantly, and pull it off the heat as soon as it thickens enough to coat the back of a spoon.
Skipping the straining step: Even if your custard looks smooth, there might still be small bits of cooked egg or undissolved cocoa. Straining the base ensures a silky, lump-free final product and makes a noticeable difference in texture.
Not chilling the custard completely before churning: Warm or even lukewarm custard doesn’t churn properly. The colder your mixture, the better the churn. Ideally, let it chill overnight in the fridge for the creamiest texture.
Over- or under-churning: If you stop churning too soon, your ice cream will be dense and icy. Churn until it reaches soft-serve consistency and holds its shape. On the flip side, if you over-churn, especially in compressor-style ice cream makers, the texture can become grainy or buttery. Follow your ice cream maker’s timing guidelines closely.
Improper storage: If you don’t cover the surface of the ice cream or store it in an airtight container, you risk freezer burn. It also helps to fill the container close to the top to minimize air exposure.
Using low-quality ingredients: The flavor of homemade ice cream really shines, so if your chocolate or cocoa powder is bitter, bland, or too processed, it will show. Stick to brands you trust and love.
By avoiding these mistakes, you’ll give yourself the best shot at creating perfect homemade chocolate ice cream every single time.
Pro Tips
Ready to take your ice cream game to the next level? These pro tips will help you master the art of homemade chocolate ice cream and maybe even earn you a reputation as the dessert person in your circle.
Use high-quality cocoa and chocolate: Since chocolate is the star here, it’s worth splurging a little on good ingredients. Look for unsweetened cocoa powder with a strong, deep flavor and semi-sweet chocolate that melts easily and tastes rich, not overly sweet.
Chill everything: This includes the bowl of your ice cream maker. If your machine has a freezer bowl, make sure it’s been chilling for a full 24 hours before use. A cold bowl makes the churning process more efficient and gives you a smoother texture.
Don’t rush the custard: Take your time during the cooking process. Low and slow wins the race when it comes to developing that creamy, custard-like texture without scrambling the eggs.
Add a pinch of salt: Though not in the original recipe, a tiny pinch (⅛ teaspoon) of fine sea salt can intensify the chocolate flavor and balance the sweetness. Just stir it into the chocolate base before adding the yolks.
Experiment with texture add-ins: Once you’ve mastered the base recipe, get creative. Swirl in fudge sauce, chopped toffee, or crushed cookies right at the end of churning. Freeze-dried raspberries or salted caramel chunks make incredible mix-ins too.
Double the batch (with caution): If you have a larger ice cream maker, you can double the recipe. But be sure not to overfill your machine—ice cream expands as it churns. You may need to churn in two batches for best results.
Pre-scoop for entertaining: If you’re serving guests, scoop the ice cream ahead of time onto a parchment-lined tray, then freeze. When it’s time to serve, just lift and drop into bowls—no waiting, no scooping stress.
Frequently Asked Questions (FAQs)
Can I make this recipe without an ice cream maker?
Yes, but the texture won’t be quite as smooth. After chilling the custard, pour it into a loaf pan and place it in the freezer. Stir it vigorously every 30 minutes for 2 to 3 hours to break up ice crystals and encourage creaminess. It’s more work but still delicious.
Is it safe to eat the egg yolks in the custard?
Yes. The eggs are gently cooked to at least 170°F, which is hot enough to kill bacteria and make the mixture safe. Always use fresh, high-quality eggs and cook the custard carefully.
Can I use Dutch-process cocoa instead of natural?
Absolutely. Dutch-process cocoa gives a smoother, less acidic flavor and can deepen the chocolate notes. Just make sure it’s unsweetened.
How long does homemade ice cream last in the freezer?
For best flavor and texture, eat it within 2 weeks. It’ll still be safe to eat after that, but it may develop some ice crystals or lose a bit of flavor.
Can I make this recipe dairy-free?
You can try using full-fat canned coconut milk instead of cream and milk, and a dairy-free chocolate alternative. Keep in mind, the texture will be slightly different, but still delicious.
Why does my ice cream get icy after a few days?
Usually, it’s because of air exposure or not enough fat in the base. Make sure to press plastic wrap against the surface and use full-fat dairy for best results.
Can I make this ahead for a party?
Definitely. You can make and churn the ice cream up to 3 days in advance. Just store it in a tightly sealed container and let it soften slightly before serving.
What’s the best way to serve it for kids?
Scoop it into cones, serve with sprinkles, or make fun mini sundaes. You can also sandwich it between graham crackers for a simple ice cream sandwich.
Can I make this into chocolate chip ice cream?
Yes! Add mini chocolate chips or chopped chocolate chunks during the last few minutes of churning for a fun twist.
Can I substitute the sugar with honey or maple syrup?
It’s possible, but it will change the flavor and texture. If you try it, reduce the amount slightly and keep the custard cooking temperature low to avoid curdling.
Conclusion & Call to Action
You did it! You now have everything you need to create the most indulgent, velvety, from-scratch chocolate ice cream. From gathering ingredients and crafting the custard to churning and storing it with care, you’ve walked through each step with purpose—and I hope with a little joy, too.
Making homemade ice cream might take a bit more time than picking up a pint at the store, but the payoff is so worth it. You get full control over what goes into it, the ability to tailor flavors and textures exactly to your liking, and best of all, that deep sense of satisfaction when your spoon sinks into something you created from scratch.
So here’s your next step: grab those ingredients, clear a little space in your freezer, and get churning. Make it for your next family dinner, surprise your kids with an after-school scoop, or just treat yourself because you deserve something homemade and delightful.
And once you’ve made it, I’d love to know how it turned out! Share your experience, ask questions, or let me know your favorite mix-ins and creative twists. If you snap a photo of your finished ice cream, post it and tag me—I’d love to celebrate your delicious success right alongside you.
Homemade chocolate ice cream isn’t just a dessert. It’s a project, a memory in the making, and a reminder that the simplest things—like cream, eggs, sugar, and chocolate—can come together to make something magical.
Now go make some ice cream magic. You’ve got this.
Print
Homemade Chocolate Ice Cream – Ultra Creamy and Rich Dessert
- Total Time: 8–16 hours (including chilling and freezing)
- Yield: About 1 quart (6–8 servings) 1x
- Diet: Vegetarian
Description
This ultra-creamy homemade chocolate ice cream is made with real cocoa, egg yolks, and chopped chocolate. It’s rich, smooth, and full of intense chocolate flavor.
Ingredients
-
2 cups whole milk
-
2 cups heavy cream
-
1 cup unsweetened cocoa powder
-
2 oz finely chopped semi-sweet chocolate
-
1 tsp vanilla extract
-
1 cup granulated sugar (divided)
-
5 large egg yolks
Instructions
-
In a saucepan, whisk milk, cream, and cocoa powder. Heat to a simmer.
-
Remove from heat. Stir in chopped chocolate and vanilla until melted.
-
Stir in ¾ cup sugar. Bring to a light simmer until dissolved.
-
Whisk egg yolks with remaining ¼ cup sugar until pale.
-
Slowly temper yolks by whisking in hot chocolate mixture, ¼ cup at a time.
-
Return mixture to saucepan and cook on medium, stirring until custard thickens.
-
Strain into a bowl over an ice bath. Cool completely. Chill for 4+ hours or overnight.
-
Churn in an ice cream maker until soft-serve consistency.
-
Freeze in airtight container for at least 4 hours before serving.
Notes
-
Strain the custard for a smoother texture
-
Chill thoroughly before churning
-
Add mix-ins during last 5 minutes of churning
- Prep Time: 30 minutes
- Cook Time: 15 minutes
- Category: Dessert
- Method: Churned Ice Cream