
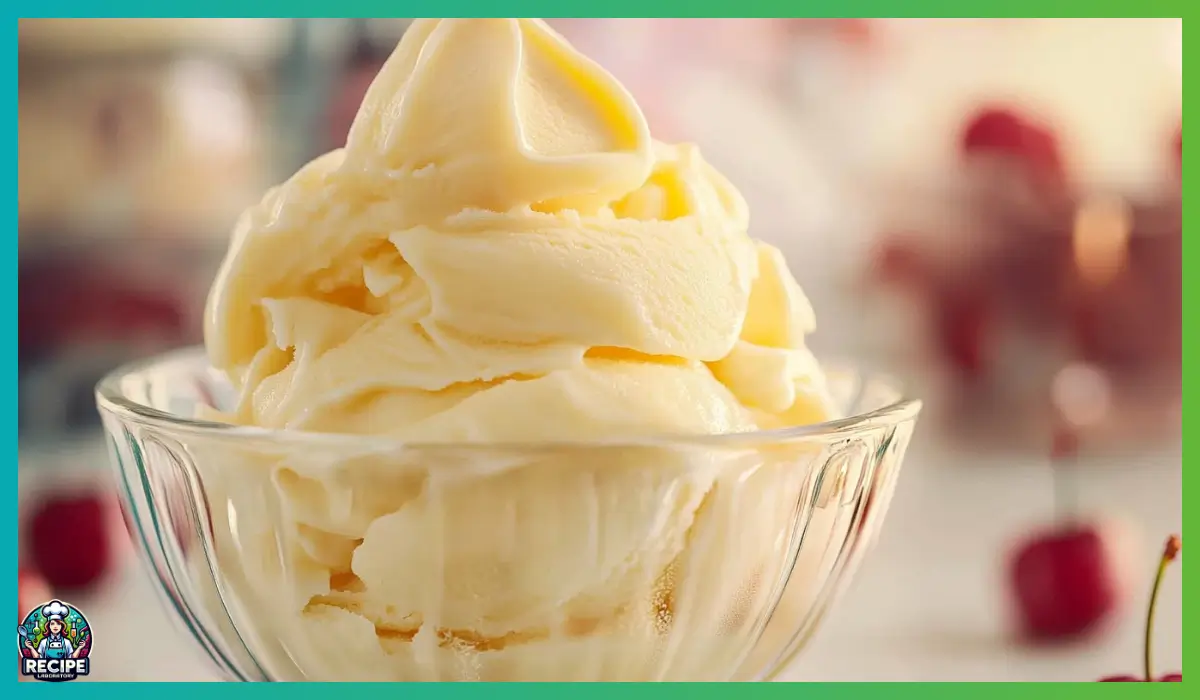
There’s something magical about a scoop of homemade vanilla ice cream. It’s classic, comforting, and universally loved. But not all vanilla ice creams are created equal. Some are icy and bland, others overly sweet. This version? It’s rich, velvety, and deeply flavored with real vanilla, thanks to a custard base made with egg yolks and cream. This isn’t just your average frozen dessert—it’s the kind of ice cream that makes you close your eyes after the first bite and savor every spoonful.
The beauty of this recipe lies in its simplicity and quality. With just six ingredients—heavy cream, milk, sugar, egg yolks, vanilla extract, and a pinch of salt—you create a luscious, creamy texture that’s smooth all the way through. The custard base, thickened gently over low heat, is what sets this ice cream apart. It’s the reason it coats your spoon so perfectly and melts on your tongue with buttery richness. And yet, despite tasting like something you’d get at a fancy dessert shop, it’s completely doable in your own kitchen.
I first started making custard-style ice cream one summer when I inherited my grandmother’s old ice cream maker. It had a slightly clunky churn, but the process was incredibly rewarding. The first time I tasted the final result, I couldn’t believe how much better it was than anything store-bought. Over the years, I’ve refined the method, learning to temper eggs without scrambling them and how long to let the base chill before churning. It’s become a bit of a ritual—me, whisking in a quiet kitchen while the custard gently thickens, filling the air with the scent of warm cream and vanilla. There’s nothing like it.
So whether you’re making this for a weekend treat, a dinner party dessert, or just because you’re craving something truly satisfying, this homemade vanilla custard ice cream will always deliver. And I promise—it’s easier than you think.
Why You’ll Love This Vanilla Custard Ice Cream Recipe
There are plenty of reasons why this recipe will become a go-to in your kitchen, especially if you’re an ice cream lover looking for that next-level experience. First and foremost, it’s the flavor. Real vanilla shines here—not artificial vanilla flavoring, but true, rich vanilla extract that brings depth and warmth to every bite. Combined with the creamy custard base, it creates a flavor that’s simultaneously nostalgic and elevated.
Another reason you’ll love this recipe is the texture. Thanks to the egg yolks and the perfect balance of cream and milk, the final ice cream is ultra-smooth and dense, with none of the icy graininess that sometimes plagues no-churn or shortcut recipes. It scoops beautifully and melts in the mouth like silk. Whether you’re eating it soft-serve style right out of the ice cream maker or after a few hours of freezer time, you’ll notice the luxurious texture in every bite.
Let’s talk about versatility, too. This vanilla custard ice cream is a fantastic base for all kinds of toppings and mix-ins. Want to swirl in some salted caramel or fudge ripple? Go for it. Feel like adding crushed cookies, roasted nuts, or fresh fruit? Absolutely. This recipe holds up wonderfully to customization while still being perfect just as it is.
And perhaps most importantly, it’s surprisingly simple. With a few basic kitchen tools and some patience, you can pull off a dessert that tastes like it came from a gourmet shop. You don’t need special ingredients or professional training—just a little time, some good-quality dairy, and a love of dessert. Once you’ve tried it, you may never go back to store-bought again.
Health Benefits of these Vanilla Custard Ice Cream
While ice cream might not be the first thing that comes to mind when thinking about healthy food, this homemade vanilla custard version does have some noteworthy benefits—especially compared to processed, store-bought varieties. Making your own ice cream gives you full control over the ingredients, meaning no preservatives, artificial stabilizers, or unrecognizable additives. What you get is real food with real flavor.
One of the standout ingredients here is the egg yolk. Egg yolks are a nutritional powerhouse, providing high-quality protein, essential fatty acids, and important vitamins like B12 and D. They also contain choline, which is vital for brain health and development. Using yolks in your ice cream doesn’t just enhance the texture—it also adds real nourishment.
Dairy is another central component of this recipe, and it brings with it several important nutrients. Whole milk and heavy cream are excellent sources of calcium, which is essential for healthy bones and teeth. They also provide vitamin A, which supports immune function and eye health. While this dessert is indulgent, it’s also more balanced than sugar-heavy commercial versions that use corn syrup and fillers in place of nutrient-rich cream and eggs.
Additionally, homemade ice cream allows you to moderate the amount of sugar used. This recipe uses just enough to create a balanced sweetness without overwhelming the delicate vanilla flavor. If you’re watching your sugar intake, you can experiment with natural sweeteners or reduce the amount slightly to suit your preferences.
Finally, there’s something to be said about the mental and emotional benefits of making your own dessert from scratch. The act of creating something delicious with your hands, the joy of sharing it with others, and the satisfaction of knowing exactly what you’re eating all contribute to a sense of well-being. So while this may be a treat, it’s one that offers both pleasure and purpose.
Preparation Time, Servings, and Nutritional Information
This vanilla custard ice cream recipe is designed to make around six servings, perfect for a family treat or a small gathering. You can easily double the recipe if you’re hosting a larger group or want to stash some in the freezer for future cravings.
Preparation and Cooking Time Breakdown:
- Prep time: 10 minutes (for measuring ingredients and initial setup)
- Cook time: 15–20 minutes (for making the custard base)
- Chill time: 3–4 hours (or overnight)
- Churn time: 20–30 minutes (depending on your ice cream maker)
- Freeze time (optional): 2–4 hours for firmer texture
Total Time (active and passive): About 6–8 hours (including chilling and optional freezing time)
Servings: 6 generous scoops
Nutritional Information (per serving, approximate):
- Calories: 320
- Protein: 4g
- Fat: 24g
- Carbohydrates: 20g
- Sugar: 18g
- Calcium: 15% of daily recommended intake
These numbers will vary slightly depending on your specific ingredients and serving size, but overall, this is a rich dessert that can absolutely be enjoyed as part of a balanced diet.
Ingredients List of this Vanilla Custard Ice Cream
Here’s everything you need to make this ultra-creamy, dreamy vanilla custard ice cream. All the ingredients are common and easy to find, but their quality really makes a difference here, so try to use the best you can.
For the Custard Ice Cream Base (makes about 6 servings):
- 2 cups heavy cream – This gives the ice cream its luxurious texture and rich mouthfeel. Avoid light cream; you need the fat for creaminess.
- 1 cup whole milk – Adds balance and keeps the ice cream from becoming too dense. Whole milk strikes the perfect texture here.
- ⅔ cup granulated sugar – Just enough to sweeten the ice cream without overpowering the vanilla. You can adjust slightly to taste.
- Pinch of salt – It might seem small, but a touch of salt actually enhances the sweetness and rounds out the flavor.
- 6 large egg yolks – The key to a custard base. Egg yolks create a silky, thick texture that sets this ice cream apart from no-cook versions.
- 2 teaspoons vanilla extract – The star of the show. Use a high-quality pure vanilla extract (or vanilla bean paste if you want those pretty specks).
Make sure to prepare your ingredients before you start the cooking process. Having everything measured and ready will make the custard-making process much smoother and help prevent overcooking or scrambling the eggs.
Step-By-Step Cooking Instructions
Step 1: Warm the Cream Base
Begin by combining the heavy cream, whole milk, granulated sugar, and a pinch of salt in a medium-sized saucepan. Place the saucepan over medium-low heat and stir the mixture gently with a wooden spoon or silicone spatula.
Heat the mixture until the sugar is completely dissolved and the liquid is hot, but not boiling. This usually takes about 3 to 5 minutes. Keep the heat low and controlled to avoid scalding the milk. The goal is to gently warm the mixture and allow the sugar to melt evenly into the cream.
Once the mixture is warm and the sugar has fully dissolved, remove the saucepan from the heat and set it aside. You’re now ready to temper the egg yolks.
Step 2: Temper the Egg Yolks
In a separate medium mixing bowl, whisk the six large egg yolks until they are smooth and slightly thickened. You can use a handheld whisk or a hand mixer for this step.
Now comes the tempering. This step is crucial because you’re slowly introducing hot liquid to the egg yolks without scrambling them. Take about ½ cup of the hot cream mixture and very slowly drizzle it into the egg yolks, whisking constantly as you pour. The key here is to go slowly and keep the whisk moving. You want to gradually raise the temperature of the yolks without cooking them.
Once you’ve whisked in the ½ cup of hot cream and the egg mixture feels warm to the touch, slowly pour the tempered yolks back into the saucepan with the rest of the cream mixture. Again, whisk constantly as you pour to ensure a smooth, even custard.
Step 3: Cook Until Slightly Thickened
Return the saucepan to medium-low heat and cook the mixture, stirring constantly. You’ll want to use a wooden spoon or heatproof spatula and stir in a figure-eight motion to ensure even heating.
This step typically takes 5 to 8 minutes. The custard will begin to thicken and should coat the back of a spoon. To test, dip the spoon in the custard, then run your finger along the back. If the line stays clear, the custard is ready.
Be careful not to let the custard boil. Boiling can cause the eggs to curdle, resulting in a grainy texture. If you notice the custard getting too hot, reduce the heat immediately and continue stirring.
Once thickened, remove the custard from heat and stir in the vanilla extract. The residual heat will release the aroma of the vanilla and infuse the custard beautifully.
Step 4: Strain and Chill
To ensure the smoothest possible ice cream, pour the custard through a fine mesh strainer into a clean bowl. This step catches any bits of egg that might have cooked during the heating process and removes any lumps.
Allow the custard to cool at room temperature for about 30 minutes. Then cover the bowl with plastic wrap, pressing the wrap directly onto the surface of the custard to prevent a skin from forming.
Refrigerate the custard for at least 3 to 4 hours, or ideally overnight. A thoroughly chilled base will churn better and result in creamier ice cream.
Step 5: Churn
Once the custard base is fully chilled, pour it into your ice cream maker. Churn according to your manufacturer’s instructions, which typically takes 20 to 30 minutes.
You’ll notice the texture gradually changing from a liquid to a soft-serve consistency. It should look smooth, airy, and pale yellow once it’s done.
Step 6: Freeze or Serve Soft
You can serve your vanilla custard ice cream immediately for a soft-serve style experience, which is especially lovely with fresh berries or warm sauces.
If you prefer a firmer, scoopable texture, transfer the churned ice cream to an airtight container and freeze it for 2 to 4 hours before serving. Let it sit at room temperature for about 5 minutes before scooping for the perfect consistency.
How to Serve of this Vanilla Custard Ice Cream
Once your vanilla custard ice cream is perfectly churned and either soft-serve ready or fully frozen to scoopable perfection, the fun part begins—serving it up in the most delicious ways possible. This ice cream is incredibly versatile, which means it pairs well with just about anything you can dream up. Whether you’re going for a showstopping dessert plate or a humble cone on a warm afternoon, there are endless ways to make the most of your homemade creation.
Start simple if you’d like. A single, generous scoop in a bowl is all you need to appreciate the rich creaminess and subtle vanilla flavor of this ice cream. Top it with a light sprinkle of sea salt or a few shavings of dark chocolate for an elegant twist. If you want to go the traditional route, serve it in a cone or waffle bowl and enjoy it on the go—perfect for summer evenings spent outside.
This ice cream also shines when paired with warm baked goods. Try spooning it over a fresh-out-of-the-oven brownie or a gooey chocolate chip cookie. The contrast between the cold, creamy ice cream and the warm, melty dessert underneath is downright irresistible. You can also serve it alongside fruit pies—apple, cherry, or peach are all fantastic matches. The custard base of the ice cream complements the tartness of fruit fillings beautifully.
If you’re entertaining guests and want to make a bigger impression, consider building an ice cream sundae bar. Set out bowls of toppings like caramel sauce, chopped nuts, crushed cookies, fresh berries, and whipped cream. Let everyone build their dream dessert. It’s fun, interactive, and perfect for family get-togethers or casual dinner parties.
For something a bit more elevated, scoop this ice cream over grilled pineapple or roasted figs and finish with a drizzle of honey or date syrup. You can even use it as the filling in an ice cream sandwich—just spoon it between two soft cookies and freeze until firm.
No matter how you choose to serve it, this homemade vanilla custard ice cream will bring comfort and joy in every spoonful.
Pairing Suggestions
Pairing vanilla custard ice cream with the right dessert, drink, or flavor combination can turn a good dessert into a truly memorable one. Because vanilla is such a universally loved and neutral flavor, it serves as the perfect canvas for a wide range of pairings. Whether you’re looking for something indulgent, fruity, or even slightly savory, there’s a perfect pairing for this classic ice cream.
Let’s start with desserts. Rich chocolate desserts make an amazing contrast to vanilla ice cream. Think flourless chocolate cake, chocolate lava cake, or a slice of fudgy brownie. The deep cocoa flavor enhances the creamy vanilla notes in the ice cream, making for a balanced and satisfying dessert experience.
Fruit is another fantastic partner for vanilla custard ice cream. Fresh berries like strawberries, raspberries, or blueberries bring brightness and acidity, cutting through the richness of the custard. Warm stewed fruit or a compote—especially with peaches, cherries, or plums—adds another dimension, especially when served warm against the cold ice cream.
Spiced desserts also work beautifully. A slice of cinnamon apple pie, spiced carrot cake, or gingerbread offers warmth and complexity, creating a cozy and nostalgic feel. You can even sprinkle a little cinnamon or nutmeg directly on the ice cream for an added flavor boost.
If you’re considering beverages to serve with your ice cream, go for contrast or complement. A hot cup of coffee or black tea alongside a cold bowl of ice cream creates a delightful balance of temperature and taste. For something a bit fancier, try serving it with a chilled glass of sparkling apple cider or a refreshing mocktail infused with herbs like mint or basil.
You can even use the ice cream in a drink. Make an affogato by pouring a shot of espresso over a scoop of ice cream, or blend it into a milkshake with a bit of almond extract or cinnamon for extra flavor.
And finally, don’t overlook the savory-sweet route. Serve a scoop of ice cream with a drizzle of aged balsamic vinegar or olive oil and a pinch of sea salt. It might sound unexpected, but the result is a sophisticated and unforgettable dessert that highlights the complexity of the vanilla custard base.
Storage, Freezing & Reheating Instructions
Storing your homemade vanilla custard ice cream properly ensures that it stays creamy, flavorful, and fresh for as long as possible. Because this ice cream contains no preservatives or stabilizers like commercial brands, it benefits from a bit of extra care during storage.
Once your ice cream is churned, you have two choices: serve it immediately in its soft-serve state, or transfer it to the freezer to firm up for later. If you’re storing it, use an airtight, freezer-safe container. Shallow containers work best because they allow the ice cream to freeze more evenly and are easier to scoop from. If you have one, a container with a tight-fitting lid designed specifically for ice cream will help reduce exposure to air and prevent freezer burn.
Before sealing the container, press a piece of plastic wrap or parchment paper directly onto the surface of the ice cream. This helps block air from reaching the top layer, which can otherwise turn icy or develop an unpleasant texture over time.
Store your ice cream in the coldest part of your freezer, ideally at the back where the temperature is most stable. Try to keep the container tightly sealed whenever not in use. This will help the ice cream maintain its fresh flavor and creamy texture.
Homemade ice cream is best enjoyed within 1 to 2 weeks of making it. While it will technically keep longer, it’s at its peak texture and taste within that window. Over time, homemade ice cream can become more icy or develop a grainy consistency, especially if it’s repeatedly exposed to air.
Reheating doesn’t apply in the traditional sense here, but if your ice cream has become too firm to scoop, don’t worry. Just let it sit at room temperature for 5 to 10 minutes before serving. This short resting period allows it to soften slightly and become perfectly scoopable again.
If you’d like to store the base for later churning, you can refrigerate the custard (before churning) for up to 2 days. Make sure it’s covered tightly and chilled thoroughly before using it in your ice cream maker. Unfortunately, the base doesn’t freeze well before churning, so it’s best to keep it chilled and churn it fresh when you’re ready.
Common Mistakes to Avoid
Making custard-style ice cream at home is a rewarding process, but like all things in the kitchen, a few common mistakes can get in the way of perfect results. The good news? Most of these are easy to avoid with just a bit of know-how.
1. Overheating the Custard
This is probably the most frequent mistake when making ice cream with a custard base. If the mixture gets too hot or boils, the egg yolks can curdle, resulting in a grainy texture. To avoid this, always cook over low to medium-low heat, stir constantly, and pull the pot off the heat as soon as the custard coats the back of a spoon.
2. Skipping the Tempering Step
Tempering the egg yolks might feel like an extra step, but it’s absolutely essential. Adding hot cream directly to cold eggs too quickly will cause them to scramble. Slowly drizzle the hot liquid into the yolks while whisking constantly to bring them up to temperature gradually.
3. Not Chilling the Base Long Enough
It’s tempting to churn the custard right away, but skipping the chill time can lead to poor texture and flavor. Chilling the base for at least 3–4 hours, preferably overnight, allows it to thicken and for the flavors to meld beautifully.
4. Using Low-Fat Dairy
Ice cream relies on fat for creaminess and mouthfeel. Using skim milk or light cream can result in an icy, unsatisfying texture. Stick with whole milk and heavy cream for best results.
5. Not Straining the Custard
Even with careful tempering and cooking, small bits of cooked egg can sneak into your custard. Straining the mixture before chilling ensures a smooth, silky final product.
6. Underchurning or Overchurning
Follow your ice cream maker’s instructions carefully. Underchurning can result in a runny texture that doesn’t freeze well, while overchurning can cause the mixture to become grainy or buttery.
Avoiding these pitfalls will help you consistently produce homemade vanilla ice cream that’s creamy, smooth, and full of flavor.
Pro Tips
If you’re ready to take your homemade vanilla custard ice cream to the next level, these tried-and-true pro tips will help you master the process and fine-tune the flavor, texture, and presentation. These tips come from both professional chefs and home cooks who’ve made ice cream a regular kitchen habit. Trust me—once you try a few of these, you’ll notice a difference in the final result.
1. Use High-Quality Vanilla
It might sound obvious, but vanilla is the star of this recipe, so it deserves the spotlight. A pure vanilla extract (not imitation) makes all the difference. For an even deeper flavor and those gorgeous black specks, consider using vanilla bean paste or scraping out the seeds of a real vanilla bean pod. You can steep the pod in the cream mixture while heating for an infusion that’s rich and aromatic.
2. Chill the Mixing Bowl Before Churning
This is especially helpful in warmer kitchens or during hot summer days. A chilled bowl helps keep the mixture cool as it churns, giving you better structure and a smoother final texture. If your ice cream maker uses a freezer bowl, make sure it’s been frozen for at least 24 hours beforehand.
3. Don’t Skip the Salt
Even just a pinch enhances sweetness and rounds out the flavor. It won’t make your ice cream salty, but it will elevate the vanilla and cream notes in a subtle, delicious way. If you want to experiment, try a pinch of flaky sea salt sprinkled on top just before serving.
4. Freeze in a Shallow, Wide Container
A wide, shallow container not only makes it easier to scoop but also allows the ice cream to freeze more evenly and quickly, which prevents large ice crystals from forming. The quicker it freezes, the creamier it stays.
5. Stir in Extra Mix-ins at the Right Time
If you want to add chocolate chips, cookie chunks, nuts, or fruit, wait until the last few minutes of churning. Adding them too early can interfere with the churning process, while adding them too late might cause uneven distribution.
6. Use a Thermometer if You’re Unsure
When cooking the custard, the ideal temperature is between 170°F to 175°F. If you’re worried about overcooking or undercooking, a kitchen thermometer can be a helpful tool for precise results.
7. Let It Rest Before Scooping
Once your ice cream is frozen solid, it might be too hard to scoop right out of the freezer. Let it sit at room temperature for 5 to 10 minutes to soften slightly. This makes it easier to serve and helps bring out the flavor.
8. Label and Date Your Container
If you’re storing leftovers, don’t forget to label the container with the date you made it. Homemade ice cream is best eaten within two weeks, so a quick note helps ensure you’re enjoying it at its best.
These tips may seem small, but they can make a world of difference in your final ice cream. Whether it’s smoother texture, stronger flavor, or just better scoops, they’ll help make your homemade dessert truly unforgettable.
Frequently Asked Questions (FAQs)
Even with a recipe this straightforward, questions are bound to come up—especially if it’s your first time making a custard-based ice cream. Here are answers to the most common questions people have when tackling this recipe.
Can I use 2% milk instead of whole milk?
Yes, but keep in mind that the texture will be slightly less creamy. Whole milk has more fat, which contributes to the rich, velvety texture. Using 2% will still work, but the final product may be a bit lighter and more prone to iciness.
Can I make this recipe without an ice cream maker?
You can, though the texture may not be as smooth. After making and chilling the custard, pour it into a shallow dish and freeze it. Stir vigorously every 30 minutes for about 3–4 hours to break up ice crystals. It’s a bit more hands-on, but it works in a pinch.
What if I accidentally overcook the custard?
If the custard curdles slightly, don’t panic. Quickly pour it through a fine mesh strainer and blend it with an immersion blender (or regular blender) to smooth it out. While the texture may not be perfect, it can still be saved and turned into delicious ice cream.
Can I reduce the sugar in this recipe?
Yes, but be cautious. Sugar not only sweetens the ice cream but also affects the texture by lowering the freezing point. Reducing sugar too much can make your ice cream hard and icy. A small reduction (say, from ⅔ cup to ½ cup) is fine and still delicious.
Can I use non-dairy milk or cream?
You can substitute dairy with full-fat coconut milk for a vegan version, though the taste and texture will differ slightly. The custard won’t be quite as rich, and the vanilla flavor may compete with the coconut. Almond milk or oat milk can be used, but you may need a stabilizer like cornstarch for the best texture.
Is it safe to eat ice cream made with egg yolks?
Yes, as long as you cook the custard to at least 170°F, it’s safe to eat. The cooking process gently pasteurizes the eggs. Always follow safe food handling practices and refrigerate the custard base promptly after cooking.
Can I add other flavors to the base?
Absolutely. This custard base is a blank canvas. You can infuse it with spices like cinnamon or cardamom, steep fresh mint leaves in the warm cream, or stir in citrus zest. Just be sure any additions are food-safe and don’t disrupt the balance of the base.
Why does my ice cream turn icy after freezing?
This usually happens when the base wasn’t properly chilled before churning, or if the churned ice cream wasn’t stored in an airtight container. Make sure to chill the custard thoroughly, churn until thick, and store it with a tight seal.
How can I make this ice cream scoopable from the freezer?
For easier scooping, you can add a tablespoon of corn syrup or a splash of alcohol (like vanilla extract or halal-friendly glycerin-based vanilla). These ingredients lower the freezing point slightly and keep the texture softer.
Can I double the recipe?
Yes! Just make sure your ice cream maker can handle the larger volume. Double the ingredients, but churn in two separate batches if necessary to avoid overfilling your machine.
Conclusion & Call to Action
There’s a special kind of joy that comes from making ice cream at home. From the aroma of vanilla warming in cream to the soft swirl of freshly churned custard, every step is part of an experience that’s as rewarding as it is delicious. This homemade vanilla custard ice cream recipe gives you a dessert that’s far beyond anything you’ll find in a grocery store—because it’s made with love, intention, and real ingredients.
Whether you enjoy it on its own, paired with fresh fruit, or as part of an elaborate dessert creation, this ice cream delivers every single time. The texture is unbelievably smooth, the flavor is deep and pure, and the whole process—from cooking the custard to scooping that first frozen spoonful—makes it all feel just a little more special.
So now, it’s your turn. Set aside an afternoon, gather your ingredients, and give this recipe a try. I promise it’s easier than you think, and the results will make you feel like a total kitchen rockstar. And if you’re like me, it’ll quickly become your go-to dessert for celebrations, comfort food nights, or just because you felt like making something wonderful.
When you do make it, I’d love to hear how it turned out. Did you try any fun mix-ins? Serve it with a pie or make sundaes for the whole family? Share your creations in the comments or tag me on social media—I’m always thrilled to see how you bring these recipes to life in your own kitchens.
Now go make something sweet, creamy, and unforgettable. You’ve got this.
Print
Vanilla Custard Ice Cream Recipe: Creamy Dessert Made Easy
- Total Time: 6–8 hours (including chill & freeze time)
- Yield: 6 servings 1x
- Diet: Vegetarian
Description
A rich, creamy vanilla ice cream made with a custard base of egg yolks, cream, and milk. Silky smooth and deeply flavored with real vanilla, this classic dessert is easy to make at home and perfect for pairing with baked goods, fruit, or enjoying all on its own.
Ingredients
-
2 cups heavy cream
-
1 cup whole milk
-
⅔ cup granulated sugar
-
Pinch of salt
-
6 large egg yolks
-
2 teaspoons vanilla extract
Instructions
-
In a saucepan over medium-low heat, combine cream, milk, sugar, and salt. Stir and heat until sugar dissolves, about 3–5 minutes. Remove from heat.
-
In a separate bowl, whisk the egg yolks. Slowly drizzle in ½ cup of the hot milk mixture while whisking to temper the eggs.
-
Return the tempered yolks to the saucepan. Cook on medium-low, stirring constantly, until the mixture thickens and coats the back of a spoon (about 5–8 minutes). Do not boil.
-
Remove from heat. Stir in vanilla extract.
-
Strain through a fine mesh sieve into a bowl. Cool to room temperature, then cover and chill for 3–4 hours or overnight.
-
Pour into ice cream maker and churn for 20–30 minutes until soft-serve consistency.
-
Serve immediately or freeze 2–4 hours for a firmer texture.
Notes
-
Chill custard base thoroughly before churning for best texture.
-
Use pure vanilla extract or vanilla bean paste for deeper flavor.
-
Straining the custard ensures a smooth final product.
-
Let frozen ice cream sit at room temperature for 5–10 minutes before scooping.
- Prep Time: 10 minutes
- Cook Time: 15–20 minutes
- Category: Dessert
- Method: Churned Ice Cream
- Cuisine: American