
There’s just something magical about cookie dough. It’s sweet, soft, a little salty, and downright irresistible. For many of us, sneaking a spoonful of cookie dough straight from the mixing bowl was the best part of baking cookies as kids. And now, with this no-bake cookie dough fudge recipe, you get to enjoy that same indulgent flavor in a completely safe, egg-free, and heat-treated form—no oven required.
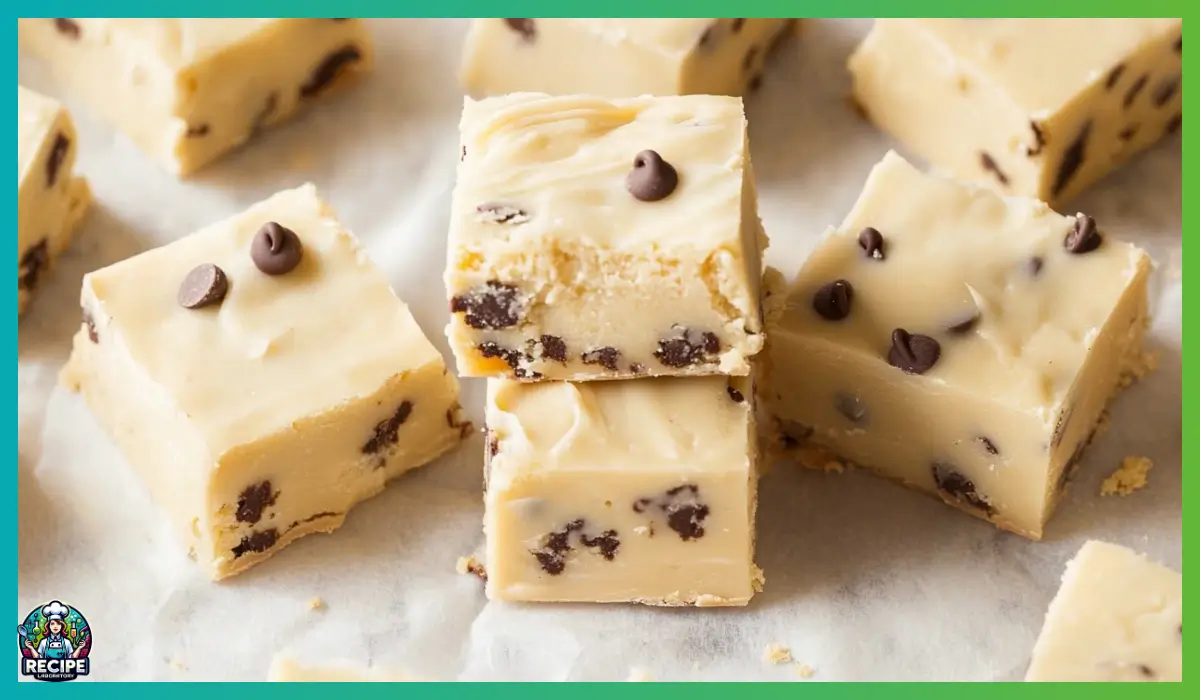
What makes this recipe truly special is its perfect fusion of textures and flavors. You’ve got the buttery richness of classic cookie dough, swirled together with the creamy sweetness of white chocolate fudge. Add in some mini chocolate chips for that familiar bite, and you’ve got a dessert that feels both playful and luxurious. It’s the kind of treat that impresses at parties but is easy enough to whip up on a lazy Sunday afternoon.
This recipe has quickly become one of my go-to desserts when I want something crowd-pleasing but don’t feel like turning on the oven. It came into my life during a heatwave when I was craving something sweet but couldn’t bear the idea of baking. I played around with a few ideas and eventually landed on this no-bake gem that combines the comforting nostalgia of cookie dough with the smooth, decadent texture of fudge.
Another bonus? You don’t need any fancy kitchen gadgets or hard-to-find ingredients. Everything in this recipe is likely already in your pantry, or just a quick grocery run away. It’s perfect for beginners who want to try something new and rewarding without too much fuss. And because it makes about 25 squares, it’s great for sharing—if you can resist eating it all yourself.
So whether you’re making this for a birthday party, potluck, or just to treat yourself after a long day, this no-bake cookie dough fudge is the kind of sweet, creamy comfort food that’s hard to beat.
Why You’ll Love This No-bake cookie dough Recipe
There are so many reasons this no-bake cookie dough fudge will steal your heart—and your taste buds. For starters, the ease of preparation is a total game-changer. You don’t need an oven, and there’s no baking involved at all. That makes this recipe perfect for hot summer days, small kitchens, or anyone who just doesn’t feel like baking. It’s a fantastic project for beginner cooks and seasoned dessert lovers alike.
The flavor is another standout. It delivers everything you love about classic chocolate chip cookie dough—the buttery base, the deep sweetness of brown sugar, a hint of vanilla, and of course, those mini chocolate chips that melt in your mouth. Now, imagine all of that enveloped in the rich creaminess of white chocolate fudge. The combination is indulgent, nostalgic, and absolutely addictive.
In terms of texture, this recipe hits the sweet spot. The cookie dough base is soft and slightly chewy, while the fudge layer brings a velvety richness that balances the whole bite. The frozen mini chocolate chips stay intact, offering little pockets of chocolate that surprise you with every bite. It’s a well-rounded dessert that doesn’t overwhelm the palate but still feels luxurious.
This recipe is also ideal for gatherings. Whether you’re hosting a birthday party, holiday celebration, or casual dinner with friends, these fudge squares are guaranteed to be a hit. You can even wrap them up as homemade gifts—they travel well, hold their shape, and look adorable stacked in a festive box.
And let’s not forget how customizable it is. You can get creative by switching up the chocolate chips, adding chopped nuts, or swirling in a bit of peanut butter. You’ll find even more variation ideas later in this article, but the base recipe is delicious enough on its own.
In short, this no-bake cookie dough fudge is easy, versatile, and deeply satisfying. If you’ve got a sweet tooth and a soft spot for cookie dough, this recipe will become a fast favorite in your dessert rotation.
Health Benefits of this No-bake cookie dough
Okay, let’s be honest—this recipe isn’t going to win any awards for being a health food. It’s rich, sweet, and indulgent, and that’s exactly what we love about it. But that doesn’t mean it’s completely without benefits. When enjoyed in moderation and made with a few smart ingredient choices, this no-bake cookie dough fudge can fit into a balanced lifestyle as a fun, feel-good treat.
One of the biggest advantages of this recipe is that it’s portion-controlled. Because the fudge is sliced into small squares, you’re able to enjoy a satisfying taste of something sweet without going overboard. Each piece is rich enough to satisfy cravings, so a little goes a long way.
There are also some ingredients in here that bring more to the table than just flavor. For example, mini chocolate chips—especially dark chocolate or semi-sweet varieties—contain antioxidants known as flavonoids, which can help support heart health in small doses. Even the white chocolate chips, when made with real cocoa butter, provide a bit of calcium and a small boost of energy from the natural fats.
Then there’s the sweetened condensed milk. While it’s certainly rich, it also provides some protein and calcium. It’s a concentrated source of dairy, and though it’s best enjoyed in moderation, it contributes to the creamy texture of this recipe in a way that doesn’t require added cream or butter beyond what’s already in the cookie dough base.
Let’s not forget about the flour. We’re heat-treating it for safety, which is a step many people skip, but it makes this raw dough completely safe to eat. By eliminating the risk of foodborne illness, this recipe becomes a fun and family-friendly dessert that even kids can enjoy without worry.
Finally, there’s something to be said for the emotional benefits of a recipe like this. Treating yourself to something delicious and homemade can lift your mood, bring back happy memories, and create moments of connection when shared with loved ones. That’s a kind of nourishment that goes beyond calories and nutrients—and it’s every bit as important.
Preparation Time, Servings, and Nutritional Information
When it comes to convenience, this no-bake cookie dough fudge scores major points. From start to finish, you’re looking at about 20 minutes of active prep time and a couple of hours in the fridge to chill. That makes it one of the fastest desserts you can put together with minimal cleanup or stress.
Total Time:
Preparation: 20 minutes
Chilling: 2 hours
Total: 2 hours 20 minutes
Servings:
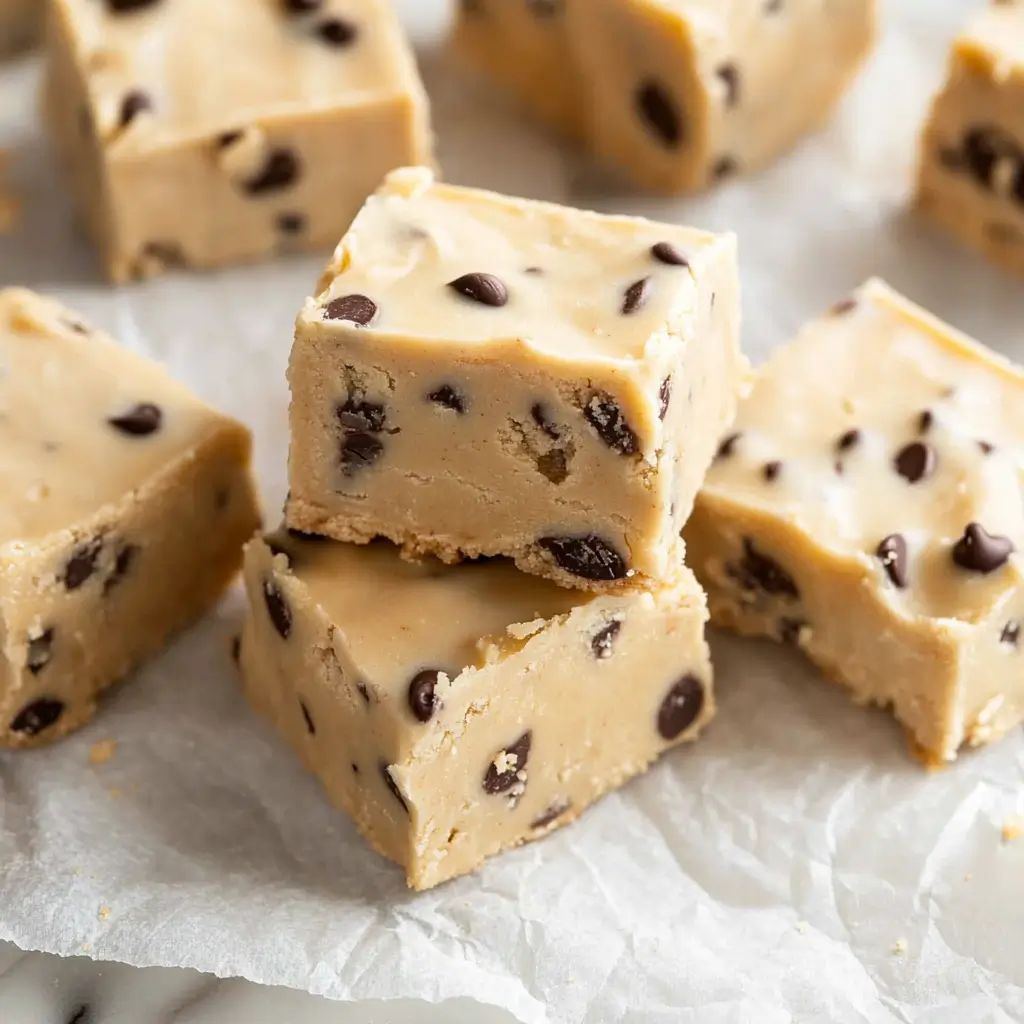
This recipe makes approximately 25 squares, depending on how you slice them. Each square is about 1½ to 2 inches wide—perfect for individual treats or sharing.
Nutritional Information (per serving):
Calories: ~180
Protein: 2g
Carbohydrates: 23g
Fat: 9g
Sugar: 18g
Fiber: 0.5g
Sodium: 70mg
Keep in mind that these are rough estimates, and the exact nutritional breakdown may vary depending on the specific brands of ingredients used. If you’re looking to make this recipe slightly lighter, you can experiment with using reduced-sugar chocolate chips, light butter, or even a sugar-free sweetened condensed milk substitute.
Ingredients List
Here’s what you’ll need to make this indulgent, no-bake cookie dough fudge. Most of these ingredients are pantry staples, but I’ll also include a few tips on what each one does in the recipe and possible substitutions where applicable.
Dry Ingredients:
- 1½ cups all-purpose flour (heat-treated): This creates the base structure for the cookie dough. Be sure to heat-treat the flour to eliminate any bacteria, since we won’t be baking it.
- ½ tsp salt: A touch of salt enhances the sweetness and balances out the flavors.
Sugars and Sweeteners:
- ¼ cup granulated sugar: Adds sweetness and helps the butter and milk blend smoothly.
- ½ cup brown sugar, packed: Brings a deeper, caramel-like flavor and helps keep the dough moist.
Fats and Liquid Ingredients:
- ½ cup (1 stick) salted butter, softened: Butter creates the rich, classic cookie dough flavor. If using unsalted butter, add an extra pinch of salt.
- 2 tbsp milk: Helps smooth the dough and bring everything together. Any milk works—dairy or non-dairy.
- 1 tsp vanilla extract: Adds warmth and enhances the cookie dough aroma.
Chocolate:
- 1 cup mini chocolate chips (freeze before using): These are stirred in last to give you those perfect chocolate bursts in every bite. Freezing them prevents them from melting when added to the warm fudge.
- 1 cup Ghirardelli white chocolate chips (recommended): These are melted with the sweetened condensed milk to make the creamy fudge base. Use a high-quality brand for the best results.
Sweetened Condensed Milk:
- 1 (14 oz) can sweetened condensed milk: This is the backbone of the fudge layer. Its thick, sweet consistency blends with the white chocolate for a perfectly smooth texture.
Optional additions include chopped nuts, peanut butter swirls, or even sprinkles for a bit of fun.
Continue reading for a detailed breakdown of how to bring all these ingredients together into the most delicious no-bake fudge you’ve ever had.
Step-By-Step Cooking Instructions
This part is where the magic happens. Don’t worry if you’re not a seasoned baker—this recipe is very forgiving, and I’ll walk you through each step with plenty of detail. By the end, you’ll have a gorgeous tray of cookie dough fudge chilling in the fridge, ready to be sliced and devoured.
Step 1: Prep the Mini Chocolate Chips
Before doing anything else, place the mini chocolate chips in the freezer. This might seem like an odd first step, but it’s actually a game-changer. Since you’ll be mixing the chips into a warm fudge base later, freezing them beforehand keeps them from melting completely. You want them to stay as little chocolate pockets inside the fudge—not disappear into it.
Step 2: Line Your Pan
Grab an 8×8-inch baking pan and line it with parchment paper. Leave a bit of overhang on the sides to make it easier to lift the fudge out once it’s set. This step will save you so much trouble when it’s time to slice the fudge.
Step 3: Heat-Treat the Flour
Since we’re not baking this recipe, it’s important to make sure the flour is safe to eat. Raw flour can contain harmful bacteria, so we’re going to heat-treat it to kill off anything unwanted.
Place the flour in a microwave-safe bowl and microwave it for 30 seconds to 1 minute, stirring halfway through. Use a food thermometer to make sure the internal temperature hits at least 165°F. Once that’s done, set the flour aside to cool slightly.
Step 4: Cream the Butter and Sugars
In a large mixing bowl, add your softened butter, granulated sugar, and brown sugar. Using a hand mixer or stand mixer, cream everything together until the mixture is light and fluffy. This usually takes about 2-3 minutes.
Tip: If your butter isn’t quite soft enough, microwave it for just 5 to 10 seconds to soften it slightly. You don’t want it melted—just soft enough to blend easily.
Step 5: Add the Milk and Vanilla
Once your butter and sugars are creamed, add the milk and vanilla extract. Mix again until fully incorporated. The mixture should look glossy and slightly lighter in color.
Transitioning from this step, you’ll now begin turning this sweet base into actual dough.
Step 6: Mix in the Flour and Salt
Gradually add the cooled, heat-treated flour and the salt into the bowl with your butter-sugar mixture. You can use your mixer on low speed, or fold it in by hand if you prefer more control. Continue mixing until a thick dough forms. It should look just like traditional cookie dough.
If the dough seems too dry at this point, you can add a splash of milk to bring it together. On the other hand, if it feels too sticky, let it rest for a few minutes—it will firm up as the flour absorbs the liquid.
Step 7: Prepare the Fudge Layer
Now comes the part that makes this treat next-level. In a microwave-safe bowl, combine the white chocolate chips and the full can of sweetened condensed milk. Microwave the mixture in 30-second intervals, stirring in between each, for about 2 minutes total. Keep going until the white chocolate chips are completely melted and the mixture is smooth and glossy.
Tip: Don’t overheat it. White chocolate can burn easily, so stick to short bursts and keep stirring.
Step 8: Combine the Cookie Dough and Fudge Base
Immediately pour the hot white chocolate mixture into the bowl with the cookie dough. While the mixture is still warm, use your mixer on low speed to blend everything together. It will turn into a thick, creamy dough with a gorgeous sheen.
Because the white chocolate fudge base is still warm, work quickly before it begins to firm up.
Step 9: Add the Frozen Chocolate Chips
Now that your dough-fudge combo is ready, grab those frozen mini chocolate chips from the freezer. Gently fold them into the mixture using a spatula or wooden spoon. The key here is to work fast and avoid overmixing, which can cause the chips to melt.
This step creates the “cookie dough chunk” texture and gives that familiar chocolate chip bite.
Step 10: Transfer to the Prepared Pan
Scrape the finished dough into your lined baking pan. Use a spatula to spread it out evenly, smoothing the top as best you can. It will be quite thick, so take your time pressing it into the corners.
Optional: Sprinkle a few extra chocolate chips on top for a prettier presentation. They’ll stick to the surface while the fudge is still soft.
Step 11: Chill and Set
Place the pan in the refrigerator and chill for at least 2 hours, or until the fudge is completely firm to the touch. If you’re in a hurry, you can speed things up by placing it in the freezer for about 30 minutes—just don’t forget it in there!
Step 12: Slice and Serve
Once the fudge is fully set, use the parchment overhang to lift it out of the pan. Transfer to a cutting board and slice into small squares—about 1½ to 2 inches each. You should end up with approximately 25 pieces.
And that’s it! You’ve just made a batch of rich, creamy, crowd-pleasing no-bake cookie dough fudge from scratch.
How to Serve
There are so many fun and easy ways to serve this cookie dough fudge, depending on the occasion. Its versatility makes it perfect for everything from casual snack time to more formal dessert spreads.
If you’re serving at a party, arrange the squares neatly on a platter or tiered dessert tray. They look beautiful stacked or placed in small paper candy cups for individual servings. The texture holds up well at room temperature, so they’ll stay firm even after sitting out for a while.
For a more indulgent twist, serve a square or two with a scoop of vanilla ice cream. The creamy cold ice cream pairs beautifully with the rich, chewy texture of the fudge and adds another layer of dessert bliss.
Want to take it up another notch? Try drizzling the squares with a little melted dark chocolate or caramel sauce just before serving. You can also sprinkle a tiny bit of sea salt on top for that sweet-salty combo everyone loves.
If you’re packing these up for lunchboxes or road trips, wrap individual pieces in wax paper or store them in small snack containers. They make for a great pick-me-up during the day and are guaranteed to make someone smile.
For gifting, place the fudge squares in a decorative tin or box lined with tissue paper. You can even tie it with a ribbon and include a little tag with the recipe—it’s the kind of homemade gift people truly appreciate.
No matter how you serve them, these cookie dough fudge bites are a guaranteed hit.
Pairing Suggestions
Pairing a dessert like this might not be your first instinct, but the right pairings can actually enhance the overall experience and elevate the treat to something even more enjoyable.
For drinks, you can’t go wrong with a cold glass of milk. The classic milk-and-cookie combo never fails, and the coolness of the milk helps balance the richness of the fudge. You can go with regular dairy milk, almond milk, oat milk, or any other variety you prefer.
If you’re enjoying the fudge as part of an afternoon snack or dessert platter, coffee or tea makes a great partner. A strong cup of espresso or a cappuccino adds a nice contrast to the sweetness. If you prefer tea, try something like a spiced chai or even a peppermint tea for a cozy flavor contrast.
Want to go the extra mile for a family movie night or gathering? Create a dessert board with the cookie dough fudge squares, some fresh strawberries, a few pieces of dark chocolate, mini marshmallows, and graham crackers. Serve it with mugs of hot cocoa or warm milk with a sprinkle of cinnamon. It’s a fun way to entertain guests or spoil your loved ones.
If you’re serving this fudge at a celebration, such as a birthday or holiday gathering, pairing it with a non-alcoholic sparkling beverage or a fruit punch adds a festive flair. The bubbles help cleanse the palate and keep things light and fun.
You can even pair it with other desserts. Serve it alongside brownies, cookies, or cupcakes as part of a dessert bar. Since each piece is small and neatly portioned, it fits right in without overwhelming the table—or the guests.
No matter how you choose to pair it, this no-bake fudge is the star of the show.
Storage, Freezing & Reheating Instructions
Proper storage is key to keeping your no-bake cookie dough fudge fresh, flavorful, and ready to enjoy anytime. The great news? This recipe stores beautifully, whether you’re planning to enjoy it throughout the week or stash some away for future sweet cravings.
How to Store in the Refrigerator
Once your fudge is fully set and sliced, transfer the squares into an airtight container. Use layers of parchment or wax paper between each layer of fudge to prevent the pieces from sticking together. Stored this way, the fudge will stay fresh in the refrigerator for up to 7 days. Because it’s rich and compact, it doesn’t dry out easily—but make sure the lid is tightly sealed to maintain texture and flavor.
How to Store at Room Temperature
If your kitchen isn’t too warm, you can keep the fudge at room temperature for up to 2-3 days. Again, make sure it’s stored in an airtight container, away from direct sunlight or heat sources. This option works well for parties or events where refrigeration might not be available. However, if you’re in a hot climate, it’s best to refrigerate to avoid melting or softening.
Freezing the Fudge
Want to make a big batch and save some for later? Freezing is a great option. To freeze the fudge:
- Place the sliced fudge squares on a baking sheet lined with parchment paper, making sure the pieces don’t touch.
- Freeze for about 1-2 hours, or until solid.
- Transfer the frozen squares to a freezer-safe container or zip-top bag. Again, layer with parchment paper to prevent sticking.
Label the container with the date, and store for up to 3 months. When you’re ready to enjoy, just let the fudge thaw in the fridge overnight or at room temperature for 30 minutes.
Reheating (if needed)
Because this is a no-bake treat meant to be served chilled or at room temperature, there’s no real need to “reheat” it. However, if your fudge has been in the fridge or freezer and you prefer a softer texture, just leave it at room temperature for about 10–15 minutes before serving. It will become slightly creamier without losing its shape.
Whether chilled, frozen, or softened slightly at room temp, this fudge remains a delicious, easy-to-store dessert that’s ready when you are.
Common Mistakes to Avoid
Even though this recipe is simple and no-bake, a few common mistakes can affect the final result. Avoiding these pitfalls will help ensure your cookie dough fudge turns out perfect every single time.
1. Skipping the Heat-Treating Step
This is a big one. Raw flour can carry harmful bacteria, and because we’re not baking the dough, it’s essential to heat-treat the flour before adding it to your mixture. Just a quick microwave until it reaches 165°F makes all the difference in safety and peace of mind.
2. Using Warm Butter Instead of Softened
Microwaving your butter until it’s melted or too hot will change the texture of the cookie dough completely. Instead, let your butter sit out at room temperature until it’s soft to the touch. This ensures a creamy, fluffy mixture that holds together without becoming greasy.
3. Overheating the White Chocolate
White chocolate can be a little finicky. If it’s overheated, it can seize up or burn, resulting in a lumpy, gritty texture. Always melt it slowly in short bursts, stirring between each interval to keep the mixture smooth.
4. Not Freezing the Chocolate Chips
This might seem like an optional step, but freezing the mini chocolate chips is crucial if you want them to hold their shape. If added at room temperature, they’re likely to melt when mixed into the warm fudge, losing that signature “chocolate chunk” effect.
5. Overmixing Once Chocolate Chips Are Added
Once your chips go in, you want to fold gently and quickly. Overmixing at this stage will melt the chips and change the entire texture of the fudge. Use a light hand and stop mixing as soon as the chips are evenly distributed.
6. Rushing the Chill Time
It’s tempting to dive in right away, but the fudge really does need a couple of hours to set in the fridge. If you try to slice it too early, it may still be soft and won’t hold its shape. Be patient—it’s worth the wait!
Avoiding these common mistakes will keep your fudge looking and tasting as amazing as it should.
Pro Tips
To really master this no-bake cookie dough fudge recipe, here are some expert-level tips that will take your dessert from good to unforgettable.
1. Use High-Quality White Chocolate
The white chocolate you use has a big impact on the final texture and flavor of the fudge. Brands like Ghirardelli melt beautifully and offer a richer, creamier finish. Lower-quality white chocolate may not melt as smoothly or can result in a grainy fudge.
2. Add a Pinch of Espresso Powder
Want to enhance the flavor of the chocolate? Add ¼ teaspoon of instant espresso powder to the white chocolate mixture before microwaving. It won’t make the fudge taste like coffee, but it will intensify the chocolate flavor in the most subtle and delicious way.
3. Make It Seasonal
You can easily turn this recipe into a seasonal treat by mixing in different ingredients. Try chopped peppermint candies around the holidays, pastel sprinkles for springtime, or even pumpkin spice for fall. The base recipe is neutral enough to handle creative flavor additions.
4. Let the Fudge Sit Before Cutting
After removing the fudge from the fridge, let it sit on the counter for 5–10 minutes before slicing. This prevents cracking and helps you get clean, even pieces without crumbling the edges.
5. Use a Warm Knife for Perfect Cuts
Dip your knife in warm water and wipe it dry before slicing the fudge. The warm blade glides through more smoothly, making your squares look bakery-level beautiful.
6. Double the Recipe for a Crowd
This recipe can be easily doubled if you’re feeding a larger group. Just use a 9×13-inch pan instead of an 8×8, and add an extra 30 minutes to your chill time to ensure everything sets properly.
With these pro tips in your back pocket, you’ll be making fudge that not only tastes amazing but looks polished and professional too.
Frequently Asked Questions (FAQs)
Can I use unsalted butter?
Absolutely. If you’re using unsalted butter, just add a small pinch (about ⅛ teaspoon) of extra salt to the dough mixture to balance the sweetness.
Is it really necessary to freeze the chocolate chips?
Yes, it makes a huge difference. Freezing keeps the mini chips from melting into the warm fudge. Without that step, you’ll end up with streaks of chocolate instead of solid chunks.
What does heat-treating flour mean?
Heat-treating flour is a quick and easy way to kill any potential bacteria in raw flour. Since this is a no-bake recipe, you’re eating the flour as-is, so it must be brought to 165°F to ensure it’s safe. This can be done in the microwave or oven.
Can I make this recipe dairy-free?
Yes, you can! Use a plant-based butter, dairy-free milk like almond or oat, and vegan sweetened condensed milk (which is available at many health food stores or online). For the white chocolate, be sure to find a dairy-free version.
What if I don’t have white chocolate chips?
You can substitute chopped white chocolate bars or even semi-sweet chocolate for a darker fudge. Just know that the flavor and color will change. White chocolate adds that creamy, classic cookie dough taste, so it’s highly recommended.
Can I make this recipe gluten-free?
Yes, just swap the all-purpose flour for a gluten-free 1:1 baking flour that’s safe for raw use. Make sure to still heat-treat it. Also, double-check that your chocolate chips and other ingredients are gluten-free.
How long does the fudge last in the fridge?
Stored properly in an airtight container, this fudge lasts up to 7 days in the fridge. If you freeze it, it’ll stay fresh for up to 3 months.
Can I use regular chocolate chips instead of mini?
You can, but mini chips are recommended because they disperse more evenly throughout the fudge. Regular-sized chips tend to clump or sink, which can affect both appearance and texture.
What’s the best way to give this as a gift?
Once chilled and cut, place each square in a mini cupcake liner and arrange in a gift box or tin. Wrap with ribbon and include a handwritten tag for a personal touch. These make beautiful and thoughtful holiday or hostess gifts.
Can kids help make this recipe?
Yes! This is a great recipe for kids to help with. There’s no baking, no knives (except at the end), and lots of stirring and measuring. Just make sure an adult handles the microwave and heat-treating the flour.
Conclusion & Call to Action
There’s something undeniably joyful about a dessert that reminds you of being a kid—especially one that’s so easy to make and share. This no-bake cookie dough fudge is everything you love about classic cookie dough, turned into a rich, sliceable treat that’s both indulgent and fun.
Whether you’re making it for a special occasion, gifting it to someone you love, or simply craving a little comfort food, this recipe is sure to deliver. It’s quick, fuss-free, and guaranteed to leave everyone asking for the recipe.
Now that you know all the steps, tips, and tricks, it’s your turn to get into the kitchen and make it your own. Add your favorite mix-ins, get the kids involved, or double the batch for a crowd. However you decide to enjoy it, one thing’s for sure—you’ll be coming back to this recipe again and again.
I’d love to see how your cookie dough fudge turns out. Don’t forget to snap a picture and share it on social media! Tag me so I can admire your sweet creation and cheer you on. And if you have any questions, tips, or fun variations, drop them in the comments. Let’s keep spreading the fudge love.
Happy no-baking!
Print
No-Bake Cookie Dough Fudge: Rich, Creamy, and Easy to Make
- Total Time: 2 hours 20 minutes (including chill time)
- Yield: ~25 squares
- Diet: Vegetarian
Description
This no-bake cookie dough fudge is rich, creamy, and packed with chocolate chips. It’s easy to make, requires no oven, and is perfect for gifting or parties.
Ingredients
-
1 cup mini chocolate chips (frozen)
-
½ cup (1 stick) salted butter, softened
-
¼ cup granulated sugar
-
½ cup brown sugar, packed
-
2 tbsp milk
-
1 tsp vanilla extract
-
1½ cups all-purpose flour (heat-treated)
-
½ tsp salt
-
1 cup white chocolate chips (Ghirardelli recommended)
-
1 (14 oz) can sweetened condensed milk
Instructions
-
Freeze mini chocolate chips. Line an 8×8 inch pan with parchment paper.
-
Heat-treat flour in microwave until it reaches 165°F. Set aside.
-
In a large bowl, cream butter, granulated sugar, brown sugar, milk, and vanilla.
-
Mix in heat-treated flour and salt to form dough.
-
In a microwave-safe bowl, melt white chocolate chips and sweetened condensed milk in 30-second intervals until smooth.
-
Pour hot fudge into dough mixture and combine until smooth.
-
Fold in frozen chocolate chips quickly.
-
Spread evenly in prepared pan.
-
Chill for 2 hours or until firm.
-
Slice and serve.
Notes
-
Always heat-treat flour to ensure food safety.
-
Freezing chips prevents them from melting into the fudge.
-
Let sit at room temp for 5–10 minutes before slicing for clean edges.
- Prep Time: 20 minutes
- Cook Time: 0 minutes
- Category: Dessert
- Method: No-Bake
- Cuisine: American