
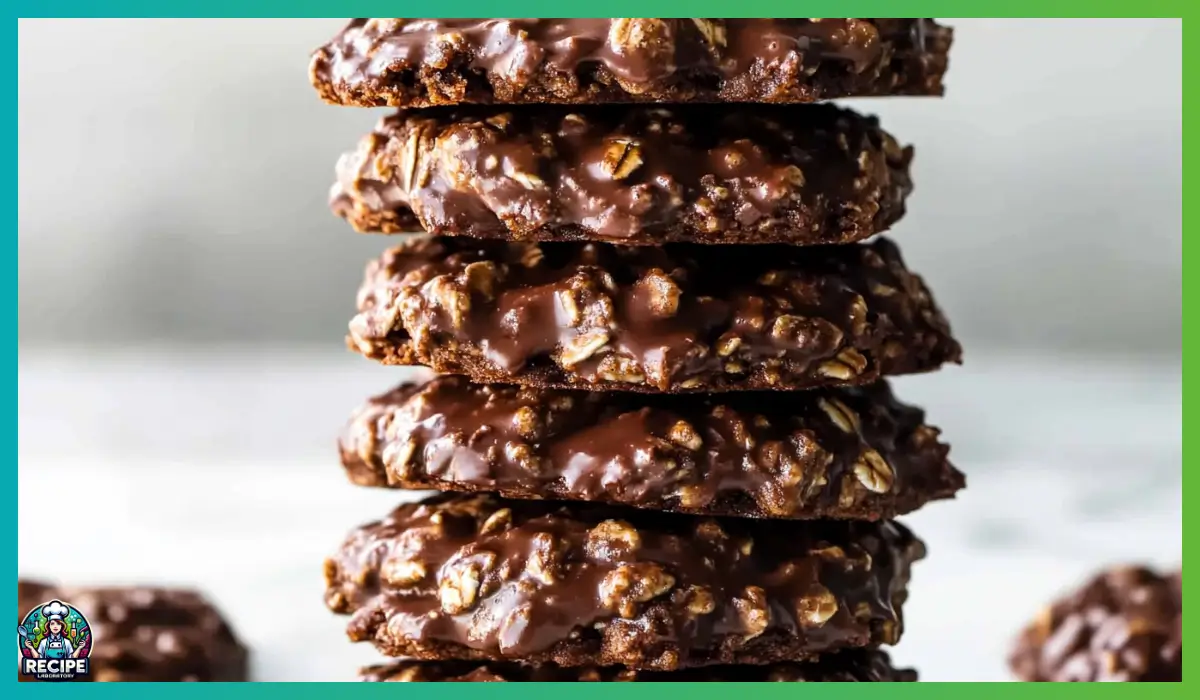
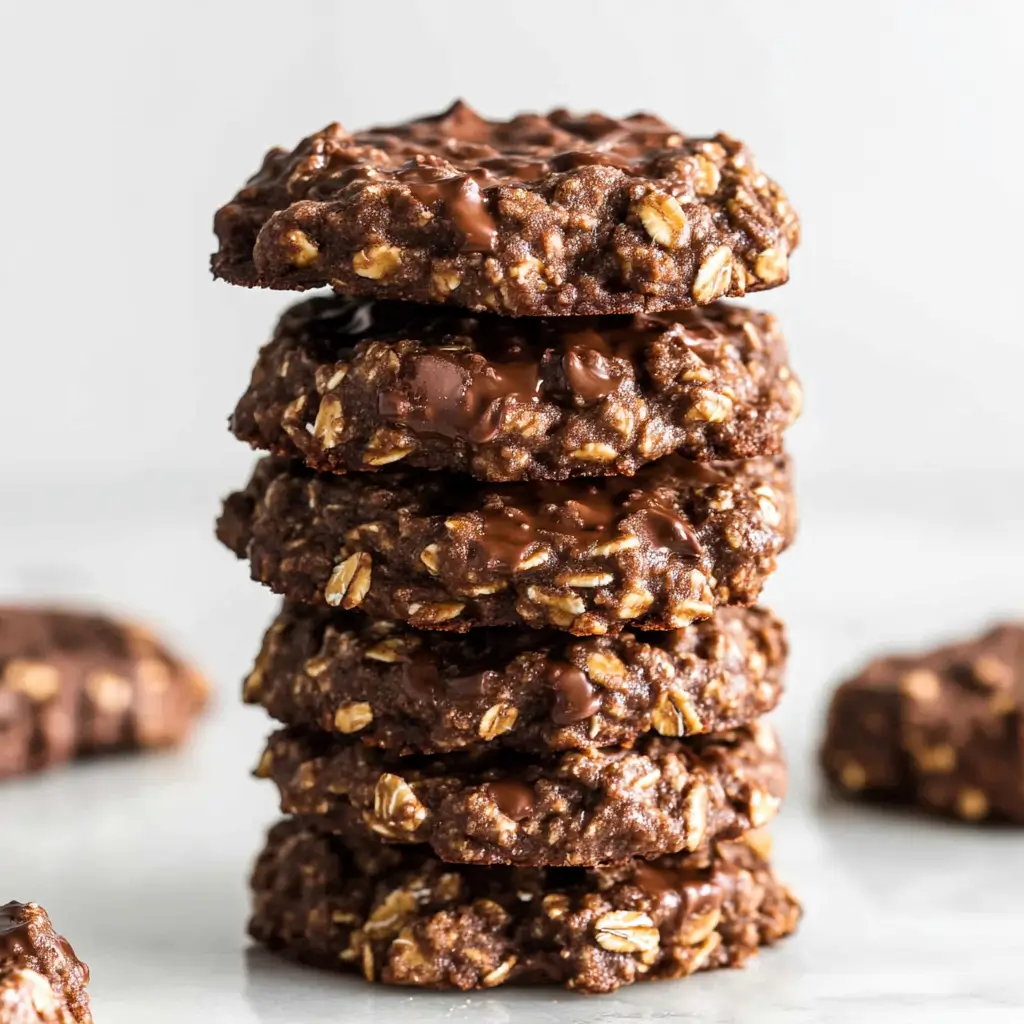
There’s a kind of magic in a recipe that comes together with zero baking required. When you can walk into your kitchen with just a few everyday ingredients and walk out 20 minutes later with a tray of rich, chocolatey, peanut buttery cookies—well, that’s the kind of kitchen magic we all need more of. These no-bake chocolate peanut butter oat cookies are exactly that. No oven, no fancy tools, and no stress.
They’re the perfect blend of creamy peanut butter, cozy oats, and rich cocoa, lightly sweetened with honey, and finished with just the right hint of vanilla and salt to balance everything out. The coconut oil adds that smooth, melt-in-your-mouth texture, and a sprinkle of shredded coconut gives them a chewy bite that’s oh-so-satisfying. And if you’re not into coconut? No problem—just add more oats and you’re good to go.
What makes this recipe even more special is that it doesn’t ask for any complicated steps or hard-to-find ingredients. Everything in here is probably already sitting in your pantry, just waiting to become something wonderful. These cookies are a go-to treat in our household. They’re great for school lunchboxes, afternoon pick-me-ups, or a little midnight snack when you’re craving something sweet but don’t want to commit to turning on the oven.
I first started making these cookies on busy weekdays when I wanted a quick dessert that didn’t leave a mountain of dishes behind. Over time, they became our emergency sweet fix—a reliable, crowd-pleasing recipe that even the kids could help with. It’s the kind of snack that invites you to slow down for a moment, maybe with a glass of milk or a cup of tea, and just enjoy something simple and good.
So if you’re looking for a low-effort, high-reward treat, you’re in the right place. These no-bake chocolate peanut butter oat cookies are easy, quick, and absolutely delightful.
Why You’ll Love This No-bake Peanut Butter Cookies Recipe
One of the best things about this recipe is how universally loved it is. Whether you’re making it for yourself, your kids, or a group of friends, these cookies hit the sweet spot—literally and figuratively. They’re chewy, rich, slightly sweet, and deeply satisfying.
First of all, let’s talk about how easy this recipe is. There’s no baking involved, which means you don’t have to worry about preheating your oven, watching timers, or waiting for something to rise or brown. All you need is a saucepan, a spoon, and a baking sheet lined with wax paper. You can prep the entire batch in under 15 minutes, and they’ll be ready to eat after a quick chill in the fridge or freezer.
They’re also incredibly family-friendly. Kids love them because they taste like candy bars. Parents love them because they’re made with real ingredients—no preservatives, artificial flavors, or weird stuff. And since there’s no egg or flour, you don’t have to stress about undercooking anything.
The flavor is what truly seals the deal. The combination of natural peanut butter and honey gives these cookies a warm, nutty sweetness, while the cocoa powder adds that deep, chocolate richness. The oats and shredded coconut add a soft chew and texture that keep each bite interesting. A touch of vanilla and a small pinch of salt bring all the flavors together in the most satisfying way.
You’ll also appreciate how customizable this recipe is. Want it vegan? Swap the honey for maple syrup. No coconut? Just add more oats. Want a little crunch? Stir in chopped nuts or seeds. You can play around with the ingredients without losing that perfect cookie consistency.
In short, these cookies are the real deal. They’re simple to make, full of wholesome ingredients, and irresistibly delicious. Once you try them, you’ll keep coming back for more.
Health Benefits of these No-bake Peanut Butter Cookies
While these cookies are definitely a treat, they also come with some surprising nutritional perks. That’s the beauty of using wholesome, real ingredients—you get flavor and nourishment in the same bite.
Let’s start with peanut butter. Natural peanut butter is packed with protein and healthy fats, which help keep you full and energized. It also contains important nutrients like magnesium, potassium, and vitamin E. Because it’s naturally creamy and flavorful, you don’t need to add a ton of extra ingredients to get that satisfying taste.
Then there’s honey, a natural sweetener that brings more to the table than just sweetness. It contains antioxidants and trace minerals, and while it’s still sugar, it’s a gentler option compared to refined white sugar. If you prefer a vegan version, you can substitute maple syrup, which also has a lovely depth of flavor and some beneficial plant compounds.
Coconut oil is another superstar in this recipe. It provides that smooth, melt-in-your-mouth texture and contributes to the cookie’s ability to set in the fridge. It’s a plant-based fat that’s often used in dairy-free or vegan baking, and it adds a subtle richness that works beautifully with chocolate and peanut butter.
The cocoa powder isn’t just there for its chocolaty goodness—it also contains antioxidants called flavonoids, which have been linked to heart health and improved brain function. Just a little goes a long way in adding depth and richness to the cookies.
Oats are another major player here. Quick-cooking oats are high in fiber, particularly beta-glucan, which is known for supporting healthy cholesterol levels and promoting gut health. They also add bulk to the cookies, making them more filling and nutritious.
Finally, shredded coconut, while optional, brings its own set of benefits. It’s rich in fiber and healthy fats and gives these cookies a pleasant chewiness and tropical flavor twist.
So while you’re treating yourself, you’re also giving your body some nourishing ingredients. That’s a win-win in our book.
Preparation Time, Servings, and Nutritional Information
One of the top reasons this recipe is such a go-to is the incredibly short prep time. When you’re short on time but still craving something homemade, these cookies come to the rescue.
Preparation Time:
Prep time: 10 minutes
Chill time: 30 minutes (in the fridge) or 15 minutes (in the freezer)
Total time: 20–40 minutes, depending on how you chill
Servings:
This recipe makes approximately 12–16 cookies, depending on how big you scoop them. If you use a standard tablespoon or cookie scoop, expect about 14 mid-size cookies.
Nutritional Information (Per Serving – 1 cookie):
Calories: 150
Protein: 3g
Fat: 9g
Carbohydrates: 14g
Fiber: 2g
Sugar: 7g
Please note these are approximate values and may vary based on the specific brands and quantities you use.
Because of their balance of fat, fiber, and protein, these cookies actually make a decent pre- or post-workout snack. They’ll give you a quick energy boost without the crash that comes from more sugary desserts. And since they store so well in the fridge or freezer, you can make a batch ahead of time and have snacks ready all week long.
Ingredients List of these No-bake Peanut Butter Cookies
Here’s what you’ll need to make these no-bake chocolate peanut butter oat cookies. Most of these are pantry staples, which makes this recipe even more convenient.
- ½ cup natural peanut butter (smooth or crunchy, your choice)
Natural peanut butter gives a rich, nutty flavor and adds protein and healthy fats. - ¼ cup honey (or maple syrup for a vegan option)
Honey adds natural sweetness and helps bind everything together. - ¼ teaspoon salt
Just a pinch brings out the other flavors and balances the sweetness. - ¼ cup coconut oil
This helps the cookies firm up and adds that soft, melt-in-your-mouth texture. - 1 teaspoon vanilla extract
Vanilla rounds out the flavors and enhances the chocolate and peanut butter. - 2 tablespoons cocoa powder
This gives the cookies their rich chocolate flavor. - 1 cup quick-cooking oats
They’re soft, chewy, and the perfect base to hold the cookies together. - ¼ cup shredded unsweetened coconut (or substitute with more oats)
Adds texture and a subtle coconut flavor, but optional if you’re not a fan.
If you’re feeling adventurous, you can mix in a few extras like:
- Chopped nuts (almonds, peanuts, walnuts) for crunch
- Mini chocolate chips for extra richness
- Ground flaxseeds or chia seeds for added fiber and omega-3s
- A dash of cinnamon or espresso powder for a flavor twist
You can really make this recipe your own with small changes based on what you have in your pantry.
Absolutely! Let’s keep going with the next section and build this into the full, detailed, easy-to-follow 5,000+ word guide, just as you asked. We’ve covered the intro, why you’ll love it, health benefits, time and servings, and ingredients. Now we’re diving into the heart of the recipe:
Step-By-Step Cooking Instructions
This is the part where all the magic happens, and I’m going to walk you through it step by step so that even if you’ve never made a cookie in your life, you’ll be able to pull this off with total confidence. No oven, no baking experience, no stress. Just follow along and you’ll be rewarded with the most delightful, chewy, chocolatey peanut butter oat cookies ever.
Step 1: Line Your Baking Sheet
Before you get started on the stovetop, take a moment to line a baking sheet with wax paper or parchment paper. This is where you’ll drop the cookies once they’re mixed, and it’ll keep them from sticking while they set.
Tip: If you don’t have wax paper, parchment paper works just as well. Just avoid foil, as the cookies will stick to it.
Step 2: Melt the Wet Ingredients
Now it’s time to head to the stove. Grab a medium saucepan and set it over medium-low heat. Add the following ingredients to the pot:
- ½ cup natural peanut butter
- ¼ cup honey (or maple syrup)
- ¼ teaspoon salt
- ¼ cup coconut oil
Stir everything together gently with a rubber spatula or wooden spoon. The coconut oil will melt first, followed by the peanut butter and honey. Stir consistently to prevent anything from sticking to the bottom of the pan.
What you’re looking for is a smooth, well-blended mixture. Once everything is completely melted and combined, remove the saucepan from the heat.
Tip: Don’t let the mixture boil. You only need to warm it enough to melt and combine the ingredients. If it starts to bubble, turn the heat down a bit.
Step 3: Add the Flavor Boosters
Now that your base is off the heat, it’s time to stir in the flavor-enhancing ingredients:
- 1 teaspoon vanilla extract
- 2 tablespoons cocoa powder
Add the vanilla first—it’ll sizzle slightly when it hits the warm mixture, and that’s totally normal. Stir it in quickly, then follow with the cocoa powder. Mix until fully incorporated. You’ll notice the mixture darkening into a deep chocolatey brown, and it should be thick but pourable.
Tip: If your cocoa powder clumps, sift it before adding to ensure an even mix. This will give your cookies a smooth, rich consistency without little dry bits of cocoa.
Step 4: Stir in the Dry Ingredients
Once the wet mixture is well-flavored, it’s time to add the dry ingredients that give these cookies their body and texture:
- 1 cup quick-cooking oats
- ¼ cup shredded unsweetened coconut (or more oats if you’re skipping coconut)
Stir everything together until the oats and coconut are fully coated in the chocolate-peanut butter mixture. At first, it may look like there isn’t enough liquid, but keep stirring—it all comes together beautifully. The warmth from the mixture softens the oats slightly, making them easier to form into cookies.
Tip: If the mixture seems too runny, let it sit for 5 minutes to thicken slightly. If it’s too thick, you can add a tablespoon of melted coconut oil or peanut butter to loosen it up.
Step 5: Scoop and Drop
Using a tablespoon or a cookie scoop, scoop the mixture into small mounds and drop them onto your prepared baking sheet. Leave a little space between each cookie, but don’t worry about spreading—they won’t expand like traditional baked cookies.
Try to make them all roughly the same size so they set evenly. If you want them more round and tidy-looking, you can shape them gently with the back of a spoon.
Tip: Wetting your hands or spoon slightly can help prevent sticking if you’re shaping them manually.
Step 6: Chill Until Set
Now comes the easiest part—waiting. Place your tray of cookies in the refrigerator for at least 30 minutes, or in the freezer for about 15 minutes, until the cookies are firm to the touch.
Once they’ve set, they’re ready to eat! Store the rest in an airtight container in the fridge or freezer, and just grab one whenever the craving hits.
Tip: If you’re making these ahead for an event, you can make them the night before and let them chill overnight.
Optional: Add a Fancy Finish
If you want to dress them up a little, try sprinkling the tops with any of the following before chilling:
- A pinch of flaky sea salt for a sweet-salty twist
- A few mini chocolate chips for extra indulgence
- Crushed nuts or toasted coconut for added texture
These little extras make the cookies feel special and add fun visual appeal if you’re serving them to guests.
How to Serve these No-bake Peanut Butter Cookies
These cookies are incredibly versatile, so serving them is all about your mood and what you’re craving. They’re satisfying enough to stand on their own, but you can totally dress them up or serve them as part of a bigger snack board or dessert platter.
Here are a few fun and delicious ways to serve them:
- Classic style: Just pop one out of the fridge and enjoy with a glass of cold milk or a warm cup of tea or coffee. This is my personal favorite way—simple and perfect.
- Cookie sandwich: Spread a little peanut butter or almond butter between two cookies for an ultra-rich snack.
- With fruit: Serve them alongside a bowl of fresh berries or sliced bananas for a sweet and satisfying afternoon treat.
- Frozen treat: Eat them straight from the freezer for a more candy-bar-like texture. They hold up beautifully and offer a firmer, chewier bite when frozen.
- On a dessert board: These pair well with chocolate-dipped strawberries, mini brownies, and mixed nuts for a no-bake dessert platter at parties.
- Crumbled over yogurt or ice cream: Turn them into a topping! Crumble a cookie over vanilla Greek yogurt or frozen banana ice cream for a high-protein dessert.
No matter how you serve them, these cookies are guaranteed to make people smile.
Pairing Suggestions for these No-bake Peanut Butter Cookies
One of the joys of a rich, chocolatey, peanut buttery treat is how well it pairs with all sorts of other foods and drinks. Whether you’re making these for a get-together or just a cozy night at home, pairing them with the right snack or beverage can elevate the whole experience.
Beverage Pairings
- Milk: A classic for a reason. The creamy richness of milk perfectly complements the chocolate and peanut butter. If you’re dairy-free, almond milk or oat milk are great alternatives.
- Coffee: The bitterness of a strong coffee cuts through the sweetness of the cookies beautifully. Try them with a shot of espresso or a homemade iced coffee.
- Tea: A smooth black tea, like Earl Grey or English breakfast, pairs nicely with the bold flavors. For a caffeine-free option, rooibos or cinnamon-spiced herbal teas are lovely.
- Smoothies: Blend a banana, some cocoa powder, peanut butter, and almond milk for a smoothie that mirrors the flavor of the cookies.
Food Pairings
- Fresh fruit: Strawberries, apple slices, or banana halves go really well with the nutty and chocolaty notes of the cookies. You can even dip the fruit in leftover peanut butter.
- Cheese board: For a quirky dessert platter, pair these cookies with salty cheeses like aged cheddar or a mild brie. The contrast in flavor and texture is surprisingly delightful.
- Popcorn: A little salty, a little crunchy, and a perfect counterbalance to the rich, chewy cookies.
- Trail mix: Set out a bowl of trail mix next to your cookies for a varied snack spread. The nuts and dried fruit go hand-in-hand with the flavors of the cookies.
Pairing is really about balance—think salty to offset sweet, light to contrast rich, or cool to contrast chewy.
Storage, Freezing & Reheating Instructions of these No-bake Peanut Butter Cookies
One of the best parts of this recipe is how easily these cookies store. You can make a batch and enjoy them throughout the week—or even longer if you freeze them. Here’s everything you need to know about storing, freezing, and keeping your cookies tasting fresh.
Storing in the Refrigerator
Once your cookies have fully set in the fridge or freezer, transfer them to an airtight container. Layer them with wax paper or parchment paper if you’re stacking them, to prevent sticking.
They’ll stay fresh in the refrigerator for up to 7 days. The texture stays chewy and slightly firm, and the flavor remains delicious.
Freezing Instructions
These cookies freeze incredibly well, making them a perfect make-ahead treat. To freeze:
- Place the set cookies on a baking sheet and freeze for 1 hour until firm.
- Transfer them to a freezer-safe container or zip-top bag.
- Label with the date, and freeze for up to 2 months.
Thawing and Reheating
Honestly, these are fantastic straight out of the freezer, but if you prefer a softer bite:
- Let the cookies sit at room temperature for 10–15 minutes.
- Or, warm one in the microwave for 5–8 seconds to soften slightly. Don’t go longer than that or they may melt.
Keep in mind, since there’s no flour or eggs, the texture is more forgiving—even after freezing.
Absolutely! Let’s continue building the complete, 5,000+ word no-bake cookie guide. We’re moving into the next set of essential, super-helpful sections: Common Mistakes to Avoid, Pro Tips, Frequently Asked Questions, and finally the Conclusion & Call to Action.
Common Mistakes to Avoid in thsese No-bake Peanut Butter Cookies
Even though this recipe is beginner-friendly and nearly foolproof, there are still a few common pitfalls that can throw things off if you’re not careful. Here’s what to watch out for, and how to avoid them, so your cookies turn out perfect every single time.
Using the Wrong Type of Oats
This recipe specifically calls for quick-cooking oats, not old-fashioned rolled oats or steel-cut oats. Quick oats are thinner and smaller, so they absorb the liquid faster and give the cookies a more cohesive texture. Using rolled oats may result in cookies that are too loose or chewy in a way that feels underdone, while steel-cut oats simply won’t soften enough without cooking.
If all you have are rolled oats, you can pulse them a few times in a blender or food processor to break them down a bit before using.
Overheating the Wet Mixture
It’s tempting to turn up the heat to melt everything faster, but resist the urge. If you let the peanut butter and honey boil or get too hot, the mixture can separate or become grainy. This not only affects texture but can also give your cookies a scorched flavor.
Stick to medium-low heat and stir gently and continuously until everything is smooth. As soon as the mixture is fully melted and combined, take it off the heat.
Adding Dry Ingredients While Mixture Is Too Hot
Once your wet ingredients are melted, it’s important to let the mixture cool slightly before adding the oats and coconut. If it’s too hot, the oats can over-soften or the coconut can lose its texture. Worse, you risk partially cooking the oats, which may make the cookies sticky or gummy rather than chewy.
Let the pot rest for a couple of minutes off heat before stirring in the dry ingredients. This quick pause makes a big difference.
Not Measuring Properly
This is a small detail that has a big impact. When making no-bake cookies, accuracy matters because you’re not using flour or eggs to bind things together.
Too much coconut oil and your cookies may be greasy and won’t hold their shape. Too few oats and the mixture won’t set properly. Always use measuring cups and level them off to keep everything balanced.
Skipping the Chill Time
Chilling is what helps these cookies firm up. If you try to eat them immediately after scooping, they’ll be too soft and might fall apart. For best results, refrigerate for at least 30 minutes or freeze for 15. If you’re in a rush, the freezer is your best friend.
It may be hard to wait, but it’s worth it—chilled cookies hold together beautifully and have a more satisfying texture.
Pro Tips
Once you’ve made these no-bake cookies a couple of times, you’ll see how easy and customizable they are. But to make sure you get the absolute best results—even on your very first try—here are some pro-level tips to keep in mind.
Use Natural Peanut Butter for Better Texture and Flavor
Natural peanut butter, the kind with just peanuts and salt, works best for this recipe. It has a smoother consistency and more pronounced peanut flavor, and it mixes easily with the other ingredients. If you’re using a peanut butter with added sugars or stabilizers, the texture may be a little stiffer, so you might need to add an extra spoonful of coconut oil.
Make sure to stir your peanut butter well before measuring—it tends to separate in the jar.
Let the Mixture Cool Slightly Before Adding Oats
As mentioned earlier, letting the mixture cool for 2–3 minutes after taking it off the heat helps the oats and coconut blend in more smoothly. It also prevents the chocolate from becoming greasy or separating.
This small step helps preserve the texture of the final cookie and ensures everything binds together properly.
Use a Cookie Scoop for Even Sizes
A medium cookie scoop (about one tablespoon) makes portioning easy and mess-free. Plus, it helps the cookies look neat and uniform. If you don’t have a scoop, two spoons work just fine. Just aim for consistency so they chill evenly.
Evenly sized cookies also help with portion control—and they look more polished if you’re serving them at a gathering.
Store in the Fridge for the Perfect Texture
These cookies are best enjoyed chilled. The fridge keeps them firm but chewy, and the flavor is even better once they’ve had time to set. Store in a sealed container to prevent them from absorbing any fridge odors.
If you prefer a softer bite, let them sit at room temperature for 5–10 minutes before eating.
Add Mix-Ins or Toppings for Variety
Once you master the base recipe, you can start experimenting with flavor and texture. Try folding in mini chocolate chips, chopped dried fruit, sunflower seeds, or crushed pretzels. You can also sprinkle the tops with sea salt, chia seeds, or a drizzle of melted dark chocolate before chilling.
These little additions can turn your simple no-bake cookies into a personalized, gourmet treat.
Frequently Asked Questions (FAQs)
Can I use a different nut butter?
Yes! You can absolutely substitute the peanut butter with almond butter, cashew butter, or even sunflower seed butter if you need a nut-free option. Just make sure you’re using a natural, drippy variety for the best texture.
What can I use instead of coconut oil?
If you don’t have coconut oil, you can use unsalted butter or a plant-based butter for a similar texture. Keep in mind that using butter may make the cookies slightly softer, and the flavor will change a bit, but they’ll still be delicious.
Are these cookies gluten-free?
Yes—if you use certified gluten-free oats. Oats are naturally gluten-free, but they’re often processed in facilities that handle wheat, so check your packaging to be sure.
Can I make them vegan?
Definitely. Simply swap the honey for maple syrup or agave nectar. Everything else in the recipe is naturally vegan-friendly. Just be sure your cocoa powder and oats are also labeled vegan if you’re being strict.
How long do they last?
Stored in the fridge, these cookies will stay fresh for about 7 days. In the freezer, they can last for up to 2 months. Be sure to keep them in an airtight container to prevent them from drying out or absorbing other flavors.
Can I double the recipe?
Yes! This recipe doubles beautifully. Just use a larger saucepan and work in batches if needed. It’s perfect for meal prep, potlucks, or gifting.
Why didn’t my cookies set?
If your cookies are too soft or falling apart, it’s likely because the mixture was too warm when you added the oats or they didn’t chill long enough. Make sure to follow the cooling and chilling instructions closely. You can always pop them in the freezer for a quick fix.
What’s the best way to shape them?
A cookie scoop is ideal, but if you’re using spoons, just drop and shape them gently on the tray. You can use the back of a spoon to flatten them slightly if you prefer a more traditional cookie look.
Can I make these without cocoa powder?
Yes, though they won’t be chocolate-flavored. You can leave the cocoa out entirely and enjoy a peanut butter oat version, or replace it with a tablespoon of protein powder or cinnamon for a different twist.
Are they safe for kids?
Yes! These cookies are made with real, simple ingredients and are free from eggs, flour, and artificial additives. They’re great for lunchboxes or after-school snacks. Just be mindful of nut allergies and modify accordingly.
Conclusion & Call to Action
There’s something so satisfying about making a dessert that checks every box: fast, easy, delicious, no baking required, and made with ingredients you already have on hand. These no-bake chocolate peanut butter oat cookies are the kind of recipe you’ll want to keep close—tucked into your go-to snack rotation, shared with friends, or saved for those nights when you just need something sweet and comforting without making a mess of your kitchen.
They’re more than just cookies. They’re little bites of joy that remind us how powerful simple food can be. No stress, no oven, no complications. Just stir, scoop, chill, and enjoy.
I hope you give this recipe a try and love it as much as I do. If you do, I’d love to hear about it. Leave a comment, send a message, or share your creations online and tag me—I always love seeing how these little cookies find their way into your lives.
Whether you’re whipping them up with your kids, prepping snacks for the week, or treating yourself to a quiet, chocolatey moment at the end of a long day, I promise these cookies will be just what you need.
Now go grab that peanut butter jar and get mixing—your perfect batch of no-bake cookies is just 15 minutes away.
Would you like me to format this into a downloadable recipe card or provide image suggestions for each stage? I can also help you convert it into a printable or blog post layout!
Print
No-Bake Chocolate Peanut Butter Cookies – Quick & Easy Treat
- Total Time: 15–30 minutes
- Yield: 12–16 cookies 1x
- Diet: Vegetarian
Description
Chewy, chocolatey, and full of peanut butter goodness, these no-bake cookies come together in just 15 minutes with simple pantry ingredients. Perfect for a quick snack or dessert—no oven needed!
Ingredients
-
½ cup natural peanut butter
-
¼ cup honey (or maple syrup for vegan)
-
¼ teaspoon salt
-
¼ cup coconut oil
-
1 teaspoon vanilla extract
-
2 tablespoons cocoa powder
-
1 cup quick-cooking oats
-
¼ cup shredded unsweetened coconut (or more oats)
Instructions
-
Line a baking sheet with wax or parchment paper.
-
In a medium saucepan over medium-low heat, melt peanut butter, honey, salt, and coconut oil until smooth.
-
Remove from heat. Stir in vanilla and cocoa powder until fully combined.
-
Mix in oats and shredded coconut.
-
Scoop tablespoons of mixture onto the prepared sheet.
-
Chill in the fridge for 30 minutes or freezer for 15 minutes until set.
-
Store in an airtight container in the fridge or freezer.
Notes
-
To make vegan, use maple syrup instead of honey.
-
Add-ins like mini chocolate chips, chopped nuts, or chia seeds are optional.
-
Best served chilled.
- Prep Time: 10 minutes
- Cook Time: 0 minutes
- Category: Dessert, Snack
- Method: No-Bake
- Cuisine: American