
There’s something undeniably magical about springtime. The air is warmer, the flowers are blooming, and there’s a sense of renewal and celebration everywhere. And what better way to celebrate the season—especially Easter—than with a Mini Easter Layer Cakes dessert that’s just as joyful and vibrant as the occasion itself?
Why Mini Easter Cakes Are a Holiday Must
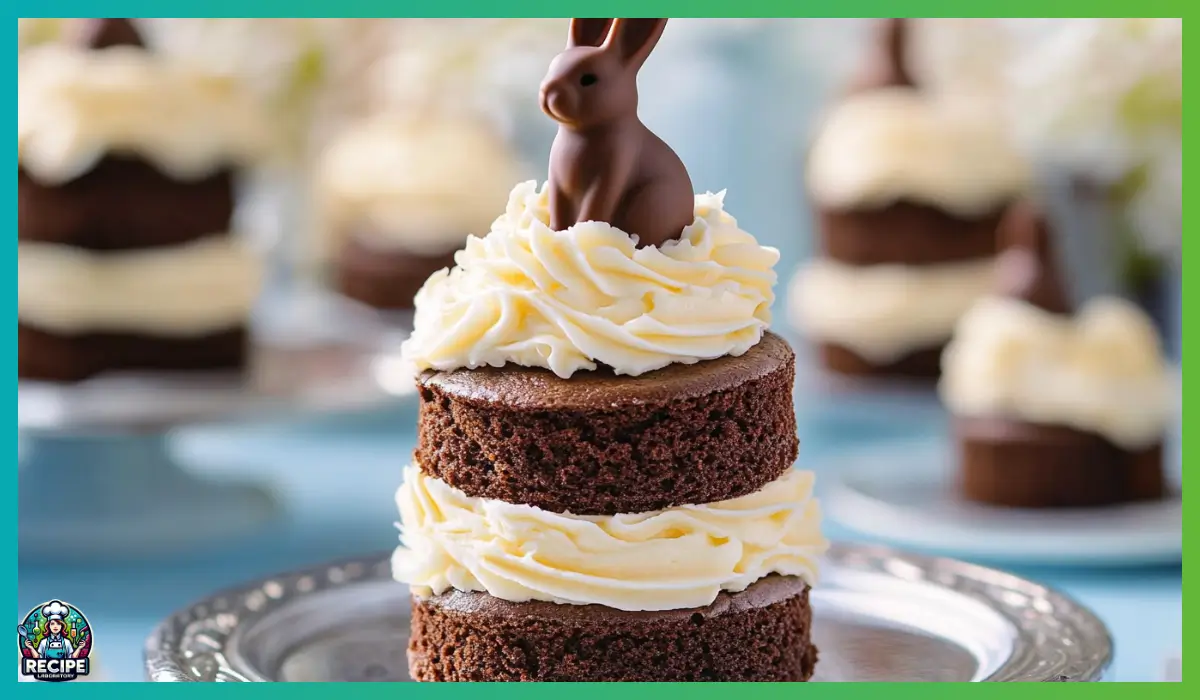
Enter: Mini Easter Layer Cakes. These little beauties are as delightful to look at as they are to eat, with their soft, moist layers of chocolate cake and a dreamy swirl of vanilla buttercream frosting. They bring the perfect balance of elegance and playfulness to your dessert table.
A Personal Connection to the Recipe
The first time I made these mini cakes, it was for an Easter brunch on a sunny Sunday. I didn’t expect them to steal the show, but they absolutely did. Everyone loved how cute and personal they were—each guest had their own little cake to dig into. That moment sealed the deal for me: these mini cakes are now an Easter tradition in our house.
Easy, Fun, and Totally Customizable
Despite their elegant appearance, these cakes are surprisingly simple to make. You start with just two round cakes, then use cookie cutters or round molds to create smaller circles that you stack with frosting. The end result feels like something out of a boutique bakery, but the process is friendly enough for beginners. Plus, you can go wild with decorating—pastel sprinkles, coconut “grass,” mini eggs, or anything you like.
Why You’ll Love This Recipe
Absolutely Adorable Presentation
Mini cakes are always a showstopper. There’s just something so fun and inviting about having a cake that’s made just for you. These little layer cakes can be dressed up or down depending on your theme, and they’re perfect for individual serving sizes at Easter parties, baby showers, or birthdays.
Flavorful, Moist, and Decadent
Thanks to the perfect blend of buttermilk, eggs, and chocolate cocoa powder, the cake itself is incredibly rich and moist. You get the deep, slightly bittersweet flavor of high-quality chocolate balanced with the smooth sweetness of a vanilla buttercream that’s whipped until light and fluffy. It’s a classic combo that never fails to satisfy.
Foolproof for Beginner Bakers
This recipe is beginner-friendly but still gives you the kind of finished product that looks bakery-level. The steps are easy to follow, and the batter comes together quickly with simple ingredients. Plus, because you’re making smaller cakes from two large ones, you don’t have to stress about getting perfect shapes from the start.
Fun to Decorate and Personalize
These cakes are basically edible crafts. Whether you want to top them with pastel-colored frosting, mini chocolate eggs, fresh berries, edible flowers, or a simple dusting of powdered sugar, there are endless ways to get creative. Kids love helping out with this part too, making it a great family-friendly baking project.
Health Benefits
Cocoa Delivers a Dose of Antioxidants
Let’s start with the main star of the show: cocoa. Ghirardelli Sweet Ground Chocolate and Cocoa doesn’t just provide that rich, luxurious chocolate flavor—it also contains antioxidants known as flavonoids. These natural compounds can help support heart health, improve blood flow, and reduce inflammation when enjoyed in moderation.
Nutrients from Eggs and Buttermilk
This cake recipe includes four eggs, which means it brings in a good source of protein, essential vitamins like B12, and choline, which supports brain function. The buttermilk not only makes the cake tender and moist, but it also supplies calcium and riboflavin, both of which are vital for strong bones and energy production.
Balanced Fats from Real Butter
We’re using real butter in both the cake and the frosting, which contributes not only to the texture and flavor but also brings in fat-soluble vitamins like A, D, E, and K. While butter is best enjoyed in moderation, it’s a wholesome fat that enhances the richness and mouthfeel of your dessert.
Customizable for Dietary Preferences
Want to make this recipe a little healthier? You can reduce the sugar in the frosting or substitute half of the all-purpose flour with whole wheat pastry flour for added fiber. If you’re watching your sodium, you can omit the optional salt without losing flavor, thanks to the richness of the other ingredients.
Preparation Time, Servings, and Nutritional Information
Time Breakdown
- Prep Time: 25 minutes
- Bake Time: 30 to 45 minutes
- Cooling and Assembly Time: 1 hour
- Total Time: Approximately 2 hours
Serving Size
- Makes: 8 to 10 mini cakes, depending on the size of your cutter or mold
- Serving Size: 1 mini cake per person
Nutrition (Per Mini Cake, Approximate)
- Calories: 430
- Protein: 5g
- Carbohydrates: 50g
- Fat: 23g
- Sugar: 36g
Please note that nutrition may vary slightly based on how the cakes are decorated or portioned.
Ingredients List
For the Chocolate Cake
- 1 1/2 cups Ghirardelli Sweet Ground Chocolate and Cocoa – for deep chocolate flavor
- 2 cups all-purpose flour – gives the cake its structure
- 1 cup granulated sugar – adds sweetness
- 1 teaspoon baking soda – helps the cake rise
- 1/2 teaspoon cream of tartar – enhances leavening
- 1/2 teaspoon salt (optional) – balances sweetness and boosts flavor
- 1 1/2 cups buttermilk – adds moisture and tang
- 1 cup butter, softened – provides richness
- 4 large eggs – bind ingredients and add fluffiness
- 1 teaspoon pure vanilla extract – enhances overall flavor
For the Vanilla Buttercream
- 1/2 cup shortening – helps stabilize frosting
- 1/2 cup butter, softened – adds creaminess and flavor
- 1 teaspoon vanilla extract – complements the chocolate base
- 4 cups confectioners’ sugar – sweetens and thickens the frosting
- 2 tablespoons milk – adjusts consistency
Make sure all your ingredients are at room temperature for best results. This helps them blend more easily and ensures an even texture in your final product.
Step-By-Step Cooking Instructions
Step 1: Preheat and Prepare Your Pans
Preheat your oven to 350°F (175°C). Grease the bottoms of two 8- or 9-inch round cake pans. Then, line the bottoms with waxed paper or parchment paper to prevent sticking. Set aside.
Step 2: Mix the Dry Ingredients
In a large mixing bowl, sift together the flour, Ghirardelli cocoa powder, sugar, baking soda, cream of tartar, and salt. Stir until evenly combined. This helps to aerate the mixture and ensures a smooth batter later.
Step 3: Cream the Butter and Buttermilk
Add 1 cup of buttermilk and 1 cup of softened butter to the dry mixture. Using an electric mixer on medium speed, beat for about 2 minutes. The mixture will start to look smooth and creamy.
Step 4: Add Eggs and Flavoring
Next, add the remaining 1/2 cup of buttermilk, the four eggs, and 1 teaspoon of vanilla extract. Beat for another 1 to 2 minutes, or until the batter is thick, smooth, and well-blended. Scrape down the sides of the bowl as needed.
Step 5: Bake the Cakes
Divide the batter evenly between the two prepared cake pans. Tap the pans gently on the counter to release any air bubbles. Bake for 30 to 45 minutes. To check for doneness, insert a toothpick into the center of the cake; it should come out clean.
Step 6: Cool and Unmold
Let the cakes cool in the pans on a wire rack for 10 to 15 minutes. Then, gently remove them from the pans, peel off the wax paper, and allow them to cool completely on the rack before cutting.
Step 7: Make the Buttercream Frosting
In a large bowl, cream together 1/2 cup of butter and 1/2 cup of shortening until smooth. Add the vanilla extract and gradually blend in the powdered sugar, one cup at a time, beating well after each addition. Finally, add the milk and beat until the frosting is light and fluffy.
Step 8: Cut and Layer
Once the cakes are fully cooled, use a round cookie cutter (around 2 to 3 inches wide) to cut out smaller circles from each cake. You’ll want at least 2 layers per mini cake, but you can stack 3 if you’re feeling fancy. Place one layer down, pipe or spread frosting over the top, then add the next layer and repeat.
Step 9: Decorate Your Mini Easter Layer Cakes
Now the fun part—decorating. Spread or pipe buttercream over the tops and sides of each mini cake. Then decorate as desired with pastel sprinkles, edible flowers, coconut flakes, or mini chocolate eggs. Let your creativity shine.

How to Serve these Mini Easter Layer Cakes
Perfect Presentation Ideas
- Serve each mini cake on a small plate or cupcake stand for an elegant touch.
- Add a paper doily underneath for a festive, spring-themed look.
- Garnish with mint leaves, fresh berries, or edible flowers for extra flair.
When to Serve
These are ideal for:
- Easter brunch or dinner
- Baby showers or bridal showers
- Springtime tea parties
- Kid-friendly dessert buffets
Serving Tips
- If making ahead, allow the cakes to come to room temperature before serving.
- You can serve these alongside a scoop of vanilla or strawberry ice cream for an extra indulgent twist.
- Provide a fork and small dessert knife so guests can enjoy clean, easy bites.
Pairing Suggestions
What Goes Best with Mini Easter Layer Cakes?
While these Mini Easter Layer Cakes are stunning and satisfying on their own, pairing them with the right side dishes and beverages can really elevate the entire experience. Whether you’re putting together a full Easter spread or simply want to enhance your dessert hour, these pairings bring out the best in your mini cakes.
Beverage Pairings
1. Freshly Brewed Tea
A light, floral tea like chamomile or jasmine is perfect for pairing with the sweet vanilla and chocolate notes in the cake. The mildness of the tea balances out the richness, keeping each bite refreshing.
2. Iced Herbal Infusions
Caffeine-free options like hibiscus or rosehip iced tea, lightly sweetened, bring a fruity acidity that plays nicely with the dense cake layers. These are especially great for spring and Easter gatherings.
3. Warm Halal-Friendly Hot Chocolate
If you’re serving younger guests or want something cozy to go with your dessert, a homemade hot chocolate (made with almond or oat milk for extra creaminess) works beautifully.
4. Sparkling Juices
A chilled glass of pomegranate or apple sparkling juice adds a festive flair to the table and brings a nice tart contrast to the sweet buttercream.
Savory Side Ideas
1. Fresh Fruit Salad
A medley of strawberries, blueberries, kiwi, and oranges not only adds color to your table but also provides a fresh, slightly tangy bite that cleanses the palate between forkfuls of cake.
2. Mini Quiches or Savory Tartlets
Adding a savory component to your dessert table can create a nice balance. Think mini spinach quiches, or tartlets with feta and caramelized onions—something salty and rich to round out the flavors.
3. Cheese Board
It might seem unexpected, but a mild cheese board with options like brie, fresh mozzarella, and crackers can be a sophisticated counterpoint to the sweetness of the cakes.
Flavor-Enhancing Garnishes
- Dust with powdered sugar and a pinch of cinnamon.
- Add a dollop of whipped cream or Greek yogurt on the side.
- Sprinkle with crushed pistachios or almonds for texture.
Storage, Freezing & Reheating Instructions
How to Store Your Mini Easter Cakes
These Mini Easter Layer Cakes are best enjoyed fresh, but they do store well with a few simple steps.
Refrigerator Storage
- Place fully assembled and decorated cakes in an airtight container.
- Store in the fridge for up to 3 days.
- Before serving, let them come to room temperature for about 30 minutes. This allows the buttercream to soften and the cake to regain its ideal texture.
Unfrosted Cake Storage
- If you want to bake the cakes ahead and frost them later, wrap the uncut cake rounds tightly in plastic wrap.
- Store them at room temperature for up to 2 days, or refrigerate for up to 5 days.
Freezing for Later
You can absolutely freeze these Mini Easter Layer Cakes, either as whole layers or as assembled minis.
Freezing the Cake Layers
- After baking and cooling, wrap each layer in plastic wrap and then a layer of aluminum foil.
- Freeze flat for up to 3 months.
- To use, thaw overnight in the fridge and bring to room temperature before assembling.
Freezing Assembled Mini Cakes
- Place the Mini Easter Layer Cakes on a parchment-lined tray and freeze until solid (about 1 to 2 hours).
- Transfer to an airtight container with wax paper between layers.
- Freeze for up to 1 month.
- Thaw in the refrigerator overnight, then allow them to sit at room temperature before serving.
Reheating Tips
Since these Mini Easter Layer Cakes are meant to be served at room temperature or slightly chilled, you don’t need to reheat them. However, if your cakes have been refrigerated for a long time and you want to soften the buttercream slightly, let them sit out at room temperature for 30–45 minutes before serving.
Common Mistakes to Avoid
1. Not Letting the Cakes Cool Fully
It might be tempting to start cutting and stacking your mini cakes while they’re still warm, but this is one of the most common mistakes. Warm cakes can crumble easily, and the buttercream will melt right off. Let your layers cool completely—preferably for at least an hour—before assembling.
2. Overbaking the Cake Layers
Overbaking leads to dry cakes, which nobody wants. Keep an eye on the bake time, especially toward the 30-minute mark. Every oven is different, so check for doneness by inserting a toothpick into the center. If it comes out clean or with just a few moist crumbs, the cakes are done.
3. Cutting Uneven Layers
Uneven cake circles will lead to wobbly mini cakes that are hard to frost and serve. Use a round cookie cutter or ring mold with a sharp edge, and press down evenly when cutting. If necessary, gently trim the tops of the circles with a serrated knife to level them.
4. Skipping the Crumb Coat
If you want professional-looking cakes, don’t skip the crumb coat. This thin layer of frosting helps trap crumbs and provides a smooth base for your final layer. Apply a light layer of frosting, refrigerate the cakes for 10–15 minutes, then proceed with your final frosting.
5. Using Cold Butter for the Frosting
For a smooth, creamy buttercream, make sure your butter and shortening are at room temperature. Cold ingredients can make the frosting lumpy or greasy. Beat well to incorporate air and achieve a light texture.
Pro Tips
Tip 1: Use High-Quality Cocoa
The cocoa powder you choose really does make a difference. Ghirardelli Sweet Ground Chocolate and Cocoa offers a rich, smooth flavor that stands out in this recipe. Lower-quality cocoa can result in a dull, flat-tasting cake, so go for the good stuff if you can.
Tip 2: Chill the Cakes Before Assembling
Once your cake layers are cool, pop them into the fridge for 30 minutes before cutting and stacking. Chilled cake is easier to handle, less likely to crumble, and holds up better under frosting.
Tip 3: Use a Piping Bag for Easy Frosting
If you want clean layers and smooth edges, a piping bag is your best friend. It allows you to apply frosting evenly and avoid messy blobs. Use a round tip or simply snip the end of a plastic bag for a homemade solution.
Tip 4: Add Food Coloring to Match the Season
Pastel colors are perfect for Easter, so feel free to tint the frosting with a few drops of food coloring. Divide your buttercream into bowls and create soft pink, lavender, mint green, and baby blue versions to make your cakes extra festive.
Tip 5: Decorate with Texture and Height
When decorating your mini cakes, think beyond flat toppings. Add height with piped swirls of frosting, place a chocolate egg on top, or sprinkle with toasted coconut for texture. A little visual contrast goes a long way in making your cakes look professional and polished.
Asked Questions (FAQs)
Can I make these cakes without a round cutter?
Yes! If you don’t have a round cutter or cookie cutter, use a glass or cup with a sharp rim. Just press firmly and twist slightly to cut through the cake. You can also cut squares with a sharp knife for a more rustic look.
Can I use store-bought frosting instead?
Absolutely. While homemade buttercream is always a treat, you can use a good-quality store-bought vanilla frosting in a pinch. Just make sure to stir it well before using, and consider adding a splash of vanilla extract to elevate the flavor.
Can I make the cakes gluten-free?
Yes, you can substitute the all-purpose flour with a 1:1 gluten-free baking flour. Make sure your other ingredients (especially the cocoa and baking soda) are certified gluten-free to avoid cross-contamination.
How far in advance can I prepare these?
You can bake the cakes up to 2 days in advance and store the unfrosted layers tightly wrapped at room temperature. You can also make the buttercream a day ahead and store it in the fridge—just bring it to room temperature and rewhip before using.
What’s the best way to transport these?
Use a cake box or a container with a secure lid that keeps the mini cakes upright and separated. Placing each cake in a cupcake liner or on its own mini cake board can help prevent shifting during transport.
Can I use different types of chocolate?
The recipe is designed for sweet ground chocolate and cocoa, but if you want to experiment, you can try substituting part of the cocoa with melted semi-sweet chocolate. Just reduce the butter slightly to compensate for the added fat.
How do I fix frosting that’s too runny?
Add more confectioners’ sugar, one tablespoon at a time, and beat until it thickens. If it’s too stiff, add a teaspoon of milk to loosen it. Always adjust slowly to maintain the right texture.
Conclusion & Call to Action
A Cake That’s Made for Celebrating
These Mini Easter Layer Cakes are more than just a dessert—they’re a celebration in every bite. From the soft, chocolatey cake layers to the sweet, whipped vanilla buttercream, every part of this recipe is made to bring joy. They’re beautiful, festive, and a total showstopper for any spring or Easter gathering.
Baking Memories That Last
Whether you’re a seasoned home baker or just dipping your toes into cake making, this recipe is forgiving and fun. Plus, it offers plenty of opportunities to get creative with decorating, which makes it a fantastic project for families, kids, or anyone looking to add a little extra color to their holiday table.
Ready to Bake?
Now it’s your turn. Preheat that oven, gather your ingredients, and get ready to make something truly special. And when your mini cakes are done—beautifully frosted and topped with springtime flair—I’d love to see how they turned out.
Take a photo and tag me on Instagram or your favorite social platform. Share your variations, your decorations, and your favorite moments from the baking process. These cakes were made to be shared, and I can’t wait to see your take on them.
Happy baking, and may your Easter be filled with sweetness, sunshine, and plenty of cake!
Print
Mini Easter Layer Cakes Recipe – Easy Chocolate Spring Desserts
- Total Time: 2 hours
- Yield: 8–10 mini cakes 1x
- Diet: Halal
Description
Adorable and delicious, these Mini Easter Layer Cakes feature rich chocolate cake and fluffy vanilla buttercream. Perfect for Easter and springtime celebrations.
Ingredients
For the Cake:
-
1 1/2 cups Ghirardelli Sweet Ground Chocolate and Cocoa
-
2 cups flour
-
1 cup granulated sugar
-
1 tsp baking soda
-
1/2 tsp cream of tartar
-
1/2 tsp salt (optional)
-
1 1/2 cups buttermilk
-
1 cup butter, softened
-
4 eggs
-
1 tsp vanilla extract
For the Buttercream:
-
1/2 cup shortening
-
1/2 cup butter, softened
-
1 tsp vanilla extract
-
4 cups confectioners’ sugar
-
2 tbsp milk
Instructions
-
Preheat oven to 350°F. Grease and line two 8–9” round cake pans with waxed paper.
-
Mix flour, cocoa, sugar, baking soda, cream of tartar, and salt.
-
Add 1 cup buttermilk and butter. Beat for 2 minutes.
-
Add eggs, remaining buttermilk, and vanilla. Beat until smooth.
-
Divide batter between pans. Bake for 30–45 minutes.
-
Cool in pans for 15 minutes. Then transfer to wire rack to cool completely.
-
Make buttercream by creaming butter and shortening. Add vanilla.
-
Gradually beat in sugar, then milk, until fluffy.
-
Use a round cutter to cut cake layers. Stack with frosting.
-
Decorate as desired.
Notes
-
Chill cakes before cutting for cleaner layers.
-
Use pastel colors or mini chocolate eggs for a festive touch.
-
Best served at room temperature.
- Prep Time: 25 minutes
- Cook Time: 45 minutes
- Category: Dessert
- Method: Baking
- Cuisine: American