
There’s something incredibly satisfying about a snack that’s easy to make, delicious to eat, and actually good for you. Enter Peanut Butter Protein Balls—your new favorite no-bake treat that checks all the boxes. Whether you need a quick breakfast on the go, a post-workout energy boost, or a sweet treat to satisfy those afternoon cravings, these protein balls are here to make your life easier and yummier. The best part? They’re made with simple, wholesome ingredients you probably already have in your pantry. No fancy equipment or baking skills are required—just a mixing bowl, a spoon, and a little bit of time.
I first discovered these protein balls during a hectic workweek when I needed something quick, portable, and energizing to keep me going. After trying a few store-bought options, I quickly realized that making them at home was not only cheaper but also much tastier. Plus, I could customize them to my liking—more chocolate chips, less sugar, a sprinkle of sea salt—whatever my heart desired. Since then, these little bites of goodness have become a staple in my weekly meal prep routine.
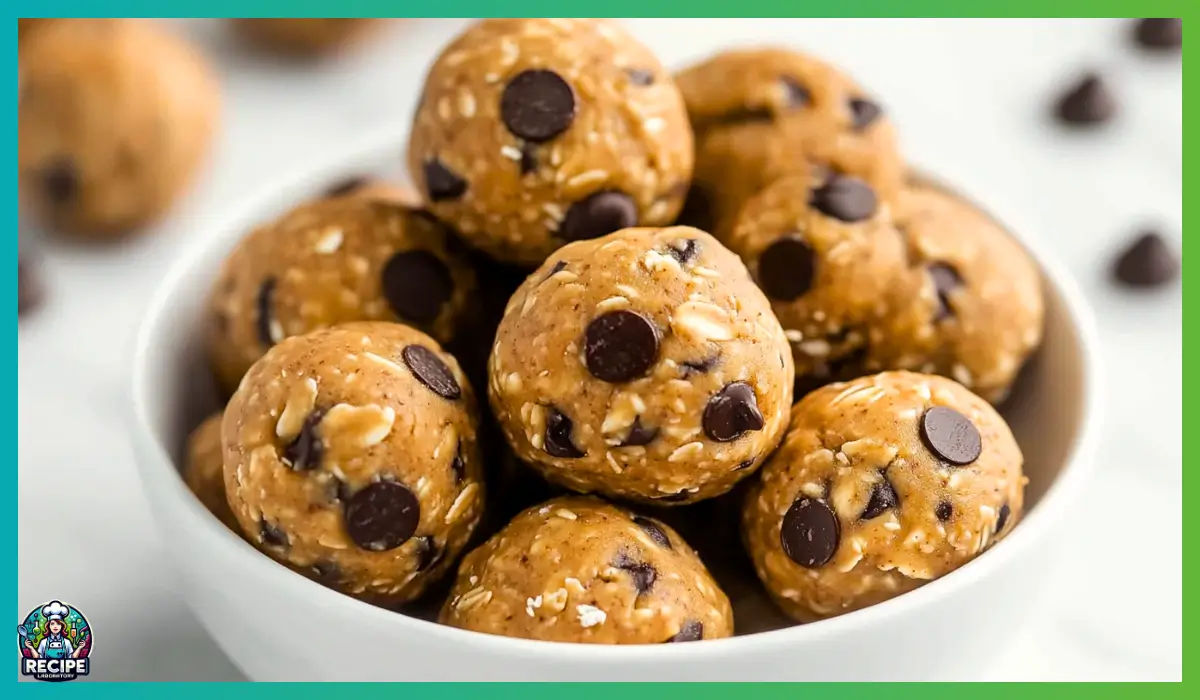
These Peanut Butter Protein Balls are creamy, chewy, and slightly sweet with a hint of saltiness that makes them irresistibly good. And if you’re like me, you might find yourself sneaking one (or two) every time you pass by the fridge. But hey, when something is this good for you, why not indulge a little? They’re packed with protein, healthy fats, and fiber, making them a balanced snack that keeps you full and satisfied. And did I mention how kid-friendly they are? If you’ve got little ones at home, this recipe will be a hit!
Why You’ll Love This Recipe
Making these Peanut Butter Protein Balls is about to become your favorite kitchen ritual. Here’s why:
No-Bake Convenience
The simplicity of this recipe is hard to beat. Since it’s a no-bake treat, you don’t need to turn on the oven or worry about complicated techniques. Just mix, roll, chill, and enjoy. It’s perfect for those busy days when you want something delicious but don’t have the time or energy to cook.
Wholesome Ingredients
This recipe is made with natural, healthy ingredients that provide real energy. From creamy peanut butter to hearty oats and protein powder, every ingredient serves a purpose. You get a balance of healthy fats, protein, and complex carbs to keep you going throughout the day.
Customizable and Versatile
The beauty of these protein balls is their flexibility. Want them vegan? Use maple syrup instead of honey. Prefer a chocolatey version? Swap the vanilla protein powder for chocolate. Craving extra crunch? Add chopped nuts or seeds.
Perfect for Meal Prep
If you’re a fan of meal prepping, these protein balls are a dream come true. Make a big batch, store them in the fridge or freezer, and enjoy a ready-to-eat snack anytime. It’s an excellent way to ensure you always have something healthy on hand, even on your busiest days.
Kid-Friendly Snack
Kids love these protein balls because of their sweet, nutty flavor and fun, bite-sized shape. And as a parent, you can feel good about giving them a nutritious treat.
Satisfying Texture and Flavor
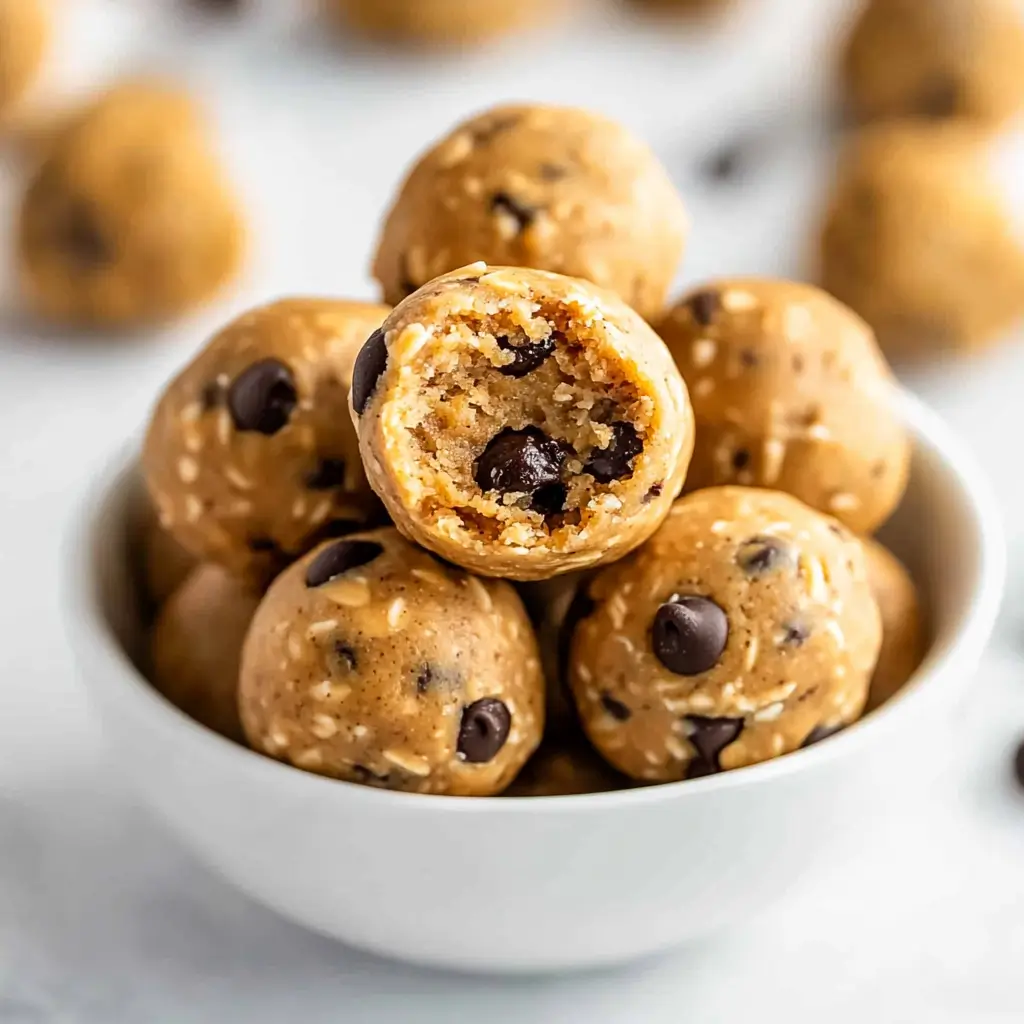
The combination of creamy peanut butter, chewy oats, and mini chocolate chips creates a perfect harmony of textures and flavors. Every bite is rich, slightly sweet, and oh-so-satisfying.
Health Benefits
It’s not just about taste—these Peanut Butter Protein Balls are packed with health benefits. Let’s break down the nutritional perks of each major ingredient:
Peanut Butter (1 1/2 cups, creamy, no-stir)
Peanut butter is a fantastic source of healthy fats, plant-based protein, and essential nutrients like magnesium, potassium, and vitamin E. It’s also rich in antioxidants, which help protect your cells from damage. The healthy fats in peanut butter provide long-lasting energy, making this recipe a great pre- or post-workout snack.
Honey (1/2 cup)
Honey adds natural sweetness and contains antioxidants, antibacterial properties, and trace minerals. It offers quick energy thanks to its natural sugars, making it perfect for an energy-boosting snack. If you opt for maple syrup as a vegan alternative, you still get antioxidants along with beneficial vitamins and minerals like zinc and manganese.
Rolled Oats (1 1/3 cups, old-fashioned oats)
Oats are a whole grain rich in dietary fiber, particularly beta-glucan, which can help lower cholesterol levels and promote heart health. They’re also packed with vitamins, minerals, and antioxidants, contributing to better digestion and sustained energy. Plus, oats are naturally gluten-free if you use certified gluten-free oats.
Protein Powder (1/2 cup, vanilla or chocolate)
Adding protein powder boosts the protein content, essential for muscle repair, growth, and satiety. Whether you use a plant-based protein powder or a whey protein powder, you’re enhancing the overall nutritional value of these snacks.
Mini Chocolate Chips (1/2 cup)
Chocolate chips, especially dark chocolate chips, contain antioxidants and add a delightful sweetness that pairs perfectly with the nutty peanut butter.
Salt (1/8 tsp)
A pinch of salt might seem small, but it enhances the overall flavor of the protein balls, balancing the sweetness and boosting the depth of the peanut butter’s natural flavor.
The combination of these ingredients creates a well-balanced snack that offers protein, fiber, healthy fats, and just the right amount of sweetness. It’s a nutritious option for anyone looking to maintain energy levels, build muscle, or simply enjoy a tasty treat without the guilt.
And remember, you can always tweak this recipe to cater to your specific dietary needs. Want more protein? Add extra protein powder. Looking for a lower-carb option? Reduce the amount of oats. The flexibility is part of what makes this recipe so wonderful.
Preparation Time, Servings, and Nutritional Information
Preparation Time: 15 minutes
Chilling Time: 1 hour
Total Time: 1 hour 15 minutes
Servings: Approximately 20 protein balls (depending on size)
Nutritional Information (Per Serving – 1 Protein Ball):
Calories: 150
Protein: 6g
Carbohydrates: 15g
Fat: 8g
Fiber: 2g
Sugar: 8g
These values are estimated based on the ingredients listed and standard serving sizes. They can vary depending on specific brands or substitutions you might use.
This snack packs a punch of protein and energy without loading you up with unnecessary sugars or unhealthy fats. It’s a balanced, nutritious treat you can enjoy any time of the day.
Now that you know how good these Peanut Butter Protein Balls are for you, let’s dive into the list of ingredients you’ll need.
Ingredients List
To make these delicious and nutritious Peanut Butter Protein Balls, you’ll need the following ingredients. Each ingredient is carefully chosen to provide the perfect balance of flavor, texture, and nutrition:
Peanut Butter (1 1/2 cups, creamy, no-stir)
Use natural, creamy peanut butter that doesn’t require stirring. This provides a rich, nutty flavor and smooth texture while delivering healthy fats and plant-based protein. Make sure to use unsweetened peanut butter for better control over the sweetness of your protein balls.
Honey (1/2 cup) or Maple Syrup for Vegan Option
This natural sweetener acts as a binding agent, holding all the ingredients together. It also adds a lovely sweetness that complements the nutty peanut butter. If you prefer a vegan option, go for maple syrup instead of honey.
Rolled Oats (1 1/3 cups, old-fashioned oats)
Old-fashioned oats give these protein balls a hearty, chewy texture. They’re also a great source of complex carbohydrates and dietary fiber, keeping you full and energized. For a gluten-free version, make sure to use certified gluten-free oats.
Protein Powder (1/2 cup, vanilla or chocolate)
This is what makes your snack a true protein-packed treat. Vanilla protein powder adds a creamy, sweet flavor, while chocolate protein powder offers a richer, decadent twist. Choose your favorite protein powder—whether it’s whey-based or plant-based—for a boost of protein that supports muscle repair and overall energy.
Salt (1/8 tsp)
Just a pinch of salt enhances all the other flavors, especially the sweetness of the honey or maple syrup. It also adds a subtle contrast to the creamy peanut butter.
Mini Chocolate Chips (1/2 cup)
These add delightful bursts of chocolatey goodness in every bite. While milk chocolate chips work well, opting for dark chocolate chips will increase the antioxidant content and provide a slightly less sweet, more sophisticated flavor.
Optional Add-Ins:
Chia Seeds or Flaxseeds: Boost the omega-3 content and fiber.
Chopped Nuts: For extra crunch and healthy fats.
Coconut Flakes: For a tropical twist.
Cinnamon or Vanilla Extract: To enhance the flavor profile.
Once you’ve gathered all the ingredients, it’s time to move on to the fun part—making these protein-packed delights!
Step-By-Step Cooking Instructions
Now, let’s get down to business. This recipe is straightforward, simple, and takes just minutes to prepare before chilling. Ready to go? Let’s do this!
Step 1: Prepare Your Mixing Bowl
Grab a large mixing bowl—this will be your workspace where all the magic happens. Make sure it’s big enough to hold all the ingredients comfortably.
Step 2: Combine the Wet Ingredients
Add the creamy peanut butter and honey (or maple syrup if using the vegan option) to the mixing bowl.
Using a rubber spatula or spoon, mix the ingredients thoroughly until you have a smooth, well-blended mixture. The honey or maple syrup will act as a natural sweetener and binder, helping to hold the protein balls together.
Step 3: Add the Dry Ingredients
Pour in the rolled oats, protein powder, and salt.
Gently fold the ingredients into the peanut butter and honey mixture.
Keep mixing until everything is evenly distributed. At first, it might look dry, but as you continue to mix, the oats and protein powder will absorb the moisture from the peanut butter and honey, creating a cohesive mixture.
Step 4: Add the Mini Chocolate Chips
Now it’s time to make these protein balls a little more exciting. Add the mini chocolate chips and fold them into the mixture.
If you’re adding any optional ingredients like chia seeds, chopped nuts, or coconut flakes, this is the perfect time to do so.
Step 5: Check the Consistency
Assess the consistency of your mixture. It should be thick and slightly sticky, but still easy to roll into balls.
If the mixture is too dry and crumbly, add a tablespoon of peanut butter or honey to help bind it together.
If it’s too wet, add a little more oats or protein powder until you achieve the right texture.
Step 6: Form the Protein Balls
Using a mini cookie scoop or a spoon, scoop out portions of the mixture (about 1-inch in size).
Roll each portion into a ball using your hands. Try to keep the balls uniform in size for even chilling and serving.
Place the rolled balls onto a parchment-lined baking sheet or a plate.
Step 7: Chill the Protein Balls
Refrigerate the protein balls for at least 1 hour. This helps them firm up and hold their shape.
If you’re in a hurry, you can speed up the process by placing them in the freezer for about 20 minutes.
Step 8: Store the Protein Balls
Once the protein balls have firmed up, transfer them to an airtight container or freezer bag.
Store them in the fridge for up to 1 week.
For longer storage, place them in the freezer where they will last for 2-3 months.
Step 9: Enjoy!
Whenever you need a quick, satisfying snack, just grab one (or two!) of these delicious Peanut Butter Protein Balls from the fridge or freezer. They’re perfect for breakfast, a midday snack, or a post-workout treat.
Step 10: Cleaning Up
Don’t forget to clean your mixing bowl and utensils while the protein balls are chilling. The stickiness of peanut butter and honey can be stubborn, so hot soapy water will do the trick.
Now that you’ve made these incredible little treats, let’s talk about the best ways to serve and enjoy them.
How to Serve
These Peanut Butter Protein Balls are delicious on their own, but if you want to take things up a notch, here are some serving ideas:
- Quick Snack: Simply enjoy them straight from the fridge or freezer whenever you need an energy boost.
- Pre-Workout Fuel: Have one or two balls about 30 minutes before a workout for a combination of protein, carbs, and healthy fats to keep you energized.
- Post-Workout Recovery: Enjoy a few of these protein balls after your workout to help replenish energy and support muscle recovery.
- Healthy Dessert: Serve these protein balls with a glass of almond milk, oat milk, or your favorite non-dairy milk for a guilt-free dessert.
- On-the-Go Breakfast: Pair a couple of protein balls with fresh fruit or a smoothie for a quick, satisfying breakfast.
- Gift Idea: Wrap them up in a cute container and gift them to a friend or family member who could use a healthy snack in their life.
These versatile protein balls can fit into nearly any occasion or meal. Now, let’s explore how to pair them with other foods and drinks for a complete, satisfying experience.
Pairing Suggestions
While these Peanut Butter Protein Balls are absolutely delicious on their own, pairing them with other foods and drinks can enhance the experience even more. Here are some ideas to take your snack game to the next level:
Perfect Beverage Pairings
Almond Milk or Oat Milk: A chilled glass of almond or oat milk complements the creamy, nutty flavor of the protein balls perfectly. The mild, slightly sweet taste of plant-based milk adds a refreshing touch.
Smoothies: Pair your protein balls with a fresh fruit smoothie or a chocolate-banana protein shake for a nutrient-packed breakfast or post-workout treat.
Green Tea or Herbal Tea: If you prefer something warm, a cup of green tea or chamomile tea provides a soothing contrast to the rich, nutty flavor of the protein balls.
Fruit Combinations
Fresh Berries: Strawberries, blueberries, or raspberries make a delightful, antioxidant-rich combo when served alongside your protein balls.
Apple Slices: The crisp, slightly tart flavor of apples pairs beautifully with the creamy sweetness of the peanut butter protein balls.
Banana Slices: For a more indulgent treat, try serving the protein balls with banana slices. It’s like having a peanut butter and banana sandwich without the bread!
Nutty and Crunchy Additions
Trail Mix: Serve the protein balls with a small portion of trail mix containing nuts, dried fruit, and seeds for an added crunch and extra nutrients.
Rice Cakes or Crackers: Spread a little extra peanut butter on a rice cake or whole-grain cracker and enjoy it alongside your protein balls.
Healthy Dessert Platter
Create a healthy dessert platter by arranging your protein balls with fresh fruit, dark chocolate squares, and coconut flakes. It’s a great way to impress guests with a guilt-free, yet indulgent, dessert option.
Breakfast Bowl Topper
Chop up a couple of protein balls and sprinkle them over a bowl of yogurt, smoothie bowl, or oatmeal for a protein-packed topping that adds texture and flavor.
These versatile pairing suggestions prove that your protein balls can be enjoyed in countless ways, depending on your cravings and dietary goals. Now, let’s talk about how to properly store, freeze, and reheat them for maximum freshness.
Storage, Freezing & Reheating Instructions
One of the best things about these Peanut Butter Protein Balls is their incredible shelf life. Whether you plan to enjoy them throughout the week or want to make a batch to last longer, proper storage is key.
- Storing in the Refrigerator
Once the protein balls have been rolled and chilled, transfer them to an airtight container or a resealable freezer bag.
Store them in the refrigerator for up to 1 week.
If you’re stacking them in a container, consider placing a piece of parchment paper between layers to prevent them from sticking together. - Freezing for Longer Storage
If you want to make a large batch and save some for later, freezing is the way to go.
Arrange the protein balls on a baking sheet lined with parchment paper, making sure they’re not touching each other.
Place the baking sheet in the freezer for about 1 hour or until the protein balls are firm.
Transfer the frozen protein balls to a freezer-safe container or freezer bag, removing as much air as possible before sealing.
Store them in the freezer for up to 2-3 months.
Label the container or bag with the date to keep track of freshness. - Reheating or Thawing Protein Balls
Since these protein balls are meant to be enjoyed cold or at room temperature, there’s no need to reheat them.
If you’ve stored them in the freezer, simply let them sit at room temperature for 10-15 minutes before enjoying them.
For a faster thawing process, pop them in the microwave for 5-10 seconds, but be careful not to overheat them. - Tips for Maintaining Freshness
Always use an airtight container to prevent the protein balls from drying out or absorbing unwanted odors from the fridge or freezer.
Keep them away from moisture, as excessive humidity can cause them to lose their texture and firmness.
If the protein balls feel a bit dry after being stored for a while, roll them lightly in a little extra peanut butter or drizzle some honey over them for added moisture.
Now that you know how to store and keep your protein balls fresh, let’s ensure you avoid common mistakes that could affect their quality and taste.
Common Mistakes to Avoid
Even though this recipe is simple, there are a few mistakes to watch out for to ensure your Peanut Butter Protein Balls turn out perfect every time.
Using Runny Peanut Butter
Using peanut butter that’s too runny or oily can result in a mixture that’s too loose to form balls. Always opt for creamy, no-stir peanut butter for the best results. If your peanut butter is particularly oily, give it a good stir before adding it to the mixture.
Overusing Dry Ingredients
Adding too much protein powder or oats can make the mixture too dry and crumbly. Measure your ingredients carefully and adjust the consistency as needed. If the mixture feels too dry, simply add a bit more peanut butter or honey to bring it all together.
Skipping the Chilling Process
Skipping the chilling step can result in protein balls that are too soft and fall apart easily. Make sure to refrigerate them for at least an hour before serving. This also helps the flavors meld together nicely.
Forgetting to Adjust for Dietary Preferences
If you’re making these protein balls for someone with dietary restrictions, double-check the ingredients. For a vegan option, use maple syrup instead of honey. For a gluten-free version, use certified gluten-free oats.
Not Storing Properly
Leaving the protein balls uncovered or storing them in a loosely sealed bag can cause them to dry out quickly. Always use an airtight container or resealable bag to maintain freshness.
Now that you know what to avoid, let’s go over some helpful tips to guarantee the best protein balls every time.
Pro Tips
Want to make your Peanut Butter Protein Balls even better? These pro tips will help you achieve the perfect texture, flavor, and consistency every single time.
- Drain Excess Oil from Peanut Butter
If your peanut butter is too oily, place it in the fridge for about 30 minutes before using it. This will help thicken the texture and make it easier to work with. - Mix the Ingredients Thoroughly
Ensure all ingredients are well-combined before forming the balls. This will prevent any dry spots and create a more cohesive mixture. - Use a Cookie Scoop for Consistency
If you want your protein balls to be uniform in size, use a mini cookie scoop to portion out the mixture. This also makes rolling them into balls much easier. - Add Protein Powder Gradually
If you’re experimenting with different protein powders, add them gradually and adjust the mixture’s consistency as needed. Some protein powders absorb more moisture than others. - Customize to Your Taste
Feel free to add spices like cinnamon or vanilla extract for extra flavor. You can also switch up the protein powder flavor to match your preference.
Now that you’ve got all the tips and tricks, let’s dive into some of the most frequently asked questions about making and storing these tasty protein balls.
Frequently Asked Questions (FAQs)
Even though these Peanut Butter Protein Balls are incredibly simple to make, you might have some questions before getting started. Here are some of the most common inquiries to help you achieve perfect results every time:
Can I Use Any Type of Peanut Butter?
Yes, but for the best results, it’s recommended to use creamy, no-stir peanut butter. Natural peanut butter that separates with oil on top can be used if thoroughly mixed before adding to the recipe. If it’s still too runny, refrigerating the peanut butter for 30 minutes before using can help firm it up.
What Can I Use Instead of Honey for a Vegan Option?
If you want to make this recipe vegan, simply swap the honey with maple syrup or agave nectar. Maple syrup provides a rich, natural sweetness that works beautifully with the other ingredients.
Can I Make These Peanut Butter Protein Balls Without Protein Powder?
Absolutely! If you don’t have protein powder or prefer not to use it, you can substitute it with additional oats, ground flaxseed, or almond flour. Keep in mind that the protein content will be lower, but the flavor and texture will still be fantastic.
What If the Mixture Is Too Dry?
If the mixture feels too dry or crumbly, try adding a tablespoon of peanut butter or honey at a time until the desired consistency is reached. Sometimes, different brands of protein powder can cause the mixture to be drier than expected.
How Do I Make These Protein Balls Gluten-Free?
This recipe is naturally gluten-free as long as you use certified gluten-free rolled oats. Always double-check your protein powder as well to ensure it’s free of gluten.
Can I Add Other Ingredients to the Mixture?
Definitely! This recipe is highly customizable. You can add chia seeds, flaxseeds, chopped nuts, dried fruit, shredded coconut, or even spices like cinnamon for a unique twist. Just be mindful that adding more dry ingredients may require you to adjust the peanut butter or honey to maintain the proper consistency.
How Long Do These Protein Balls Last?
In the fridge, they will stay fresh for up to one week. In the freezer, they can last up to 2-3 months when properly stored in an airtight container or freezer bag.
Can I Double the Recipe?
Yes! This recipe is perfect for doubling or even tripling if you want to prepare a larger batch. Just make sure you have enough room in your fridge or freezer for storage.
What’s the Best Way to Store Them for Easy Access?
For convenience, you can divide the protein balls into smaller containers or portion them into freezer bags so you can grab a few at a time without thawing the entire batch.
Can I Make Them Crunchy Instead of Chewy?
If you prefer a crunchier texture, try using crunchy peanut butter instead of creamy, or fold in chopped nuts like almonds or walnuts. Toasting the oats before mixing them in can also add a pleasant crunch.
Now that you have answers to the most common questions, you’re all set to make the best Peanut Butter Protein Balls ever. Ready to give them a try? Let’s wrap things up with some final thoughts.
Conclusion & Call to Action
Peanut Butter Protein Balls are everything you want in a snack—easy, delicious, healthy, and super convenient. They’re perfect for busy mornings, afternoon pick-me-ups, post-workout recovery, or even a healthy dessert option when those sweet cravings hit. Best of all, you can make a batch in just minutes and keep them on hand for whenever hunger strikes.
With their perfect balance of protein, healthy fats, and carbohydrates, these protein balls provide long-lasting energy and satisfaction. Whether you’re following a specific diet or just looking for a tasty, wholesome snack, this recipe is incredibly versatile and adaptable. You can customize it to suit your preferences, dietary needs, or simply what you have available in your pantry.
So, why not give these Peanut Butter Protein Balls a try? You’ve got nothing to lose and so much deliciousness to gain. Once you make them, you’ll wonder how you ever lived without these little bites of heaven.
I’d love to hear how your protein balls turn out! Did you add any fun twists or ingredients to make them your own? Share your experience and leave a comment below. And if you snap a photo of your beautiful creation, be sure to tag me on social media—I can’t wait to see your healthy snack masterpiece!
Print
Peanut Butter Protein Balls – Easy No-Bake Snack Recipe
- Total Time: 1 hour 15 minutes (including chilling)
- Yield: Approximately 20 balls 1x
- Diet: Vegetarian
Description
These creamy, chewy, and delicious Peanut Butter Protein Balls are the perfect no-bake snack. Made with peanut butter, oats, protein powder, and honey, they provide an energy boost and satisfying treat for any time of day. Easy to customize, kid-friendly, and ideal for meal prep.
Ingredients
-
1 1/2 cups creamy peanut butter (no-stir)
-
1/2 cup honey (or maple syrup for vegan option)
-
1 1/3 cups rolled oats (old-fashioned oats)
-
1/2 cup vanilla protein powder (or chocolate protein powder for variation)
-
1/8 tsp salt
-
1/2 cup mini chocolate chips
Instructions
-
Mix Ingredients: In a large mixing bowl, combine peanut butter, honey, oats, protein powder, salt, and chocolate chips. Stir well using a rubber spatula until fully mixed.
-
Form Balls: Use a mini cookie scoop or spoon to drop 1-inch-sized balls onto a parchment-lined baking sheet. Roll each scoop into a ball with your hands.
-
Chill: Refrigerate for 1 hour until firm.
-
Store: Transfer to an airtight container or freezer bag. Store in the fridge for up to 1 week or freeze for 2-3 months.
Notes
-
For a vegan version, replace honey with maple syrup.
-
Add-ins like chia seeds, chopped nuts, or coconut flakes are optional but delicious.
-
Use certified gluten-free oats if needed.
- Prep Time: 15 minutes
- Cook Time: None (No-Bake)
- Category: Snacks, Desserts
- Method: No-Bake
- Cuisine: American