
Who doesn’t love a creamy, luscious cheesecake? Now imagine that decadent experience in adorable, bite-sized portions that are easy to make and even easier to enjoy. That’s the magic of mini cheesecakes. These little treats pack all the richness of a classic cheesecake but with a convenient, handheld twist. And let’s be honest, desserts just seem even more delightful when they come in mini form.
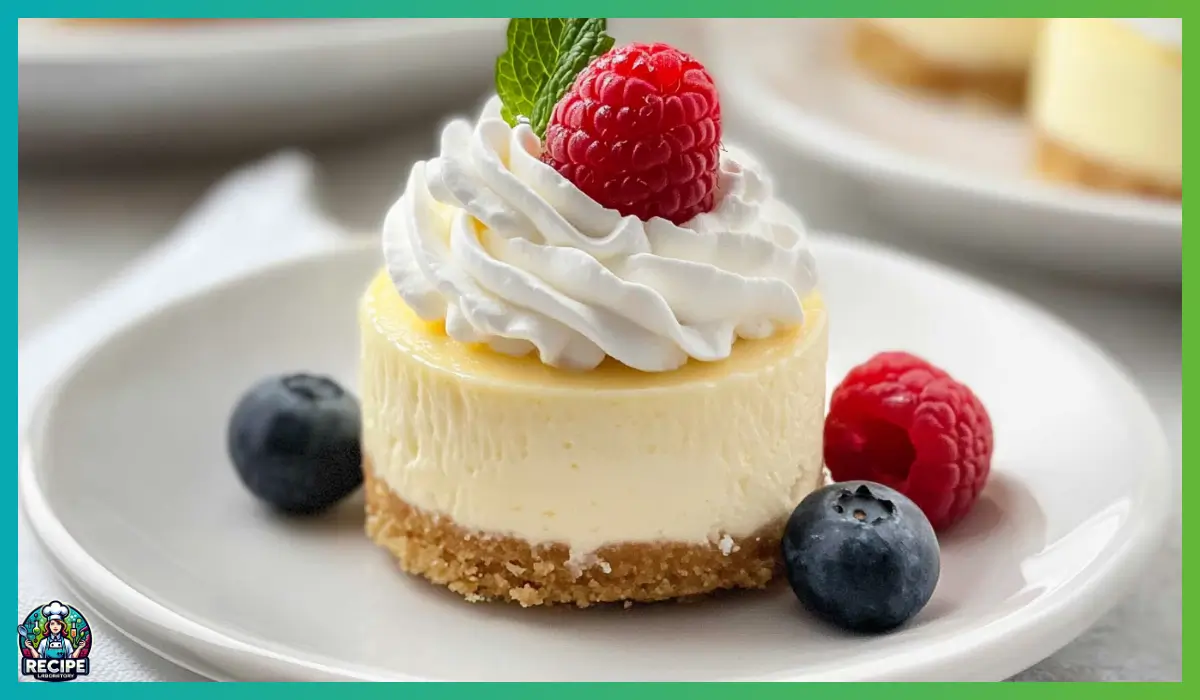
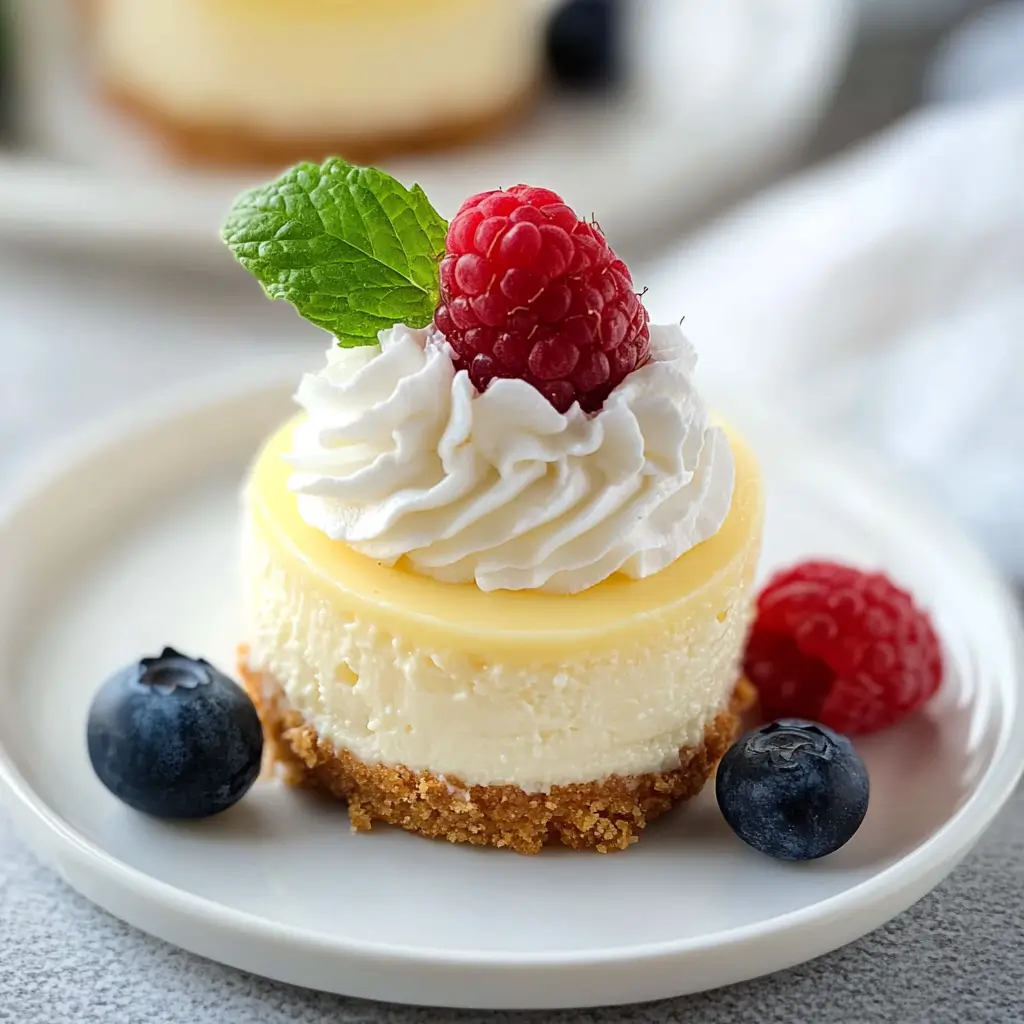
There’s something special about these mini cheesecakes. Maybe it’s the buttery, crumbly graham cracker crust that melts in your mouth. Or the smooth, velvety cream cheese filling with just the right amount of sweetness. And if you decide to add a touch of fresh lemon juice? Pure heaven. To top it all off, you can make them as fancy or as simple as you like, with toppings ranging from fresh berries to decadent chocolate drizzles or even a fluffy dollop of whipped cream.
The first time I made these mini cheesecakes was for a family gathering. I wanted something impressive yet simple because, let’s face it, who has time for complicated desserts when you’re also trying to make a three-course meal? These little beauties were a hit. The best part? They’re incredibly versatile and customizable, so you can make them to suit any occasion or personal preference. From birthday parties to casual get-togethers, these mini cheesecakes always steal the show.
Now, I’m here to walk you through everything you need to know to make these irresistible mini cheesecakes at home. Whether you’re a seasoned baker or just getting started, this recipe is foolproof and oh-so-rewarding. Let’s dive in!
Why You’ll Love This Recipe
You’re going to fall head over heels for these mini cheesecakes, and here’s why:
1. Easy to Make: This recipe doesn’t require fancy techniques or special equipment. All you need is a muffin tin, a mixing bowl, and some basic ingredients you probably already have on hand.
2. Quick Baking Time: Unlike traditional cheesecakes that can take hours to bake and set, these mini versions only take about 15–18 minutes in the oven. After a couple of hours chilling in the fridge, they’re ready to be devoured.
3. Perfect for Any Occasion: Whether it’s a holiday party, a birthday celebration, or just a casual weekend treat, these mini cheesecakes are a guaranteed crowd-pleaser. Their individual portions make them perfect for serving at gatherings without the hassle of slicing and serving.
4. Customizable: You can easily switch things up by experimenting with different toppings or even adding flavors to the filling. Fresh berries, chocolate drizzle, caramel sauce—whatever your heart desires!
5. Make-Ahead Friendly: These little cheesecakes store beautifully in the fridge, making them a great option for prepping ahead of time. And guess what? They freeze well, too!
6. Creamy and Delicious: The texture of these mini cheesecakes is out-of-this-world creamy. The combination of rich cream cheese, a hint of vanilla, and the buttery graham cracker crust is simply divine.
From their irresistible flavor to their impressive presentation, these mini cheesecakes are a dessert you’ll want to make again and again. And the best part? They’re practically foolproof!
Health Benefits
Now, let’s be real: Mini cheesecakes are a dessert, so they’re definitely more of an indulgence than a health food. However, that doesn’t mean there aren’t some surprising health benefits hidden in these creamy little bites.
1. Portion Control: Because these cheesecakes are made in individual servings, they offer built-in portion control. Unlike a full-sized cheesecake where it’s easy to over-serve yourself, these minis are perfectly pre-portioned. Enjoy one without the guilt!
2. Protein Boost: Thanks to the cream cheese and eggs, these mini cheesecakes contain a decent amount of protein, which helps with satiety. While they shouldn’t be considered a primary protein source, it’s nice to know that they offer more than just sugar and fat.
3. Customizable Ingredients: If you’re looking to make these treats a bit healthier, there are plenty of ways to do so. Opt for reduced-fat cream cheese, swap out the graham crackers for a whole-grain version, or reduce the sugar slightly.
4. Antioxidants From Toppings: Fresh berries like strawberries, blueberries, and raspberries are packed with antioxidants and vitamins. Adding a generous layer of berries on top of your mini cheesecakes can boost their nutritional value while enhancing their flavor.
5. Gluten-Free Options: If you have dietary restrictions, these mini cheesecakes can easily be made gluten-free by using gluten-free graham cracker crumbs.
6. Reduced Stress Baking: Okay, this one is more of a mental health benefit. Baking, especially something as straightforward and satisfying as these mini cheesecakes, can be a fantastic stress-reliever. There’s something incredibly soothing about mixing ingredients, popping them into the oven, and seeing your delicious creation come to life.
While mini cheesecakes might not be the healthiest dessert in the world, there are certainly ways to enjoy them more mindfully. And honestly, sometimes treating yourself to something sweet and creamy is good for the soul.
Preparation Time, Servings, and Nutritional Information
Before diving into the recipe itself, let’s go over some of the practical details.
Preparation Time: About 20 minutes for mixing and assembling.
Baking Time: 15–18 minutes.
Cooling Time: 2 hours in the refrigerator.
Total Time: Approximately 2 hours and 40 minutes.
Servings: This recipe makes 12 mini cheesecakes.
Nutritional Information (Per Serving):
Calories: Approximately 225 kcal
Protein: 4 grams
Carbohydrates: 18 grams
Fat: 16 grams
Sugar: 14 grams
Cholesterol: 70 mg
Sodium: 200 mg
Keep in mind that these nutritional values are estimates and can vary based on ingredient brands and portions. If you choose to add toppings like chocolate or whipped cream, the calorie count will increase slightly.
These mini cheesecakes are definitely a treat, but knowing the nutritional information can help you enjoy them mindfully. And if you’re looking to reduce calories, you can always swap ingredients or reduce the sugar a bit.
Ready to dive into the deliciousness? Let’s gather our ingredients and get baking!
Ingredients List
Here’s what you’ll need to create these creamy, dreamy mini cheesecakes:
Crust
1 cup Graham cracker crumbs (about 8 whole crackers crushed)
3 tablespoons Butter, melted (for that irresistible buttery flavor)
2 tablespoons Granulated sugar (to add a touch of sweetness)
Cheesecake Filling
16 ounces (2 packs) Cream cheese, softened to room temperature (the star ingredient for creamy goodness)
1/2 cup Granulated sugar (for sweetness and smooth texture)
2 large Eggs, room temperature (this helps the filling set beautifully)
1 teaspoon Vanilla extract (adds lovely flavor depth)
1 tablespoon Fresh lemon juice (optional, but adds a delightful tanginess)
Toppings (Optional but highly recommended)
Fresh berries (strawberries, blueberries, raspberries)
Chocolate drizzle (for the chocoholics)
Whipped cream (light and fluffy perfection)
These ingredients are easy to find and straightforward to work with. Plus, there’s plenty of room for creativity when it comes to toppings and flavors.
Now that you’ve got your ingredients ready, let’s walk through the step-by-step instructions to make these amazing mini cheesecakes.
Step-By-Step Cooking Instructions
Making these mini cheesecakes is a breeze, even if you’re new to baking. Just follow these simple steps, and you’ll have a batch of creamy, decadent mini cheesecakes ready to impress.
Step 1: Prepare the Crust
- Preheat the Oven: Start by preheating your oven to 325°F (163°C). Line a 12-cup muffin tin with paper liners. This will make removing the cheesecakes super easy later on.
- Crush the Graham Crackers: If you’re using whole graham crackers, crush them into fine crumbs. You can do this by placing them in a resealable plastic bag and crushing them with a rolling pin. Alternatively, you can use a food processor for a finer, more even texture.
- Mix the Crust Ingredients: In a medium-sized bowl, combine the graham cracker crumbs, melted butter, and granulated sugar. Stir until the mixture is well-coated and resembles wet sand. This ensures your crust will hold together nicely when pressed into the muffin cups.
- Press the Crust Into Muffin Cups: Divide the graham cracker mixture evenly among the muffin cups. This should be about a tablespoon per cup. Use the back of a spoon or the bottom of a small glass to press the mixture firmly and evenly into the bottom of each liner.
- Pre-Bake the Crust (Optional): For a firmer crust, you can bake the crusts for about 5 minutes before adding the filling. However, this step is optional. If you prefer a softer crust, you can skip this step and proceed with the filling.
Step 2: Make the Cheesecake Filling
- Soften the Cream Cheese: Make sure your cream cheese is at room temperature before you start. This makes it much easier to mix and results in a smoother filling.
- Beat the Cream Cheese and Sugar: In a large mixing bowl, beat the softened cream cheese and sugar together using an electric mixer. Start on low speed to avoid splattering, then gradually increase to medium speed. Continue beating until the mixture is smooth and creamy, usually about 2–3 minutes.
- Add the Eggs: Add the eggs one at a time, beating well after each addition. Scrape down the sides of the bowl as needed to ensure everything is fully incorporated.
- Add Vanilla and Lemon Juice: Mix in the vanilla extract and lemon juice (if using). The lemon juice adds a subtle brightness to the cheesecake, but you can skip it if you prefer a classic vanilla flavor.
- Don’t Overmix: Once everything is combined, stop mixing. Overmixing can cause cracks in your cheesecakes as they bake.
Step 3: Fill and Bake the Cheesecakes
- Fill the Muffin Cups: Using a spoon or a cookie scoop, evenly distribute the cheesecake filling among the prepared crusts. Each cup should be about 3/4 full.
- Smooth the Tops: Use the back of a spoon to gently smooth the tops of the cheesecakes. This will help them bake evenly.
- Bake: Place the muffin tin in the preheated oven and bake for 15–18 minutes. The cheesecakes are done when the centers are just set and slightly jiggly. Don’t worry if they still look a little soft—this is exactly what you want.
- Cool: Remove the muffin tin from the oven and let the cheesecakes cool in the tin for about 30 minutes. Cooling them gradually helps prevent cracking.
- Refrigerate: Once they’ve cooled to room temperature, transfer the muffin tin to the refrigerator and chill the cheesecakes for at least 2 hours. This step is crucial for them to fully set and develop their rich, creamy texture.
Step 4: Add Toppings and Serve
- Remove from the Tin: Carefully remove the paper liners from the cheesecakes. They should come off easily once properly chilled.
- Add Your Favorite Toppings: This is where the fun begins. You can top your mini cheesecakes with fresh berries, a drizzle of chocolate sauce, whipped cream, or anything else your heart desires.
- Serve and Enjoy: Arrange them on a serving platter and prepare for the oohs and ahhs from your lucky guests. These mini cheesecakes are best enjoyed chilled but will still taste amazing if they’ve been out for a little while.
How to Serve
Serving these mini cheesecakes is a joy because they’re already perfectly portioned and ready to impress. Here are some delicious ways to present and enjoy them:
1. Classic & Elegant:
Arrange the mini cheesecakes on a pretty dessert tray. Top them with fresh berries for a colorful, sophisticated look. This approach works especially well for special occasions like birthdays, anniversaries, or holiday parties.
2. Chocolate Lover’s Dream:
Drizzle each cheesecake with melted chocolate and sprinkle with chocolate shavings or mini chocolate chips. You can even add a dollop of whipped cream for extra indulgence.
3. Fruity Delight:
Top your cheesecakes with a mix of fresh berries or even a spoonful of fruit compote. This adds a lovely burst of freshness and a hint of tartness that complements the rich, creamy filling.
4. Kid-Friendly Fun:
Want to make these even more appealing to kids? Serve them with a variety of toppings so everyone can customize their own. Think crushed cookies, sprinkles, or even caramel sauce.
5. Pair with Coffee or Tea:
These mini cheesecakes are divine when served alongside a hot cup of coffee or tea. The creamy, sweet cheesecakes balance beautifully with a strong, slightly bitter drink.
Serving these mini cheesecakes in creative ways makes them feel even more special. And since everyone gets their own little dessert, there’s no fighting over who gets the biggest slice!
Pairing Suggestions
Now that you’ve got your gorgeous mini cheesecakes ready to go, it’s time to think about what to pair them with to make the experience even more enjoyable.
1. Coffee & Espresso:
The rich, creamy texture of cheesecake pairs beautifully with the deep, roasted flavors of coffee. A bold espresso shot or a creamy latte makes an especially wonderful contrast to the sweetness of the cheesecakes.
2. Herbal Teas:
For a lighter, refreshing option, try pairing these cheesecakes with herbal teas like chamomile or peppermint. These gentle flavors won’t overpower the dessert and will cleanse the palate perfectly.
3. Fresh Fruit Compote:
If you’re serving the cheesecakes without toppings, consider offering a small dish of warm fruit compote on the side. The sweetness and acidity of cooked berries, cherries, or even apples can add a whole new layer of deliciousness.
4. Sparkling Water or Mocktails:
For a non-alcoholic pairing, go with something bubbly. Sparkling water with a slice of lemon or a fruity mocktail provides a refreshing contrast to the creamy richness of the cheesecakes.
5. Ice Cream:
Want to make your mini cheesecakes even more decadent? Serve them alongside a small scoop of vanilla ice cream. The cold, creamy texture of the ice cream pairs beautifully with the cheesecake’s silky filling.
Whether you keep it simple or go all out with fancy pairings, these mini cheesecakes will be the star of any dessert spread.
Storage, Freezing & Reheating Instructions
The best thing about these mini cheesecakes, aside from how delicious they are, is how well they store. You can easily make them ahead of time and keep them fresh for days. Here’s everything you need to know about storing, freezing, and reheating (if necessary) these delightful treats.
Storing in the Refrigerator
- Cooling First: Always allow your mini cheesecakes to cool completely at room temperature before refrigerating them. This prevents condensation from forming and making the tops soggy.
- Cover and Store: Once cooled, place the cheesecakes in an airtight container. Make sure the container is deep enough so that the cheesecakes aren’t squished by the lid.
- Refrigeration Time: Store the mini cheesecakes in the refrigerator for up to 5 days. They’ll remain creamy and delicious throughout the week.
- Serving From the Fridge: If you prefer a slightly softer texture, you can let the cheesecakes sit at room temperature for about 10 minutes before serving.
Freezing for Later
- Freezing Individually: To prevent the cheesecakes from sticking together, place them on a baking sheet and freeze them uncovered for about 1 hour or until they’re firm.
- Packaging: Once frozen, transfer the mini cheesecakes to a freezer-safe container or a resealable freezer bag. Place parchment paper between layers if you’re stacking them to avoid sticking.
- Label and Store: Label your container with the date so you can keep track of how long they’ve been in the freezer. They’ll stay fresh for up to 2 months.
- Thawing: To thaw, place the mini cheesecakes in the refrigerator overnight. For quicker results, you can let them sit at room temperature for about 30 minutes before serving.
Reheating (If Needed)
These cheesecakes are meant to be served chilled, but if you’ve just pulled them from the freezer and need them ready faster, you can:
- Microwave Option: Place a cheesecake on a microwave-safe plate and microwave at 50% power for 10-second intervals until just softened. Be careful not to overheat, or you’ll end up with a melty mess.
- Room Temperature Thawing: For the best texture, allow frozen cheesecakes to thaw at room temperature for about 30 minutes.
Whether you’re storing them in the fridge or keeping them in the freezer for a future craving, these mini cheesecakes handle storage like a champ.
Common Mistakes to Avoid
Even though this recipe is incredibly simple, there are a few common mistakes that can mess up your mini cheesecakes. Here’s how to avoid them and make sure your desserts come out perfect every time.
1. Not Softening the Cream Cheese Properly:
If you try to mix cold cream cheese, you’ll end up with a lumpy filling. Always make sure your cream cheese is fully softened to room temperature before beating it with sugar. To speed up the process, you can cut the cream cheese into smaller pieces and let it sit out for about 30 minutes.
2. Overmixing the Batter:
It’s tempting to beat the mixture until it’s completely smooth, but overmixing introduces too much air into the batter. This can cause your cheesecakes to crack or puff up too much during baking. Mix just until the ingredients are combined and smooth.
3. Skipping the Cooling Process:
Cooling the cheesecakes gradually is essential. If you place them directly in the fridge right after baking, condensation can form, resulting in a soggy texture. Let them cool at room temperature for at least 30 minutes before refrigerating.
4. Not Using Paper Liners:
Trying to bake these mini cheesecakes directly in a muffin tin without paper liners is a recipe for disaster. They will stick to the pan and be nearly impossible to remove without falling apart. Always use liners to ensure easy removal.
5. Overbaking:
The biggest mistake most people make is overbaking. Remember, the cheesecakes should still have a slight jiggle in the center when you take them out of the oven. They’ll continue to firm up as they cool. If you bake them until fully set, they’ll end up dry and dense.
6. Improper Freezing:
If you plan to freeze the cheesecakes, make sure they’re completely cooled before wrapping them up. Also, don’t freeze them with toppings like fresh fruit or whipped cream. Add those just before serving.
Avoiding these mistakes will help you achieve perfect mini cheesecakes every single time.
Pro Tips
To help you achieve the best results, here are some pro tips that will take your mini cheesecakes from good to absolutely amazing:
1. Room Temperature Ingredients Are Key:
Using room temperature cream cheese and eggs makes it much easier to achieve a silky-smooth texture. Cold ingredients tend to form lumps that are hard to beat out.
2. Use a Muffin Tin With a Non-Stick Surface:
Even though you’re using paper liners, a non-stick muffin tin will make the baking process smoother. Plus, it ensures the cheesecakes bake evenly.
3. Let Them Chill Overnight:
If you have the time, chill the cheesecakes overnight for the creamiest, most delicious texture. This extra chilling time allows the flavors to fully develop and the filling to set perfectly.
4. Experiment With Flavors:
Want to take things up a notch? Add a swirl of fruit puree, melted chocolate, or caramel into the batter before baking. This adds flavor and creates beautiful patterns when baked.
5. Toast the Graham Cracker Crust:
For an extra-crispy, flavorful crust, consider baking the graham cracker mixture for 5 minutes before adding the cheesecake filling. It’s a small step that makes a big difference.
6. Make Them Gluten-Free:
If you’re serving guests with dietary restrictions, simply swap the graham cracker crumbs for gluten-free alternatives. It’s a straightforward adjustment that doesn’t compromise on taste.
7. Use a Cookie Scoop for Even Portions:
When filling the muffin cups, a cookie scoop makes it easy to get perfectly even portions, ensuring all your mini cheesecakes bake at the same rate.
8. Don’t Open the Oven Door Too Often:
Resist the urge to peek while your cheesecakes are baking. Temperature fluctuations from opening the oven door can cause them to sink or crack.
9. Avoid Moisture Traps When Freezing:
If you’re freezing the cheesecakes, make sure they’re well-wrapped. Any exposure to air can cause freezer burn, which ruins the texture.
10. Personalize Your Toppings:
Get creative with your toppings! From fresh fruit and sauces to crushed cookies or caramelized nuts, the options are endless.
These tips will ensure that your mini cheesecakes turn out beautifully every single time, no matter how often you make them.
Frequently Asked Questions (FAQs)
As straightforward as this recipe is, you might still have some questions. Here are the most common ones I’ve come across, along with helpful answers to make sure your mini cheesecakes turn out perfect every time.
1. Can I Use Low-Fat or Reduced-Fat Cream Cheese?
Yes, you can use low-fat or reduced-fat cream cheese if you prefer. However, keep in mind that it will slightly alter the texture and flavor of your mini cheesecakes. They may be a bit less creamy and slightly less rich. If you’re looking for a lighter version, this is a good option, but full-fat cream cheese definitely provides the best texture.
2. Can I Make These Mini Cheesecakes Without Eggs?
Absolutely! If you’re looking for an egg-free version, you can substitute each egg with 1/4 cup of plain Greek yogurt or 1/4 cup of pureed silken tofu. The texture will be slightly different, but still delicious. You can also try using commercial egg replacers if you prefer.
3. Why Did My Mini Cheesecakes Crack?
Cracks are usually caused by overmixing the batter or overbaking the cheesecakes. Also, cooling them too quickly can cause cracks. To avoid this, make sure to mix your ingredients until just combined, avoid overbaking, and let them cool gradually before refrigerating.
4. Can I Make These Cheesecakes Gluten-Free?
Yes! To make this recipe gluten-free, simply swap the graham cracker crumbs for gluten-free graham crackers. The rest of the ingredients are naturally gluten-free.
5. Can I Freeze These Mini Cheesecakes With Toppings?
It’s best to freeze the cheesecakes without toppings. Berries, whipped cream, and chocolate drizzle can get messy or lose their texture when frozen and thawed. Add your toppings just before serving for the freshest presentation.
6. Can I Double or Halve This Recipe?
Definitely! This recipe is very flexible. To double it, simply double all the ingredients and use two 12-cup muffin tins. To halve it, just divide all the ingredients by two. Adjust the baking time only slightly if making a smaller batch, but the general timing should be the same.
7. How Do I Know When the Mini Cheesecakes Are Done Baking?
The cheesecakes are done when the centers are just set but still have a slight jiggle when you gently shake the muffin tin. They will continue to firm up as they cool, so don’t overbake them.
8. What If I Don’t Have Paper Liners?
If you don’t have paper liners, you can use silicone muffin cups, which work beautifully. You can also generously grease your muffin tin with butter or non-stick spray, but be aware that removing the cheesecakes can be trickier.
9. Can I Add Flavors to the Cheesecake Batter?
Yes, definitely! You can mix in flavors like melted chocolate, caramel, or even fruit puree. Swirl them into the batter before baking for a visually stunning and delicious result. Just make sure not to add too much liquid, as this can affect the texture of the filling.
10. How Long Should I Let Them Chill Before Serving?
For the best texture and flavor, chill the mini cheesecakes for at least 2 hours. If you have time, chilling them overnight is even better as it allows the flavors to develop fully.
These frequently asked questions cover most of the concerns that come up when making mini cheesecakes. Now, let’s wrap things up and get you excited to try this recipe yourself!
Conclusion & Call to Action
Now that you have everything you need to make the most delicious mini cheesecakes, there’s no reason not to give them a try. They’re easy to make, incredibly satisfying, and perfect for just about any occasion. Whether you’re hosting a dinner party, looking for a fun dessert to make with the kids, or simply craving something sweet and creamy, these mini cheesecakes are the perfect choice.
Remember, what makes these mini cheesecakes so amazing is their versatility. You can keep them classic and simple or get creative with toppings and flavors. From fresh berries and chocolate drizzle to caramel swirls and cookie crumbles, the options are endless. And because they’re perfectly portioned, they’re a guilt-free way to enjoy dessert without overindulging.
I can’t wait for you to try these mini cheesecakes. They’re sure to become a go-to dessert in your home, just like they have in mine. The ease of making them, combined with their impressive presentation, makes them a guaranteed hit every time.
Once you’ve made these little beauties, I’d love to hear how they turned out for you. Did you stick with the classic recipe, or did you try something new with your toppings? Feel free to leave a comment, share your experience, and even suggest your own creative flavor combinations.
And if you’re feeling extra proud of your mini cheesecakes, don’t forget to snap a photo and share it on social media. Tag me so I can see your gorgeous creations and celebrate your success with you!
Happy baking!
Print
Mini Cheesecakes Recipe – Easy, Creamy & Delicious Bites
- Total Time: 2 hours 40 minutes (including chilling)
- Yield: 12 mini cheesecakes 1x
- Diet: Vegetarian
Description
These Mini Cheesecakes are creamy, rich, and irresistible! With a buttery graham cracker crust and smooth vanilla filling, they’re the perfect handheld dessert for any occasion. Easy to make and completely customizable with your favorite toppings.
Ingredients
Crust:
- 1 cup Graham cracker crumbs (about 8 whole crackers crushed)
- 3 tbsp Butter, melted
- 2 tbsp Granulated sugar
Cheesecake Filling:
- 16 oz (2 packs) Cream cheese, softened
- 1/2 cup Granulated sugar
- 2 large Eggs, room temperature
- 1 tsp Vanilla extract
- 1 tbsp Fresh lemon juice (optional)
Toppings (Optional):
- Fresh berries
- Chocolate drizzle
- Whipped cream
Instructions
-
Prepare the Crust:
- Preheat oven to 325°F (163°C). Line a 12-cup muffin tin with paper liners.
- Mix graham cracker crumbs, melted butter, and sugar until well combined.
- Press the mixture firmly into each muffin cup, about 1 tablespoon per cup.
- (Optional) Bake crusts for 5 minutes and set aside to cool.
-
Make the Filling:
- In a large bowl, beat softened cream cheese and sugar until smooth and creamy.
- Add eggs one at a time, mixing well after each addition.
- Mix in vanilla extract and lemon juice (if using).
-
Fill and Bake:
- Divide cheesecake filling evenly among the muffin cups, filling each about 3/4 full.
- Bake for 15–18 minutes until centers are slightly jiggly.
- Let them cool in the muffin tin for 30 minutes, then refrigerate for at least 2 hours.
-
Top and Serve:
- Add desired toppings before serving.
Notes
Notes:
- Make sure cream cheese is softened for a smoother texture.
- Avoid overmixing to prevent cracks.
- Cheesecakes can be stored in the fridge for up to 5 days or frozen for up to 2 months.
- Prep Time: 20 minutes
- Cook Time: 18 minutes
- Category: Dessert
- Method: Baking
- Cuisine: American