
Easter is a time for celebration, family gatherings, and, of course, delicious treats. Among the many Easter-themed desserts, Frosted Easter Egg Cookies stand out as a colorful, sweet, and festive addition to any holiday spread. These cookies are not only deliciously buttery and soft but also serve as a fun activity for both kids and adults to enjoy.
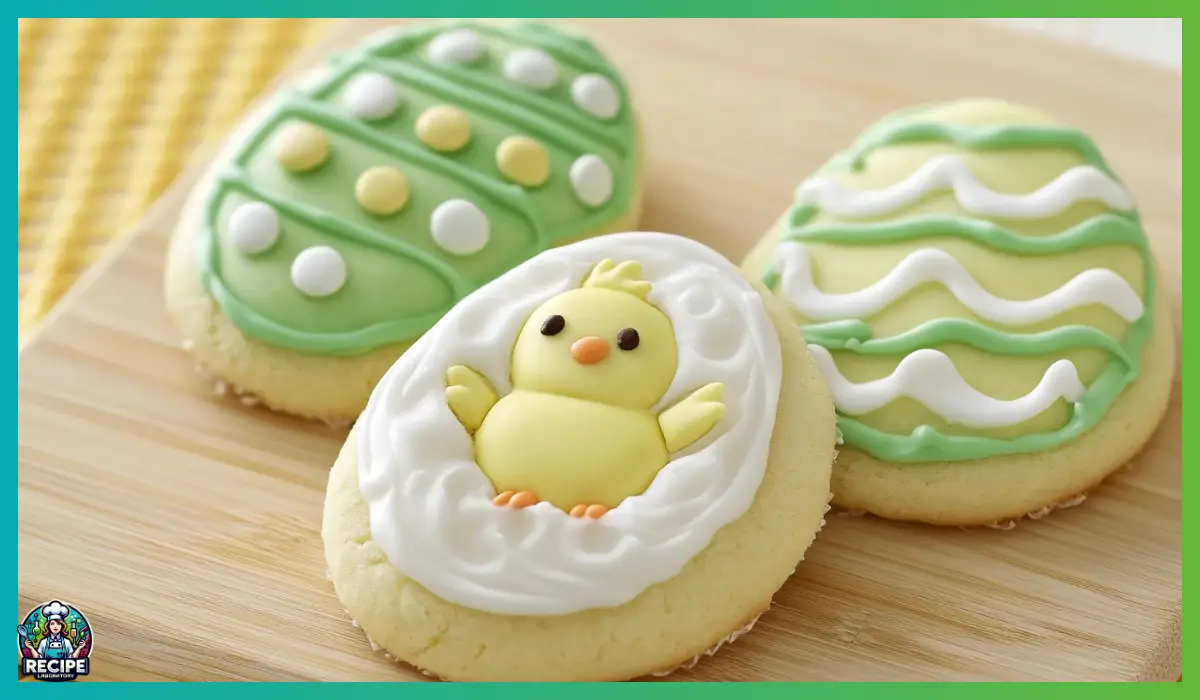
What makes these cookies extra special is their vibrant decoration. With pastel-colored frosting, sprinkles, and edible glitter, they bring the essence of spring right into your kitchen. Whether you’re hosting an Easter brunch, looking for a homemade gift, or simply craving a creative baking project, these cookies fit the occasion perfectly.
Beyond their visual appeal, these cookies have a classic sugar cookie base with a slight crunch on the edges and a soft, melt-in-your-mouth center. The smooth, creamy frosting adds a perfect balance of sweetness and flavor. The best part? You can customize them with different colors, designs, and even alternative flavors to make them uniquely yours.
In this guide, you’ll find everything you need to create these delightful Easter cookies from scratch. From why you’ll love this recipe to step-by-step instructions, decorating tips, and common mistakes to avoid, this article ensures that your cookies turn out perfect every single time. Let’s get baking!
Why You’ll Love This Recipe
There are many reasons to love these Frosted Easter Egg Cookies, whether you’re a seasoned baker or a beginner looking for a fun and rewarding recipe.
First and foremost, they are easy to make. The dough requires simple ingredients that you probably already have in your kitchen, and the process is straightforward, making it a great baking project for all skill levels.
Another reason to adore this recipe is its versatility. While the classic version features a buttery sugar cookie base, you can easily experiment with different flavors like almond extract, lemon zest, or even cocoa powder for a unique twist.
Decorating these cookies is where the real fun begins. With pastel frostings, piping designs, and fun sprinkles, you can turn each cookie into a tiny, edible masterpiece. This makes them perfect for family activities—kids love to get creative with their decorations, and adults can enjoy the therapeutic process of icing and embellishing.
Additionally, these cookies make great gifts. Wrapped in a festive box or placed in a decorative jar, they are a thoughtful and homemade way to spread Easter cheer.
Finally, these cookies are great for make-ahead baking. You can prepare the dough in advance, refrigerate it, and bake fresh cookies when you’re ready. Plus, the frosting sets beautifully, making them easy to store and transport.
Health Benefits
While these cookies are undoubtedly a treat, they do have some qualities that make them a better choice compared to store-bought options.
For starters, making cookies at home allows you to control the ingredients. You can opt for higher-quality butter, organic sugar, and natural food coloring to avoid artificial additives and preservatives commonly found in commercial cookies.
Another benefit is portion control. Since these cookies are homemade, you can choose to make them smaller or larger based on your preference, ensuring that you enjoy them in moderation.
If you’re looking for a healthier alternative, you can modify the recipe by using whole wheat flour instead of all-purpose flour, swapping out some of the sugar for honey or maple syrup, and reducing the amount of butter by substituting Greek yogurt or unsweetened applesauce for part of the fat content.
The frosting can also be made lighter by using a cream cheese base instead of buttercream, adding a slight tang that balances the sweetness.
Lastly, baking at home encourages a mindful approach to food, as it connects you with the ingredients and the process. Plus, the joy and satisfaction of making these cookies from scratch make them even more enjoyable to eat.
Preparation Time, Servings, and Nutritional Information
Before diving into the recipe, let’s take a look at the approximate time commitment and serving details.
- Prep Time: 20 minutes
- Chill Time: 30 minutes
- Bake Time: 7-9 minutes
- Total Time: About 1 hour
- Servings: Approximately 24 cookies
Nutritional Information (per cookie):
- Calories: 160-180 kcal
- Carbohydrates: 22g
- Sugar: 14g
- Fat: 7g
- Protein: 2g
Keep in mind that these values are approximate and can vary based on ingredient substitutions and portion sizes.
Ingredients List
To make these delightful cookies, you’ll need the following ingredients:
For the Cookies:
- 3 cups all-purpose flour
- 1 cup unsalted butter, softened
- 1 cup granulated sugar
- 1 large egg
- 2 tablespoons milk
- 1 teaspoon vanilla extract
- ½ teaspoon salt
- ½ teaspoon baking powder
For the Frosting:
- 3 cups powdered sugar
- 3 tablespoons milk
- 3 tablespoons unsalted butter, softened
- 1 teaspoon vanilla extract
- Food coloring (pastel shades for Easter-themed cookies)
- Sprinkles, sugar pearls, or edible glitter for decoration
Step-By-Step Cooking Instructions
Step 1: Prepare the Dough
Start by creaming the butter and sugar together in a large mixing bowl using an electric mixer. Beat until the mixture is light and fluffy, which should take about 2-3 minutes. Next, add the egg, milk, and vanilla extract, and mix until well combined.
Step 2: Mix the Dry Ingredients
In a separate bowl, whisk together the flour, baking powder, and salt. Gradually add the dry ingredients to the wet mixture, stirring until the dough forms. It should be smooth, slightly firm, and easy to handle.
Step 3: Chill the Dough
Wrap the dough in plastic wrap and refrigerate for at least 30 minutes. This step is crucial as it makes the dough easier to roll out and helps prevent spreading during baking.
Step 4: Roll and Cut
Preheat your oven to 375°F (190°C). Lightly flour your work surface and roll the dough out to ¼-inch thickness. Use an egg-shaped cookie cutter to cut out cookies, then transfer them to a parchment-lined baking sheet.
Step 5: Bake the Cookies
Bake for 7-9 minutes or until the edges turn slightly golden. Let them cool on the baking sheet for a couple of minutes before transferring them to a wire rack.
Step 6: Prepare the Frosting
While the cookies cool, make the frosting by beating together powdered sugar, butter, milk, and vanilla extract until smooth. Divide the frosting into separate bowls and add food coloring as desired.
Step 7: Decorate the Cookies
Use a piping bag or a spatula to frost the cookies. Get creative by adding sprinkles, edible pearls, or drizzles of contrasting icing for fun designs.
Step 8: Let the Frosting Set
Allow the frosting to set before stacking or serving the cookies. This ensures they remain neat and visually appealing.

How to Serve
Once your Frosted Easter Egg Cookies are beautifully decorated and set, it’s time to serve them in a way that enhances their visual appeal and enjoyment.
One of the best ways to present these cookies is on a festive Easter platter. Arrange them in a circular or layered pattern on a decorative serving tray to showcase their vibrant colors and intricate designs. If you’re hosting an Easter gathering, consider placing the tray in the center of the dessert table as a statement piece.
For a more elegant presentation, stack a few cookies in clear treat bags and tie them with pastel-colored ribbons. These make great party favors or gifts for guests, friends, or family members. You can also package them in small bakery boxes lined with parchment paper for a homemade, professional touch.
If you want to create an Easter-themed dessert board, pair these cookies with chocolate eggs, marshmallow bunnies, and pastel-colored candies for a visually stunning and delicious spread. This makes for a great dessert centerpiece at Easter brunches, picnics, or family gatherings.
For an interactive serving idea, set up a cookie decorating station at your event. Provide unfrosted cookies, different colored icings, sprinkles, and edible decorations, allowing guests—especially kids—to customize their own Easter cookies. This adds a fun and engaging element to your celebration.
For an afternoon treat, serve these cookies alongside a warm cup of tea, coffee, or hot cocoa. Their buttery texture and sweet frosting pair wonderfully with beverages, making them a perfect companion for a cozy break.
Pairing Suggestions
These cookies are already delightful on their own, but pairing them with complementary flavors can elevate the overall experience.
For a classic pairing, serve these cookies with a tall glass of cold milk. The creamy richness of the milk balances out the sweetness of the sugar cookies, making for a nostalgic and satisfying treat.
If you’re hosting an Easter brunch, consider serving them with a selection of fruity beverages, such as freshly squeezed orange juice, strawberry lemonade, or a refreshing berry iced tea. These bright, citrusy flavors help cut through the sweetness of the frosting and add a refreshing contrast.
For a more sophisticated touch, pair these cookies with flavored teas like chamomile, Earl Grey, or a vanilla rooibos blend. These herbal and floral teas enhance the delicate flavors of the cookies without overpowering them.
If you’re serving them as part of a dessert platter, consider adding dark chocolate truffles, white chocolate-covered pretzels, or fresh berries to complement their sweetness. The slight bitterness of dark chocolate or the tartness of berries provides a well-balanced contrast.
For an indulgent treat, serve these cookies with a scoop of vanilla bean ice cream or a dollop of whipped cream. The cool, creamy texture pairs beautifully with the soft cookies and creamy frosting, making it an irresistible combination.
Storage, Freezing & Reheating Instructions
To keep your Frosted Easter Egg Cookies fresh and delicious, it’s essential to store them properly.
Storing at Room Temperature
Once the frosting has fully set, store the cookies in an airtight container at room temperature. Place parchment paper between the layers to prevent them from sticking together. These cookies will stay fresh for up to 5 days when stored in a cool, dry place.
Refrigerating the Cookies
If you live in a warmer climate or want to extend their shelf life, you can refrigerate the cookies. Place them in a sealed container and store them in the refrigerator for up to 7 days. Before serving, let them sit at room temperature for about 15 minutes to soften slightly.
Freezing the Cookies
For longer storage, these cookies freeze exceptionally well. Here’s how to do it:
- Freezing Unfrosted Cookies: Allow the baked cookies to cool completely, then stack them between sheets of parchment paper in an airtight container or freezer bag. They can be frozen for up to 3 months. When ready to decorate, let them thaw at room temperature before frosting.
- Freezing Frosted Cookies: If you prefer to freeze them after decorating, arrange them in a single layer on a baking sheet and freeze until the frosting hardens. Then, transfer them to a freezer-safe container, separating layers with parchment paper. When ready to eat, let them thaw at room temperature for about 30 minutes.
Reheating (If Needed)
Cookies don’t usually require reheating, but if you prefer to enjoy them warm, you can place them in a 300°F (150°C) oven for 3-5 minutes to bring back a freshly baked texture. Just be careful not to melt the frosting!
Common Mistakes to Avoid
To ensure your Frosted Easter Egg Cookies turn out perfectly, avoid these common mistakes:
- Skipping the chilling step – Chilling the dough helps prevent cookies from spreading too much while baking. Don’t skip this step, or you’ll end up with thin, uneven cookies instead of perfectly shaped Easter eggs.
- Overmixing the dough – Overmixing can lead to tough cookies instead of soft and tender ones. Mix only until the ingredients are incorporated.
- Rolling the dough too thick or too thin – Aim for a ¼-inch thickness when rolling out the dough. If it’s too thick, the cookies may bake unevenly; if it’s too thin, they may become too crisp.
- Baking for too long – These cookies should be slightly golden around the edges but not browned all over. Overbaking can result in dry, crunchy cookies instead of soft, buttery ones.
- Not letting the cookies cool before frosting – Applying frosting to warm cookies can cause it to melt and slide off. Ensure they are completely cool before decorating.
Pro Tips
To achieve bakery-quality cookies, follow these expert tips:
- Use room temperature ingredients – Softened butter and room-temperature eggs ensure that your dough mixes evenly, resulting in a smoother texture.
- Add a hint of flavor – Enhance the cookie dough by adding a teaspoon of almond extract or lemon zest for a fresh, unique twist.
- Invest in quality food coloring – Gel food coloring provides vibrant pastel shades without making the frosting too watery.
- Use piping bags for precise decorating – For intricate designs, use a fine piping tip and a steady hand to create patterns, swirls, and dots.
- Allow the frosting to set before stacking – If transporting or storing the cookies, make sure the frosting is completely dry to avoid smudging.
Frequently Asked Questions (FAQs)
Can I make these cookies ahead of time?
Yes! You can prepare the dough and refrigerate it up to 3 days in advance, or freeze the dough for up to 3 months before rolling and baking.
Can I use store-bought frosting?
Absolutely! If you’re short on time, store-bought vanilla or buttercream frosting can be used. However, homemade frosting has a fresher, richer flavor.
What other shapes can I make?
Besides egg-shaped cookies, you can use bunny, chick, or flower-shaped cutters to create a variety of Easter-themed cookies.
Can I make these cookies gluten-free?
Yes! Substitute the all-purpose flour with a gluten-free 1:1 baking flour for a gluten-free version.
Conclusion & Call to Action
Now that you have everything you need to make the perfect Frosted Easter Egg Cookies, it’s time to head to the kitchen and start baking! These cookies are fun, festive, and delicious, making them an ideal treat for Easter celebrations. Whether you’re baking for your family, gifting them to friends, or setting up a decorating station for kids, these cookies are sure to be a hit.
Try this recipe and share your creations! If you enjoyed making these cookies, let us know in the comments or tag us in your pictures. Happy baking, and have a wonderful Easter!
Print
Frosted Easter Egg Cookies Slug: frosted-easter-egg-cookies
- Total Time: About 1 hour
- Yield: About 24 cookies
- Diet: Vegetarian
Description
These Frosted Easter Egg Cookies are soft, buttery sugar cookies decorated with colorful pastel frosting and sprinkles—perfect for Easter celebrations!
Ingredients
- For the Cookies: 3 cups all-purpose flour, 1 cup butter (softened), 1 cup sugar, 1 egg, 2 tbsp milk, 1 tsp vanilla, ½ tsp salt, ½ tsp baking powder
- For the Frosting: 3 cups powdered sugar, 3 tbsp milk, 3 tbsp butter (softened), 1 tsp vanilla, food coloring (pastel shades), sprinkles for decoration
Instructions
- Make the Dough: Beat butter and sugar until fluffy. Mix in egg, milk, and vanilla. Gradually add flour, baking powder, and salt until combined.
- Chill & Roll: Wrap dough and chill for 30 minutes. Roll out to ¼-inch thickness on a floured surface.
- Cut & Bake: Use an egg-shaped cookie cutter, place cookies on a lined baking sheet, and bake at 375°F (190°C) for 7-9 minutes. Cool completely.
- Prepare Frosting: Beat powdered sugar, butter, milk, and vanilla until smooth. Divide into bowls and add food coloring.
- Decorate: Spread or pipe frosting onto cookies, add sprinkles, and let set before serving.
Notes
- For extra flavor, add almond extract or lemon zest to the dough.
- Use gel food coloring for vibrant pastel shades.
- Allow cookies to cool completely before decorating.
- Prep Time: 20 minutes
- Chill Time: 30 minutes
- Cook Time: 7-9 minutes
- Category: Dessert
- Method: Baking
- Cuisine: American