
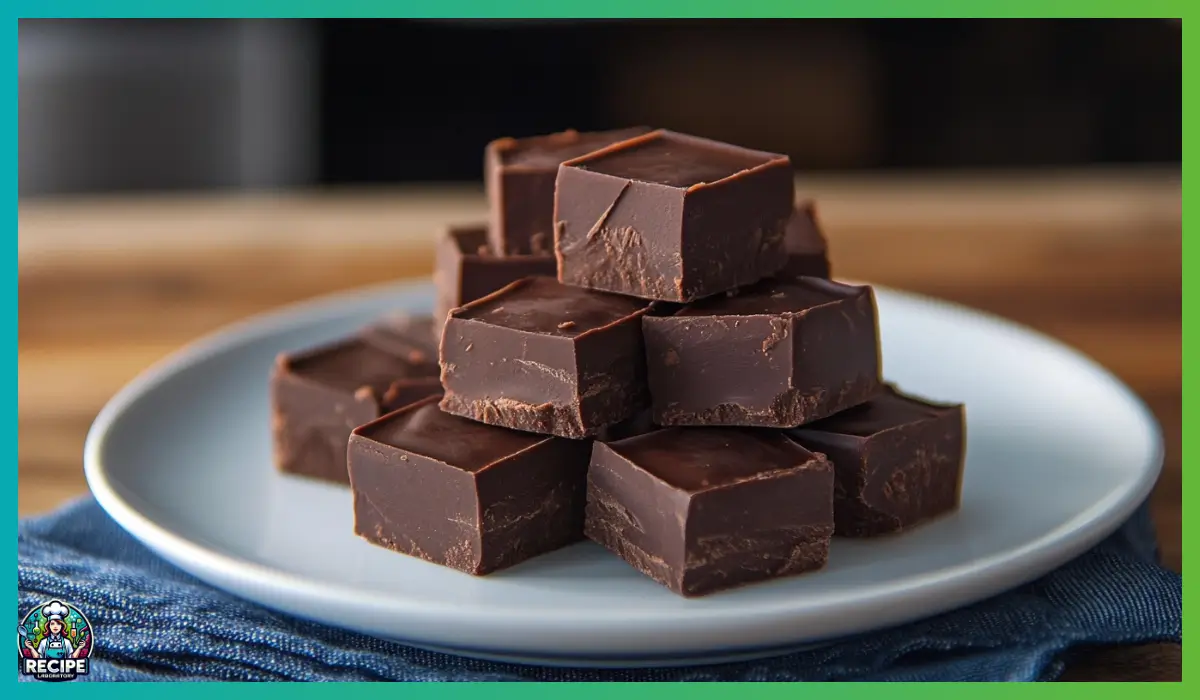
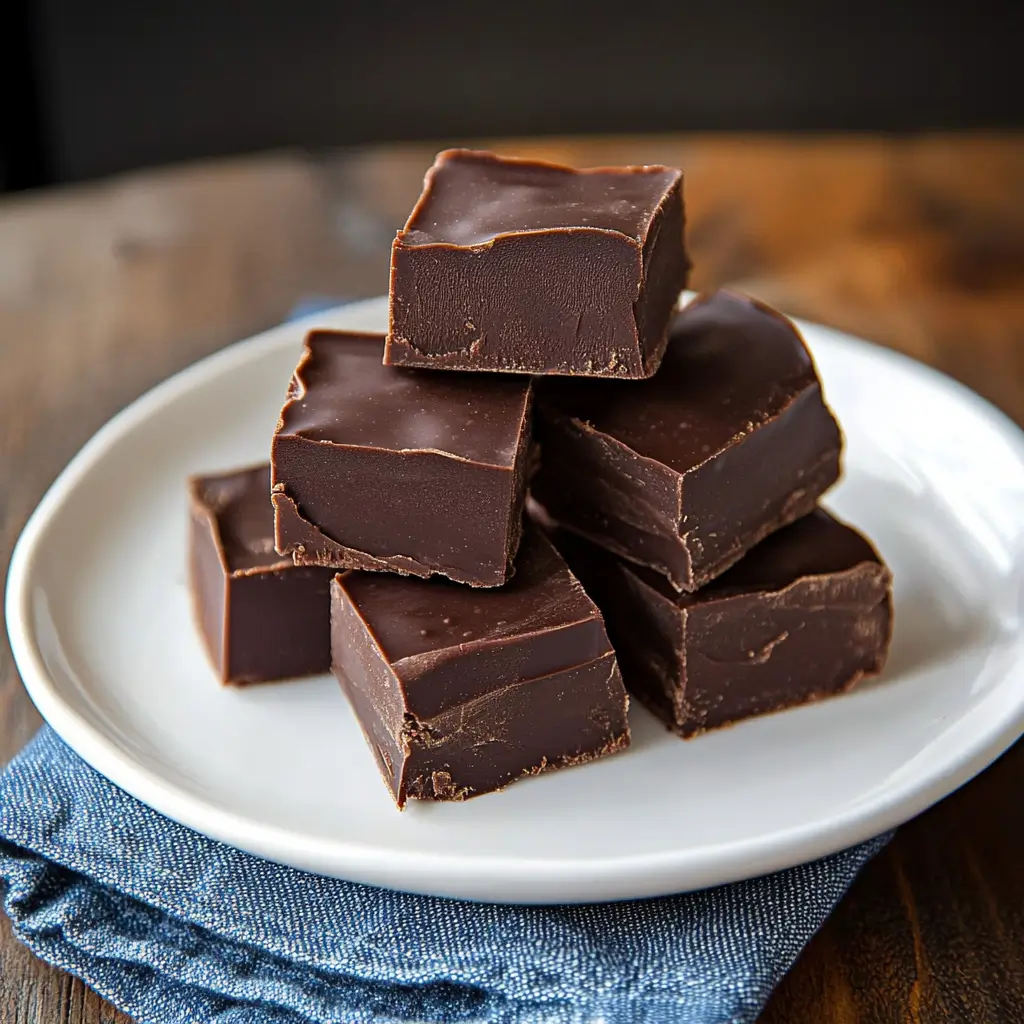
There’s something undeniably comforting about 3-ingredient chocolate fudge. It’s rich, it’s sweet, and it practically melts on your tongue in the most luxurious way. When life calls for a little indulgence—whether it’s a quiet afternoon pick-me-up, a holiday treat to share with family, or a quick dessert to bring to a potluck—this chocolate fudge recipe delivers every single time.
What makes it even more irresistible is just how simple it is. With only three ingredients, minimal effort, and no fancy equipment needed, it feels almost magical that you can end up with something so decadent. You don’t have to be an experienced baker or a kitchen expert to make this recipe work. In fact, even if this is your first attempt at homemade fudge, you’re going to absolutely nail it.
This recipe has been a favorite in my family for years. I still remember the first time I made it—it was during a hectic holiday season, and I was looking for something quick, fuss-free, and chocolatey enough to satisfy every sweet tooth in the house. I stumbled on the idea of combining sweetened condensed milk with chocolate chips, added a splash of vanilla, and after a bit of cooling, the result was pure bliss. Ever since then, it’s become my go-to.
The texture is smooth and creamy, almost like a truffle, and the flavor is rich without being overly sweet. The best part? It comes together in less than 10 minutes of active prep. Then, all you have to do is wait patiently while it sets. It’s the kind of dessert you can prep while the rest of dinner is cooking, or even late at night when you need a quick chocolate fix.
Whether you’re making it for a special occasion or just because, this fudge recipe never disappoints.
Why You’ll Love This 3-ingredient chocolate fudge Recipe
There are so many reasons why this fudge deserves a spot in your recipe rotation, but let’s start with the most obvious one: it’s incredibly easy. You don’t need a candy thermometer, you don’t need a stand mixer, and you don’t need hours of baking time. This is a one-pot, no-fuss dessert that requires almost no cleanup afterward.
But beyond the simplicity, the taste and texture are what truly shine. The semi-sweet chocolate gives the fudge a deep, rich cocoa flavor without being cloyingly sweet. It’s the kind of flavor that appeals to kids and adults alike. Add in the sweetened condensed milk, which brings not only sweetness but also creaminess, and you’ve got a melt-in-your-mouth experience that’s borderline addictive. The touch of vanilla rounds everything out with a warm, aromatic finish.
Another reason you’ll love this recipe is its versatility. You can enjoy it as-is, or dress it up with a variety of mix-ins and toppings. Crushed nuts, mini marshmallows, sea salt flakes, or even a swirl of peanut butter can take this simple fudge into gourmet territory without any extra effort.
It’s also a make-ahead dream. Since it needs to chill to set, you can make it the night before a gathering or prep it in the morning before guests arrive. It holds up beautifully in the fridge, making it perfect for holidays, potlucks, gift boxes, or just an easy weeknight treat.
Finally, there’s something deeply satisfying about making your own fudge from scratch. Even though it only takes a few ingredients and minutes, you’ll still get that homemade feeling that store-bought treats just can’t replicate.
Health Benefits of this 3-ingredient chocolate fudge
While fudge is certainly a treat and not something you’d consider a “health food,” it does have a few redeeming qualities—especially when compared to many processed desserts loaded with artificial additives and preservatives. When you make your own fudge, you know exactly what’s going into it. This version uses just three straightforward ingredients: semi-sweet chocolate chips, sweetened condensed milk, and vanilla extract. No hidden ingredients or unpronounceable chemicals here.
Let’s talk about chocolate. Semi-sweet chocolate chips are often made with a higher percentage of cocoa solids than milk chocolate, and that’s a good thing. Cocoa contains antioxidants known as flavonoids, which have been linked to heart health and anti-inflammatory benefits. While you wouldn’t eat fudge for the antioxidants alone, it’s still nice to know that quality chocolate has some positive nutritional elements.
Sweetened condensed milk, although high in sugar, also contains calcium and vitamin D thanks to its dairy content. It contributes to the creamy consistency of the fudge and helps eliminate the need for additional butter or heavy cream. Plus, its richness means a little goes a long way—you only need a small square to feel completely satisfied.
Vanilla extract, while used in small amounts, adds depth to the flavor without any added sugar or fat. And if you’re using pure vanilla extract, you’re also getting a dose of antioxidants along with its naturally soothing aroma.
In moderation, this fudge can be part of a balanced diet. Because it’s so rich and indulgent, you won’t be tempted to eat large amounts at once. One or two small pieces are enough to satisfy your sweet tooth. Additionally, if you choose to use high-quality chocolate chips with minimal added sugar or opt for organic ingredients, you can make this recipe a little more wholesome.
Ultimately, while this isn’t a low-calorie or low-sugar dessert, it’s made with whole ingredients and can be a more mindful way to enjoy sweets compared to pre-packaged alternatives.
Preparation Time, Servings, and Nutritional Information of this 3-ingredient chocolate fudge
When you’re short on time but still want to serve up a delicious, crowd-pleasing dessert, this recipe is an absolute lifesaver. It’s quick, efficient, and requires hardly any prep work.
Total Preparation Time
Prep Time: 10 minutes
Chill Time: 2 hours (minimum)
Total Time: 2 hours 10 minutes
Servings
This recipe yields about 36 small squares of fudge, depending on how you cut it. These bite-sized pieces are ideal for sharing, gifting, or portion-controlled snacking.
Nutritional Information (per square, approximately)
Calories: 130
Fat: 6g
Saturated Fat: 3.5g
Carbohydrates: 18g
Sugar: 16g
Protein: 1.5g
Fiber: 1g
Calcium: 4% DV
Please note, these values are estimates and can vary based on the exact brands of ingredients used. If you’re looking to reduce the sugar or fat, you can experiment with sugar-free chocolate chips or low-fat condensed milk, although these substitutions may slightly alter the texture and flavor.
Ingredients List of this 3-ingredient chocolate fudge
This recipe is proof that you don’t need a long list of ingredients to make something absolutely delicious. All you need are three simple items, all of which are pantry staples or easily found in any grocery store.
Here’s what you’ll need:
3 cups semi-sweet chocolate chips
The star of the show. Semi-sweet chocolate offers the perfect balance of rich cocoa flavor and sweetness. You can use chocolate chips or chop up a baking bar. If you want to switch things up, dark chocolate chips will give you a bolder, less sweet flavor, while milk chocolate will result in a creamier and sweeter fudge.
1 (14 oz) can sweetened condensed milk
This thick, sweet milk is what gives the fudge its signature smooth and creamy texture. It helps bind everything together and eliminates the need for butter or cream. Make sure you’re using sweetened condensed milk—not evaporated milk—as they are not interchangeable.
1 teaspoon vanilla extract
A little goes a long way here. Vanilla rounds out the chocolate flavor, adding warmth and richness. Opt for pure vanilla extract rather than imitation for the best results.
Optional Add-Ins and Toppings (not required, but fun):
- Chopped nuts (walnuts, pecans, almonds)
- Sea salt flakes for a salty-sweet contrast
- Mini marshmallows
- Crushed candy canes for a festive twist
- Swirls of peanut butter or caramel
These are totally optional, but if you’re looking to customize your fudge, they’re great ways to elevate the base recipe without adding any extra complexity.
Step-By-Step Cooking Instructions
Creating this fudge couldn’t be easier. Follow these steps, and you’ll have perfect, creamy squares every time. The process is beginner-friendly and only requires a saucepan, a spatula, and a baking dish.
Step 1: Prepare Your Pan
Start by lining an 8×8-inch baking pan with parchment paper. Be sure to leave a bit of overhang on the sides so you can easily lift the fudge out later. If you don’t have parchment paper, aluminum foil will work too—just lightly grease it to prevent sticking.
Step 2: Combine Chocolate and Condensed Milk
Place a medium-sized saucepan over low heat. Add in the chocolate chips and pour in the sweetened condensed milk. Stir gently and continuously as the mixture begins to melt.
Tip: Use a silicone or heat-resistant rubber spatula for best results. It will allow you to scrape the sides and bottom of the pan without damaging your cookware.
Step 3: Stir Constantly Until Smooth
This part takes about 5–7 minutes. Keep the heat low to prevent scorching the chocolate. Stir slowly but consistently, watching as the mixture transforms into a glossy, thick, and smooth consistency.
Don’t walk away from the stove—chocolate can burn quickly. If you notice any signs of sticking or dark spots forming, lower the heat further.
Step 4: Add Vanilla Extract
Once the chocolate is fully melted and smooth, remove the saucepan from heat. Add in the vanilla extract and stir it through until evenly incorporated. This will add depth and balance to the richness of the chocolate.
Step 5: Pour into Prepared Pan
Using your spatula, scrape the fudge mixture into your lined baking dish. Smooth the top as evenly as possible. Tap the pan gently on the counter to settle the fudge and release any trapped air bubbles.
Optional: Add Toppings
At this point, if you’re using any add-ins like sea salt or chopped nuts, sprinkle them evenly over the top and gently press them in.
Step 6: Let It Set
Now comes the hardest part—waiting. Let the fudge cool at room temperature for about 20–30 minutes, then transfer it to the refrigerator. Chill for at least 2 hours, or until it’s completely firm.
Step 7: Cut and Serve
Once set, lift the fudge out of the pan using the parchment paper overhang. Place it on a cutting board and use a sharp knife to cut it into squares. For the cleanest cuts, warm the knife by dipping it in hot water and wiping it dry before slicing.
Now that you’ve got the basics, there’s still much more to explore. The next sections will show you how to serve, store, and elevate this delightful dessert in countless ways—so keep reading!
How to Serve
Now that your fudge is perfectly set and cut into gorgeous, glossy squares, it’s time to enjoy it. While this treat is wonderful all on its own, there are plenty of ways to serve it that can make it even more special—especially if you’re presenting it at a party or giving it as a homemade gift.
First, you can serve it simply on a decorative plate or a rustic wooden board. Arrange the squares neatly, maybe layering them a little for that cozy, homemade look. If you’re hosting a gathering, placing the fudge in mini paper liners adds a festive, polished touch and makes it easier for guests to pick up individual pieces.
For a holiday platter, consider mixing your chocolate fudge with other sweets like sugar cookies, chocolate-dipped pretzels, and peppermint bark. The contrast in colors and textures is eye-catching and turns your dessert into a centerpiece.
At family dinners, fudge can serve as a simple, satisfying dessert to pass around with coffee or tea. You can even serve it slightly warmed and paired with a scoop of vanilla ice cream for a quick take on a chocolate lava dessert.
If you’re packing it as a gift, use a small tin or a craft box lined with wax or parchment paper. Stack the squares in neat rows, and add a little handwritten tag or label to make it feel even more thoughtful.
No matter how you serve it, this fudge adds an elegant, indulgent touch to any setting—and because it’s bite-sized, people can enjoy just the right amount of sweetness after a meal.
Pairing Suggestions
Chocolate fudge is rich, sweet, and velvety, which means it pairs beautifully with a variety of flavors and textures. Whether you’re serving it for dessert, giving it as a gift, or enjoying a piece with your afternoon tea, choosing the right pairings can enhance the experience tenfold.
Let’s start with beverages. A cup of strong, slightly bitter coffee is an ideal match. The deep roastiness of coffee balances the sweetness of the fudge and creates a luxurious flavor harmony. Alternatively, hot tea—particularly black tea or chai with warming spices—can complement the richness without overpowering it. For those who prefer something cold, a glass of iced milk, oat milk, or almond milk also makes a perfect classic companion.
When it comes to fruits, pair your fudge with fresh berries. Raspberries, strawberries, and blackberries offer a tart contrast that cuts through the sweetness, while also adding a lovely pop of color if you’re serving a dessert platter. Sliced bananas or poached pears are also a decadent match if you want to go for something slightly more elegant.
You can also think in terms of textures. Serve your fudge alongside something crunchy—like shortbread cookies, toasted nuts, or even pretzel sticks. The crispy elements balance the creaminess of the fudge and make for a fun, satisfying contrast.
If you’re planning to use this fudge as part of a dessert board or sweet buffet, try surrounding it with mini chocolate chip cookies, caramel popcorn, or chocolate-covered fruits. The variety will give your guests options without stealing the spotlight from the fudge.
Pairing fudge with other sweets can also be an excellent idea for themed events. For example, around the holidays, combine it with spiced gingerbread or peppermint bark. In the summer, pair it with toasted coconut or grilled peaches for a unique twist.
Storage, Freezing & Reheating Instructions
Fudge is one of those perfect make-ahead desserts because it stores beautifully and lasts for quite a while if kept properly. Let’s talk about how to store it for maximum freshness, how to freeze it for longer-term storage, and what to do if you want to serve it slightly warm.
Storing in the Refrigerator
Once the fudge is fully set and cut, place the squares in an airtight container. If you’re stacking layers, use parchment or wax paper between each one to prevent sticking. Stored in the fridge, your fudge will stay fresh for up to 2 weeks. Make sure it’s in a sealed container to avoid absorbing any fridge odors.
Storing at Room Temperature
If your kitchen is cool and dry, fudge can also be stored at room temperature for up to 5 days. Just make sure it’s in a tightly sealed container and out of direct sunlight or heat.
Freezing Instructions
Fudge freezes exceptionally well, which means you can make a large batch ahead of time and enjoy it whenever a craving hits. To freeze, arrange the fudge squares on a baking sheet lined with parchment paper. Place in the freezer until fully solid—this usually takes about 1–2 hours. Then transfer the frozen pieces to a freezer-safe container or zip-top bag, with parchment paper between layers.
Frozen fudge will keep for up to 3 months. When you’re ready to enjoy it, simply move a few pieces to the fridge and let them thaw overnight, or leave them at room temperature for about 30–45 minutes.
Reheating Tips
While fudge is typically served chilled or at room temperature, some people enjoy it slightly warm. If you want to try that, microwave a single square on a microwave-safe plate for just 5–10 seconds. Be careful not to overheat it, or it may start to melt completely. The result is a gooey, melty center with just enough structure to still feel like a treat.
Common Mistakes to Avoid
Even though this recipe is extremely simple, there are a few common pitfalls that can affect your final product. Knowing what to watch out for can help ensure that every batch turns out perfect.
1. Overheating the Chocolate
One of the most common mistakes is applying too much heat. Chocolate is sensitive and can burn easily. Always melt it over low heat and stir continuously. If you notice any signs of scorching—like a grainy texture or burnt smell—remove it from the heat immediately.
2. Using Evaporated Milk Instead of Sweetened Condensed Milk
These two ingredients are often confused, but they are very different. Sweetened condensed milk is thick and sweet, whereas evaporated milk is unsweetened and much thinner. Substituting one for the other will result in fudge that doesn’t set properly.
3. Not Stirring Enough
While the mixture melts, it’s important to keep stirring to ensure everything combines smoothly. Uneven stirring can lead to lumps or separation in the mixture.
4. Cutting Before It’s Set
Impatience can get the better of us all, but cutting the fudge too early can ruin the texture. Wait the full 2 hours (or longer) for it to chill thoroughly. If it feels soft or sticky when touched, give it more time.
5. Skipping the Parchment Paper
It might seem like a minor step, but lining your pan makes a huge difference. It allows you to lift the entire block of fudge out easily and cut clean squares without digging around with a spatula.
Pro Tips
Want to take your fudge to the next level? These tried-and-true tips will ensure your recipe turns out beautifully every single time—and may even inspire you to experiment a bit.
1. Use High-Quality Chocolate
Since chocolate is the star ingredient here, quality matters. Look for chocolate chips with a higher cocoa content, or use chopped chocolate bars for an even smoother melt.
2. Try Flavor Variations
Once you’re comfortable with the base recipe, start playing around with flavors. Add a teaspoon of espresso powder for a mocha twist, a touch of cinnamon for warmth, or a pinch of sea salt for contrast.
3. Use an Offset Spatula
When spreading the fudge in your pan, an offset spatula helps you get a smoother, more level top. It’s especially helpful if you’re making the fudge as a gift or for a party.
4. Customize with Mix-Ins
Fold in chopped nuts, dried fruit, or crushed cookies right before pouring the fudge into the pan. This adds both flavor and texture.
5. Label and Date Your Freezer Fudge
If you’re making multiple batches or saving some for later, label each container with the date. This makes it easier to keep track of freshness and ensures you always enjoy the best-tasting pieces first.
Frequently Asked Questions (FAQs)
Can I use dark chocolate instead of semi-sweet?
Yes, absolutely. Dark chocolate will give you a more intense, less sweet flavor. It’s perfect for those who prefer a richer, more sophisticated fudge.
Can I double the recipe?
Yes, you can easily double or even triple the ingredients. Just use a larger pan—like a 9×13 baking dish—and extend the chilling time accordingly.
Can I make this fudge dairy-free?
Yes, you can try using dairy-free chocolate chips and sweetened condensed coconut milk. Keep in mind that the texture and flavor will be slightly different, but still delicious.
What if my fudge is too soft?
If your fudge didn’t set properly, it may need more chilling time. Make sure you used the correct ingredients (especially sweetened condensed milk, not evaporated), and check that your measurements were accurate.
How long does fudge last?
At room temperature: up to 5 days. In the fridge: up to 2 weeks. In the freezer: up to 3 months.
Can kids help with this recipe?
Yes! This is a great recipe to make with kids, since it’s so simple. Just supervise them during the stovetop step to ensure safety.
Can I add peanut butter to this recipe?
Definitely. Swirl in a few tablespoons of peanut butter after the chocolate has melted for a delicious peanut butter fudge variation.
Why is my fudge grainy?
Graininess can happen if the chocolate gets too hot or isn’t stirred enough. Melt it slowly and stir constantly for best results.
Can I use a microwave instead of the stovetop?
Yes, combine the chocolate chips and sweetened condensed milk in a microwave-safe bowl and heat in 30-second intervals, stirring well in between. Once fully melted, stir in the vanilla.
What size pan should I use?
An 8×8-inch pan is ideal for this recipe. If you use a larger pan, your fudge squares will be thinner, so adjust as needed.
Conclusion & Call to Action
And there you have it—the creamiest, easiest, most satisfying chocolate fudge recipe you’ll ever make. With just three ingredients, no fancy tools, and almost no effort, you can create a dessert that feels like it took hours to perfect. Whether you’re serving it at a family get-together, wrapping it up as a gift, or stashing a few pieces in the fridge for late-night cravings, this fudge fits every occasion.
If you’ve been looking for a foolproof dessert that’s rich in flavor, easy on the prep, and endlessly customizable, this is your sign to try it. Don’t wait for a special occasion—make a batch just because.
Once you do, I’d love to hear how it turned out. Share your thoughts in the comments below, or tag your creations online so others can be inspired too. There’s nothing better than seeing your take on this simple recipe. And trust me—once you try it, it won’t be the last time.
Because let’s be honest: life is better with a little fudge in it.
Print
3-Ingredient Chocolate Fudge: Quick, Creamy, and Homemade
- Total Time: 2 hours 15 minutes (includes chilling)
- Yield: 36 squares 1x
- Diet: Vegetarian
Description
This easy 3-ingredient chocolate fudge recipe is creamy, rich, and melts in your mouth. Perfect for holidays, parties, or a quick homemade treat.
Ingredients
-
3 cups semi-sweet chocolate chips
-
1 (14 oz) can sweetened condensed milk
-
1 tsp vanilla extract
Instructions
-
Line an 8×8-inch pan with parchment paper.
-
In a saucepan over low heat, combine chocolate chips and sweetened condensed milk.
-
Stir constantly until smooth and melted.
-
Remove from heat and mix in vanilla extract.
-
Pour into the pan, smooth the top, and let cool.
-
Chill in the fridge for at least 2 hours.
-
Slice into squares and serve.
Notes
Use good quality chocolate for best results. Add toppings like sea salt, nuts, or marshmallows if desired. Store in fridge or freezer.
- Prep Time: 10 minutes
- Cook Time: 5 minutes
- Category: Dessert
- Method: No-Bake
- Cuisine: American